
Introduction
The Spooktacular Spider-Web Cookies offer an exciting and festive treat perfect for Halloween celebrations. With their delightful flavors and whimsical design, these cookies are sure to wow both kids and adults alike. These cookies combine a buttery, sweet cookie base with a rich and smooth icing that takes them to another level of creativity and taste. The raised patterns of icing mimic real spider webs, making them the perfect centerpiece for a Halloween party or a fun activity for kids before trick-or-treating.
In every bite, you’ll experience a balance of sweet and subtle hints of vanilla and almond flavors, paired with a unique visual appeal that adds to the excitement of the festive occasion. Whether you place them on a spooky platter or include them in a themed goodie bag, these cookies are bound to be a hit at any gathering. This article will provide a comprehensive guide to creating these spooky delights, from preparation to presentation, ensuring your baking adventure is as enjoyable as the results.
Recipe Overview
– Total Time: 1 hour
– Prep Time: 20 minutes
– Servings: 24 cookies
– Difficulty: Not specified in the recipe
Ingredients
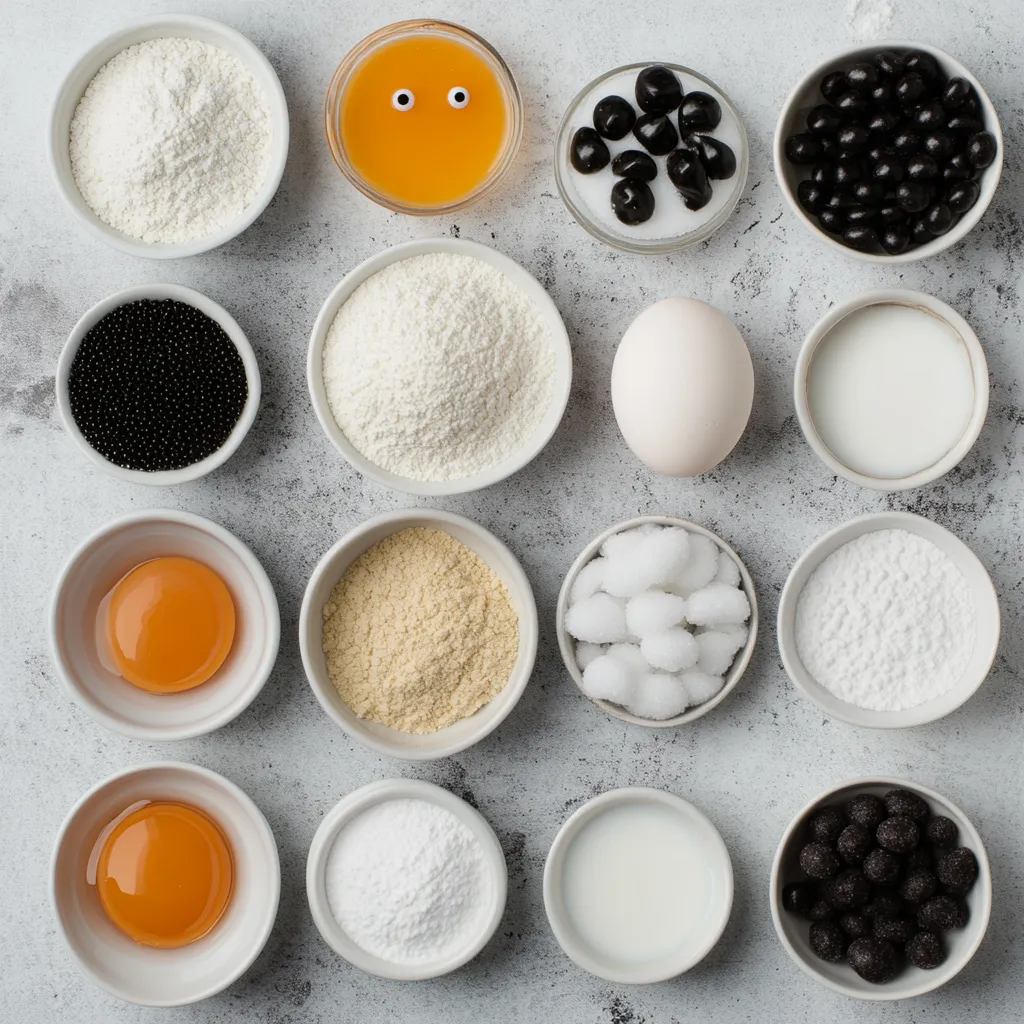
– 2 ¾ cups all-purpose flour
– 1 teaspoon baking soda
– ½ teaspoon baking powder
– 1 cup unsalted butter, softened to room temperature
– 1 ½ cups granulated sugar
– 1 large egg
– 1 teaspoon pure vanilla extract
– 1 teaspoon almond extract
– ½ teaspoon salt
– 1 cup powdered sugar (for icing)
– 2 tablespoons milk (for icing)
– Black gel food coloring
– Edible candy eyes (for decoration)
Instructions
1. Preheat the Oven: Begin by preheating your oven to 350°F (175°C). Prepare your baking sheets by lining them with parchment paper to prevent sticking.
2. Mix Dry Ingredients: In a medium-sized bowl, whisk together the all-purpose flour, baking soda, baking powder, and salt until well combined. Set this mixture aside for later use.
3. Cream Butter and Sugar: In a large mixing bowl, use an electric mixer to cream the softened butter and granulated sugar together until the mixture is light, fluffy, and pale in color, which should take about 3-5 minutes.
4. Add Egg and Extracts: Beat in the egg, followed by the vanilla and almond extracts, mixing until everything is thoroughly blended.
5. Combine Ingredients: Gradually incorporate the dry ingredient mixture into the butter mixture, stirring gently until just combined. Be careful not to overmix to keep the cookies tender.
6. Shape Cookies: Take portions of the dough and roll them into balls about 1 inch in diameter. Place them on the prepared baking sheets, ensuring to space them about 2 inches apart for even baking.
7. Bake Cookies: Place the baking sheets in your preheated oven and bake for 8-10 minutes, or until the edges are lightly golden. Once baked, let the cookies cool on the baking sheet for a few minutes before transferring them to a wire rack to cool completely.
8. Prepare Icing: In a small mixing bowl, combine the powdered sugar and milk, stirring until the mixture is smooth and free of lumps. Divide this icing into two portions: keep one portion white and color the other with black gel food coloring until you achieve a deep, dark hue.
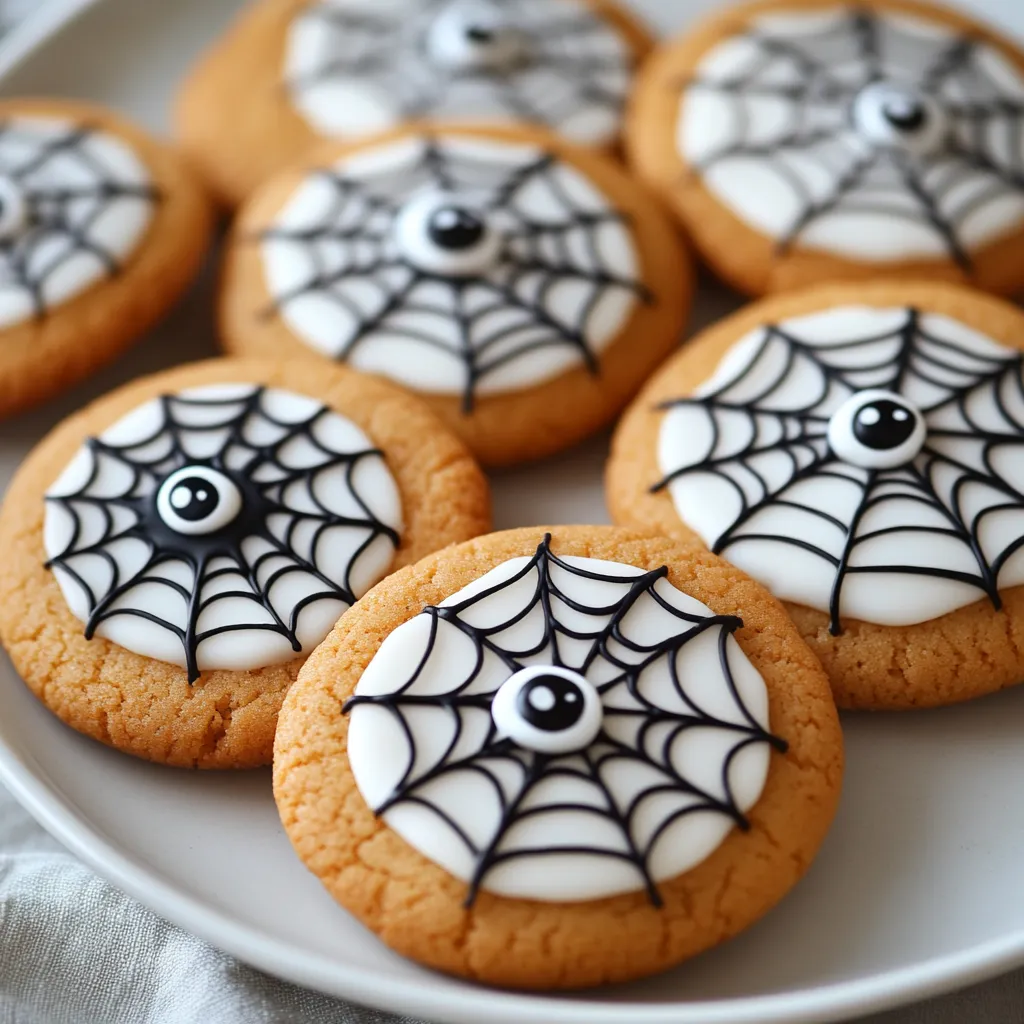
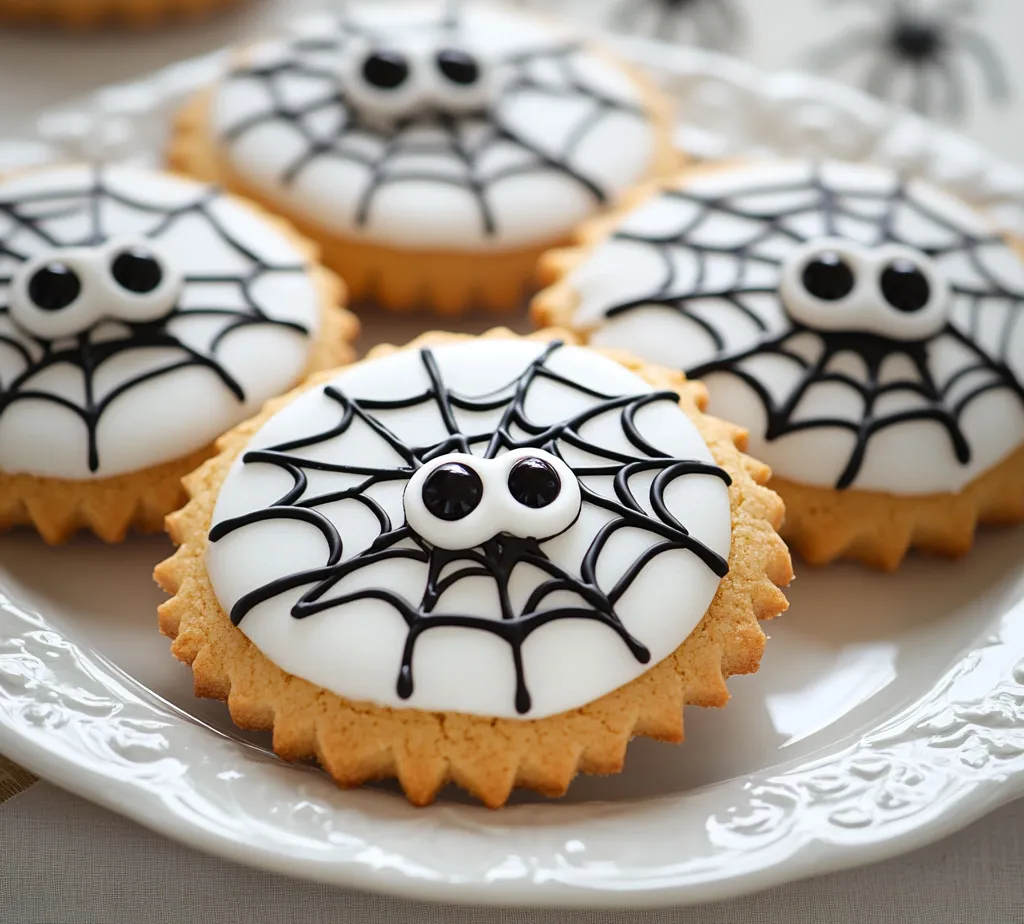
9. Decorate Cookies: Using a piping bag or a small zip-top plastic bag with a corner snipped off, pipe a spiral of the white icing on top of each cooled cookie. Follow this by piping a web design with the black icing over the white spiral, creating a spooky spider web effect.
10. Add Spider Details: To complete the look, place edible candy eyes on top of the cookies, giving the appearance of little spiders resting on their web.
11. Let Set: Allow the decorated cookies to sit for about 30 minutes so the icing can set properly before serving.
Flavor Profile
The flavor profile of Spooktacular Spider-Web Cookies is rich and satisfying, delivering a delightful blend of sweetness and warmth. Each bite reveals the creamy richness of unsalted butter combined with the saccharine touch of granulated sugar, creating a light and fluffy base for these cookies. The inclusion of pure vanilla extract provides a familiar and comforting flavor that pairs beautifully with the slightly nutty undertone from the almond extract. This combination not only enhances the overall sweetness but also contributes subtle complexity, making these cookies irresistible to those with a sweet tooth.
When decorated with the sweet icing, the initial flavor burst is mellowed out with the contrasting black icing, which adds a fun and theatrical element to your Halloween desserts. The creamy icing encasing the cookie complements its soft texture, balancing perfectly with the added candy eyes that not only serve as a cute decoration but also contribute a fun element to the overall taste experience.
Textural Elements
Texture plays a crucial role in the enjoyment of Spooktacular Spider-Web Cookies. The base of the cookie is tender and soft, thanks to the careful creaming of the butter and sugar, which introduces air into the dough, resulting in a light, almost cake-like texture that is pleasing to bite into. The subtle yielding of the cookie as you take a bite releases a hint of buttery goodness, making it an unparalleled treat.
The icing introduces a delightful contrast, presenting a smooth and creamy consistency that melts in your mouth. The visual appeal of the spider web design adds an extra textural layer; when you pipe the icing, it becomes a perfect balance of sweet and slightly chewy. The overall contrast between the tender cookie and the smooth icing creates a delightful symphony of textures that enhances the enjoyment of these Halloween-themed delights.
Occasions
These Spooktacular Spider-Web Cookies are perfect for a wide array of occasions, particularly centered around Halloween festivities. Whether you are hosting a themed party, participating in a school bake sale, or simply looking to create a fun snack for family, these cookies will undoubtedly fit the occasion.
At Halloween parties, they can serve as both a delicious treat and a fun decoration, drawing attention to your dessert table. Their whimsical appearance makes them ideal for kids’ events, where you can engage children in the decorating process, making the baking experience more interactive and enjoyable. Additionally, packaging these cookies as gifts for friends and family during Halloween can add a personal touch to your holiday celebrations, making them a memorable gift. Ultimately, these cookies are versatile enough to be enjoyed at any gathering where the spirit of fun and festivity is welcomed.
Shaping and Baking Cookies
To achieve the perfect Spooktacular Spider-Web Cookies, it is essential to master the techniques of shaping and baking them.
Shaping the Dough
When shaping the dough, strive for uniformity in size to ensure even baking. Start by taking a portion of dough and rolling it gently between the palms of your hands to form a ball about one inch in diameter. It helps to lightly coat your hands with flour to prevent sticking. If you find the dough is too soft or sticky, refrigerate it for about 10-15 minutes to firm it up slightly. This can help maintain the shape of the cookies during baking.
As you place the dough balls on the prepared baking sheet, aim for spacing them approximately 2 inches apart. This spacing is crucial as it allows the cookies room to spread while baking without merging into one another.
Baking Conditions
The baking time for these cookies is between 8-10 minutes at 350°F (175°C). To check for doneness, look for lightly golden edges. The centers may appear slightly underbaked, which is acceptable as they will continue to cook slightly after removal from the oven. No additional browning on the tops is necessary; in fact, you want to avoid overbaking to keep the cookies on the softer side. After baking, let the cookies sit on the sheet for about 5 minutes before transferring them to a wire rack for complete cooling.
Cooling Process
Cooling is a critical step as it allows the cookies to set properly without breaking or crumbling. After transferring them to a wire rack, allow the cookies to cool for at least 20 minutes. This cooling period is essential for ensuring the icing adheres properly and doesn’t slide off. Patience is key; don’t rush the cooling process as warm cookies can be fragile.
Preparing the Icing
The icing takes these cookies to the next level, so proper preparation is key.
Mixing the Icing
In a small mixing bowl, combine the powdered sugar and milk. Use a whisk to mix until you achieve a smooth consistency free from lumps. It’s advisable to start with the powdered sugar in the bowl, then gradually add the milk. This approach helps you to better control the thickness of the icing. If the icing is too thick, add a bit more milk—one teaspoon at a time. If it’s too thin, add a little more powdered sugar until the desired consistency is reached.
Coloring the Icing
To achieve the desired dark shade for the black icing, carefully add black gel food coloring to one portion of the icing. Start with a small amount, stirring in thoroughly to assess the color intensity. Gel food coloring is preferred as it allows for rich colors without altering the icing’s consistency significantly. If you want a more vibrant color, add more gel as needed, but do this gradually.
Dividing Icing Portions
Dividing the icing is straightforward: once combined, pour the icing into two separate bowls. This allows you to keep one portion white for the base design while coloring the other black. Using separate bowls for each color not only prevents mixing but also makes it easier to pipe each design precisely.
Decorating Techniques
Once the cookies are cool and the icing is prepared, it’s time to let your creativity shine.
Piping White Icing
To pipe the white icing, you can either utilize a piping bag fitted with a small round tip or create a makeshift piping tool using a zip-top plastic bag with one corner snipped off. Begin by piping a spiral design onto the center of each cookie. The spiral should start at the center and work its way outwards, leaving a small margin around the edge. This forms a base that will allow the black icing to create the spider web effect seamlessly.
Creating the Spider Web
After the white icing spiral is complete, it’s time to create the spider web using the black icing. Start at the outer edge of the white spiral and pipe curved lines that extend outward, creating a web-like pattern. Work from the center outwards; this technique allows the black lining to adhere to the white icing effectively while capturing the spooky essence of Halloween. Don’t worry about including too much detail—simplicity often makes for the most impactful designs.
Adding Final Details
The final touch to give your cookies personality is adding edible candy eyes. Place them strategically on top of the black web pattern to mimic little spiders peering out from their web. For a fun twist, you can use varied sizes of candy eyes to create some diversity among the cookies, but consistency in the design provides a cohesive look.
Presentation Suggestions
The presentation of your Spooktacular Spider-Web Cookies can enhance their appeal tremendously.
Serving Platters
Select serving platters in bold colors, such as black or orange, to resonate with the Halloween theme. A high-contrast plate will make the colors of your cookies pop and draw the eye. Consider using multiple small platters to create an engaging display across a table.
Thematic Enhancements
Enhance your festive presentation by adding thematic decorations around the cookies. Items such as faux spiders, cobwebs, or miniature pumpkins can help set the spooky scene and elevate the overall aesthetic. These props can also serve as conversation starters during gatherings.
Cookie Arrangement
When arranging cookies, consider placing them in layers or heights; taller cookie stacks or tiered trays add dimension and visual interest to your display. Make sure to leave enough space between items to avoid overcrowding the platters.
Storage and Shelf Life
Proper storage ensures your cookies remain fresh and delicious for as long as possible.
Short-term Storage
For short-term storage, keep cookies in an airtight container at room temperature. They should stay fresh for about 3-5 days. Ensure they are fully cooled before sealing them to maintain their texture.
Long-term Storage
If you want to prepare ahead of time, these cookies can be frozen for longer shelf life. To freeze, place the completely cooled cookies in a single layer in the freezer for a few hours. Once firm, transfer them to a freezer-safe container or bag, ensuring to separate layers with parchment paper to prevent sticking. The cookies can be frozen for up to 3 months. To enjoy, thaw at room temperature for several hours before frosting; avoid microwaving as it can alter the texture.
Conclusion
The Spooktacular Spider-Web Cookies embody a delightful mix of soft textures, festive designs, and delicious flavors, making them an ideal treat for Halloween gatherings. These cookies can be prepared in roughly an hour, providing both a fun baking experience and a visually captivating finish that delights both kids and adults alike. The combination of creamy icing and playful decoration ensures they will be a favorite among your guests.

Spooktacular Spider-Web Cookies Recipe
Ingredients
- 2 ¾ cups all-purpose flour
- 1 teaspoon baking soda
- ½ teaspoon baking powder
- 1 cup unsalted butter softened
- 1 ½ cups granulated sugar
- 1 large egg
- 1 teaspoon pure vanilla extract
- 1 teaspoon almond extract
- ½ teaspoon salt
- 1 cup powdered sugar for icing
- 2 tablespoons milk for icing
- black gel food coloring
- edible candy eyes for decoration
Instructions
- Preheat your oven to 350°F (175°C) and line baking sheets with parchment paper.
- In a medium bowl, whisk together flour, baking soda, baking powder, and salt.
- In a large bowl, cream together softened butter and granulated sugar until light and fluffy.
- Beat in the egg, vanilla extract, and almond extract until well combined.
- Gradually mix in the dry ingredients until just combined, being careful not to overmix.
- Roll dough into 1-inch balls and place on prepared baking sheets, spacing them 2 inches apart.
- Bake for 8-10 minutes until edges are lightly golden, then cool on wire racks.
- In a small bowl, mix powdered sugar and milk until smooth; divide and color one portion with black gel food coloring.
- Pipe white icing in a spiral on each cookie, then pipe black icing in a web design over it.
- Add edible candy eyes to complete the spider web look and let set for 30 minutes before serving.