
Introduction
Oreo Protein Bliss Balls are an exciting dessert that beautifully marries the classic flavors of Oreo cookies with the modern benefits of protein powder. These delectable bites are not just a treat for your taste buds; they also serve a nutritional purpose, making them a dual delight for anyone with a sweet tooth and a health-focused mindset. Whether you’re in need of a post-workout snack or looking for a fun dessert to share with friends, these bliss balls tick all the boxes.
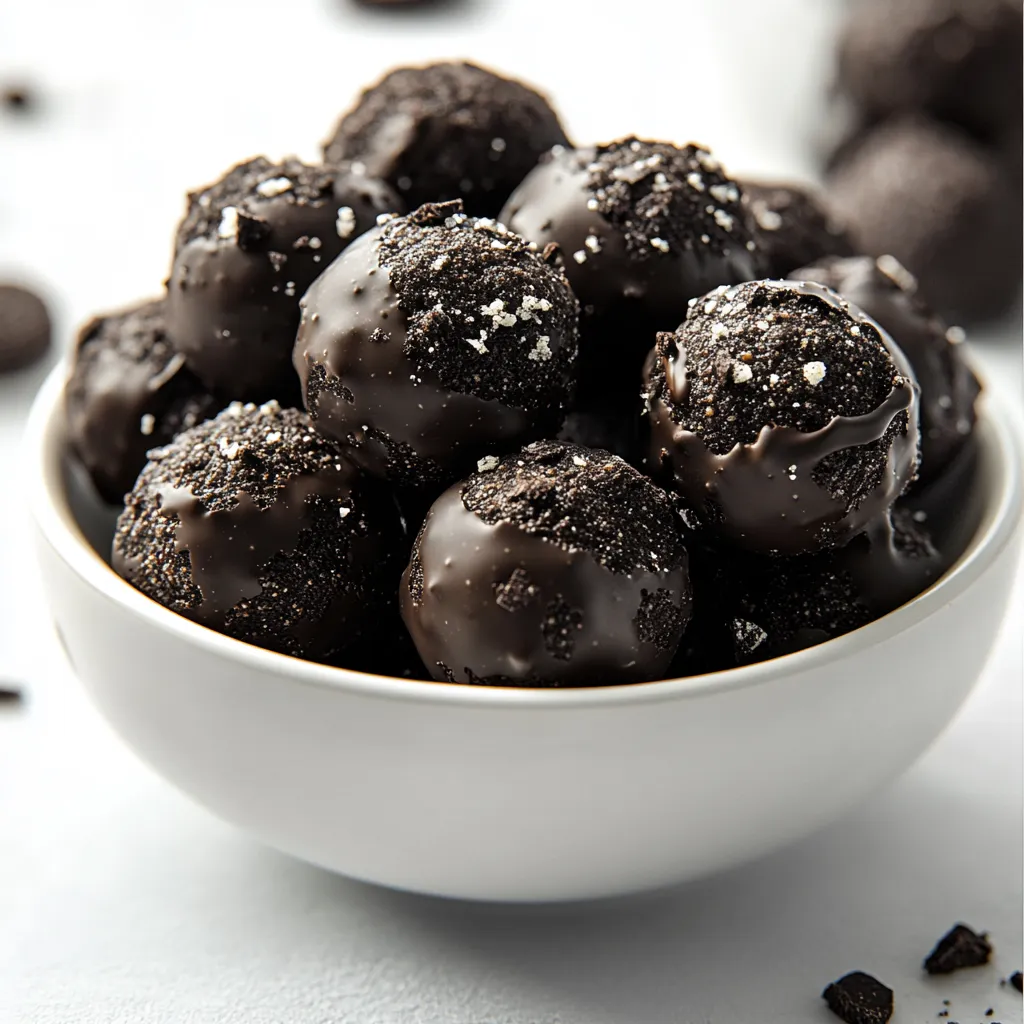
The creamy essence of the cream cheese combined with the delightful crunch of Oreo cookie crumbs creates a blend that is both nostalgic and innovative. Wrapped in a smooth chocolate coating, these bliss balls are perfect for gathering and social occasions or simply as a gratifying pick-me-up during the day. The secret to their irresistible flavor lies in their simplicity and the quality of ingredients—making them not only easy to make but also enjoyable to share.
Recipe Overview
– Prep Time: 15 minutes
– Cook Time: Not specified in the recipe
– Total Time: 45 minutes
– Course: Dessert
– Cuisine: American
– Servings: 20
– Calories: Approximately 150 per ball
This Oreo Protein Bliss Balls recipe brings together the simplicity of no-bake desserts with the indulgence of chocolate-covered treats. With a preparation time of just 15 minutes and a chill time of 30 minutes, these bites are quick to prepare and perfect for gatherings, snacks, or post-workout treats. With a total of 20 servings, they are a crowd-pleaser that doesn’t compromise on taste or nutrition.
Ingredients
– 1 package (15.25 oz) Oreo cookies, finely crushed
– 8 oz cream cheese, softened to room temperature
– 1 cup vanilla-flavored protein powder
– 1 cup dark chocolate chips
– 1 tablespoon coconut oil
– Optional: additional crushed Oreos for garnishing

Instructions
Combining the Base Mixture
1. In a large mixing bowl, combine the finely crushed Oreo cookies with the softened cream cheese. Mix thoroughly until the mixture is smooth and well-blended, ensuring there are no lumps.
The key to an excellent start is in creating a robust base mixture. It is essential to ensure thorough integration of the cream cheese and the crushed Oreos. This not only enhances the flavor but also sets the stage for the texture of the bliss balls. You’ll want to keep mixing until it forms a cohesive mass, which will significantly influence the final consistency of the balls. A smooth and lump-free blend lays the foundation for the right eating experience.
Integrating the Protein Powder
2. Gradually add the vanilla protein powder to the Oreo-cream cheese mixture. Stir continuously until the protein powder is fully integrated, creating a uniform mixture.
The addition of the protein powder serves a dual purpose—it provides a nutritional boost while giving the bliss balls a well-rounded flavor. By incorporating this ingredient gradually, you allow for better control over the texture of the mixture. This technique helps to prevent clumping and ensures that each ball has a consistent taste profile. The resulting mass should be thick enough to hold its shape when rolled, yet pliable enough to be formed into balls.
Rolling the Bliss Balls
3. Using your hands, roll the mixture into small balls, roughly 1 inch in diameter. Arrange the formed balls on a baking sheet lined with parchment paper for easy handling.
Rolling the mixture into balls can be one of the most satisfying steps in the process. To achieve the perfect size, aim for about an inch in diameter; this ensures that they’re easy to pop in your mouth without being overwhelming. Lay out the balls on a lined baking sheet, which prevents them from sticking and simplifies the cooling process later. Ensuring they are spaced well apart will also make it easier for the chocolate coating to dry later on.
Melting Chocolate Coating
4. In a microwave-safe bowl, combine the dark chocolate chips and coconut oil. Heat in 30-second intervals in the microwave, stirring after each interval until the mixture is completely melted and silky smooth.
The choice of chocolate not only enhances the visual appeal of your bliss balls but also adds a rich flavor contrast to the sweet and creamy base. Utilizing coconut oil in your melting process aids in achieving a glossy finish and makes the chocolate easier to coat. For best results, be attentive during the melting, stirring frequently to avoid any burning. Ideally, you want the mixture to be just melted, as overcooking can lead to a gritty texture.
Dipping Technique
5. Dip each Oreo ball into the melted chocolate, ensuring that each ball is completely coated. Use a fork to lift the balls out of the chocolate and gently tap to remove any excess coating.
Dipping the bliss balls into the chocolate creates an indulgent outer layer that complements the inner filling. By using a fork, you gain better control over the dipping process, allowing you to coat each ball thoroughly without making a mess. Tapping off the excess chocolate is crucial; this step not only prevents a puddle of chocolate from forming but also contributes to a clean, professional appearance.
Optional Garnishing
6. Return the chocolate-coated Oreo balls back onto the parchment-lined baking sheet. If desired, sprinkle crushed Oreos on top before the chocolate hardens for an extra touch of flavor and decoration.
Adding an extra layer of crushed Oreos on top of the chocolate before it sets enhances both the taste and presentation of your bliss balls. This optional step allows for personalization and adds visual height to each treat. It’s a simple way to make a statement with your dessert while paying homage to the original flavor.
Chilling to Set
7. Place the baking sheet in the refrigerator and chill for at least 30 minutes, allowing the chocolate to set and the balls to firm up.
Chilling the bliss balls is essential to achieving the perfect texture. The cooling time allows the chocolate to harden correctly, ensuring that each bite maintains its shape. Patience during this step will result in a much more enjoyable eating experience. Once chilled, they’re ready to serve and will make a delightful treat for any occasion.
The entire process of making Oreo Protein Bliss Balls is not only straightforward but also fulfilling, producing a dessert that beautifully combines the worlds of indulgence and health. As you prepare to enjoy these delectable bites, consider presentation ideas and additional personal touches to make them truly your own.
Garnishing Enhancements
Crushed Oreos for a Classic Finish
To elevate the visual appeal of your Oreo protein bliss balls, consider garnishing them with additional crushed Oreos. This not only enhances the aesthetic but also adds an extra crunch that mirrors the cookie’s classic taste. You can sprinkle these delicately over the melted chocolate before it sets, ensuring they adhere well. The striking contrast of the black cookie crumbs against the glossy chocolate coating makes for an eye-catching presentation.
Alternative Garnishing Techniques
If you’re looking for variety in your presentation, there are several alternative garnishing options to explore. Drizzling melted white chocolate over the chocolate-coated bliss balls can provide a delightful contrast in color and taste. Additionally, you might use vibrant sprinkles or edible glitter for a festive touch when serving these treats at parties or celebrations. For a more sophisticated look, finely chopped nuts or coconut flakes can also be used, providing both flavor and texture that perfectly complements the bliss balls’ rich chocolate interior.
Chilling Process
Importance of Chilling
The chilling step is an essential part of creating the perfect Oreo protein bliss balls. Not only does refrigeration help the chocolate coating set, but it also allows the balls to firm up, making them easier to handle and enjoy. During the chilling process, the flavors meld together, enhancing the overall taste experience. It’s recommended to chill the bliss balls for at least 30 minutes, ensuring that they achieve that perfect balance between softness and solidity.
Effects of Chilling on Texture and Taste
Chilling the bliss balls changes their texture, transforming them from a soft mixture into a satisfying, slightly firm treat. As the chocolate hardens, the balls retain their shape, allowing for more defined bites when served. This process also intensifies the chocolate flavor while serving to cool the creaminess of the cream cheese, creating a harmonious balance. The chilling time, though simple, ensures these protein bites can be enjoyed as a rewarding treat, without the mess, at any given moment.
Presentation Tips
Creative Serving Ideas
When it comes to serving your finished Oreo protein bliss balls, presentation matters just as much as taste. Arrange the bliss balls on a decorative platter to create an inviting display. If you’re serving them at a party or gathering, placing them in individual cupcake liners can add a touch of elegance and make serving effortless. This not only allows for personal portions but also adds a colorful element to your dessert table.
Drizzling for Decorative Touch
Enhancing the visual appeal doesn’t have to stop at the base decoration. A simple drizzle of melted chocolate, whether dark or white, can create a chic and gourmet look. Use a fork or a piping bag to create delicate swirls or zigzags over the tops of the bliss balls. This additional layer of chocolate enriches the depth of flavor and makes your bliss balls look professionally crafted, adding a gourmet touch to your homemade creations.
Seasonal Adaptations
Adapt your Oreo protein bliss balls for various seasons or holidays to keep your treats fresh and exciting. For a fall-themed treat, consider rolling the bliss balls in crushed walnuts or pumpkin pie spice. During festive times, use red and green sprinkle embellishments for a seasonal twist. These adaptations can make your bliss balls more than just a dessert; they become a delightful contribution to holiday celebrations or themed gatherings.
Storage Guidelines
Short-Term Storage
If you find yourself with leftover Oreo protein bliss balls, storing them properly ensures their longevity. Place the decorated bliss balls in an airtight container and keep them in the refrigerator, where they can last for up to a week. This way, you can enjoy a quick, nutritious treat after meals or as a snack throughout the week without sacrificing freshness or flavor.
Long-Term Options
For those who love to plan ahead, freezing Oreo protein bliss balls is an excellent option for enjoying them at a later date. Make sure to place individual bliss balls in a single layer on a baking sheet and freeze them until solid. Once frozen, transfer the balls to an airtight container or freezer-safe bag. Properly stored, they can be kept for up to three months. When you’re ready to indulge, simply thaw them in the refrigerator for a couple of hours, or let them sit at room temperature for a quick thaw before serving.
Nutritional Benefits
Ingredients Breakdown
Let’s delve into the nutritional profiles of some of the key ingredients in Oreo protein bliss balls. The crushed Oreo cookies offer a sweet crunch, while the cream cheese contributes a creamy texture and a dose of calcium. The vanilla-flavored protein powder packs these bliss balls with muscle-building protein, which is essential for active lifestyles. Dark chocolate chips not only add decadence but also bring antioxidants to the mix, making your dessert not only delicious but also somewhat beneficial in moderation.
Healthier Sweet Treats
These Oreo protein bliss balls strike an admirable balance between indulgence and health-conscious eating. At approximately 150 calories per ball, they provide a more nutritious option compared to typical desserts. Instead of the usual heavy cake or pastry, these bliss balls offer a satisfying way to satisfy a sweet craving without derailing health goals. They allow you to enjoy a treat without guilt, blending the realms of dessert and nutrition in an enticing package that caters to cravings while being mindful of dietary needs.
Conclusion
Oreo Protein Bliss Balls combine a rich, chocolatey flavor with a balance of nutritional benefits, making them a delightful treat for dessert lovers and health enthusiasts alike. With a simple preparation time of 15 minutes and a total time of 45 minutes, this recipe yields 20 servings that can be enjoyed in various settings. They present a satisfying indulgence without compromising on health goals, crafting a perfectly sweet addition to any gathering, or a fulfilling snack to enjoy during the day.

Oreo Protein Bliss Balls: A No-Bake Dessert Delight
Ingredients
- 1 package Oreo cookies finely crushed
- 8 oz cream cheese softened to room temperature
- 1 cup vanilla-flavored protein powder
- 1 cup dark chocolate chips
- 1 tablespoon coconut oil
- to taste additional crushed Oreos for garnishing
Instructions
- In a large mixing bowl, combine the finely crushed Oreo cookies with the softened cream cheese and mix until smooth.
- Gradually add the vanilla protein powder, stirring continuously until fully integrated.
- Roll the mixture into small balls, about 1 inch in diameter, and place them on a parchment-lined baking sheet.
- In a microwave-safe bowl, combine the dark chocolate chips and coconut oil, heating in 30-second intervals until melted and smooth.
- Dip each Oreo ball into the melted chocolate, ensuring they are fully coated, then lift out with a fork to remove excess chocolate.
- Return the chocolate-coated balls to the baking sheet and sprinkle with crushed Oreos if desired.
- Chill in the refrigerator for at least 30 minutes to allow the chocolate to set.
- Serve cold and enjoy your easy, no-bake Oreo protein bliss balls.