
Introduction
The joy of entertaining is elevated by beautifully crafted accessories that complement your culinary creations. Custom stamped charcuterie board accessories not only enhance your table’s aesthetic but also showcase your personality and creativity. Elevating your gatherings involves thoughtful details, and what better way to add a personal touch than through customized utensils? These handmade items serve as focal points during gatherings and generate conversation among guests, making your dining experience not just a meal, but a memorable event.
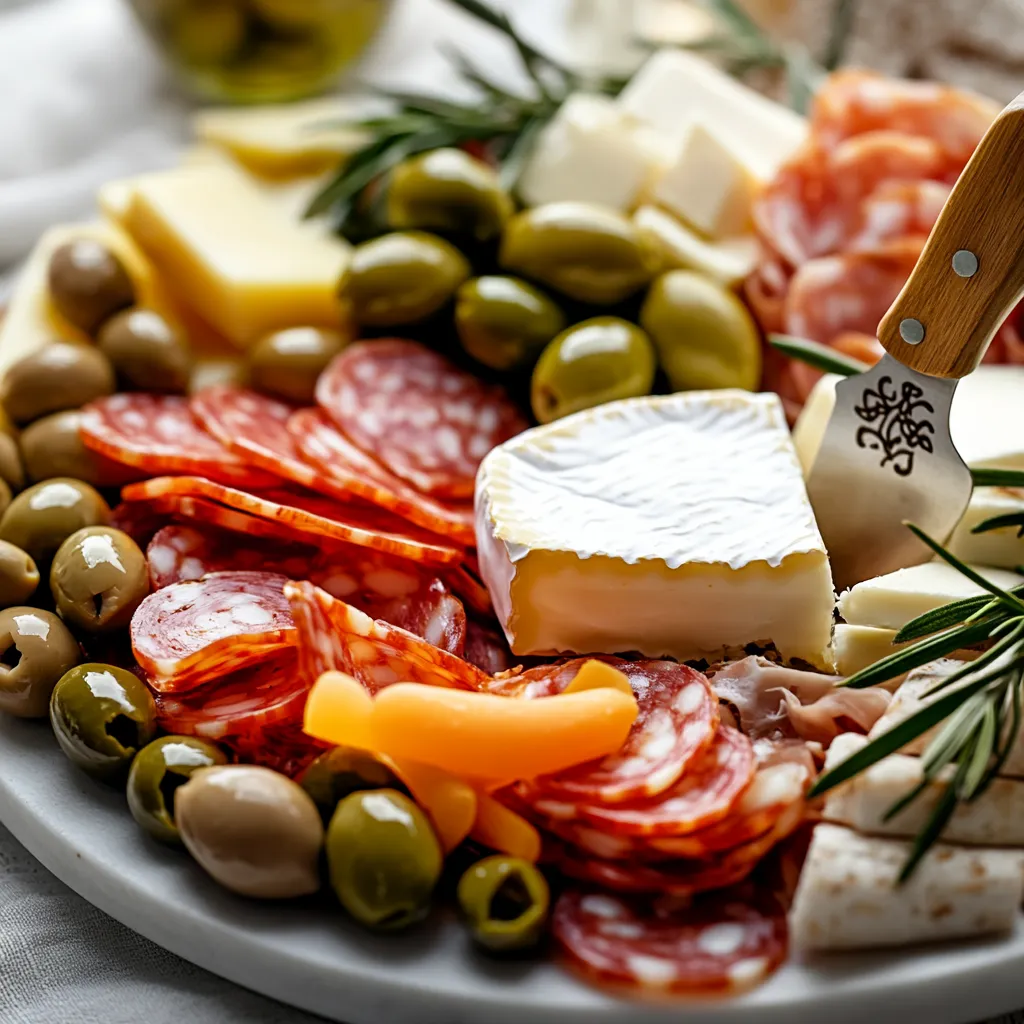
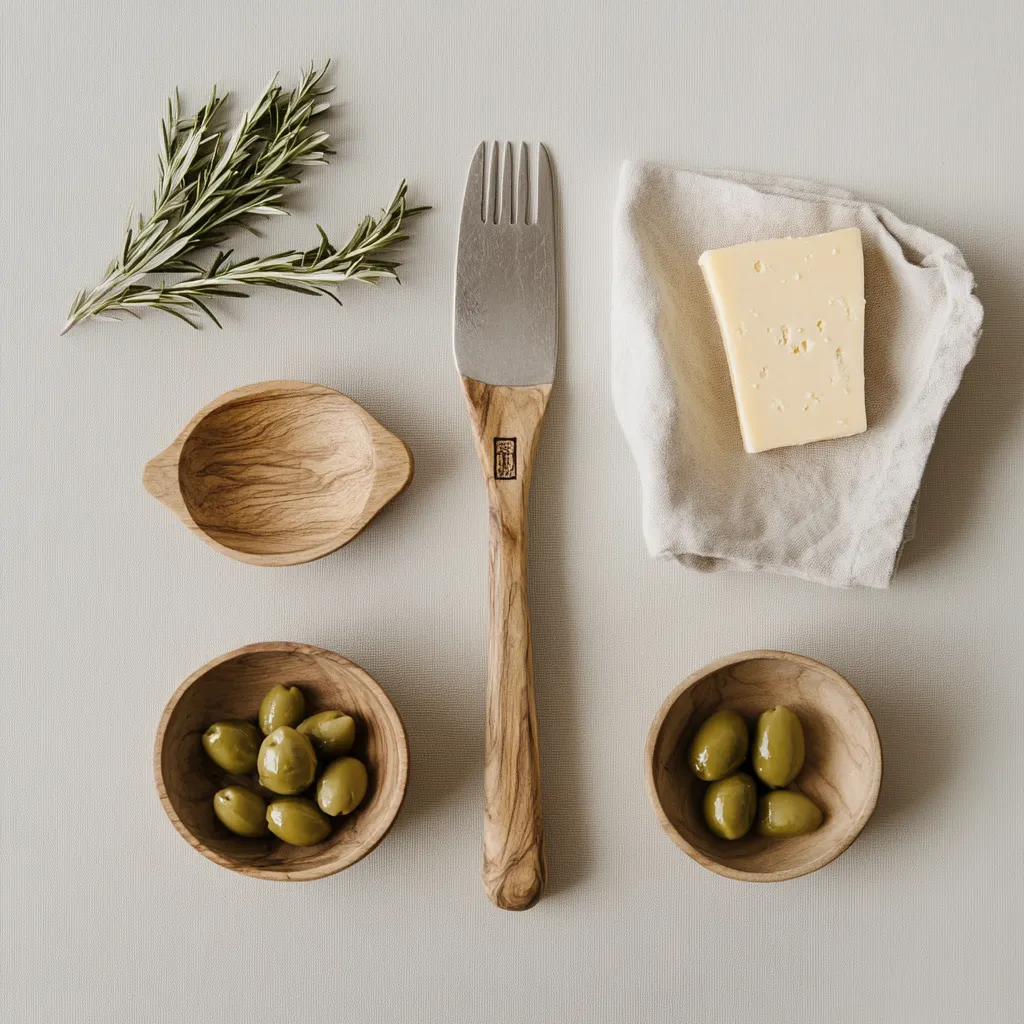
When preparing for your next get-together, consider the profound impact of well-crafted utensils. Picture a wooden butter knife, engraved with a design that harmonizes with your decor, alongside a stainless steel cheese knife and an olive-pickle fork—each stamped with unique patterns, they invite guests to partake in your charcuterie delights. Not only are these accessories functional, but they also provide a visual feast that can elevate the overall experience of your table setting.
Whether it’s for a festive Thanksgiving gathering or a cozy cheese and wine night with friends, these tokens of effort demonstrate the love and care you put into your entertaining. This guide will walk you through the systematic process of creating your own personalized wooden and stainless steel utensils, ensuring that your charcuterie board stands out and impresses everyone who gathers around it.
Recipe Overview
– Prep Time: 20 minutes
– Cook Time: 0 minutes
– Total Time: 24 hours (including drying time)
– Course: Accessories/Decor
– Cuisine: American
– Servings: 1 set
– Calories: ~50 per accessory
Creating custom stamped charcuterie board accessories is a fulfilling project that adds both functionality and aesthetic appeal to your entertaining toolkit. In this recipe, you will learn how to personalize a wooden butter knife, a stainless steel cheese knife, and a stainless steel olive-pickle fork. Each accessory is designed not just for practical use but to also tell a story—your story—as it reflects your tastes and style.
Ingredients
– 1 wooden butter knife
– 1 stainless steel cheese knife
– 1 stainless steel olive-pickle fork
– Food-safe wood stamp featuring your unique designs
– Non-toxic wood finish for protection
– Soft polishing cloth
Instructions
1. Begin by thoroughly cleaning the wooden butter knife. Ensure it is devoid of any dust or debris to prepare for stamping.
2. Take your food-safe wood stamp and firmly press it onto the handle of the butter knife, applying consistent pressure to achieve a sharp and clear design.
3. Repeat the stamping process on both the stainless steel cheese knife and the olive-pickle fork, making sure to align the designs as desired.
4. Allow the stamped designs to air dry completely, following the drying time recommended by the manufacturer.
5. Once the designs are dry, apply a thin coat of non-toxic wood finish to the wooden butter knife. This will protect the stamped design and enhance the wood’s natural beauty.
6. Allow the finish to cure according to the product’s guidelines, which usually takes about 24 hours.
7. After the curing period, use a soft polishing cloth to buff the wooden butter knife until it shines, highlighting your custom design.
8. Arrange your beautifully stamped accessories on your charcuterie board, creating an inviting and visually appealing display.
9. Complement your accessories with an assortment of your favorite cheeses, olives, and pickles to elevate your Thanksgiving table decor.
10. Share your personalized creations with family and friends, making your gathering even more special!
Preparation Process
Cleaning the Utensils
Before you can begin the stamping process, it’s essential to start with clean utensils. The wooden butter knife, as well as the stainless steel accessories, should be free of any debris or fingerprints that could interfere with the stamping design. Importance lies in ensuring a pristine surface; a dirty surface can result in unclear designs, undermining the effort put into personalizing these utensils.
Recommended cleaning agents include mild soap and warm water, used in combination with a soft cloth or sponge. Avoid using any abrasive cleaners that could scratch the utensils. After initial washing, rinse thoroughly to ensure all cleaning agents are removed, and dry completely with a clean towel.
To enhance the finish, consider lightly sanding the wooden surface before stamping. This step can help create a smooth canvas for your designs, ensuring that they stand out vibrant and clear.
Stamping the Designs
Choosing the right wood stamp is crucial for creating clear and attractive designs on your utensils. Look for stamps that feature unique designs, as well as food-safe materials. When applying the stamp, technique matters—firmly press down on the handle of the butter knife, ensuring even pressure across the entire surface. This consistency will yield the best results, preventing any parts of the design from appearing faded or incomplete.
To achieve clear impressions, practice makes perfect. If you’re using a new wood stamp, consider testing it on a scrap piece of wood to gauge pressure and alignment before moving on to your final utensils. It’s a subtle but significant step—ensuring that the final product meets your expectations fully.
Drying and Curing Time
Importance of Proper Drying
Once you have stamped your designs, the next crucial phase is allowing the stamped images to air dry completely. This step is imperative for ensuring that the design adheres properly to the surface and doesn’t smudge or lose its clarity. Understanding and following the manufacturer’s guidelines on drying time is fundamental.
Factors affecting drying time include humidity, temperature, and airflow in your workspace. If the environment is too humid, it may extend drying times, while a warm, airy space will aid in quicker drying.
Applying the Wood Finish
After the designs have dried, applying a thin coat of non-toxic wood finish is an essential step. This finish serves not just as a protective layer but also enhances the natural beauty of the wood, giving it a polished look. When choosing the finish, ensure that it is labeled as non-toxic, as you’ll want to guarantee that your finished utensils are safe for food use.
Application techniques include using a clean brush or cloth to evenly spread the finish across the surface. It’s important to apply a thin coat, as thick layers can result in a sticky or uneven finish. After applying the finish, adhere to the recommended curing times provided by the product’s guidelines, generally around 24 hours for optimal results. This word of caution ensures that the finish is set and protects your stamped designs, allowing them to last through numerous gatherings and events.
Visual Aesthetics
Creating a visually appealing charcuterie board is as much about the arrangement as it is about the ingredients. With your custom stamped accessories ready to go, it’s the perfect time to focus on how to present everything in a balanced manner.
Guidelines for a Balanced Display
To achieve a balanced display, consider the color, shape, and textures of your ingredients. Position items with contrasting shapes next to each other. For example, pair cubes of cheese with slices of cured meats, which can soften the lines of your layout. Pay attention to color as well—mix bright hues like green olives or red radishes with the neutral tones of cheeses and wooden accessories. This will draw the eye and make the board inviting.
Another essential tip is to keep similar items grouped together. This organization allows your guests to easily navigate the board while also providing a cohesive look. For example, create a small zone dedicated to cured meats, one for cheeses, and another for your decorative accessories.
Creating Focal Points on the Board
Focal points help to guide the visual journey across your charcuterie board. To create effective focal points, consider using your custom stamped accessories as anchors. Place the butter knife in the center or off to one side alongside a small dish of honey or a vibrant fig compote. This will naturally draw attention and give structure to your presentation.
Additionally, you can utilize height variation as a tactic. Layer ingredients in small piles or use small stands or pedestals for cheeseboards to create depth. Stacking ingredients, such as jars of pickles and olives, can also add intrigue to your display.
Considerations for Pairing
The foundation of a good charcuterie board is a thoughtfully curated selection of food pairings that complement one another.
Suggested Cheese Types to Pair
Cheese is a staple of any charcuterie board, and selecting a variety of types will enhance both the taste and texture immensely. Consider offering a mix of:
– Soft cheeses like Brie or Camembert
– Aged cheeses such as sharp cheddar or Gruyère
– Blue cheese for those who enjoy strong flavors
– Fresh cheeses like mozzarella or burrata
Each cheese type can bring a different flavor profile and texture, which will delight the palate of your guests.
Ideal Olive and Pickle Combinations
Olives and pickles are fantastic for adding a briny kick to your selection. Here are some great combinations:
– Green olives alongside tangy dill pickles — the bitterness of green olives complements the sourness of dill pickles perfectly.
– Kalamata olives paired with spiced gherkins — this combination offers a delightful twist to your board.
– A mix of stuffed olives, such as those filled with garlic or pimentos, can add variety and enhance flavor dynamics.
Enhancing the Presentation
To take your charcuterie board to the next level, consider incorporating additional elements that elevate the overall experience.
Optional Labels and Tags
Labels and tags can serve both practical and aesthetic purposes on a charcuterie board.
Ideas for Labels
Think about crafting simple cards that denote the types of cheese or the origins of the meats featured. You might use small flags for a charming touch, creatively inscribing the names and any notable pairing suggestions.
Importance of Descriptive Tags
Descriptive tags can provide helpful information for your guests, particularly for those who may have dietary restrictions or preferences. Knowing if a particular item is gluten-free or contains nuts can be crucial in a social setting.
Photography Tips
Capturing the beauty of your charcuterie board can be just as important as creating it, allowing you to share this culinary art with others.
Best Angles for Displaying the Board
For optimal photography results, shoot from a slight overhead angle, showcasing the entirety of the board for a broad view of the arrangement. Close-up shots on specific areas can also help highlight your custom accessories along with intricate details like textures and colors.
Lighting Considerations for Capturing the Spread
Natural light works best for food photography. Set your charcuterie board near a window that allows in soft daylight, avoiding direct sunlight, which can create harsh shadows. A reflector can also enhance your image by dispersing light evenly across the display.
Seasonal and Festive Usage
Your stamped accessories can be utilized throughout various seasons and holidays, making them versatile additions to your kitchen.
Thanksgiving and Holiday Themes
During the holiday season, infuse your charcuterie board with seasonal decorations, such as mini pumpkins or autumn leaves to match the festive spirit. Consider using a color palette that reflects the holiday theme with richer hues or a cozy color scheme to create a welcoming atmosphere.
Thematic Pairings to Complement Holidays
For Thanksgiving, think of including seasonal items like cranberry chutney or spiced nuts. Winter holidays could call for more robust flavors, incorporating toppings like spiced meats or even festive cheeses adorned with herbs. These seasonal items can harmoniously complement your custom accessories.
Year-Round Occasions
The charm of your custom accessories extends well beyond the holiday season.
Versatility of the Accessories
These accessories are perfect for all occasions. From casual gatherings to formal events, they provide a unique way to serve food that stands out and connects guests to the experience.
Perfect Events for Displaying Charcuterie Boards
Your custom charcuterie board can shine at birthdays, anniversaries, and company gatherings. The accessories not only elevate the experience but also prompt social interaction and conversation among guests.
Sustainability and Eco-Friendliness
As you create your custom stamped accessories, it’s worthwhile to consider the sustainability aspect.
Choosing Sustainable Materials
Using wood and stainless steel for your accessories offers dual benefits: durability and eco-friendliness. Wood is biodegradable, and when sourced sustainably, it supports forest conservation efforts. Stainless steel, being recyclable, adds elegance to your kitchen without adding waste to landfills.
Importance of Non-Toxic Finishes
The application of non-toxic finishes ensures that your items are safe for food contact and environmentally friendly. These finishes help preserve the integrity of the wood while ensuring it doesn’t introduce harmful chemicals into your food environment.
Reusing Accessories
A key component of sustainability is reusing your accessories in innovative ways.
Maintenance Tips for Longevity
Regular care will help extend the life of your accessories. Avoid soaking wood items in water, as this can warp the wood. After each use, simply hand wash with mild soap and dry immediately to maintain its beauty.
Ways to Update Designs Seasonally
Consider refreshing the look of your custom stamped items. A simple redesign or adding seasonal stamps can transform their appearance, allowing for a new take on your charcuterie board while celebrating the change in seasons.
Taste and Aesthetic Benefits
Finally, the ultimate goal of these accessories is to enhance both the taste and visual appeal of your gatherings.
Flavor Enhancement
The right accessories can significantly improve the dining experience, influencing how guests perceive and enjoy the food. A well-curated selection that allows for easy serving can encourage exploration and tasting, enhancing flavors through presentation.
Visual Appeal
The role of accessories doesn’t stop at functionality; their aesthetic charm creates enticing displays that draw guests in. Crafting a visually pleasing board encourages guests to engage with the offerings, fostering an inviting atmosphere ideal for social interactions.
Conclusion
The custom stamped charcuterie board accessories are not just functional items; they are a celebration of creativity and craftsmanship. The end result is a stunning combination of aesthetic allure and practical utility that will enhance any gathering, making it truly memorable. The thoughtful design and personal touches involved in crafting these pieces add a layer of warmth and charm to your culinary experiences.
Custom Stamped Charcuterie Board Accessories Made Easy
Ingredients
- 1 piece wooden butter knife
- 1 piece stainless steel cheese knife
- 1 piece stainless steel olive-pickle fork
- 1 piece food-safe wood stamp
- 1 bottle non-toxic wood finish
- 1 piece soft polishing cloth
Instructions
- Clean the wooden butter knife thoroughly to remove dust.
- Press the food-safe wood stamp onto the handle of the butter knife.
- Repeat stamping on the cheese knife and olive-pickle fork.
- Allow the stamped designs to air dry completely.
- Apply a thin coat of non-toxic wood finish to the butter knife.
- Let the finish cure for about 24 hours.
- Buff the butter knife with a soft polishing cloth until it shines.
- Arrange the stamped accessories on your charcuterie board.
- Add cheeses, olives, and pickles for a complete display.
- Share your creations with family and friends.