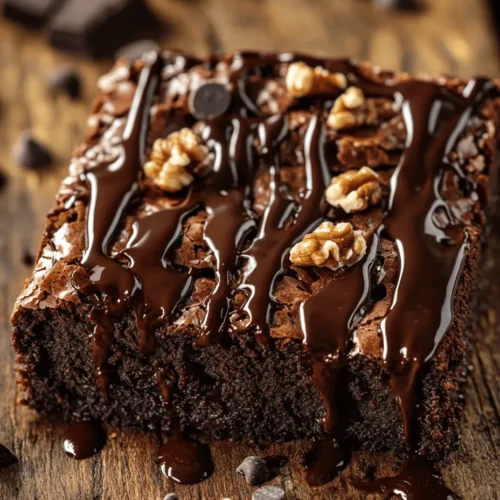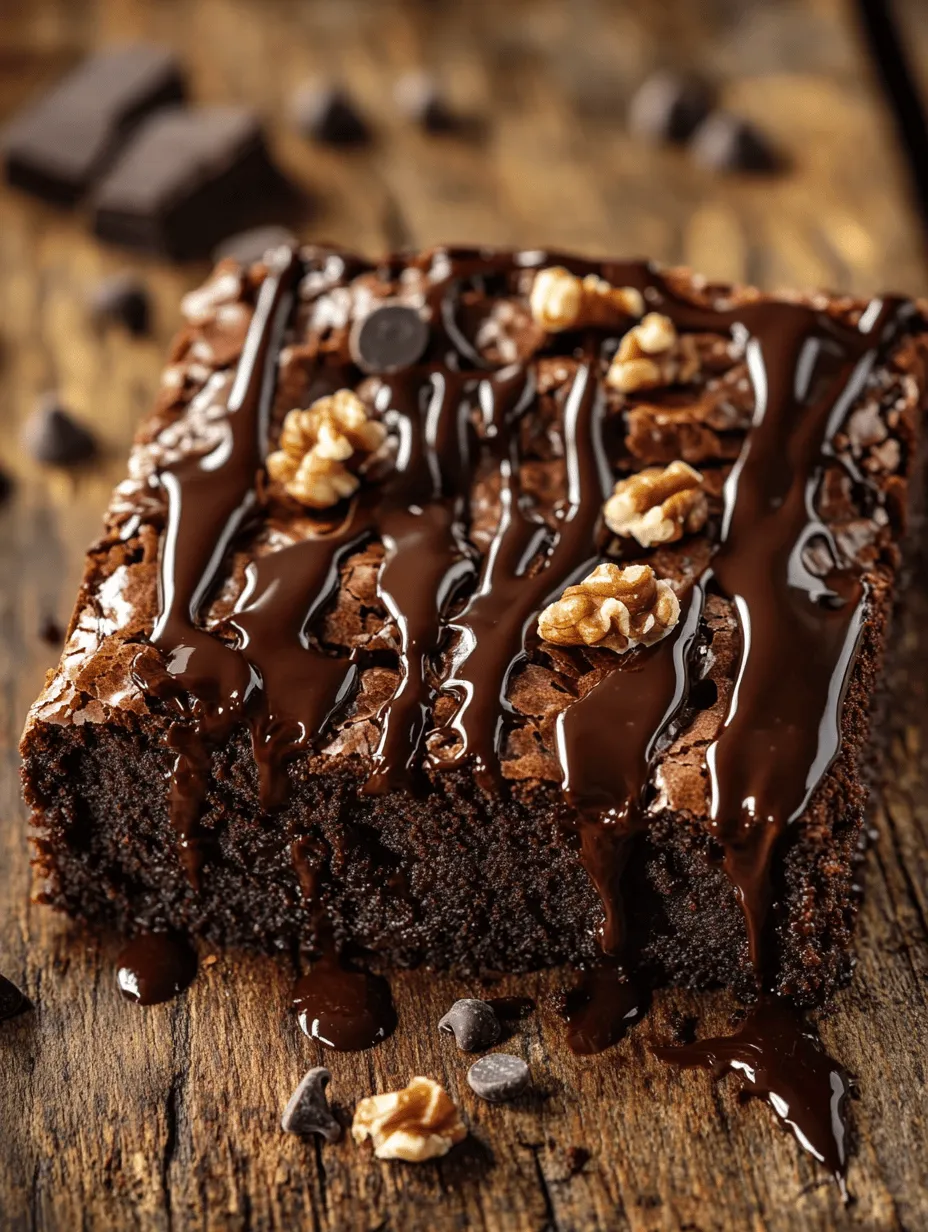
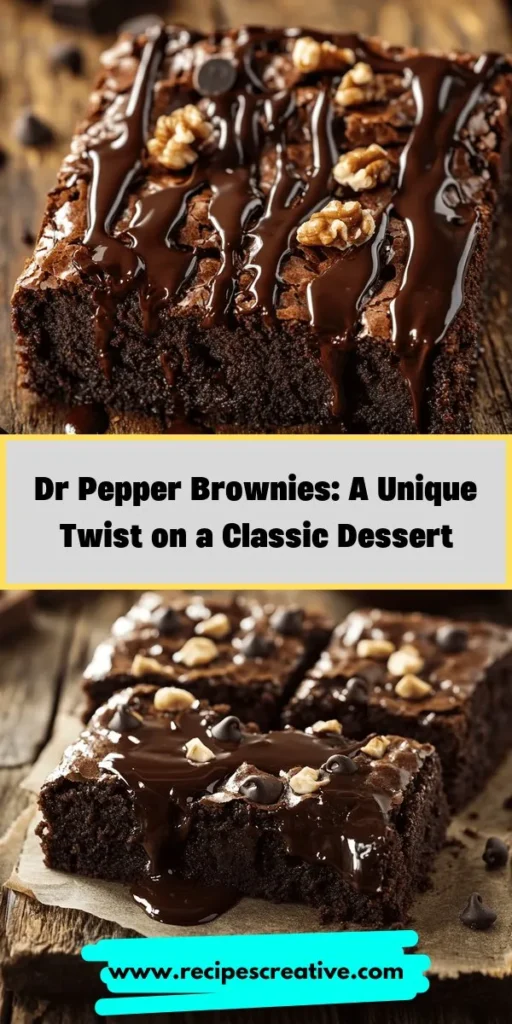
In the world of desserts, brownies hold a special place for their rich, fudgy texture and delightful chocolate flavor. But what if we could elevate this classic treat with a unique twist? Enter Dr Pepper Brownies – a delectable fusion of chocolate and the iconic soda that enhances the taste and adds a surprising depth of flavor. These brownies are not just a dessert; they are an experience, combining the beloved characteristics of traditional brownies with the fizzy, complex notes of Dr Pepper.
The Allure of Brownies
Exploring the History of Brownies
Brownies have a storied past that dates back to the late 19th century in the United States. While the exact origins remain somewhat of a mystery, it is widely believed that brownies were first created in the Chicago area. The initial recipe for brownies appeared in the 1897 edition of the Boston Cooking School Cookbook, authored by Fannie Farmer. This early version was simply a chocolate cake baked in a pan, but over time, bakers refined the recipe into the fudgy, dense treat we adore today.
The evolution of brownies has led to numerous variations, each adding its own flair. From the classic chocolate brownie to the introduction of nuts, caramel swirls, and even cheesecake layers, the possibilities are virtually endless. However, the introduction of Dr Pepper into the mix adds an exciting twist that is sure to intrigue both brownie enthusiasts and soda lovers alike.
Understanding the Classic Brownie Recipe
At its core, a classic brownie recipe typically comprises a few simple ingredients: flour, sugar, cocoa powder, eggs, butter, and a pinch of salt. This straightforward combination is what gives brownies their signature fudgy consistency. The key to a perfect brownie lies in the balance between dry and wet ingredients, ensuring they bake evenly while maintaining that indulgent texture.
The simplicity of the classic brownie recipe is one reason for its enduring popularity. It’s easy to whip up a batch on a whim, making it a go-to dessert for both novice and experienced bakers. However, the addition of Dr Pepper transforms this already beloved treat into something extraordinary, introducing a tangy sweetness that harmonizes beautifully with the chocolate.
Different Types of Brownies: Fudgy vs. Cake-like
When it comes to brownies, there are generally two camps: fudgy and cake-like. Fudgy brownies are denser, moister, and richer, often made with more fat (butter or oil) and less flour. They are the epitome of indulgence, often described as “chewy” or “gooey.” On the other hand, cake-like brownies have a lighter texture and resemble a chocolate cake more closely, featuring a higher flour content and whipped eggs to create a fluffier structure.
The choice between fudgy and cake-like brownies often comes down to personal preference. Some may prefer the dense, chocolaty richness of fudgy brownies, while others may enjoy the airy texture of cake-like varieties. Dr Pepper Brownies lean towards the fudgy side of the spectrum, enhancing the chocolate flavor while adding a hint of effervescence from the soda, making them an irresistible treat.
Dr Pepper: More Than Just a Soda
A Brief History of Dr Pepper
Dr Pepper, one of America’s oldest soft drinks, was invented in the 1880s by Charles Alderton, a pharmacist in Waco, Texas. Originally marketed as a tonic for various ailments, it quickly became a popular refreshment. The unique blend of flavors—spicy, fruity, and sweet—set Dr Pepper apart from other sodas. Today, it remains a favorite across the nation, known for its distinctive taste and iconic branding.
Over the years, Dr Pepper has expanded beyond just a beverage. It has become a cultural icon, featuring prominently in advertisements, music, and even social media. Its versatility as an ingredient in cooking and baking has also gained popularity, with chefs and home bakers alike experimenting with its unique flavor profile in a variety of dishes.
The Unique Flavor Profile of Dr Pepper
What makes Dr Pepper stand out is its complex flavor profile. Unlike many sodas that rely on a straightforward sweetness, Dr Pepper combines 23 different flavors, including cherry, vanilla, licorice, almond, and even hints of cola. This intricate blend creates a depth that enhances desserts and savory dishes alike. When used in baking, Dr Pepper imparts a subtle sweetness while also adding a slight tang and a hint of spice, making it an excellent pairing for chocolate.
How Dr Pepper Enhances Desserts
Incorporating Dr Pepper into desserts like brownies adds a layer of flavor that is both unexpected and delightful. The carbonation in the soda can help create a lighter texture, while the diverse flavor notes complement the richness of chocolate. For instance, when combined with cocoa powder and melted chocolate, Dr Pepper enhances the overall taste profile, making each bite a delicious adventure.
Utilizing Dr Pepper in brownie recipes not only elevates the taste but also provides a unique conversation starter. It’s a fun way to surprise guests with a dessert that’s familiar yet refreshingly different. Whether served at a casual gathering or a special occasion, Dr Pepper Brownies are bound to impress.
Ingredients Breakdown for Dr Pepper Brownies
Essential Ingredients and Their Roles
To make Dr Pepper Brownies, you will need a few fundamental ingredients. Here’s a brief breakdown of what you’ll need and their roles in the recipe:
– Butter: Acts as the primary fat, contributing to the fudgy texture and rich flavor of the brownies. Using unsalted butter allows you to control the salt content.
– Granulated Sugar: Sweetens the brownies and helps create a nice crust on the top.
– Brown Sugar: Adds moisture and a slight caramel flavor, enhancing the overall richness.
– Cocoa Powder: Provides the chocolate flavor and contributes to the brownie’s dark color.
– All-Purpose Flour: Gives structure to the brownies, balancing the wet ingredients.
– Eggs: Bind the ingredients together and add moisture, contributing to the fudgy texture.
– Dr Pepper: The star ingredient, adding sweetness, carbonation, and a unique flavor profile that elevates the brownies.
– Vanilla Extract: Enhances the overall flavor, rounding out the chocolate and soda notes.
The Importance of Quality Ingredients
When it comes to baking, the quality of your ingredients can significantly impact the final product. Using high-quality cocoa powder, fresh eggs, and real butter will yield better-tasting brownies. For the best results, opt for a brand of Dr Pepper that you enjoy drinking, as the flavor will be prominent in the finished dessert.
Optional Add-ins: Chocolate Chips and Nuts
To take your Dr Pepper Brownies to the next level, consider adding chocolate chips or nuts. Semi-sweet chocolate chips can provide additional bursts of chocolate flavor, while chopped nuts, such as walnuts or pecans, add a delightful crunch. These optional add-ins can customize your brownies and make them even more indulgent.
Step-by-Step Guide to Making Dr Pepper Brownies
Preparation Before Baking
Before diving into the baking process, it’s essential to prepare your kitchen and gather all the necessary ingredients. Here’s how to get started:
1. Gather Your Ingredients: Ensure you have all the required ingredients listed above on hand. Measure them out beforehand to streamline the process.
2. Preheat Your Oven: Preheat your oven to 350°F (175°C). This step is crucial, as placing your brownies in a properly heated oven ensures even baking.
3. Prepare Your Baking Pan: Line an 8×8-inch square baking pan with parchment paper or lightly grease it with butter or cooking spray. This will prevent the brownies from sticking and make for easier removal.
With your ingredients and baking equipment ready, you’re all set to begin the exciting process of creating Dr Pepper Brownies. The next steps will guide you through mixing, baking, and achieving that perfect fudgy texture that everyone will love. Stay tuned for the detailed instructions on how to bring this unique dessert to life!
Gathering Your Ingredients
Before diving into the delicious world of Dr Pepper Brownies, it’s essential to gather all your ingredients. This will ensure a smooth baking experience with no last-minute scrambles to find items. Here’s what you will need:
– For the Brownies:
– 1 cup (2 sticks) unsalted butter
– 1 cup granulated sugar
– 1 cup packed brown sugar
– 4 large eggs
– 1 teaspoon vanilla extract
– 1 cup all-purpose flour
– 1 cup unsweetened cocoa powder
– 1 teaspoon baking powder
– 1/2 teaspoon salt
– 1 cup Dr Pepper soda
– For the Dr Pepper Glaze:
– 1/2 cup powdered sugar
– 3 tablespoons Dr Pepper soda
Make sure to have all these ingredients at room temperature for optimal mixing. Fresh ingredients will yield the best results, especially with the key flavors in this unique brownie recipe.
Step-by-Step Instructions
Now that you have your ingredients ready, let’s walk through the process of creating these decadent Dr Pepper Brownies.
1. Preheat Your Oven: Start by preheating your oven to 350°F (175°C). This ensures that the brownies bake evenly and achieve that perfect texture.
2. Prepare Your Baking Pan: Grease a 9×13 inch baking pan with butter or line it with parchment paper for easy removal after baking.
3. Melt the Butter: In a large saucepan over medium heat, melt the butter. Once melted, remove from heat and let it cool for a few minutes.
4. Mix Sugars: Add the granulated sugar and brown sugar to the melted butter. Stir until well combined and the mixture is smooth.
5. Add Eggs and Vanilla: Beat in the eggs, one at a time, mixing well after each addition. Then, stir in the vanilla extract until fully incorporated.
6. Combine Dry Ingredients: In a separate bowl, whisk together the flour, cocoa powder, baking powder, and salt to ensure there are no lumps.
7. Incorporate Dry Ingredients: Gradually add the dry mixture to the butter and sugar mixture. Stir until just combined, being careful not to over-mix.
8. Add Dr Pepper: Finally, carefully fold in the Dr Pepper soda. The carbonation will help create a light texture in the brownies, so don’t be alarmed if the batter bubbles a bit.
9. Pour into Pan: Spread the batter evenly into the prepared baking pan.
10. Bake: Place the pan in the preheated oven and bake for 25-30 minutes. Keep an eye on the brownies as they bake to avoid overcooking.
Tips for Achieving the Perfect Brownie Texture
Getting the brownie texture just right can be a challenge, but following these tips will help you achieve that gooey, fudgy consistency that everyone loves.
– Do Not Overmix: Once you add the dry ingredients, mix just until combined. Overmixing can lead to dense brownies rather than the desired fudgy texture.
– Use Quality Cocoa: The flavor of your brownies largely depends on the quality of cocoa powder you use. Opt for a high-quality unsweetened cocoa powder for the richest flavor.
– Check for Doneness: For brownies, you want a few moist crumbs sticking to a toothpick when inserted into the center. If it comes out clean, they may be overbaked.
Baking Tips for Success
Understanding how to manage your baking environment plays a crucial role in achieving the best results. Here are some baking tips to ensure success:
Understanding Oven Temperatures
Every oven is different, and some can run hotter or cooler than the displayed temperature. It’s wise to invest in an oven thermometer to ensure accuracy. If your oven tends to run hot, you may need to reduce the baking temperature by 25°F to prevent overbaking your brownies.
How to Test Brownies for Doneness
To test for doneness, insert a toothpick or cake tester into the center of the brownies. If it comes out with a few moist crumbs, they are done. If it comes out clean, the brownies may be overdone. Remember, they will continue to cook slightly as they cool, so it’s better to err on the side of underbaking.
Common Mistakes to Avoid
– Skipping the Cooling Step: Allow your brownies to cool in the pan for at least 15 minutes before cutting. This helps them set properly and reduces crumbling.
– Not Using Quality Ingredients: Using fresh and high-quality ingredients will significantly impact the flavor and texture of your brownies.
– Not Measuring Accurately: Baking is a science, and accurate measurements are crucial. Use dry measuring cups for dry ingredients and liquid measuring cups for liquids.
Serving Suggestions for Dr Pepper Brownies
Once your Dr Pepper Brownies are baked and cooled, it’s time to think about how to serve them. Here are some creative serving suggestions to elevate your dessert experience:
Creative Ways to Serve Brownies
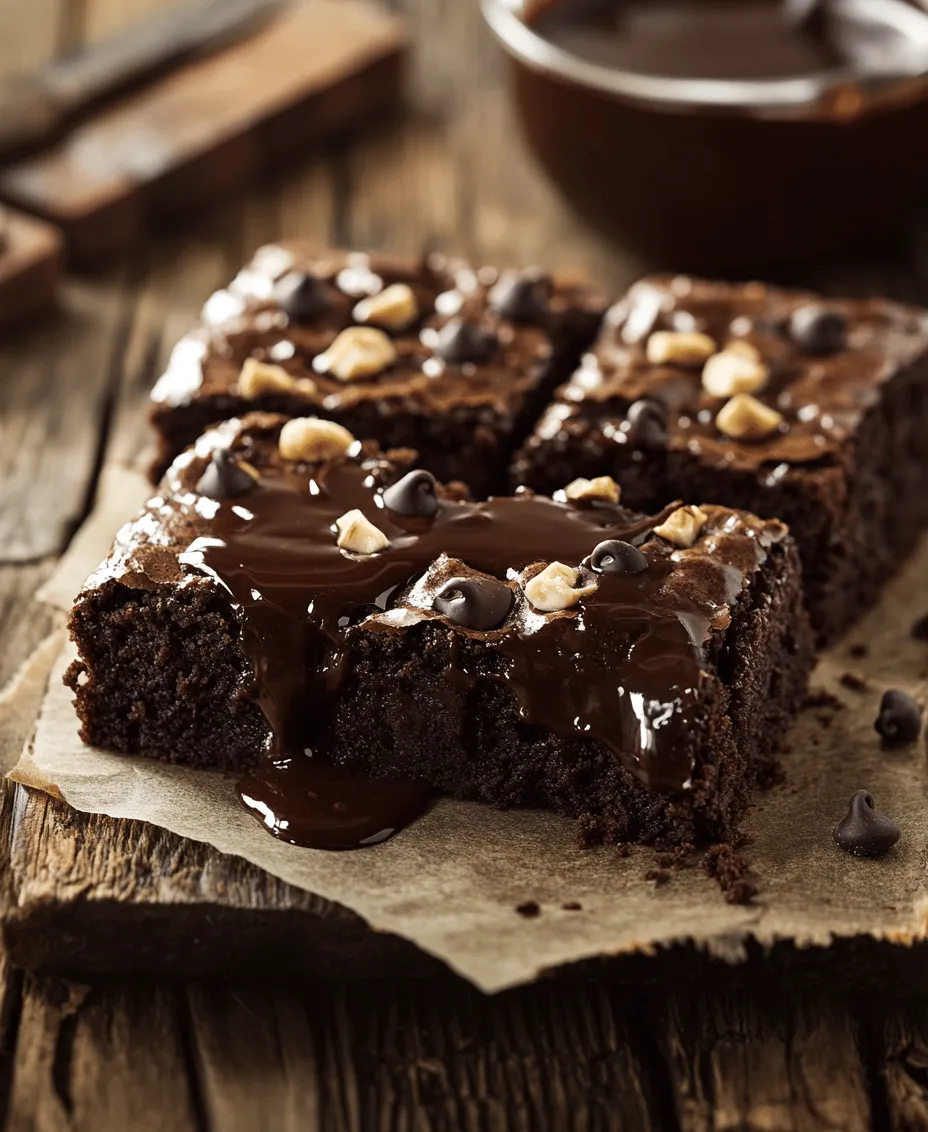
– Brownie Sundaes: Top warm brownies with scoops of vanilla or chocolate ice cream, a drizzle of chocolate sauce, and whipped cream for a decadent sundae.
– Brownie Trifle: Layer brownie pieces with whipped cream and your favorite fruits in a glass for an elegant presentation.
– Brownie Bites: Cut the brownies into small squares for bite-sized treats that are perfect for parties.
Pairing Suggestions: Ice Cream and Sauces
Dr Pepper Brownies pair wonderfully with various ice creams and sauces. Consider these combinations:
– Ice Cream: Vanilla, caramel, or even cherry ice cream can complement the flavors of the brownies.
– Sauces: Drizzle with chocolate sauce, caramel sauce, or even a fruit sauce for added flavor and visual appeal.
Presentation Tips for an Impressive Dessert
– Garnish: Sprinkle the top of your brownies with powdered sugar or drizzle with a simple Dr Pepper glaze made from powdered sugar and Dr Pepper for an attractive finish.
– Plating: Serve brownies on decorative plates and add fresh berries or mint leaves for a pop of color.
Storing and Reheating Brownies
If you find yourself with leftover brownies (which is unlikely!), here’s how to store and reheat them for optimal enjoyment.
Best Practices for Storing Leftovers
– Room Temperature: Store brownies in an airtight container at room temperature for up to 3-4 days. This keeps them soft and delicious.
– Refrigeration: If you want to keep them longer, you can refrigerate them, but be aware that this may change their texture. They will last up to a week in the fridge.
How to Reheat Brownies for Optimal Enjoyment
– Microwave: To reheat a brownie, place it on a microwave-safe plate and heat for about 10-15 seconds. This will warm the brownie without drying it out.
– Oven: Preheat your oven to 350°F (175°C), wrap the brownie in foil, and heat for 5-10 minutes until warmed through.
Conclusion
Dr Pepper Brownies offer a delightful twist on a beloved dessert, combining the rich, chocolatey goodness we all crave with the unexpected flavor of Dr Pepper. Whether you’re baking for a special occasion or simply indulging yourself, this recipe is sure to impress. By following the steps outlined in this article, you will not only create a batch of delicious brownies but also gain insight into the magic that happens when classic recipes meet innovative ingredients. Enjoy every bite of this unique treat that pays homage to both traditional baking and the playful spirit of culinary experimentation.