Introduction
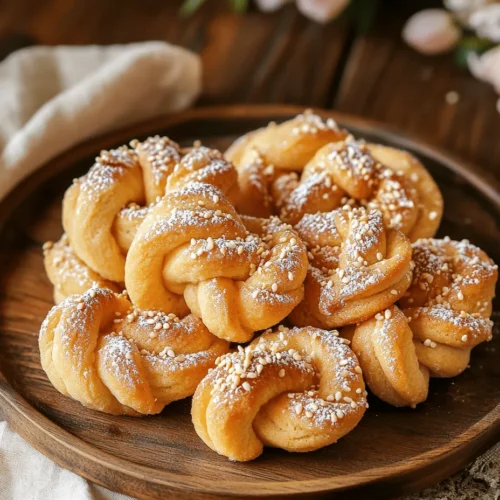
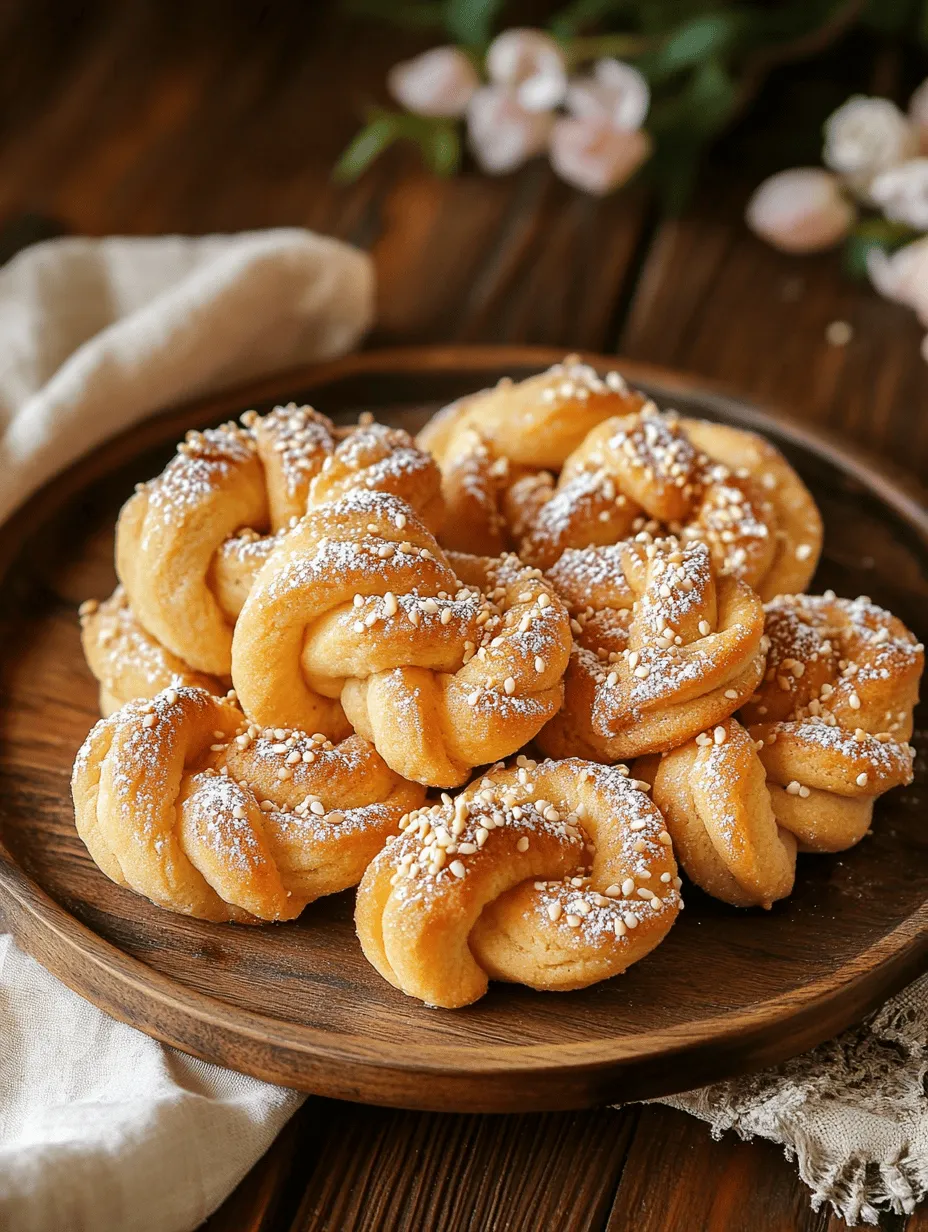
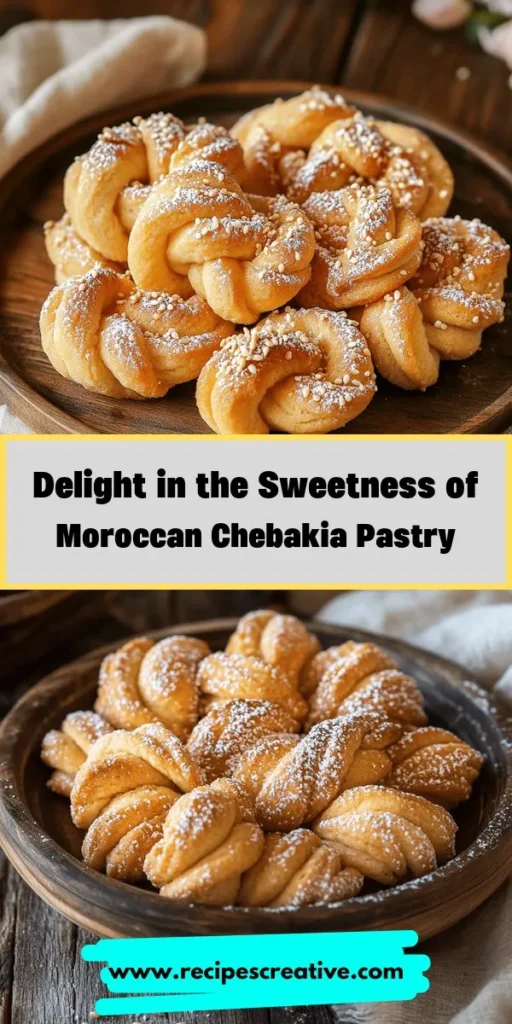
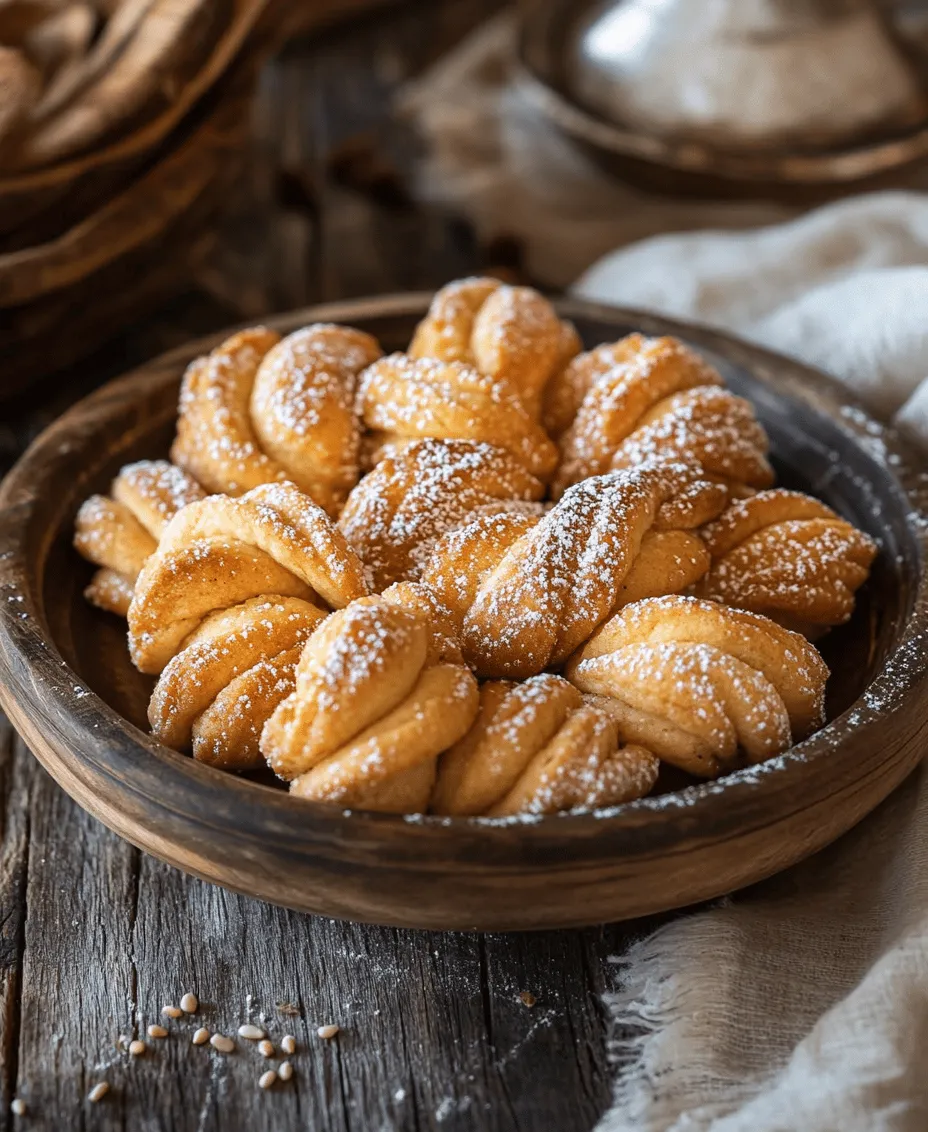
Chebakia, a delightful Moroccan pastry, holds a special place in the hearts and homes of many during festive seasons, particularly Ramadan. This intricate sweet is more than just a dessert; it embodies tradition, celebration, and the essence of sharing joy with loved ones. As families gather to break their fasts, the aroma of freshly prepared Chebakia wafts through homes, signaling the onset of special moments and cherished memories. With its beautifully twisted shape and a glaze of honey, Chebakia is a feast for both the eyes and the palate.
The joy of making Chebakia goes beyond the end product; it is about the process itself. Families often come together to prepare this delicacy, bonding over the mixing of ingredients and the careful shaping of each piece. The unique flavor profile of Chebakia combines sweet, nutty, and floral notes, thanks to the blend of spices, sesame seeds, and orange blossom water. Each bite is a celebration of texture and taste, promising a delightful experience that is both satisfying and comforting.
In this article, we will explore the rich history behind Chebakia, its significance in Moroccan cuisine, and guide you through an authentic recipe that will allow you to create this exquisite treat in your own kitchen. Get ready to embark on this culinary adventure and discover the magic of Chebakia!
Understanding Chebakia
Chebakia, also known as “Ghriba,” traces its origins back to Morocco, where it has been enjoyed for centuries. This traditional pastry is believed to have been created by Moroccan women who wanted to produce a sweet treat that could be stored for long periods, making it an ideal choice for special occasions. Over time, Chebakia has become synonymous with Ramadan, serving as a delicious way to break the fast after a long day of abstaining from food and drink.
The significance of Chebakia during Ramadan cannot be overstated. It is often served alongside other traditional Moroccan dishes, such as harira soup and dates, as part of the iftar meal. The preparation of Chebakia is not just a culinary task; it is a ritual that brings families together, reinforcing bonds and creating shared memories. The intricate shaping and frying of Chebakia also reflect the artistry and dedication of Moroccan home cooks, who take pride in presenting this beautiful confection.
What sets Chebakia apart is its unique flavor profile, achieved through a blend of aromatic spices and high-quality ingredients. The key to an authentic Chebakia lies in the use of ingredients such as all-purpose flour, sesame seeds, cinnamon, anise, and orange blossom water. These elements come together to create a symphony of flavors that are distinctively Moroccan, making Chebakia a beloved treat that transcends generations.
Ingredients Breakdown
To create the perfect Chebakia, it is essential to use high-quality ingredients that enhance both flavor and texture. Here is a detailed breakdown of each ingredient used in this traditional recipe:
1. All-Purpose Flour: The foundation of Chebakia, all-purpose flour provides structure to the dough. It is crucial to use a flour that has a good protein content to achieve the desired chewiness and strength in the pastry.
2. Sesame Seeds: These tiny seeds add a delightful nuttiness and crunch to Chebakia. Toasting the sesame seeds before incorporating them into the dough enhances their flavor and brings out their natural oils.
3. Cinnamon: A quintessential spice in Moroccan cooking, cinnamon adds warmth and sweetness to the Chebakia. Its aromatic qualities contribute significantly to the overall flavor profile.
4. Anise Seeds: Offering a subtle licorice flavor, anise seeds are essential for achieving the characteristic taste of Chebakia. They complement the other spices while adding depth to the sweet pastry.
5. Orange Blossom Water: This fragrant floral water is a hallmark of Moroccan desserts. A small amount goes a long way in imparting a delicate aroma and enhancing the overall flavor of the Chebakia.
6. Butter and Oil: A combination of butter and oil is used in the dough to ensure richness and a tender texture. The fat content helps create a flaky and soft pastry that melts in your mouth.
7. Honey: Traditionally, Chebakia is glazed with honey after frying, which not only adds sweetness but also creates a beautiful glossy finish. The honey helps to bind the sesame seeds to the surface of the pastry.
8. Water: Used to bring the dough together, the amount of water may vary based on humidity and flour quality. It’s important to add water gradually to achieve the right consistency.
Variations and Substitutions
While the traditional Chebakia recipe is beloved for its authentic flavors, there are variations and substitutions that can cater to different dietary preferences. For instance, if you’re looking for a gluten-free option, you can experiment with gluten-free flour blends that mimic the texture of all-purpose flour. Additionally, for those who prefer a lower sugar option, honey can be substituted with agave syrup or a sugar-free alternative, though it may alter the flavor profile slightly.
Step-by-Step Instructions
Creating Chebakia is a rewarding process that requires some time and care, but the end result is well worth the effort. Here’s a comprehensive guide to preparing this delightful Moroccan pastry.
Mixing the Dry Ingredients
Begin by sifting the all-purpose flour into a large mixing bowl. This step is crucial as it aerates the flour, ensuring a light and fluffy dough. Next, add the toasted sesame seeds, ground cinnamon, ground anise seeds, and a pinch of salt. Mix these dry ingredients thoroughly with a whisk or your fingers to ensure even distribution of the spices. The aromatic blend of spices will evoke the essence of Moroccan cooking, setting the stage for the flavors to come.
Preparing the Wet Mixture
In a separate bowl, melt the butter and combine it with the oil. This mixture of fats is vital for achieving the right consistency in the dough. The butter adds richness, while the oil contributes to a tender texture. Allow it to cool slightly, then mix in the orange blossom water, which will infuse the dough with its signature floral aroma.
Once combined, create a well in the center of the dry ingredients and pour in the wet mixture. Use your hands to gently incorporate the flour into the liquid, forming a shaggy dough. Be careful not to overmix at this stage, as this can lead to a tough pastry.
Kneading and Resting the Dough
Transfer the dough onto a lightly floured surface and begin kneading it. Kneading is essential for developing gluten, which will provide structure and elasticity to the Chebakia. Knead the dough for about 10 minutes, or until it becomes smooth and elastic. If the dough is too sticky, sprinkle a little more flour as needed, but avoid adding too much, as this can alter the final texture.
Once kneaded, shape the dough into a ball and wrap it in plastic wrap or cover it with a damp cloth. Allow the dough to rest for at least 30 minutes at room temperature. This resting period is crucial, as it allows the gluten to relax, making it easier to roll out later and enhancing the flavor development.
Shaping the Chebakia
After the resting period, divide the dough into smaller portions to make it easier to work with. Take one portion and roll it out on a lightly floured surface to a thickness of about 1/8 inch. Using a sharp knife or a pizza cutter, cut the dough into strips approximately 2 inches wide. Each strip will be shaped into the iconic twisted form of Chebakia.
To shape each piece, take one strip and make a series of cuts down the center, leaving about half an inch at the top intact. Gently pull the ends of the strip through the center, creating a twist. This intricate shaping not only adds to the visual appeal of Chebakia but also allows the honey glaze to seep into every crevice, ensuring a deliciously sweet bite.
—
As we venture deeper into the world of Chebakia, the anticipation of frying and glazing these delicate pastries builds. The process of creating Chebakia is a blend of tradition, artistry, and love, culminating in a dish that is as beautiful as it is delicious. Stay tuned for the next part, where we will delve into the frying process and the final touches that will make your Chebakia truly unforgettable.
Detailed Instructions on Achieving the Traditional Flower Shape
To create the iconic flower shape of Chebakia, you will need to work with the dough you’ve previously prepared. This shape not only enhances the visual appeal but also allows for optimal absorption of the honey coating later. Follow these steps for crafting your Chebakia:
1. Divide the Dough: Start by dividing your dough into equal portions, about the size of a golf ball. This ensures uniformity in size and cooking time.
2. Roll the Dough: Take one portion and roll it into a long strip, approximately 10 inches in length and about 1 inch wide. The thickness should be even to ensure consistent frying.
3. Create the Petals: Fold the strip in half, and using your fingers, pinch the folded edge to create a small loop. This loop will serve as the center of the flower. As you work, be sure to maintain a gentle pressure to avoid tearing the dough.
4. Twist and Shape: Take the ends of the loop and twist them around each other, forming a petal-like shape. You can create up to five petals per flower, depending on how elaborate you want your Chebakia to look. Make sure the ends are secured by pinching them together, so they don’t unravel during frying.
5. Repeat: Continue this process for the remaining dough portions, placing each shaped Chebakia on a floured surface to prevent sticking.
Frying the Chebakia
Now that your Chebakia is shaped, it’s time to fry them to golden perfection. Follow these steps for frying:
1. Heat the Oil: In a deep frying pan, pour enough oil to submerge the Chebakia completely. Heat the oil over medium heat until it reaches around 350°F (175°C). Use a kitchen thermometer for accuracy.
2. Fry in Batches: Carefully place a few Chebakia into the hot oil, ensuring not to overcrowd the pan. Fry for about 2-3 minutes on one side until they turn golden brown.
3. Flip and Fry: Once browned, flip them over and fry the other side for an additional 2-3 minutes. Keep an eye on the color, as the Chebakia can brown quickly.
4. Drain Excess Oil: Once fried, use a slotted spoon to remove them from the oil and place them on a plate lined with paper towels to absorb excess oil.
Tips on Achieving the Perfect Golden-Brown Color and Texture
1. Temperature Control: Maintaining the correct oil temperature is crucial. If the oil is too hot, the Chebakia will brown too quickly and remain raw inside. If it’s too cold, they will absorb too much oil and become greasy.
2. Use Fresh Oil: Always use fresh oil for frying to avoid any off-flavors that can affect the taste of your Chebakia.
3. Test a Sample: Before frying all of your Chebakia, fry one as a test. This will help you adjust the cooking time and temperature as needed.
Making the Honey Coating
The honey mixture is essential for flavor and moisture, giving Chebakia its signature sweetness. Here’s how to prepare it:
1. Combine Ingredients: In a saucepan, combine 1 cup of honey, 1/2 cup of water, and 1 teaspoon of cinnamon. You can also add a splash of orange blossom water for additional flavor.
2. Heat the Mixture: Place the saucepan over medium heat and stir until the honey dissolves into the water. Bring it to a gentle simmer and allow it to cook for about 5 minutes. The goal is to create a syrup that will coat the Chebakia but not be overly runny.
3. Check Consistency: You should achieve a consistency that is slightly thickened but still pourable. If it’s too thick, add a little more water; if too thin, let it simmer for a few more minutes.
Tips on Achieving the Right Consistency for Dipping
1. Temperature Matters: Ensure the honey mixture is warm when you dip the Chebakia. If it cools down, it may thicken too much and not coat properly.
2. Test the Coating: Dip one Chebakia into the honey mixture to check if it coats well. It should adhere without dripping excessively.
Finishing Touches
Once your Chebakia is fried and coated in honey, it’s time for the finishing touches.
1. Dusting with Powdered Sugar: After the Chebakia has been coated in honey and allowed to cool slightly, dust them with powdered sugar for a beautiful presentation and added sweetness.
2. Serving Suggestions: Chebakia can be enjoyed on its own or paired with traditional Moroccan mint tea. For a beautiful presentation, arrange them on a decorative plate and accompany them with fresh mint leaves or nuts for added texture.
3. Storage and Preservation: To store Chebakia, place them in an airtight container at room temperature. They can last for up to a week. If you want to preserve them for longer, consider freezing them before coating in honey. When ready to serve, simply fry them and dip in honey.
Nutritional Information
Understanding the nutritional aspects of Chebakia is important for those mindful of their dietary intake. Here’s a brief overview:
– Serving Size: One piece of Chebakia (approximately 30g) contains about:
– Calories: 150
– Total Fat: 5g
– Saturated Fat: 1g
– Carbohydrates: 25g
– Sugars: 12g
– Protein: 2g
Keep in mind that portion sizes can vary based on personal preference, and it’s easy to overindulge in this delightful treat. Enjoy in moderation, especially during festive occasions.
Cultural Significance and Traditions
Chebakia holds a special place in Moroccan culture, particularly during Ramadan. It’s often prepared in large quantities to break fasts each evening, symbolizing hospitality and community spirit. Here are some cultural insights:
1. Family Traditions: In many Moroccan households, the process of making Chebakia is a family affair, where generations gather to share recipes, stories, and laughter. Each family often has its unique twist on the recipe, passed down through the years.
2. Celebrations: Beyond Ramadan, Chebakia is served during weddings and special occasions, highlighting its significance in Moroccan celebrations. The sweet aroma wafting through homes during these times creates a sense of togetherness and joy.
3. Personal Anecdotes: Many Moroccans fondly remember the days spent in the kitchen with their mothers or grandmothers, learning the art of crafting Chebakia. These memories emphasize the bond created through cooking and the importance of tradition in family life.
Conclusion
Making and sharing Chebakia is not just about creating a delicious treat; it’s about embracing a rich cultural tradition that brings people together. Whether enjoyed during the holy month of Ramadan or at festive gatherings, Chebakia is a symbol of joy and unity.
As you embark on your journey to create this delightful Moroccan pastry, remember that the process is as rewarding as the end result. The laughter shared in the kitchen, the aroma filling your home, and the smiles as you serve these treats to loved ones are what truly make Chebakia special.
Embrace the tradition, add your creative touch, and enjoy the wonderful experience of making Chebakia at home. Your family and friends will surely appreciate the effort, and you’ll create lasting memories with each delicious bite.