
Introduction
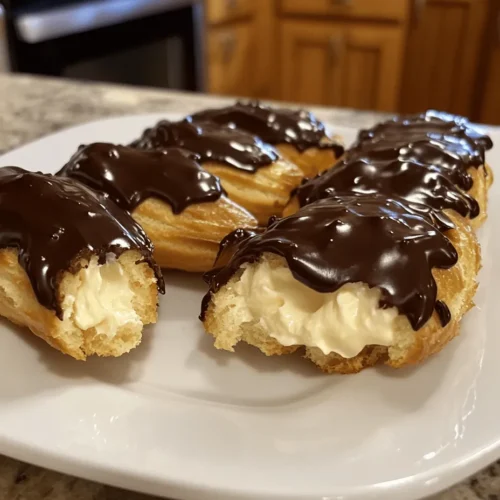
Éclairs, those delectable elongated pastries filled with sumptuous cream and glazed with chocolate, have long been a cherished staple of French patisserie. Their delicate, airy texture and rich flavors make them a favorite not only in France but around the globe. The joy of baking éclairs at home brings a sense of accomplishment and an opportunity to share these delightful treats with family and friends. In this article, we will guide you through a detailed recipe for crafting your own heavenly homemade éclairs, ensuring that you master the art of this classic pastry.
Baking can be a rewarding experience, especially when it involves a recipe as elegant and satisfying as éclairs. Whether you are hosting a gathering, celebrating a special occasion, or simply indulging in a sweet treat, éclairs are sure to impress. With a few ingredients, some patience, and a little practice, you can create these stunning pastries right in your kitchen. Join us as we delve into the history, craftsmanship, and techniques that will elevate your pastry game to new heights.
Understanding Éclairs
Historical Background of Éclairs
The history of éclairs dates back to the 19th century, with roots that can be traced back to the French culinary tradition. The term “éclair,” which translates to “flash” in French, is believed to refer to the speed at which these pastries are consumed. Originally created by French pastry chefs, éclairs were designed to showcase the versatility of choux pastry, which is the fundamental base for this delightful treat.
Éclairs gained popularity across Europe and have since inspired countless variations in different cultures. In addition to the classic chocolate éclair, you may find variations filled with coffee cream, vanilla custard, or fruit-flavored fillings. Each region has its unique twist, reflecting local tastes and ingredients. The ability to customize and experiment with éclairs makes them an exciting pastry to both enjoy and create.
Different Types of Éclairs
While the traditional éclair is filled with pastry cream and topped with chocolate glaze, the world of éclairs is diverse. Here are some popular variations you might encounter:
– Chocolate Éclair: The classic version filled with rich chocolate pastry cream and topped with a glossy chocolate ganache.
– Coffee Éclair: Filled with coffee-flavored pastry cream, this variant often features a coffee glaze, making it a favorite for coffee lovers.
– Fruit Éclair: These éclairs incorporate fresh fruit fillings, such as strawberry or raspberry, often topped with a fruity glaze or fresh fruit.
– Savory Éclair: A modern twist on the traditional pastry, savory éclairs may be filled with creamy cheeses, herbs, or other savory ingredients, making them perfect for appetizers.
Mastering the art of éclairs not only allows you to create these delightful treats but also lays the foundation for mastering other pastries, such as cream puffs and profiteroles. Understanding the fundamentals of choux pastry is crucial for any aspiring baker, as it is a versatile dough that can be adapted for various sweet or savory applications.
The Art of Éclair Pastry
What is Choux Pastry?
Choux pastry, or pâte à choux, is a unique type of pastry dough that is light and airy. It is made by cooking a mixture of water, butter, flour, and eggs, resulting in a batter that puffs up beautifully when baked. The magic of choux pastry lies in its ability to create a hollow shell, perfect for filling with pastry cream, whipped cream, or any number of delicious fillings.
The process of making choux pastry is a delicate balance of technique and timing. It requires precise measurements and careful attention to heat to achieve the perfect puff. When baked, the moisture inside the dough turns to steam, causing the pastry to rise and create that signature hollow center. This is why mastering choux pastry is essential for anyone looking to create éclairs that are both visually appealing and delicious.
Key Ingredients Used in Éclair Pastry
To make perfect éclairs, you will need the following key ingredients:
– Water: The base of the dough, providing moisture that will eventually create steam during baking.
– Butter: Adds richness and flavor, while also contributing to the pastry’s texture.
– Flour: All-purpose flour is typically used, providing structure and stability to the pastry.
– Sugar: A small amount of sugar enhances flavor and adds a touch of sweetness to the pastry.
– Salt: A pinch of salt balances the sweetness and enhances the overall flavor.
– Eggs: Essential for binding the ingredients together, eggs also add moisture and help the pastry rise.
Step-by-Step Breakdown of the Preparation Process
Now that we understand the importance of choux pastry and its ingredients, let’s dive into the step-by-step process of preparing the dough for your homemade éclairs.
1. Gather Your Ingredients: Start by measuring out all your ingredients. This will help streamline the process and prevent any missteps.
2. Prepare the Mixture: In a medium saucepan, combine the water, butter, salt, and sugar. Heat over medium heat until the butter has melted and the mixture comes to a gentle boil.
3. Add the Flour: Once the butter is melted and the mixture is boiling, remove the saucepan from the heat. Add all-purpose flour at once, stirring vigorously with a wooden spoon or spatula until a dough forms. The dough should come away from the sides of the pan, forming a ball.
4. Cook the Dough: Return the saucepan to low heat and continue to cook the dough for about 1-2 minutes, stirring constantly. This helps to dry out the dough slightly, ensuring that your éclairs will rise properly during baking.
5. Incorporate the Eggs: Transfer the dough to a mixing bowl, and let it cool for a few minutes. Once slightly cooled, add the eggs one at a time, mixing well after each addition. The dough should become smooth and glossy, and it should hold its shape when piped.
6. Piping the Dough: Prepare a baking sheet lined with parchment paper. Transfer the choux pastry dough to a piping bag fitted with a large round tip. Pipe long strips, approximately 4-5 inches in length, onto the prepared baking sheet, leaving enough space between each éclair to allow for expansion during baking.
Importance of Technique in Achieving the Perfect Puff
Achieving the perfect puff with éclairs requires attention to technique and temperature. Here are some essential tips to ensure your pastry rises beautifully:
– Avoid Opening the Oven Door: When baking éclairs, resist the urge to open the oven door frequently. This can cause a drop in temperature and hinder the rising process.
– Bake at the Right Temperature: Start baking your éclairs at a high temperature (around 425°F or 220°C) to create steam, then lower the temperature (to about 375°F or 190°C) halfway through baking to allow them to dry out and set.
– Ensure Proper Cooling: Once baked, allow the éclairs to cool completely on a wire rack before filling them. This step is crucial to prevent sogginess.
By following these steps and tips, you will be well on your way to creating perfectly puffed éclairs that are ready for filling.
Crafting the Perfect Pastry Cream
Overview of Pastry Cream
Pastry cream, or crème pâtissière, is the rich, creamy filling that takes éclairs from delightful to divine. Its smooth texture and luscious flavor complement the airy choux pastry beautifully, making it an essential component of this classic treat. Whether you choose to flavor your pastry cream with vanilla, chocolate, or coffee, mastering this filling is key to achieving éclairs that will impress your family and friends.
Ingredients Required for the Pastry Cream
To make a rich and creamy pastry cream for your éclairs, you will need the following ingredients:
– Milk: The base of your pastry cream, providing creaminess and richness.
– Sugar: Sweetens the cream and enhances flavor.
– Cornstarch: Thickens the pastry cream, ensuring a smooth and stable filling.
– Salt: A pinch enhances the overall flavor.
– Egg Yolks: Provides richness and acts as a thickening agent.
– Butter: Adds creaminess and sheen to the finished pastry cream.
– Vanilla: For flavor, you can use pure vanilla extract or a vanilla bean for an extra touch of luxury.
Detailed Instructions on Making Pastry Cream
Here is a step-by-step guide to making your pastry cream:
1. Heat the Milk: In a saucepan, heat the milk over medium heat until it is just about to simmer. Remove from heat before it reaches a full boil.
2. Whisk the Egg Yolks: In a separate bowl, whisk together the egg yolks, sugar, cornstarch, and salt until well combined and slightly pale in color.
3. Temper the Eggs: Slowly pour the hot milk into the egg mixture while whisking constantly. This process, known as tempering, prevents the eggs from scrambling.
4. Cook the Mixture: Pour the tempered mixture back into the saucepan and cook over medium heat, stirring constantly until it thickens and begins to bubble. This should take about 2-3 minutes.
5. Add Butter and Flavor: Once thickened, remove the pastry cream from heat and stir in the butter and vanilla until fully incorporated. This will give your pastry cream a beautiful shine and luxurious texture.
6. Cool the Pastry Cream: Transfer the pastry cream to a bowl and cover with plastic wrap, pressing it directly onto the surface to prevent a skin from forming. Allow it to cool completely before using it to fill your éclairs.
Importance of Tempering Eggs
Tempering eggs is a crucial step in making pastry cream as it ensures a smooth texture and prevents curdling. By gradually introducing the hot milk to the egg yolks, you allow the temperature of the eggs to rise slowly, reducing the risk of scrambling. This technique is essential for achieving a luscious, creamy filling that will elevate your éclairs to gourmet status.
Techniques for Achieving a Smooth and Creamy Consistency
To ensure your pastry cream is perfectly smooth and creamy, consider the following techniques:
– Whisk Constantly: When cooking the mixture, continuous whisking helps prevent lumps from forming and ensures even cooking.
– Strain the Pastry Cream: If you encounter any lumps, strain the finished pastry cream through a fine-mesh sieve before cooling it. This will guarantee a silky-smooth texture.
– Cool Gradually: Allow the pastry cream to cool to room temperature before chilling it in the refrigerator. This helps to stabilize the cream and enhances its flavor.
With these insights into the art of making éclairs, you are now equipped to tackle the challenges of this classic pastry. As we continue in the next part of the article, we will guide you through the final steps of assembling and glazing your homemade éclairs, ensuring that they are as visually stunning as they are delicious. Stay tuned for the next steps in your journey to pastry perfection!
Tips for Cooling and Storing Pastry Cream Effectively
Proper cooling and storing of pastry cream are crucial to ensure its texture and flavor remain intact. Here are some key tips to help you achieve the best results:
1. Cool Quickly: After cooking the pastry cream, transfer it to a clean bowl. To speed up the cooling process, place the bowl into a larger bowl filled with ice water. Stir the cream frequently to prevent a skin from forming on the surface.
2. Cover Properly: Once cooled to room temperature, cover the pastry cream with plastic wrap. It’s vital to press the wrap directly onto the surface of the cream to prevent any air exposure, which can cause a skin to develop.
3. Refrigerate: Store the covered pastry cream in the refrigerator for up to three days. Ensure your fridge is set to a cool temperature, ideally between 35°F and 40°F (1°C to 4°C).
4. Rewhip Before Use: If your pastry cream has thickened too much in the fridge, gently rewhip it with a whisk before filling the éclairs. This will restore its smooth and creamy texture.
Creating the Decadent Chocolate Glaze
The chocolate glaze is the crowning glory of your éclairs, adding not only a rich flavor but also a stunning visual appeal. Here’s how to create that perfect glaze.
Ingredients for the Chocolate Glaze
To craft the glossy chocolate glaze, you will need:
– 1 cup heavy cream
– 8 ounces semi-sweet chocolate, chopped
– 2 tablespoons unsalted butter
Step-by-Step Guide to Preparing the Glaze
1. Heat the Cream: In a small saucepan over medium heat, bring the heavy cream to a gentle simmer. Be careful not to let it boil, as boiling can cause the cream to separate.
2. Melt the Chocolate: Once the cream is simmering, remove the saucepan from the heat. Add the chopped semi-sweet chocolate to the hot cream. Let it sit for a minute to allow the chocolate to soften.
3. Stir Until Smooth: Whisk the chocolate and cream together until the mixture is completely smooth and glossy. If necessary, return it to low heat while whisking continuously to ensure the chocolate melts completely.
4. Add Butter: Stir in the unsalted butter until it is fully melted and incorporated. This will add richness and help achieve a silky texture.
5. Cool the Glaze: Allow the glaze to cool at room temperature for about 10-15 minutes. It should thicken slightly but still be pourable for glazing your éclairs.
Techniques for Achieving a Glossy Finish
– Temperature Control: Ensure your glaze is not too hot when applying it to the éclairs. If the glaze is too warm, it may run off instead of adhering.
– Use a Dipping Method: For a smooth finish, consider dipping the top of each éclair into the glaze instead of pouring it over. This method produces a clean, even coating.
Assembling Your Heavenly Éclairs
Proper assembly is essential for both the presentation and enjoyment of your éclairs. Follow these steps to assemble them beautifully.
Step-by-Step Instructions for Filling the Éclairs with Pastry Cream
1. Prepare the Éclairs: Once your choux pastry shells are baked and cooled, use a sharp knife to make a small slit in one end of each éclair. This will serve as the filling point.
2. Fill the Pastry Bag: Fit a pastry bag with a round tip and fill it with the chilled pastry cream. If you don’t have a pastry bag, a resealable plastic bag with a corner cut off can work as well.
3. Inject the Cream: Hold the éclair upright and insert the tip of the pastry bag into the slit. Gently squeeze the bag until you feel the éclair filling up. Repeat for all éclairs, ensuring each one is filled adequately.
4. Replace the Slit: If the filling oozes out slightly from the slit, gently press the edges together to close it off, creating a neat appearance.
Instructions for Glazing the Éclairs
1. Prepare the Glaze: Once your chocolate glaze has cooled to the appropriate consistency, you’re ready to glaze the éclairs.
2. Dip or Pour: Depending on your preference, either dip the top of each filled éclair into the glaze or use a spoon to pour the glaze over the top.
3. Smooth the Surface: If dipping, gently shake the éclair to remove any excess glaze and create a smooth finish.
Tips for Achieving a Professional-Looking Finish
– Work Quickly: Once filled, it’s best to glaze the éclairs promptly to maintain the integrity of the pastry and the glaze.
– Chill Before Serving: After glazing, place your éclairs in the refrigerator for about 30 minutes to set the glaze before serving. This helps solidify the chocolate and makes for easier handling.
Serving and Enjoying Éclairs
Éclairs are a delightful treat on their own, but serving them with a few thoughtful touches can elevate the experience.
Best Practices for Serving Éclairs at Gatherings
– Presentation: Arrange your éclairs on a decorative platter or cake stand. Consider garnishing with fresh berries or a dusting of powdered sugar for added visual appeal.
– Cutting for Sharing: If serving at a gathering, you may want to cut the éclairs in half to share, allowing guests to enjoy a taste without committing to a whole éclair.
Suggestions for Pairing with Beverages
Éclairs pair wonderfully with a variety of beverages. Consider these options:
– Coffee: A rich cup of coffee complements the sweetness of the éclairs beautifully, balancing the flavors.
– Tea: A light herbal or black tea can also be a refreshing accompaniment, providing a nice contrast to the richness of the cream and chocolate.
Ideas for Storing Leftover Éclairs While Maintaining Freshness
If you have leftover éclairs, here’s how to keep them fresh:
– Refrigerate: Place any uneaten éclairs in an airtight container in the refrigerator. Consume them within a day or two for the best texture and flavor.
– Avoid Freezing: Freezing éclairs is not recommended, as it can compromise the texture of both the pastry and the cream. Enjoy them fresh for the best experience.
Conclusion
Making heavenly homemade éclairs is a rewarding endeavor that brings a touch of elegance to your dessert repertoire. The joy of creating these delightful pastries, from the airy choux pastry to the velvety pastry cream and the glossy chocolate glaze, is unmatched.
Embark on this baking adventure and savor the satisfaction of indulging in your creations. Feel free to explore variations of the recipe, such as flavored creams or different glazes, to make it your own. Remember, practice makes perfect, and experimentation is the key to discovering new favorites in the world of baking. Happy baking!