
Introduction
Soft pretzels are a beloved snack that transcends cultures and continents, often found at sporting events, fairs, and street vendors. Their distinctive twisted shape, golden-brown exterior, and soft, chewy interior make them a favorite among snack enthusiasts. Whether enjoyed on their own or paired with a delicious dipping sauce, soft pretzels offer a delightful snacking experience.
In this article, we are excited to present a recipe for “Twisted Delight Soft Pretzels with Cheesy Bliss.” This recipe elevates the classic soft pretzel by introducing a rich, velvety cheese dip that perfectly complements the warm, fluffy pretzel. The combination of the two creates an irresistible snack that’s ideal for parties, game days, or simply a cozy night in.
The purpose of this article is to provide you with a comprehensive guide to making these delicious pretzels at home. We will walk you through each step, from understanding the ingredients to shaping the pretzels, ensuring that you can recreate this delightful treat in your own kitchen.
Understanding Soft Pretzels
Soft pretzels have a long and storied history, with origins tracing back to ancient times. The earliest known pretzel dates back to 610 AD in Europe, where they were created by monks as a reward for children who learned their prayers. The twisted shape is thought to represent arms crossed in prayer. Over the centuries, pretzels evolved into the popular snack we know today, particularly in Germany, where they are often enjoyed with mustard or cheese.
Nutritionally, soft pretzels are primarily made from simple ingredients like flour, water, salt, and yeast. While they can be high in carbohydrates, they provide a satisfying and filling snack. When paired with a cheesy dip, such as the one we’ll be preparing, you add a boost of flavor and richness. Cheese provides protein and calcium, making this snack not only delicious but also a decent source of nutrients.
While store-bought pretzels can certainly satisfy a craving, there’s something special about homemade pretzels. The ability to control the ingredients and customize the flavors means you can create a snack that’s tailored to your palate. Plus, the experience of making pretzels from scratch is incredibly rewarding and fun!
Ingredients Breakdown
To create the perfect Twisted Delight Soft Pretzels with Cheesy Bliss, you will need a selection of quality ingredients. Here’s a detailed list of what you’ll need for both the pretzels and the cheese dip:
Ingredients for Soft Pretzels
1. All-Purpose Flour (4 cups): The foundation of the pretzel dough, providing structure and chewiness.
2. Active Dry Yeast (1 packet or 2 ¼ teaspoons): Essential for leavening the dough and giving pretzels their airy texture.
3. Warm Water (1 ½ cups): Activates the yeast and helps to hydrate the flour.
4. Sugar (1 tablespoon): Aids in yeast activation and adds a hint of sweetness.
5. Salt (1 teaspoon): Enhances flavor and strengthens the dough.
6. Baking Soda (⅓ cup): Used in the boiling process before baking, it gives the pretzels their characteristic brown color and unique flavor.
7. Coarse Sea Salt (for topping): Adds a salty crunch to the finished pretzel.
Ingredients for Cheesy Bliss Dip
1. Cream Cheese (8 oz): Adds richness and a creamy texture to the dip.
2. Shredded Cheddar Cheese (2 cups): The star of the dip, providing a bold and tangy flavor.
3. Milk (½ cup): Helps to thin out the dip and make it creamy.
4. Garlic Powder (½ teaspoon): Adds depth of flavor.
5. Onion Powder (½ teaspoon): Enhances the overall taste of the dip.
6. Salt and Pepper (to taste): Season the dip to your liking.
Each ingredient plays a crucial role in achieving the perfect flavor and texture. The all-purpose flour forms the base of the dough, while yeast provides the necessary rise. Sugar not only helps the yeast but also balances the saltiness of the pretzel. Baking soda plays a unique role in the boiling process, giving the pretzels their classic pretzel flavor and color. For the cheese dip, cream cheese and cheddar combine to create a rich and satisfying sauce that complements the warmth of the pretzel.
Preparing the Dough for Soft Pretzels
Now that you have gathered all your ingredients, it’s time to prepare the dough for your Twisted Delight Soft Pretzels. Follow these step-by-step instructions to ensure your pretzels turn out perfect:
Step 1: Activate the Yeast
Begin by activating the yeast. In a mixing bowl, combine the warm water (ensure it’s around 110°F to 115°F for optimal yeast activation) and sugar. Sprinkle the active dry yeast over the top, and stir gently to combine. Allow the mixture to sit for about 5 to 10 minutes, or until it becomes frothy. This indicates that the yeast is active and ready to use.
Step 2: Mix the Dough
In a large mixing bowl, combine the flour and salt. Once the yeast mixture is frothy, pour it into the flour mixture. Stir with a wooden spoon or spatula until the dough begins to come together. It may look a bit shaggy at first, but that’s perfectly fine.
Step 3: Knead the Dough
Transfer the dough to a lightly floured surface. Knead the dough for about 8-10 minutes until it becomes smooth and elastic. To knead, fold the dough over itself and push it down with the heel of your hand, then turn it a quarter turn and repeat. This process develops the gluten, which gives the pretzels their chewy texture.
Step 4: Let the Dough Rise
Once kneaded, shape the dough into a ball and place it in a lightly greased bowl. Cover the bowl with a clean kitchen towel or plastic wrap. Allow the dough to rise in a warm, draft-free area for about 1 hour, or until it has doubled in size. This rise is crucial as it allows the yeast to work and develop the pretzel’s airy texture.
Step 5: Prepare for Boiling
While the dough is rising, prepare for the next steps. In a large pot, bring about 10 cups of water to a boil. Once boiling, carefully stir in the baking soda. Be cautious, as the water will bubble up significantly. This baking soda bath is essential for achieving the pretzel’s signature flavor and dark brown crust.
Step 6: Shape the Pretzels
Once the dough has risen, punch it down gently to release any air bubbles. Turn the dough out onto a floured surface and divide it into 8 equal pieces. Roll each piece into a long rope, about 24 inches in length. To shape the pretzels, make a U-shape with the rope, then cross the ends over each other and twist them together once before folding them back down to the bottom of the U. Press the ends into the pretzel base to secure the shape.
This initial shaping is critical, as it not only influences the visual appeal of the finished pretzel but also affects how the dough cooks and expands in the boiling process.
With your pretzels shaped and the boiling water prepared, you’re well on your way to creating these delightful snacks. In the next section of this guide, we will cover the final steps of boiling the pretzels, baking them to perfection, and preparing the cheesy bliss dip that will take your soft pretzels to the next level. Stay tuned for more mouthwatering details!
Twisted Delight Soft Pretzels with Cheesy Bliss
Visual Description of the Twisting Technique
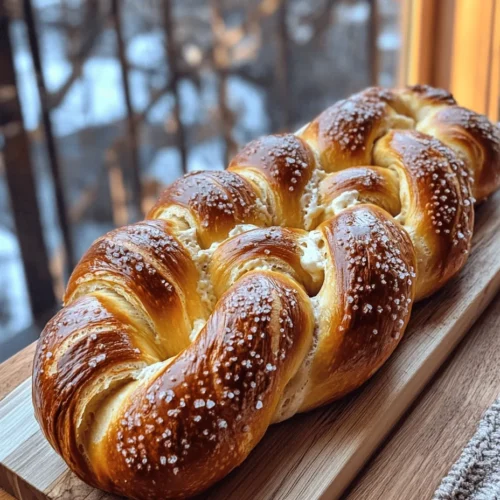
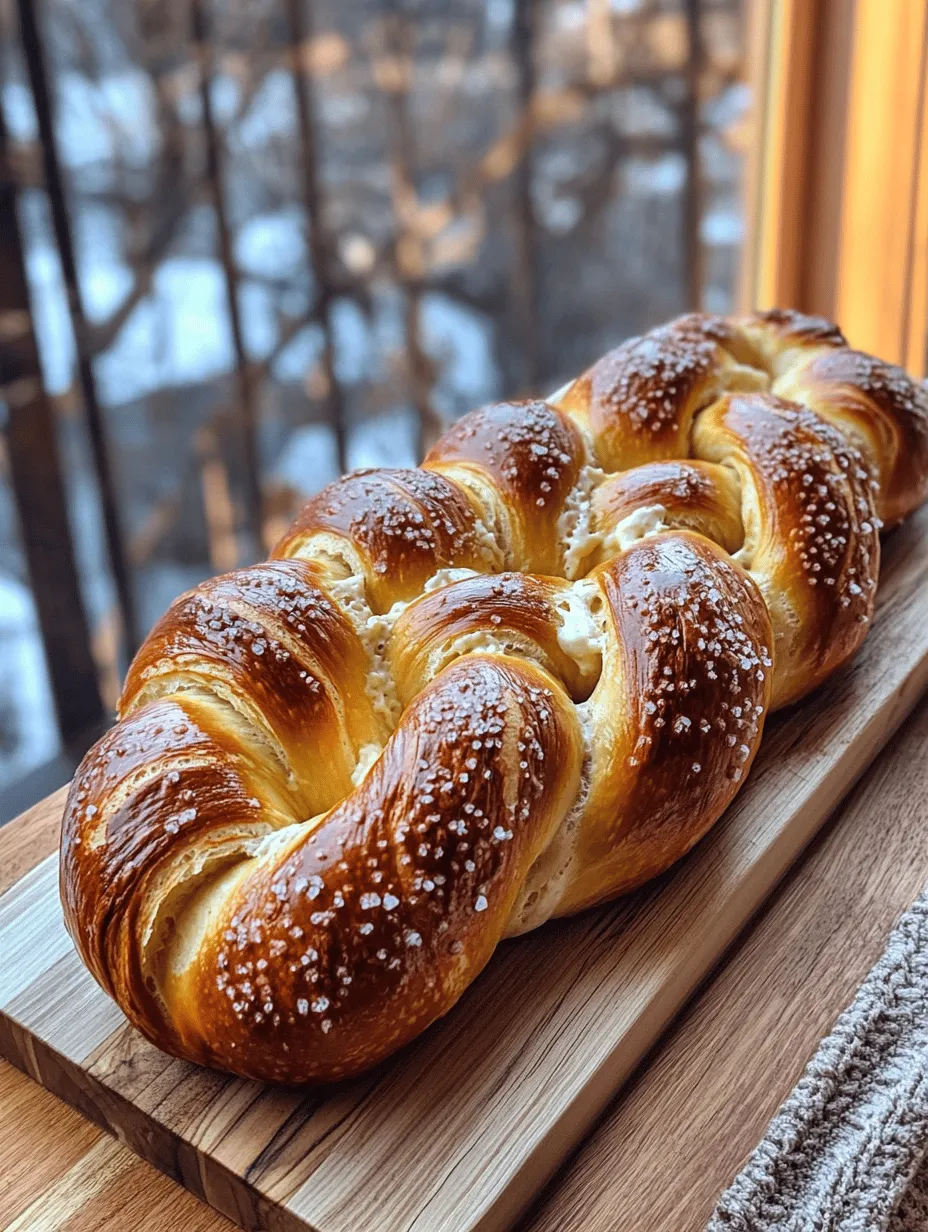
Creating the perfect twisted soft pretzel begins with mastering the art of twisting. To achieve that iconic shape, start with a piece of dough that has been rolled out into a long rope—about 24 inches in length. The twisting technique involves crossing the ends of the rope over each other twice, then bringing the top of the twisted section down towards the base to form a loop. Pinch the ends securely to the bottom of the pretzel to ensure it holds its shape during boiling and baking.
Visualize the motion as a gentle dance; the dough should not be too tight, as this could lead to a tough texture. A looser twist will allow the pretzel to expand beautifully in the boiling process, resulting in a soft, fluffy interior. To practice, you might want to roll a few test pieces and experiment until you feel confident with the technique.
Common Mistakes to Avoid While Shaping
When shaping your pretzels, there are a few common pitfalls to watch out for:
1. Rolling the Dough Too Thin: If the dough is rolled too thin, the pretzels will become overly crispy instead of soft. Aim for about a half-inch thickness.
2. Over-Twisting: While it may be tempting to twist the dough tightly, this can lead to a tough pretzel. Keep the twists gentle and even.
3. Inconsistent Sizes: Ensure that all pretzels are shaped to a similar size for an even bake. Uneven pretzels can lead to some being overcooked while others remain undercooked.
4. Neglecting to Pinch Ends Securely: Failing to secure the ends of the pretzel can result in them unraveling during boiling. Make sure to pinch the ends firmly to the base.
By avoiding these common mistakes, you will enhance not only the appearance of your pretzels but also their overall taste and texture.
Suggestion of Variations in Pretzel Shapes
While the classic pretzel shape is delightful, feel free to get creative! Here are a few variations you can try:
– Knots: Instead of the traditional shape, twist the dough into simple knots for a fun twist on presentation.
– Bites: For quick snacking, cut the dough into bite-sized pieces before boiling and baking. These pretzel bites are perfect for dipping!
– Sticks: Roll out the dough into long sticks for a fun, shareable option that is easy to eat.
– Braided Pretzels: For a more intricate look, try braiding three strands of dough together before boiling and baking.
These variations not only provide different shapes but also make your pretzels visually appealing for gatherings or parties.
Boiling and Baking Process
The boiling process is crucial for achieving that signature pretzel crust. It helps develop the chewy texture and deep brown color that soft pretzels are known for.
Boiling Process and Its Role:
To boil your pretzels, bring a large pot of water to a rolling boil and add a generous amount of baking soda—about 1/2 cup for every 10 cups of water. This alkaline solution is what gives pretzels their distinctive flavor and dark crust.
Safety Tips for Boiling Pretzels:
– Always wear gloves or use tongs to handle the pretzels when boiling, as the water can be very hot.
– Avoid overcrowding the pot; boil only a few pretzels at a time to prevent sticking and ensure an even cook.
– Be cautious when adding baking soda to boiling water, as it can bubble up rapidly.
Baking Instructions:
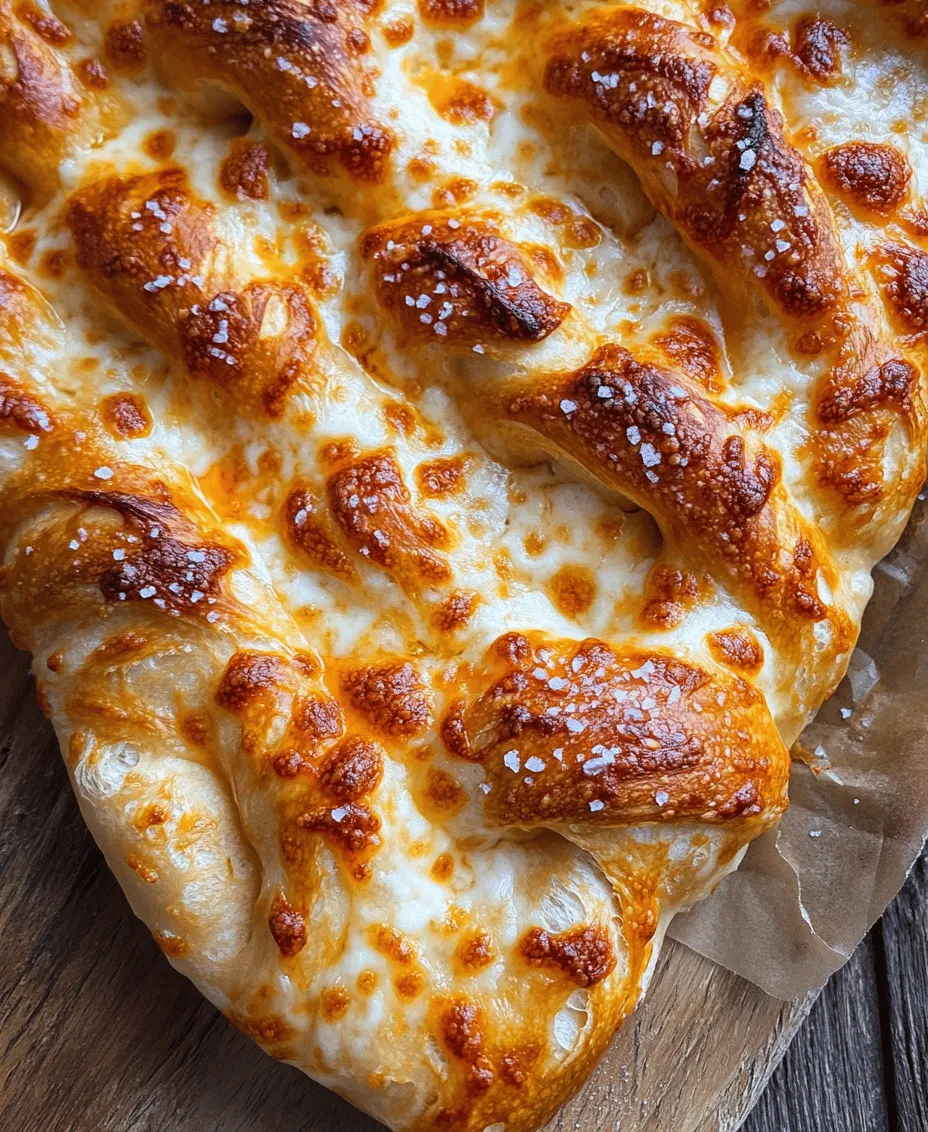
Preheat your oven to 450°F (232°C) while the pretzels are boiling. Once boiled, place them on a parchment-lined baking sheet. For an extra touch, brush the pretzels with an egg wash (one beaten egg mixed with a teaspoon of water) for a glossy finish and sprinkle with coarse sea salt. Bake for 12 to 15 minutes, or until they are golden brown.
The high temperature is crucial here; it allows for a quick rise and ensures the pretzels develop that perfect crust while maintaining a soft interior.
Crafting the Cheesy Dip
No soft pretzel experience is complete without a delicious cheese dip. Here’s how to create a cheesy bliss that pairs perfectly with your pretzels.
Step-by-Step Instructions for Making the Cheese Dip:
1. Make the Roux: In a medium saucepan, melt 2 tablespoons of butter over medium heat. Once melted, whisk in 2 tablespoons of all-purpose flour. Stir continuously for about 2 minutes until the mixture is bubbly and golden.
2. Add Milk: Gradually pour in 1 cup of milk while whisking to prevent lumps. Continue to stir until the mixture thickens, about 3 to 5 minutes.
3. Incorporate Cheese: Once thickened, reduce the heat to low and add 1 cup of shredded cheese (cheddar works wonderfully). Stir until the cheese is completely melted and the dip is smooth.
Importance of Creating a Roux:
Creating a roux is a key step in ensuring your cheese dip has the right consistency. The flour helps to thicken the sauce, making it creamy without being overly runny.
Tips for Selecting the Best Cheese for Flavor:
For the best flavor, opt for sharp cheddar, gouda, or a blend of cheeses. Each type contributes its own unique taste, so feel free to experiment with combinations.
Flavor Variations and Additions:
To elevate your cheese dip, consider adding spices or herbs such as garlic powder, cayenne pepper, or even a splash of hot sauce for heat. Fresh herbs like chives or parsley can also add a refreshing touch.
Serving Suggestions and Pairings
Once your pretzels and cheesy dip are ready, it’s time to serve! Here are some ideas to enhance your presentation and experience:
– Garnishes: Top your cheese dip with chopped herbs or a sprinkle of paprika for an added visual appeal. You can also serve with a side of mustard for those who enjoy a tangy dip.
– Accompaniments: Pair your pretzels with a variety of snacks such as sliced vegetables, pickles, or even a charcuterie board for a delightful appetizer spread.
– Beverage Pairings: Soft pretzels and cheese dip pair wonderfully with a range of beverages. For adults, a cold beer—particularly a lager or pale ale—complements the flavors beautifully. If you prefer non-alcoholic options, consider serving with sparkling water or a refreshing lemonade.
– Creative Serving Ideas for Parties: Present your pretzels on a large wooden board, arranging them alongside the cheese dip and garnishes for a rustic touch. You can also use small bowls to serve individual portions for a fun twist.
Storing and Reheating Leftover Pretzels
If you find yourself with leftover pretzels, here’s how to store them properly to maintain their delightful texture:
– Best Practices for Storing Soft Pretzels: Allow the pretzels to cool completely before storing them in an airtight container at room temperature. They can stay fresh for a day or two but should be consumed sooner for the best texture.
– Tips for Reheating Pretzels and Cheese Dip: To reheat, preheat your oven to 350°F (175°C) and place the pretzels on a baking sheet for about 5 to 10 minutes until warmed through. For the cheese dip, reheat gently in a saucepan over low heat, stirring occasionally. You may need to add a splash of milk to restore its creamy consistency.
Conclusion
Making Twisted Delight Soft Pretzels with Cheesy Bliss at home is not just a cooking project; it’s an experience filled with joy and satisfaction. From the mesmerizing twisting of the dough to the delightful aroma of baking, each step brings you closer to enjoying a classic treat that’s perfect for any occasion.
I encourage you to experiment with the recipe, try out different shapes and flavor variations for both the pretzels and the cheese dip, and make it your own. The satisfaction of crafting these homemade delights will surely be a highlight, whether you’re serving them at a gathering or enjoying them as a cozy snack at home.
So gather your ingredients, roll up your sleeves, and dive into the world of homemade pretzels and cheese dip. Your taste buds will thank you!