Crunchy Delight: Homemade Potato Chips

WANT TO SAVE THIS RECIPE?

Introduction

The allure of homemade snacks is irresistible. There’s something uniquely satisfying about creating your own treats in the kitchen, where you can control every ingredient and tailor flavors to your liking. With the rise of health-conscious eating habits, many people are looking for alternatives to store-bought snacks that often contain preservatives, unhealthy fats, and excessive sodium. Homemade snacks, like Crunchy Delight: Homemade Potato Chips, not only allow you to indulge in a crispy, satisfying crunch but also provide a way to enjoy fresh ingredients that align with healthier eating habits.

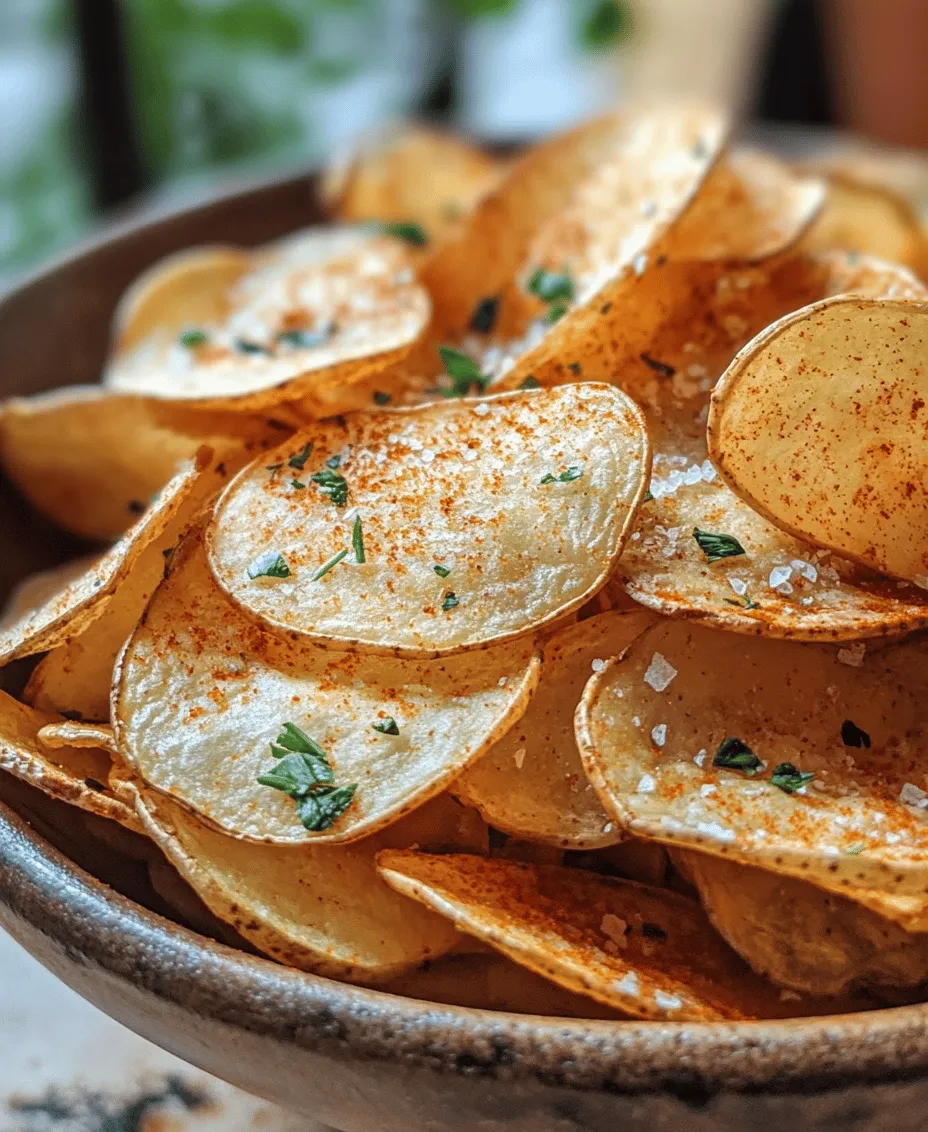
Crunchy Delight: Homemade Potato Chips is a versatile recipe that elevates the humble potato into a gourmet snack. Perfect for gatherings, movie nights, or simply as a delightful treat to enjoy throughout the week, these chips can be customized to suit any palate. Whether you prefer them plain or loaded with your favorite seasonings, making your own potato chips is an engaging culinary adventure that promises delicious results.

Understanding the Ingredients

Before diving into the preparation process of this delightful recipe, it’s essential to understand the ingredients that contribute to the flavor and texture of these homemade potato chips. Let’s take a closer look at each component:

Russet Potatoes

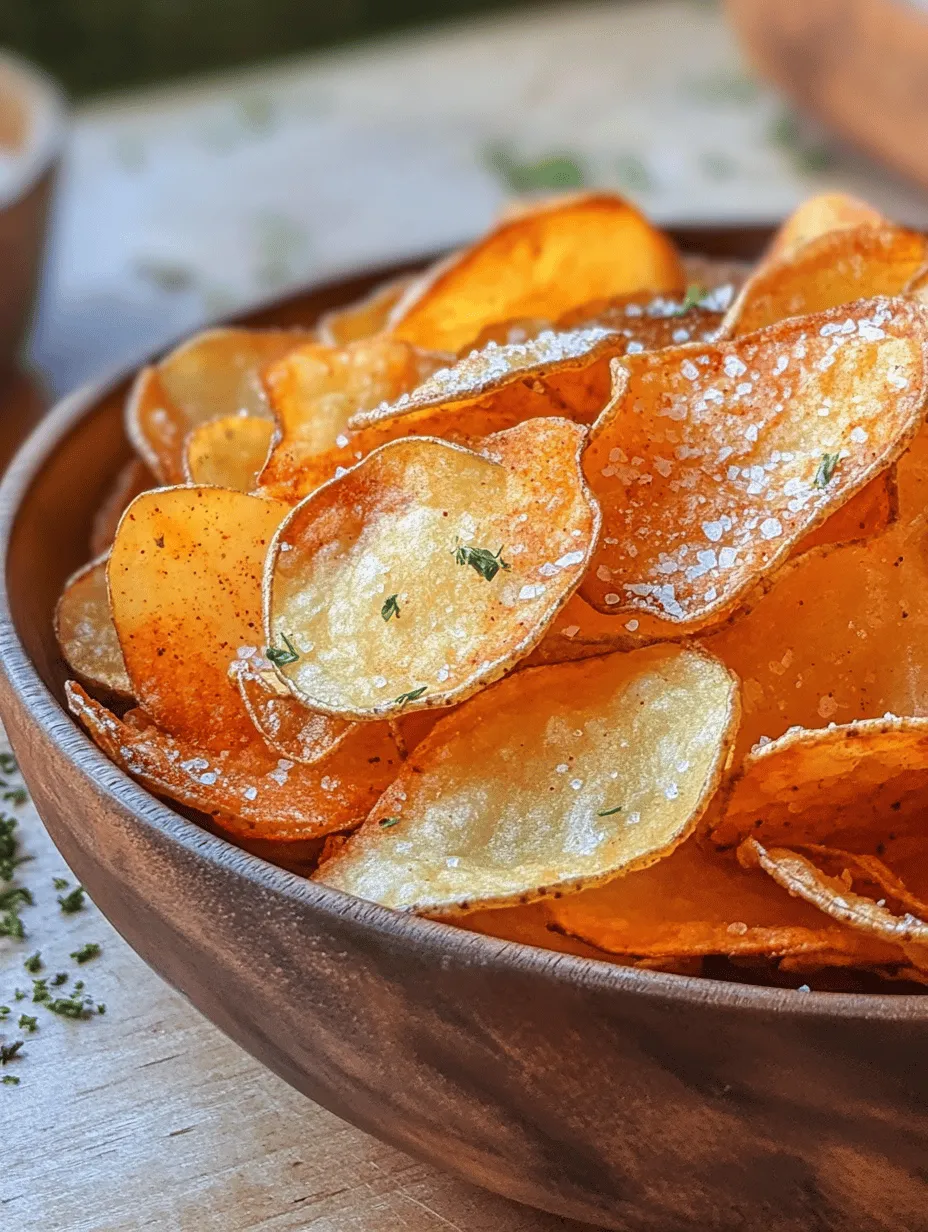
When it comes to making the perfect potato chips, the choice of potatoes is crucial. Russet potatoes are often considered the gold standard for chip-making due to their high starch content and low moisture level. This combination is ideal for achieving that crunchy texture we all crave. The characteristics of russet potatoes allow them to fry up beautifully, resulting in a crisp exterior while maintaining a light and fluffy interior. Additionally, their earthy flavor complements various seasonings, making them a favorite among potato chip enthusiasts.

Olive Oil

Incorporating olive oil into your homemade potato chips not only enhances their flavor but also provides a healthier alternative to traditional frying oils. Olive oil is rich in monounsaturated fats, which can help lower bad cholesterol levels and provide a range of antioxidants. When used sparingly in the chip-making process, olive oil not only contributes to the chips’ golden color but also aids in achieving that satisfying crunch. Plus, it allows for a deliciously rich flavor that elevates the overall taste of your chips.

Sea Salt

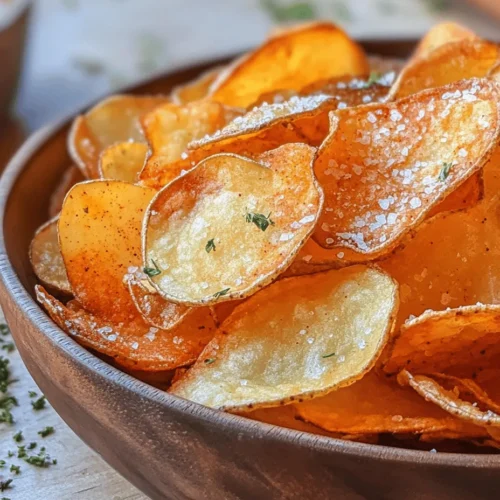
No potato chip is complete without the perfect seasoning, and sea salt plays a pivotal role in bringing out the natural flavors of the potatoes. The importance of seasoning cannot be overstated; it can make or break your snack. Sea salt is often preferred over regular table salt due to its larger crystals and more complex flavor profile. It provides a slight crunch and enhances the taste of the chips without overwhelming them. Adjusting the amount of salt to your preference will ensure that your chips are just right for your palate.

Optional Spices

To take your homemade potato chips to the next level, consider adding optional spices such as paprika and garlic powder. These spices can add depth and complexity to your chips, allowing you to personalize the flavor profile. Paprika offers a smoky sweetness, while garlic powder provides a savory punch that can transform ordinary chips into something extraordinary. Experimenting with different spice combinations can result in a unique snack that reflects your personal tastes.

Fresh Herbs

For those looking to enhance presentation and add a burst of flavor, garnishing your potato chips with fresh herbs can be a delightful touch. Fresh herbs like rosemary, thyme, or parsley can elevate the visual appeal of your chips while adding a fresh, aromatic quality. A sprinkle of finely chopped herbs just before serving can enhance the overall experience and give your homemade chips an artisanal flair.

Step-by-Step Preparation Process

Now that you’ve gathered your ingredients, it’s time to dive into the step-by-step preparation of your Crunchy Delight: Homemade Potato Chips. This process will guide you through making these delicious snacks from scratch, ensuring that you achieve the perfect crunch and flavor.

Preparation of Potatoes

The first step in creating your homemade potato chips is preparing the potatoes themselves. This stage is critical for optimal texture and flavor.

1. Washing and Peeling: Begin by thoroughly washing your russet potatoes under cold water to remove any dirt or impurities. While some recipes suggest leaving the skins on for added texture and nutrients, peeling the potatoes will result in a smoother chip that is more consistent in texture. Using a vegetable peeler, carefully remove the skins, ensuring that you maintain as much of the flesh as possible.

2. Slicing the Potatoes: The thickness of your potato slices greatly impacts the final product. For the best results, aim for slices that are approximately 1/8 inch thick. This thickness ensures that the chips cook evenly and achieve that desired crunchiness. You can use a mandoline slicer for uniform slices or a sharp knife if you prefer a more hands-on approach. Just remember to be careful while slicing to avoid any accidents.

Soaking the Potato Slices

After slicing the potatoes, the next crucial step is soaking the slices. This process is vital for achieving crispy chips.

Why Soaking is Important: Soaking the potato slices in cold water helps to remove excess starch. This excess starch can create a gummy texture when frying, which prevents the chips from achieving the perfect crunch. By soaking, you can ensure that your chips fry up light and crispy.

Recommended Soaking Time: Aim to soak the potato slices for about 30 minutes to 1 hour. This duration allows sufficient time for the starch to leach out while also keeping the potatoes crisp. If you’re short on time, even a quick 15-minute soak can make a difference.

Drying the Potatoes

Once the soaking time is complete, it’s essential to dry the potato slices thoroughly. Removing moisture is critical for achieving that crunchy texture you desire.

Techniques for Drying: Use clean kitchen towels or paper towels to pat the potato slices dry. Lay the slices out in a single layer, taking care not to overlap them, which can trap moisture. If you’re using kitchen towels, ensure they are absorbent and clean to avoid any unwanted flavors.

Tips for Ensuring Thorough Drying: After patting the slices dry, you can let them air dry for an additional 10 to 15 minutes. This step ensures that all moisture is removed, creating the ideal conditions for frying. The drier the potato slices, the crispier your chips will be.

As you proceed through these preliminary steps, you’ll be laying the foundation for your homemade potato chips. Each action taken is crucial in ensuring the final product is not only delicious but also satisfying. In the next section, we’ll delve into flavoring the chips, where you can customize your snack to suit your taste preferences.

The allure of homemade snacks is irresistible. There’s something uniquely satisfying about creating your own treats in the kitchen, where you can control every ingredient and tailor flavors to your liking. With the rise of health-conscious eating habits, many people are looking for alternatives to store-bought snacks that often contain preservatives, unhealthy fats, and excessive sodium. Homemade snacks, like <strong>Crunchy Delight: Homemade Potato Chips</strong>, not only allow you to indulge in a crispy, satisfying crunch but also provide a way to enjoy fresh ingredients that align with healthier eating habits.” /></p>
</p>
<h3>Oil and Seasoning Process</h3>
</p>
<p>To achieve that irresistible crunch and flavor in your homemade potato chips, the oil and seasoning process is crucial. Olive oil is often the oil of choice for many home cooks because it not only enhances the flavor but also contributes to the crispiness of the chips. The richness of olive oil complements the natural taste of potatoes while providing a healthier alternative to other oils, thanks to its monounsaturated fats and antioxidants.</p>
</p>
<p><strong>Coating the Potato Slices</strong></p>
</p>
<p>To properly coat your potato slices with oil and seasonings, follow these steps:</p>
</p>
<p>1. <strong>Drizzle the Olive Oil</strong>: Start by drizzling a generous amount of olive oil over your sliced potatoes in a large mixing bowl. A good rule of thumb is about 1 to 2 tablespoons of oil per medium-sized potato.</p>
</p>
<p>2. <strong>Toss the Slices</strong>: Using your hands or a spatula, gently toss the potato slices to ensure each piece is evenly coated. Be careful not to break the slices; the goal is to keep them intact for that perfect crunch.</p>
</p>
<p>3. <strong>Seasoning</strong>: After coating with oil, sprinkle your choice of seasonings over the potatoes. This is where you can get creative! Common choices include sea salt, garlic powder, onion powder, paprika, and black pepper. Aim for about 1 teaspoon of salt and other spices to taste, but adjust based on your preference.</p>
</p>
<p>4. <strong>Final Toss</strong>: Give the mixture one last toss to ensure the seasonings stick to the oily potato slices. This step is essential for achieving that flavorful bite in every chip.</p>
</p>
<h3>Customization Options for Seasoning</h3>
</p>
<p>One of the best things about homemade potato chips is the ability to customize the seasoning according to your personal preference. Here are some popular options to consider:</p>
</p>
<p>– <strong>Spicy</strong>: Add cayenne pepper or chili powder for a kick.</p>
<p>– <strong>Herbed</strong>: Try dried herbs like rosemary or thyme for a fragrant twist.</p>
<p>– <strong>Cheesy</strong>: Incorporate nutritional yeast or powdered cheese for a savory flavor.</p>
<p>– <strong>Sweet</strong>: For a sweeter version, experiment with cinnamon and a touch of sugar.</p>
</p>
<p>Feel free to mix and match these suggestions to create your signature blend!</p>
</p>
<h3>Baking the Potato Chips</h3>
</p>
<p><strong>Preparing the Baking Sheet</strong></p>
</p>
<p>Before you start baking, it’s essential to prepare your baking sheet properly. Line it with parchment paper to prevent sticking and ensure easy cleanup after you enjoy your crunchy delights. Parchment paper also helps promote even cooking, as it allows heat to circulate around the chips.</p>
</p>
<p><strong>Arranging Potato Slices</strong></p>
</p>
<p>For optimal results, the way you arrange your potato slices on the baking sheet matters significantly. Ensure that the slices are laid out in a single layer without overlapping. This allows hot air to circulate around each chip, ensuring they cook evenly and achieve that desired crispiness.</p>
</p>
<h3>Baking Instructions</h3>
</p>
<p><strong>Optimal Temperature Settings and Baking Times</strong></p>
</p>
<p>Set your oven to 400°F (200°C). Preheating is key to achieving the perfect texture. Once the oven reaches the desired temperature, place your baking sheet in the middle rack. Bake the chips for about 15-20 minutes, but keep a close eye on them as they cook.</p>
</p>
<p><strong>Monitoring Chips for Perfect Doneness</strong></p>
</p>
<p>As the chips bake, it’s crucial to monitor them regularly. After about 10 minutes, check on them and give the baking sheet a gentle shake to ensure even cooking. You may need to rotate the baking sheet halfway through baking for consistent results.</p>
</p>
<p><strong>Signs of Readiness</strong></p>
</p>
<p>Your potato chips are ready when they turn a golden brown color and feel firm to the touch. If they appear too pale, give them a few more minutes. Remember, they will crisp up further as they cool, so take care not to overbake them.</p>
</p>
<h3>Cooling and Serving</h3>
</p>
<p><strong>Importance of Cooling</strong></p>
</p>
<p>Once out of the oven, let your homemade potato chips cool down on the baking sheet for about 5-10 minutes. Cooling is a crucial step that allows the chips to firm up and develop that satisfying crunch. If you serve them immediately while they’re still hot, they may be softer than desired.</p>
</p>
<h3>Recommended Cooling Time and Serving Suggestions</h3>
</p>
<p>After they have cooled, you can transfer the chips to a serving dish. For an appealing presentation, arrange them in a bowl or on a platter. Consider garnishing with fresh herbs or a sprinkle of extra seasoning for visual and flavor enhancement.</p>
</p>
<p><strong>Presentation Ideas</strong></p>
</p>
<p>Here are some creative ways to serve your homemade potato chips:</p>
</p>
<p>– <strong>Chic Serving Bowl</strong>: Use a rustic wooden bowl for a charming presentation.</p>
<p>– <strong>Layered Display</strong>: Stack chips in a tall glass for a fun, vertical display.</p>
<p>– <strong>Themed Platter</strong>: Pair chips with themed dips or accompaniments for a party platter.</p>
</p>
<p><strong>Suggestions for Dips or Accompaniments</strong></p>
</p>
<p>To elevate your homemade potato chips, consider serving them with a variety of dips. Some excellent choices include:</p>
</p>
<p>– <strong>Guacamole</strong>: Creamy and rich, this dip balances the crunchy texture of the chips.</p>
<p>– <strong>Salsa</strong>: Fresh and zesty, salsa adds a refreshing element.</p>
<p>– <strong>Hummus</strong>: A healthier choice that pairs well with the salty chips.</p>
<p>– <strong>Ranch Dressing</strong>: A classic favorite for those who enjoy creamy, herby flavors.</p>
</p>
<h3>Nutritional Benefits of Homemade Potato Chips</h3>
</p>
<p>When it comes to nutrition, homemade potato chips offer several advantages over their store-bought counterparts. Store-bought chips often contain preservatives and unhealthy fats, while homemade chips allow you to control the ingredients.</p>
</p>
<p><strong>Comparison of Homemade vs. Store-Bought Chips</strong></p>
</p>
<p>Homemade chips are generally healthier because you know exactly what goes into them. You can choose high-quality oils, fresh potatoes, and limit the amount of salt to your preference. A serving of homemade chips can be lower in calories than many commercial options, depending on the ingredients and portion sizes.</p>
</p>
<p><strong>Overview of Health Benefits from Using Fresh Ingredients</strong></p>
</p>
<p>Using fresh ingredients in your homemade chips means you’re not only consuming fewer preservatives but also gaining more nutrients. Potatoes are a good source of vitamins C and B6, potassium, and fiber. By opting for olive oil, you’re adding healthy fats that can benefit heart health.</p>
</p>
<p><strong>Caloric and Nutritional Breakdown Based on Ingredients Used</strong></p>
</p>
<p>The caloric content of your homemade potato chips will depend on the type and amount of oil used, as well as the serving size. On average, a serving of homemade potato chips (about 1 ounce) can contain around 150-200 calories. However, by minimizing oil use and choosing healthier seasonings, you can create a snack that fits your dietary needs.</p>
</p>
<h3>Conclusion</h3>
</p>
<p>Making homemade potato chips is not only rewarding but also brings a sense of satisfaction knowing that you control the quality and flavor of your snack. The process of slicing, seasoning, and baking your chips allows for creativity in the kitchen, and every batch can be a delightful experiment in flavor.</p>
</p>
<p>Encouraging you to explore different seasonings and presentation styles enhances your culinary repertoire. The joy of producing a delicious, crunchy snack at home is unmatched. So, dive into the world of homemade snacks, and enjoy the process of making your very own potato chips! Incorporating these homemade delights into your snack routine not only promotes healthier eating but can also become a fun activity to share with friends and family. Enjoy the crunch!</p>
<div id=

The allure of homemade snacks is irresistible. There’s something uniquely satisfying about creating your own treats in the kitchen, where you can control every ingredient and tailor flavors to your liking. With the rise of health-conscious eating habits, many people are looking for alternatives to store-bought snacks that often contain preservatives, unhealthy fats, and excessive sodium. Homemade snacks, like Crunchy Delight: Homemade Potato Chips, not only allow you to indulge in a crispy, satisfying crunch but also provide a way to enjoy fresh ingredients that align with healthier eating habits.

Homemade Potato Chips

Discover the satisfaction of making your own Crunchy Delight: Homemade Potato Chips! This versatile recipe allows you to control every ingredient, ensuring a healthier alternative to store-bought snacks. With russet potatoes, olive oil, and your favorite seasonings, you can create a delicious, crispy treat perfect for any occasion. Elevate your snacking game and enjoy experimenting with flavors that suit your palate! #HomemadeSnacks #PotatoChips #HealthyEating #Foodie #SnackTime

Ingredients
  

4 medium-sized russet potatoes

1 tablespoon olive oil

1 teaspoon sea salt (adjust to taste)

1/2 teaspoon paprika (optional, for flavor)

1/4 teaspoon garlic powder (optional, for flavor)

Fresh herbs (such as rosemary or thyme, optional for garnish)

Instructions
 

Preparation of Potatoes:

    - Wash and peel the russet potatoes. Use a mandoline slicer or a sharp knife to slice the potatoes into thin rounds, about 1/16 inch thick for optimal crunch.

      Soaking:

        - Place the potato slices in a large bowl of cold water. Let them soak for at least 30 minutes. This step helps to remove excess starch, which will make the chips crispier.

          Drying:

            - After soaking, drain the potato slices and spread them out on a clean kitchen towel or paper towels. Pat them dry thoroughly to remove as much moisture as possible.

              Oil and Seasoning:

                - Preheat your oven to 375°F (190°C). In a large bowl, toss the dried potato slices with olive oil, sea salt, paprika, and garlic powder until they are evenly coated.

                  Baking:

                    - Line a baking sheet with parchment paper for easier cleanup. Arrange the potato slices in a single layer on the baking sheet, making sure they don’t overlap. Bake in the preheated oven for about 20-25 minutes. Keep an eye on them as baking time can vary - you want them golden and crispy but not burnt.

                      Cooling:

                        - Once they are baked, remove the chips from the oven and let them cool on the baking sheet for a few minutes. They will continue to crisp up as they cool.

                          Serving:

                            - Serve your homemade potato chips warm with a sprinkle of fresh herbs if desired, or let them cool completely and store in an airtight container for later enjoyment.

                              Prep Time: 15 minutes | Total Time: 1 hour | Servings: 4-6

                                WANT TO SAVE THIS RECIPE?

                                Leave a Comment

                                Recipe Rating