
Introduction
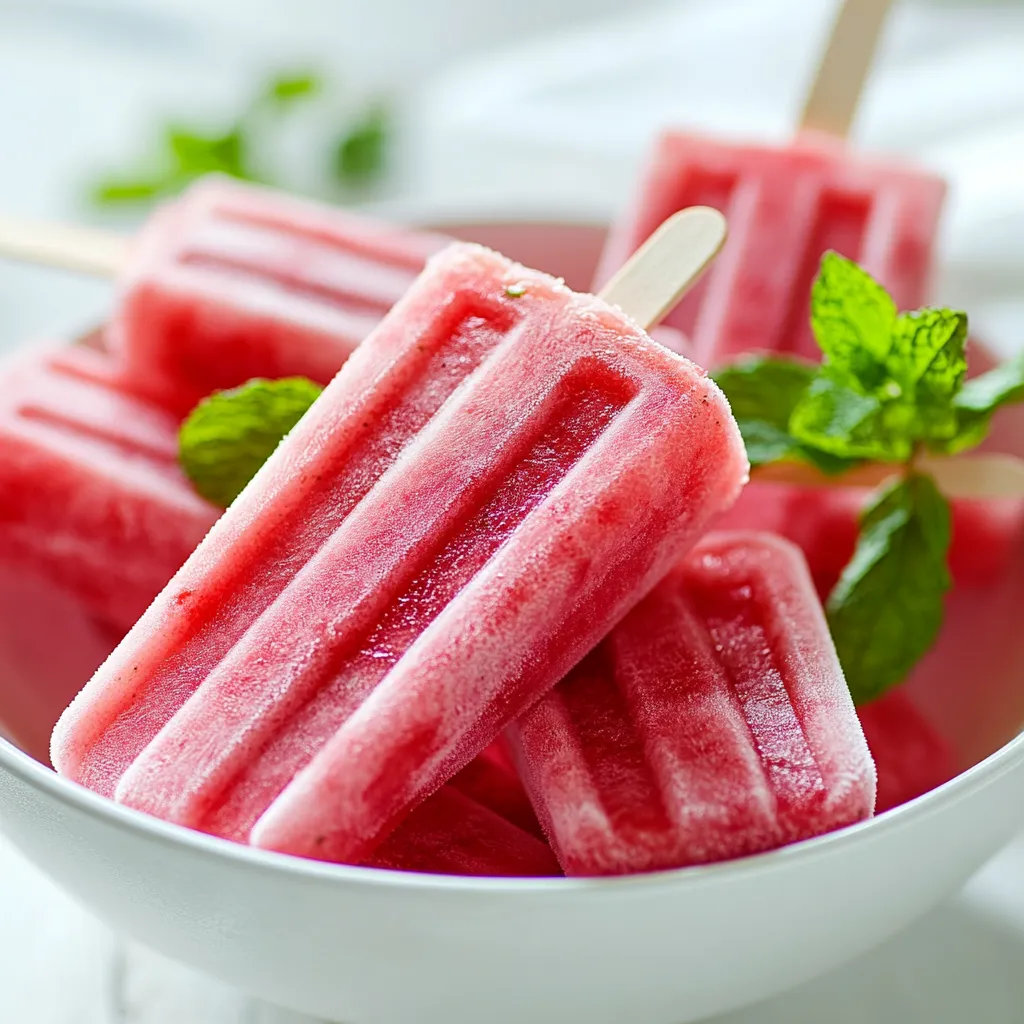
The arrival of warmer weather calls for refreshing treats that not only hydrate but also invigorate. Watermelon mint popsicles serve as an ideal snack, combining the sweet juiciness of watermelon with the cooling essence of fresh mint. This delightful recipe is perfect for summertime gatherings, outdoor playdates, or simply as a tasty way to cool off on hot days. The vibrant colors and natural flavor of these popsicles make them a hit for both kids and adults alike, bringing a sense of joy and nostalgia with each refreshing bite.
Not only are these watermelon mint popsicles visually appealing, but they also provide a healthful alternative to store-bought frozen treats, which can often be loaded with added sugars and preservatives. By creating your own popsicles at home, you have the control to adjust the sweetness and ensure that you are using high-quality, fresh ingredients. As you prepare these, you can bask in the knowledge that you are serving a wholesome and flavorful snack that contributes to hydration, nutrition, and an enjoyable summer experience.
Recipe Overview
Watermelon mint popsicles are easy to prepare and require minimal ingredients. In just 15 minutes of prep, and after a few hours in the freezer, you can enjoy a deliciously refreshing dessert that everyone will love. This guide will walk you through every step, ensuring you create popsicles that are bursting with flavor.
– Prep Time: 15 minutes
– Total Time: 6 hours (includes freezing time)
– Servings: Makes 8 popsicles
– Difficulty: Not specified in the recipe
Ingredients
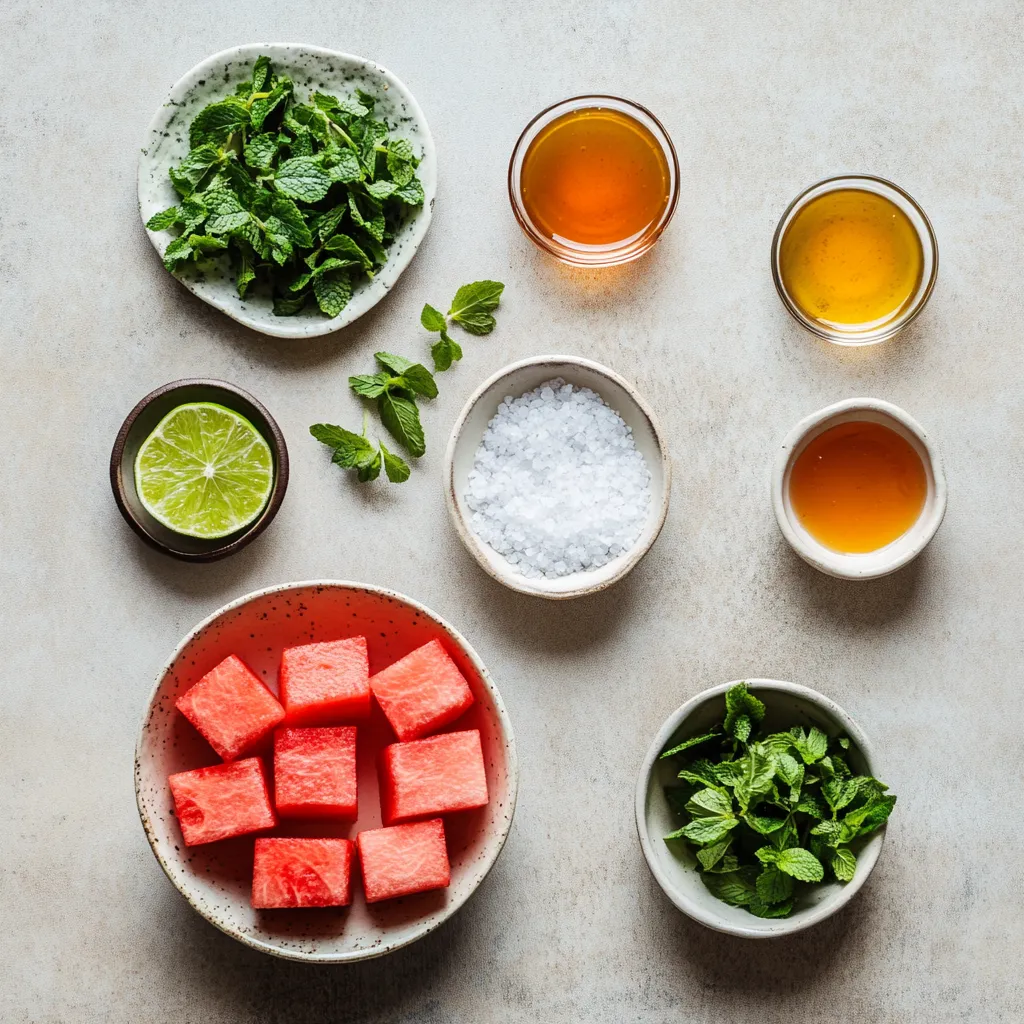
The key to creating perfect watermelon mint popsicles lies in selecting fresh and high-quality ingredients. Here’s what you will need:
– 4 cups seedless watermelon, cubed
– 1/4 cup fresh mint leaves, tightly packed
– 2 tablespoons freshly squeezed lime juice (approximately 1 lime)
– 2 tablespoons honey or agave syrup (adjust according to your sweetness preference)
– A small pinch of salt
Instructions
1. Blend the Watermelon: Start by adding the cubed watermelon to a blender. Blend on high speed until the mixture is completely smooth, yielding about 4 cups of vibrant watermelon juice.
2. Prepare the Mint: Take a small bowl and finely chop the fresh mint leaves. This will enhance the mint flavor by releasing its essential oils.
3. Combine the Ingredients: In a large mixing bowl, combine the smooth watermelon juice, chopped mint, lime juice, honey or agave syrup, and a pinch of salt. Mix thoroughly until the honey or agave is fully dissolved and the ingredients are well blended.
4. Taste and Adjust: Before pouring the mixture into your popsicle molds, take a moment to taste it. If you desire a sweeter flavor, feel free to add a bit more honey or agave syrup to suit your palate.
5. Fill the Molds: Carefully pour the watermelon mixture into popsicle molds, leaving a small gap at the top to allow for expansion as they freeze. For an extra touch, you can add a couple of whole mint leaves into each mold.
6. Insert the Sticks: Place the popsicle sticks into the center of each mold, making sure they are upright and evenly spaced.
7. Freeze the Popsicles: Transfer the filled molds to the freezer and allow them to freeze for at least 4 to 6 hours or until they are completely solid.
8. Unmold and Serve: To release your delicious popsicles, run warm water over the outside of the molds for a few seconds, then gently pull them out. Savor your refreshing watermelon mint popsicles on a hot day!
Selecting Watermelon
Choosing the right watermelon is crucial for the best flavor. Here are a few tips to ensure you pick a top-quality fruit:
Look for Seedless Varieties
Seedless watermelons are easier to work with and yield a smoother blend. They allow for hassle-free preparation without the need to manage seeds, leading to a better texture in your popsicles.
Inspect Ripeness
A ripe watermelon should feel heavy for its size and have a deep, uniform color. A heavy watermelon indicates that it is full of water, contributing to a more refreshing taste. Also, check for any uneven discoloration, which could indicate an underripe or overripe fruit.
Check the Field Spot
A creamy yellow spot indicates ripeness—this is where the watermelon rested on the ground as it ripened. If the spot is too light or green, it may not be fully ripe.
Fresh Mint Selection
Mint can greatly enhance the flavor profile of your popsicles, making it essential to select it carefully:
Choosing Fresh Leaves
Look for vibrant green, crisp leaves without wilting or browning. The freshness of the mint significantly impacts the taste of the popsicles, with fresh leaves imparting a bright and lively flavor.
Packing Mint
Tightly packing the mint leaves will yield a richer flavor when blended. When measuring, ensure you are using tightly packed leaves to maximize the mint essence in your final product.
Storing Fresh Mint
Store any leftover mint in a damp paper towel in the refrigerator for longevity. This helps maintain its freshness and crispness, allowing you to utilize it in other recipes or drinks throughout the week.
Preparing the Ingredients
A few simple steps can elevate your popsicle recipe:
Blending the Watermelon
This process is straightforward but crucial for achieving the right texture. Make sure the watermelon is blended until completely smooth for an impeccable popsicle experience. Using a high-speed blender ensures a consistent mixture without any chunks.
Chopping Mint
Finely chopping mint releases essential oils that boost flavor. It’s important to chop the leaves as finely as possible to ensure an even distribution throughout the watermelon juice.
Mixing Ingredients
Ensure all components are properly mixed for a harmonious taste. Take your time when combining the watermelon juice with the other ingredients, as thorough mixing helps incorporate the flavors, resulting in a well-rounded taste profile in your popsicles.
Adjusting Sweetness
Personalizing your popsicles is vital for catering to different taste preferences:
Tasting Before Freezing
Sampling your mixture allows for adjustments in sweetness and flavor. This is the perfect opportunity to tweak the honey or agave syrup according to your liking. The natural sweetness of watermelon can vary, so adjusting the sweetness here will ensure the final product is just right for you and your guests.
Choosing Your Sweetener
Both honey and agave syrup serve as natural sweeteners in this recipe, each contributing its own unique flavor profile and sweetness level. Honey, with its floral undertones, can amplify the taste of the watermelon and mint, while agave syrup offers a more neutral sweetness that blends seamlessly into the mixture. Select the sweetener based on your flavor preference and dietary considerations. Vegans or those with honey allergies may opt for agave. Remember that the sweetness can always be adjusted based on personal taste and intended serving.
How to Adjust
If you find your watermelon mint mixture is a bit too tart after adding the lime juice, you can easily make adjustments. Gradually introduce more sweetener, whether it be honey or agave syrup, tasting as you go to ensure that the final product aligns with your preference. A small pinch of salt also helps to balance flavors, bringing out the natural sweetness of the watermelon.
Filling the Popsicle Molds
The filling method is crucial for achieving the desired texture and aesthetic appeal of the popsicles.
Pouring Techniques
To ensure a clean and spill-free filling process, consider using a funnel or a pitcher. Both tools can help guide the liquid into the molds without drips or overflow, which is especially important if you’re working with a large batch.
Allowing for Expansion
It’s essential to leave a small gap at the top of each popsicle mold before inserting the sticks and freezing. As the mixture freezes, it will expand; leaving space will prevent spills and potential messes inside your freezer.
Adding Garnishes
Enhancing your popsicles with garnishes can uplift both the flavor and presentation. Adding whole mint leaves or small pieces of watermelon into the molds not only beautifies the popsicles but also infuses more flavor as they freeze.
Inserting Popsicle Sticks
Getting the placement of your popsicle sticks right ensures stability and a smoother unmolding experience.
Proper Placement
When inserting the sticks into your molds, ensure they are centered upright in the mixture. This balanced positioning not only holds the popsicle together during freezing but also makes them easier to handle when serving.
Spacing Quartet
If making multiple popsicles, it’s vital to maintain adequate spacing between the sticks. This reduces the chances of them freezing together and makes it easier to pull apart without damaging the popsicles.
Using Alternative Sticks
For those looking for eco-friendly options, consider using wooden chopsticks or biodegradable sticks instead of traditional materials. This choice aligns with a more sustainable approach to cooking and entertaining.
Freezing Methodology
Proper freezing is key to achieving the perfect popsicle texture.
Freezing Time Guidelines
Allow the filled molds to freeze for at least 4 to 6 hours or until completely solid. For a more reliable result, freezing overnight is suggested, particularly if you plan to serve them the next day.
Location in Freezer
To ensure that the popsicles freeze uniformly, place the molds in the coldest section of the freezer. This location prevents uneven freezing, which could lead to an undesirable texture.
Checking for Doneness
Before attempting to unmold, check the popsicles by gently squeezing the side of the mold. If they hold their shape and do not feel soft, they are ready to be removed.
Unmolding and Serving
The way you present your popsicles can significantly enhance their appeal.
Techniques for Easy Removal
To easily release the popsicles from the molds, run warm water over the outside for a few seconds. The warmth helps to melt the outer layer slightly, loosening them for easier extraction.
Serving Suggestions
For a visually pleasing presentation, use colorful dishes, rustic wooden boards, or even glass stands. Displaying the popsicles creatively can make them more enticing, especially during gatherings or parties.
Garnishing Ideas
Enhance the visual appeal and flavor by adding fresh mint leaves or small watermelon slices when serving. These garnishes provide a lovely accent and signify freshness to those enjoying the popsicles.
Taste and Texture Profile
Understanding the overall taste and texture can heighten the anticipation for these popsicles.
Flavor Harmony
The combination of sweet watermelon with the cooling mint and a twist of tart lime creates a well-rounded and refreshing flavor profile. Each element complements the others, delivering a delightful taste experience.
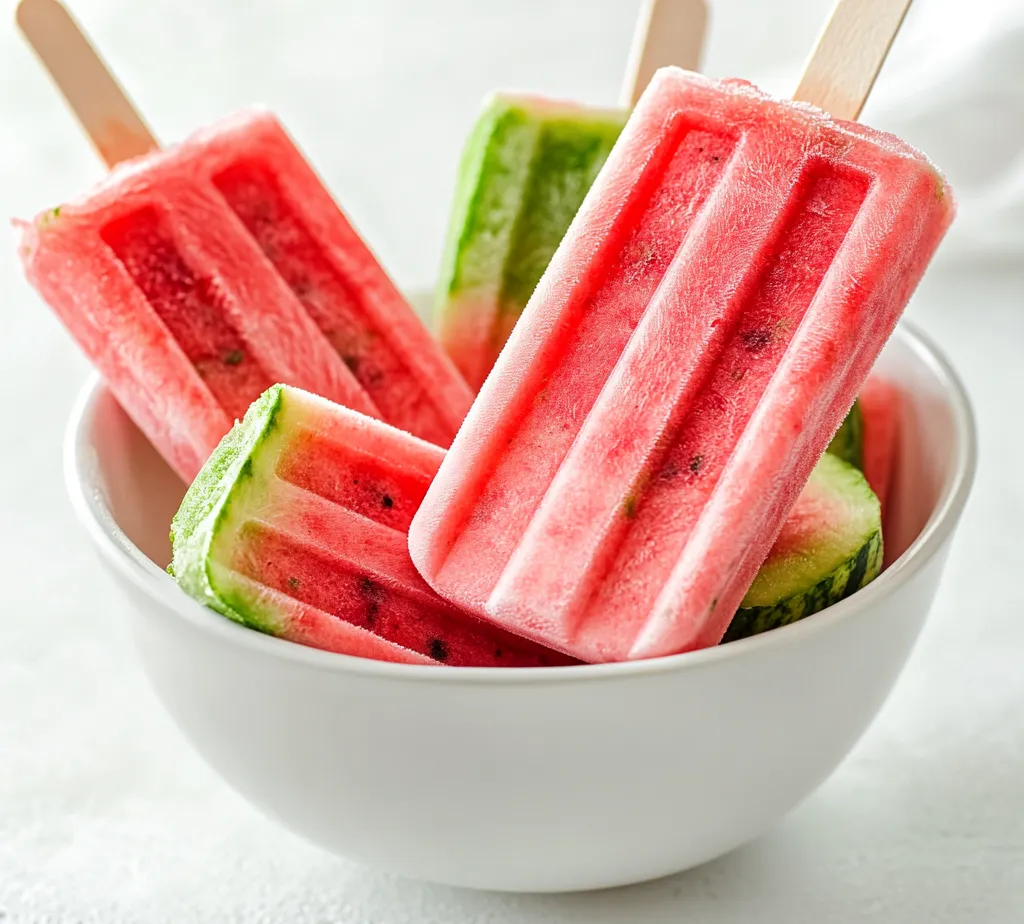
Texture Feels
These watermelon mint popsicles should have a smooth and icy texture, providing a satisfying crunch and refreshment with every bite. The smoothness from the blended watermelon allows for easy consumption, making them perfect for hot summer days.
Tasting Occasion
These popsicles are ideal for enjoying on warm days, at picnics, during barbecues, or simply as a guilt-free snack anytime you’re in need of a cooling treat. Their fresh, vibrant flavors make them an excellent choice for health-conscious dessert lovers.
In conclusion, these watermelon mint popsicles offer a delightful blend of sweet and refreshing flavors and a pleasing icy texture. With a preparation time of just 15 minutes, they are an effortless and enjoyable treat to make, ready to brighten up any day.

Refreshing Watermelon Mint Popsicles
Ingredients
- 4 cups seedless watermelon cubed
- ¼ cup fresh mint leaves tightly packed
- 2 tablespoons freshly squeezed lime juice
- 2 tablespoons honey or agave syrup
- a small pinch salt
Instructions
- Blend the cubed watermelon until smooth to yield about 4 cups of juice.
- Finely chop the fresh mint leaves to enhance the flavor.
- In a large bowl, combine watermelon juice, chopped mint, lime juice, honey or agave, and salt. Mix well.
- Taste the mixture and adjust sweetness if necessary.
- Pour the mixture into popsicle molds, leaving a gap at the top.
- Insert popsicle sticks into the molds, ensuring they are upright.
- Freeze the molds for at least 4 to 6 hours until solid.
- Run warm water over the molds to release the popsicles and enjoy.