

Introduction
Understanding the joy of creating festive treats can enhance any celebration. With Halloween just around the corner, there’s no better time to surprise friends and family with a spooky yet delightful dessert. This detailed guide will walk you through creating Spooktacular Frankenstein Rice Krispie Treats, a fun twist on a classic and an eye-catching addition to your Halloween spread. These treats blend nostalgia with creativity, making them perfect not only for children but also for adults who enjoy a touch of whimsical fun in their dessert offerings.
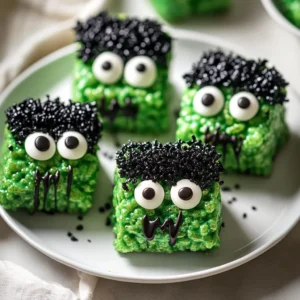
The vibrant green color reminiscent of Frankenstein’s iconic look adds to the excitement, while the gooey marshmallow base provides that familiar Rice Krispie texture we all know and love. What’s more, these treats can transform any occasion into a festive gathering with just a little effort. Whether you’re hosting a Halloween party or simply want to surprise your family with a fun dessert, Spooktacular Frankenstein Rice Krispie Treats are sure to be a hit.
Recipe Overview
– Total Time: 1 hour
– Prep Time: 15 minutes
– Yield/Servings: 12-16 servings
– Difficulty: Not specified in the recipe
Ingredients
– 6 cups Rice Krispies cereal
– 4 cups mini marshmallows
– 3 tablespoons unsalted butter
– 1 teaspoon vanilla extract
– Green food coloring (adjust to your preferred shade)
– Black chocolate melting wafers or dark chocolate chips
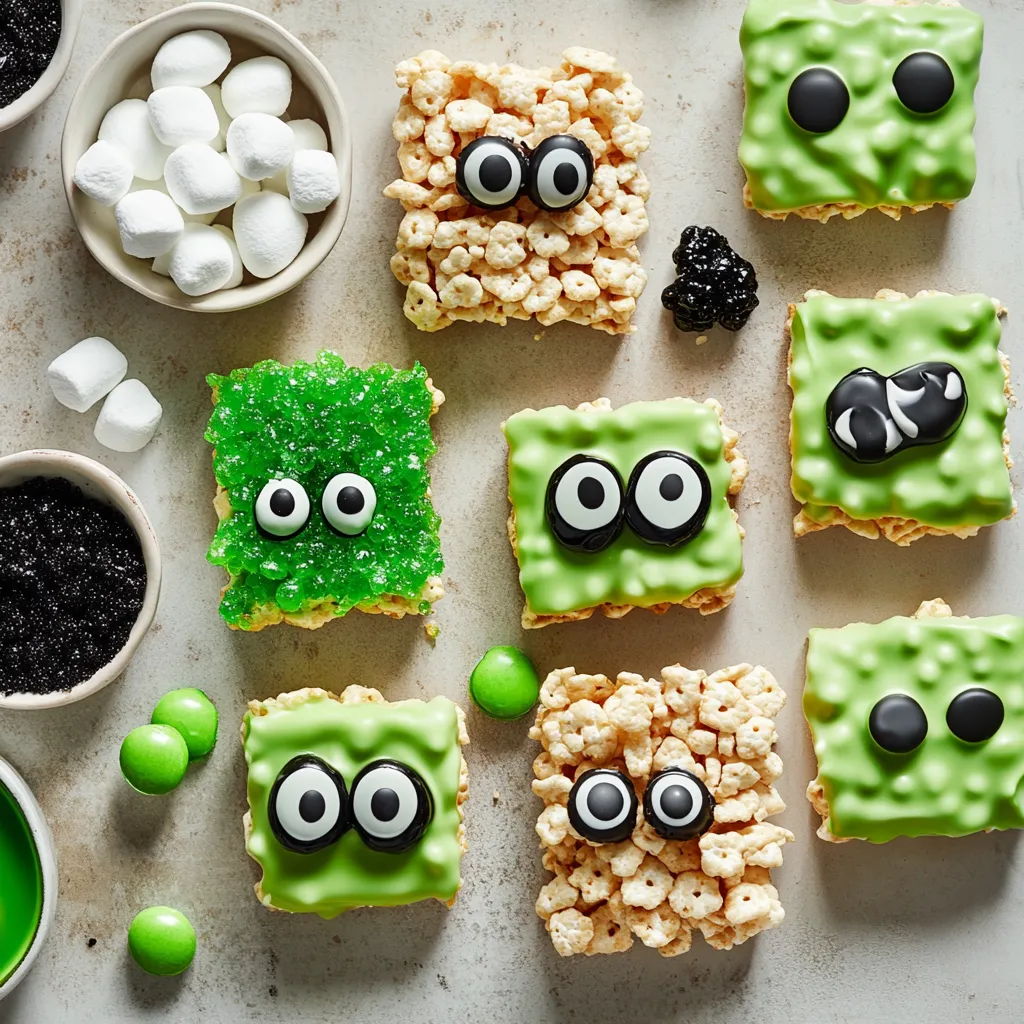
– Candy eyes (for that extra spooky effect)
– Edible black glitter or sprinkles (optional for decoration)
– Wax paper or parchment paper (for lining the baking dish)
Instructions
1. Prepare the Baking Dish: Start by lining a 9×13 inch baking dish with wax paper or parchment paper. Ensure there’s an overhang on the sides to make lifting the treats out easier later.
2. Melt the Butter and Marshmallows: In a large saucepan, melt the unsalted butter over low heat. Once it’s fully melted, add the mini marshmallows. Stir constantly until the marshmallows are completely melted and the mixture is smooth. Remove the saucepan from heat.
3. Incorporate Vanilla and Color: Stir in the vanilla extract, followed by a few drops of green food coloring. Mix until the marshmallow mixture achieves a vibrant, uniform green color.
4. Mix in the Cereal: Gradually fold in the Rice Krispies cereal, stirring gently to ensure each piece is evenly coated with the marshmallow mixture.
5. Press the Mixture into the Dish: Transfer the mixture to the prepared baking dish. Using a spatula or lightly greased hands, press the mixture down firmly and evenly into the dish, ensuring it’s compact.
6. Allow to Cool: Let the Rice Krispie treats cool completely in the pan at room temperature, which should take about 30 minutes.
7. Shape the Treats: Once the treats have cooled, lift them out of the pan using the overhanging parchment. Cut them into rectangles, or utilize Halloween-themed cookie cutters to create fun monster shapes.
8. Decorate with Chocolate: In a microwave-safe bowl, melt the black chocolate wafers or dark chocolate chips in 30-second intervals, stirring after each interval until smooth. Dip the top of each treat into the melted chocolate or drizzle it over the treats for a fun hair effect.
9. Add the Eyes: While the chocolate is still warm and melty, place candy eyes onto the treats. If you like, sprinkle edible black glitter or sprinkles around the eyes for an extra spooky touch.
10. Let Set and Serve: Allow the chocolate to set for about 15 minutes before serving. Enjoy your delightful and spooky Frankenstein Rice Krispie Treats!
Prepare the Baking Dish
Selecting the Right Dish
Choosing a 9×13 inch baking dish is essential for even distribution during the setting process. This size ensures that you have enough space to mix and cool your Rice Krispie treat mixture appropriately. A baking dish that is too small may lead to uneven cooling or difficulty in pressing the mixture down. Additionally, a larger dish can make the treats thinner and less appealing, whereas a perfectly sized dish helps create that ideal thickness we crave in a Rice Krispie treat.
Lining the Dish
Use wax paper or parchment paper to line the baking dish adequately. This step is crucial to preventing the sticky treats from adhering to the dish’s surface. Paper provides a protective layer that makes it easy to lift the treats out later. It’s advisable to adequately smooth the paper out, eliminating any bubbles which could become sticky spots.
Ensuring Easy Removal
Leave an overhang of paper on the sides. This will help lift the treats out smoothly without damaging their shape. The overhang acts like a handle, allowing you to gently pull the entire sheet of treats out when they have cooled. If you do not leave enough overhang, you risk breaking the treats or having to scrape them out, which could turn into a messy task.
Melt the Butter and Marshmallows
Using the Right Technique
Melt unsalted butter in a large saucepan over low heat to prevent burning. The key to achieving the perfect texture is to manage your heat properly. Cooking the butter too fast can burn it and impart a burnt flavor to your treats. Using low heat means you can carefully control the melting process, ensuring that the butter is fully melted before adding in the marshmallows.
Adding Marshmallows
Once the butter is melted, gradually incorporate the mini marshmallows. This allows for a more controlled melting of the marshmallows, ensuring they melt evenly. As the marshmallows begin to soften, it’s crucial to keep stirring to integrate them well with the butter, helping to avoid any lumps.
Achieving Smoothness
Constant stirring is key along with removing from heat when the mixture is completely melted. If you stop stirring too soon, you may end up with unmelted marshmallows in the mixture, leading to clumps in your Rice Krispie treats. A smooth consistency is essential for even coating of the Rice Krispies and for achieving that gooey texture everyone adores.
Incorporate Vanilla and Color
Flavor Enhancement
Adding vanilla extract enhances the deliciousness of the treats. Vanilla adds depth and richness that balances the sweetness of the marshmallows. It’s a simple addition but results in a more complex flavor profile, ensuring your treats are not only good but truly enjoyable.
Choosing Food Coloring
Select green food coloring to achieve the classic Frankenstein appearance. Adjust the amount to your preferred shade. The fun part about this recipe is that you can customize the shade of green to match your vision. Whether you prefer a vibrant neon green or a subtle pastel, this flexibility allows you to get creative while making your Halloween treats.
Mixing to Uniform Color
Mix thoroughly until the marshmallow mixture obtains a consistent vibrant green color. Be careful not to over-mix, as this can lead to excessive air incorporation, which would make the treats lose their density. A uniform color gives your Frankenstein treats a professional look and enhances their themed appeal, making them irresistible among a sea of Halloween confections.
Mix in the Cereal
Gradual Incorporation
Gently fold in the Rice Krispies cereal to ensure even coating. The term “fold” is critical here, as it means to incorporate the cereal in a way that preserves as much of the airiness from the marshmallow mixture as possible. Speed and force are not your friends in this step, as vigorous mixing can lead to tougher treats.
Importance of Gentle Stirring
Over-mixing can lead to a tough texture, so gentle stirring maintains the desired lightness of the treats. Aim for a methodical approach, taking care to coat each piece of cereal evenly without crushing them. The right texture ensures that your treats are chewy yet crispy, embodying the classic Rice Krispies experience.
Ensuring Even Coating
Check that each piece of cereal is evenly coated with the marshmallow mix. This step is crucial, as uneven coating can lead to dry patches or areas lacking that gooey marshmallow goodness we all crave in a Rice Krispie treat. A thorough inspection can save you from having some bites that are too sticky and others that are entirely bland.
Press the Mixture into the Dish
To be continued…

your Halloween celebrations.
Technique for Even Distribution
When preparing the Rice Krispie mixture, the technique of folding the ingredients is crucial to achieving an even distribution of marshmallow throughout the cereal. Using a spatula or greased hands, press the mixture down firmly into the prepared baking dish. It’s important to fold instead of stirring vigorously to avoid crushing the cereal. This gentle technique allows the mixture to keep its texture, ensuring that each bite retains that satisfying crunch.
Importance of Compactness
Creating a compact mixture is vital for the structural integrity of the treats. A mixture that is tightly packed will hold together better after cooling, making them easy to cut and preventing them from crumbling apart. Take your time when pressing the mixture into the baking dish, ensuring not to leave any loose or airy spots.
Finishing Touches
Once the mixture is spread into the pan, check the surface for levelness. A smooth top will not only enhance the visual appeal but also provide a better surface for decoration later. Use the bottom of the spatula to gently press and evenly level the top, ensuring a clean and polished look.
Allow to Cool
Timing for Optimal Texture
The cooling process is essential not just for setting the treats, but also for achieving the ideal texture. Allowing the Rice Krispie treats to cool for about 30 minutes ensures they firm up properly. If they are cut too soon, they may be overly sticky and challenging to handle.
Staying at Room Temperature
For the best results, let the treats cool at room temperature. Cooling in the refrigerator can introduce condensation, leading to sogginess, which detracts from the crispy texture that makes Rice Krispie treats so appealing.
Signs of Proper Cooling
You can tell the treats are ready for cutting when they feel firm to the touch and no longer stick to your fingers. A good benchmark is to gently press the surface; it should bounce back slightly without leaving any indentation.
Shape the Treats
Lifting Out of the Pan
To remove the Rice Krispie treats from the pan, carefully lift them out using the overhanging parchment paper. This method helps to preserve the shape of the treats while avoiding any risk of breakage that may occur if you try to scoop them out with a utensil.
Cutting Techniques
When it comes to shaping, you can cut the treats into traditional rectangles, or for a festive twist, use Halloween-themed cookie cutters. If using cookie cutters, it’s advisable to grease them lightly to prevent sticking and ensure a clean cut.
Handling Cut Treats
Once cut, handle the treats with care. Their compact nature should hold up, but gentle movement is crucial to prevent crumbling. Consider using a spatula or flat serving utensil to lift them safely without damaging the edges.
Decorate with Chocolate
Melting the Chocolate
Melting the black chocolate wafers or dark chocolate chips requires patience and attention. Place the chocolate in a microwave-safe bowl and heat it in 30-second intervals, stirring after each interval. This method prevents overheating, which could lead to burned chocolate that won’t melt smoothly.
Techniques for Dipping and Drizzling
You can choose to dip the top of each treat into the melted chocolate or create a fun hair effect by drizzling the chocolate over the treats. For dipping, submerge just the top of the treat and let the excess drip off before transferring it to a cooling rack or baking sheet.
Importance of Timing
Timing is crucial when working with melted chocolate. It’s best to work quickly while the chocolate is still warm and fluid, enabling better adhesion for the candy eyes and any additional decorations you wish to add.
Add the Eyes
Positioning the Candy Eyes
To achieve the perfect presentation, place candy eyes immediately onto the warm chocolate topping of each treat. The warmth helps the eyes stick effectively, making them less likely to fall off after the chocolate sets.
Adding Extra Decoration
For that extra spooky aesthetic, sprinkle edible black glitter or sprinkles around the eyes while the chocolate is still melty. This additional touch not only enhances visual appeal but also adds a bit of fun texture.
Final Touches
Striking a balance between whimsical and spooky is essential for the final decoration. Be playful with your designs while ensuring it remains festive and inviting for your guests.
Let Set and Serve
Setting Time for Best Results
After decorating, allow the chocolate to set for about 15 minutes at room temperature. This waiting period ensures that the chocolate hardens properly and enhances the overall texture of the treats.
Presentation Suggestions
When ready to serve, arrange the Frankenstein Rice Krispie treats on a spooky platter. Utilizing Halloween-themed decorations, such as small pumpkins or spider web accents, creates an alluring visual centerpiece.
Enhancing Festivity
To amplify the festive spirit, consider using additional Halloween-themed decorations around the treats. This could include colorful candies, plastic spiders, or themed napkins, which can all draw attention and excitement from your guests.
Conclusion
The Spooktacular Frankenstein Rice Krispie Treats are enticingly chewy and crispy, enhanced by the playful addition of chocolate and spooky decorations. With a total preparation time of one hour, these treats make for a fun and festive addition to any Halloween gathering. Their unique texture, delightful appearance, and easy preparation create a memorable treat for all ages.
Spooktacular Frankenstein Rice Krispie Treats Recipe
Ingredients
- 6 cups Rice Krispies cereal
- 4 cups mini marshmallows
- 3 tablespoons unsalted butter
- 1 teaspoon vanilla extract
- to taste Green food coloring
- to taste Black chocolate melting wafers or dark chocolate chips
- to taste Candy eyes
- to taste Edible black glitter or sprinkles
- 1 Wax paper or parchment paper
Instructions
- Line a 9x13 inch baking dish with wax paper or parchment paper.
- Melt the butter in a large saucepan over low heat, then add the mini marshmallows and stir until smooth.
- Remove from heat and stir in the vanilla extract and green food coloring until uniform.
- Fold in the Rice Krispies cereal until evenly coated.
- Press the mixture firmly into the prepared baking dish.
- Allow to cool completely at room temperature for about 30 minutes.
- Lift the treats out of the pan and cut into rectangles or fun shapes.
- Melt the black chocolate in intervals, then dip or drizzle over the treats.
- Add candy eyes while the chocolate is still warm.
- Let the chocolate set for about 15 minutes before serving.