

Introduction
Crafting the perfect chocolate chip cookie is a rite of passage for many bakers. These Heavenly Chocolate Chip Cookies are a delightful treat that evokes memories of warmth and comfort. With their golden edges, soft centers, and melty chocolate chips, these cookies are a true standout. They are perfect for any occasion, whether you’re hosting a gathering, surprising family after school, or simply indulging in a sweet craving at home.
The simplicity of the recipe allows even novice bakers to achieve great results. By following a few careful steps, you can create cookies that not only satisfy your sweet tooth but also fill your kitchen with an irresistible aroma. The blend of ingredients comes together to create a chewy texture that melts in your mouth, making each bite an experience to savor.
Baking cookies brings joy and nostalgia; it’s hard not to associate the creation of chocolate chip cookies with childhood memories of baking with family or running home from school for a freshly baked treat. These Heavenly Chocolate Chip Cookies are designed to not only evoke those memories but also to foster new ones.
Recipe Overview
– Total Time: Approximately 22–25 minutes (includes baking and cooling)
– Yield/Servings: Not specified in the recipe
– Difficulty: Not specified in the recipe
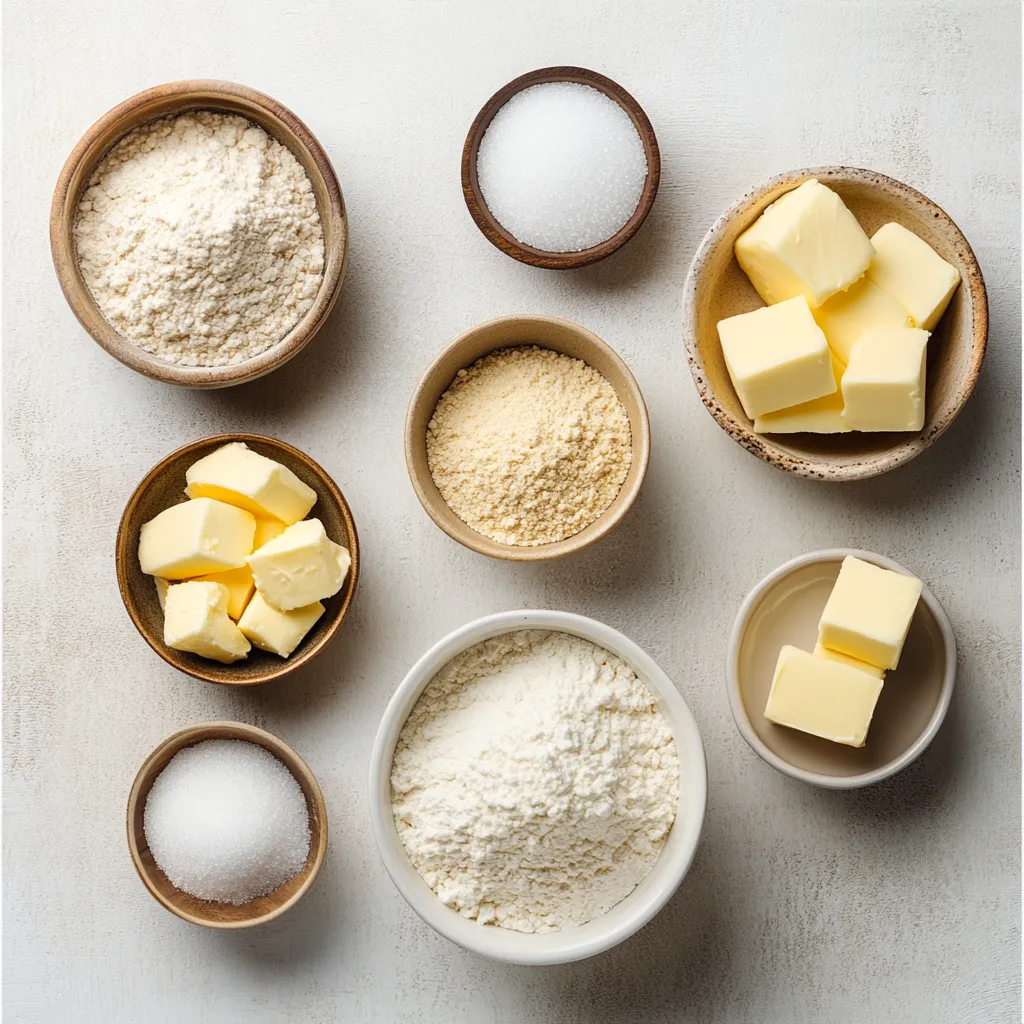
Ingredients
– 2 1/4 cups all-purpose flour
– 1/2 teaspoon baking soda
– 1 cup unsalted butter, softened to room temperature
– 1/2 cup granulated sugar
– 1 cup packed light brown sugar
– 1 teaspoon salt
– 2 teaspoons pure vanilla extract
– 2 large eggs
– 2 cups semi-sweet chocolate chips
– 1 cup chopped nuts (optional)
Instructions
1. Preheat your oven to 350°F (175°C). Line two baking sheets with parchment paper to prevent sticking.
2. In a medium bowl, whisk together the all-purpose flour and baking soda. Set this mixture aside.
3. In a large mixing bowl, cream together the softened unsalted butter, granulated sugar, and packed light brown sugar until the mixture is light and fluffy. This should take about 2-3 minutes with a hand mixer or stand mixer.
4. Add the salt, pure vanilla extract, and eggs to the butter mixture. Beat until well combined and smooth.
5. Gradually add the flour mixture to the wet ingredients, mixing until just combined. Be careful not to overmix.
6. Fold in the semi-sweet chocolate chips and, if using, the chopped nuts until evenly distributed throughout the dough.
7. Using a spoon or cookie scoop, drop rounded tablespoons of dough onto the prepared baking sheets, leaving space between each cookie for spreading.
8. Bake in the preheated oven for 10-12 minutes, or until the edges are golden brown but the centers remain soft. Remove from the oven and allow to cool on the baking sheets for 5 minutes before transferring to wire racks to cool completely.
Preparation Steps
Proper preparation is essential in creating the best cookies. Follow these steps closely.
Preheating the Oven
Preheating your oven to 350°F (175°C) is crucial for achieving even baking. An adequately preheated oven ensures that your cookies will spread appropriately and bake uniformly, avoiding any raw or undercooked centers. Make sure to check the accuracy of your oven’s temperature with an oven thermometer if possible, as some ovens can be off by a significant degree.
When placing your baking sheets in the oven, consider the placement; placing them in the center of the oven allows for optimal heat circulation. It’s advisable to rotate the baking sheets halfway through the baking time to ensure that both trays receive equal heat exposure.
Mixing Dry Ingredients
To prepare your cookie dough, the first step is mixing the dry ingredients, which includes all-purpose flour and baking soda. In a medium bowl, whisk these together to ensure they are thoroughly combined. This step is essential because it allows the baking soda to be evenly distributed throughout the flour. The aeration achieved by whisking starts the leavening process, which helps create a light texture in your cookies.
You may choose to sift the flour before measuring, as some bakers find this method helps decrease any potential clumps. While it’s not strictly necessary, sifting does help create a finer consistency and can lead to even more tender cookies.
Creaming Butter and Sugars
The creaming stage is a pivotal moment in cookie-baking that greatly impacts the texture and taste of the final product. In a large mixing bowl, combine your softened unsalted butter, granulated sugar, and packed light brown sugar. Using a hand mixer or stand mixer fitted with a paddle attachment, beat these ingredients together on medium speed for about 2-3 minutes.
This process incorporates air into the mixture, resulting in a light and fluffy texture. This is key for achieving that perfect cookie structure. Ensure the butter is softened to room temperature before beginning; it should leave a slight indentation when pressed but not feel oily or melted. If you find your butter is too hard, you can cut it into smaller chunks or microwave it in short intervals to soften it, ensuring that it does not melt.
Continuing with this foundational technique will guide you toward creating delectable, heavenly cookies that leave everyone wanting more.

Duration of Mixing
Achieving the perfect creaming of butter and sugars is critical for the success of your chocolate chip cookies. The ideal duration for creaming is approximately 2 to 3 minutes. This process incorporates air into the mixture, resulting in a lighter and fluffier final cookie. Significantly, take the time to scrape down the sides of the bowl halfway through to ensure all ingredients are evenly mixed.
Incorporating Eggs and Vanilla
When incorporating the eggs and vanilla extract into the creamed butter mixture, it is essential to beat them until fully integrated. This solid emulsification is accomplished by mixing for an additional 1 to 2 minutes after adding these ingredients. The role of the eggs is crucial: they not only add moisture but also help stabilize the batter by emulsifying the fats. Properly incorporating air through vigorous mixing helps achieve a tender, airy texture in the finished cookies.
Combining Dry and Wet Ingredients
To combine the flour mixture with the wet ingredients successfully, add the flour in several incremental stages rather than all at once. Start by adding about one-third of the flour mixture at a time, mixing gently after each addition until just combined. Signs of a well-combined dough include a slightly sticky texture with no dry patches visible. Be cautious not to overmix, as this can lead to denser cookies due to gluten development.
Folding in Chocolate Chips and Nuts
When it comes to incorporating chocolate chips and optional nuts into your dough, a gentle folding technique is advised. This preserves the integrity of the chocolate chips, preventing them from breaking or becoming overly crushed. Use a rubber spatula to fold in these ingredients, moving from the bottom of the bowl to the top in a circular motion until they are evenly distributed throughout the dough. It’s ideal to ensure that you have roughly equal proportions of chocolate chips and nuts, if used, for a balanced flavor in every bite.
Shaping the Cookies
Portioning the Dough
When it comes to portioning the dough, you may opt between using a spoon or a cookie scoop. A cookie scoop can provide uniformity in size, resulting in cookies that bake evenly. Ideally, each portion should be about 2 tablespoons in size for a generous cookie. Remember, larger cookies will require a longer baking time, so adjustments may be necessary depending on the size chosen.
Arranging on Baking Sheets
Spacing your cookie dough balls on the baking sheets is pivotal for successful baking. Aim for at least 2 inches of space between each portion to allow for spreading. Improper spacing may lead to cookies merging during baking, resulting in irregular shapes. Carefully arranging them on the baking sheets not only aids in achieving a beautiful cookie shape but also ensures proper airflow around each cookie as they bake.
Baking the Cookies
Temperature and Timing
Preheating your oven to 350°F (175°C) is a vital step that should not be overlooked. The baking time will vary slightly, but generally, it should not exceed 12 minutes. Cookies are often perfectly baked when their edges are golden brown while the centers appear slightly soft. A tip to identify readiness is to lightly touch the center of a cookie; it should spring back gently without leaving any indentation.
Cooling Process
After baking, the cooling process is crucial as it allows the cookies to set properly. Allow the cookies to rest on the baking sheets for about 5 minutes; this helps to ensure the edges firm up while the centers maintain that desirable chewy texture. Once slightly cooled, transfer them to wire racks where they can cool completely, which will help them achieve their ideal texture.
Optional Presentation Tips
Enhancing Visual Appeal
For visual enhancement, consider sprinkling a pinch of sea salt on top of the cookies immediately after they come out of the oven. This not only adds a decorative touch but also heightens the overall flavor by providing a pleasing contrast to the sweetness of the chocolate. Serve cookies on elegant decorative plates or in rustic baskets lined with parchment paper to elevate the presentation further.
Pairing Suggestions
Consider pairing these chocolate chip cookies with milk or coffee for a delightful accompaniment. The creaminess of the milk complements the sweetness of the cookies exceptionally well, while a rich cup of coffee can provide a beautiful balance, making every morsel thoroughly enjoyable.
Tips for Success
Common Mistakes to Avoid
One common mistake to avoid is overmixing the dough after the addition of flour, as this can lead to tougher cookies. Similarly, navigating the fine line between underbaking and overbaking is essential; under-baked cookies can be unappetizingly gooey, while overbaked cookies can end up dry. Utilizing timers and observing the visual cues of browning will help in finding that perfect balance.
Storing Cookies
Optimal storage is key to maintaining freshness. The best containers for storage are airtight cookie jars or resealable bags, as these can keep cookies soft for several days. For extended shelf life, consider refrigerating or freezing cookies after they have cooled completely. When freezing, ensure they are in a single layer to avoid sticking, and they can typically be enjoyed for up to three months.
Variations of the Classic Recipe
Flavor Infusions
To add a personal touch to your cookies, consider flavor variations such as almond extract or peppermint extract, which can provide a unique twist to your traditional chocolate chip cookies. Additionally, incorporating spices like cinnamon or nutmeg can enhance the flavor profile, offering a delightful warmth.
Dietary Adaptations
If gluten-free adaptations are essential, replacing regular flour with gluten-free all-purpose flour can be effective, typically in a 1:1 ratio. For those seeking vegan alternatives, substituting unsalted butter with a plant-based butter alternative, using flax eggs, and employing non-dairy chocolate can yield satisfying results without compromising flavor.
In summary, these Heavenly Chocolate Chip Cookies possess the ideal blend of textures, featuring crispy edges and soft, gooey centers. The meticulous technique employed during preparation significantly contributes to their delightful taste and perfect consistency. From preparation to final baking, each stage plays a critical role in crafting these beloved treats.

Heavenly Chocolate Chip Cookies Recipe Guide
Ingredients
- 2 ¼ cups all-purpose flour
- ½ teaspoon baking soda
- 1 cup unsalted butter softened
- ½ cup granulated sugar
- 1 cup packed light brown sugar
- 1 teaspoon salt
- 2 teaspoons pure vanilla extract
- 2 large eggs
- 2 cups semi-sweet chocolate chips
- 1 cup chopped nuts optional
Instructions
- Preheat your oven to 350°F (175°C) and line two baking sheets with parchment paper.
- In a medium bowl, whisk together the all-purpose flour and baking soda, then set aside.
- In a large mixing bowl, cream together the softened butter, granulated sugar, and brown sugar until light and fluffy.
- Add the salt, vanilla extract, and eggs to the butter mixture, beating until well combined.
- Gradually mix in the flour mixture until just combined, being careful not to overmix.
- Fold in the chocolate chips and optional nuts until evenly distributed.
- Drop rounded tablespoons of dough onto the prepared baking sheets, leaving space between each cookie.
- Bake for 10-12 minutes until edges are golden brown and centers are soft.
- Allow to cool on baking sheets for 5 minutes before transferring to wire racks.