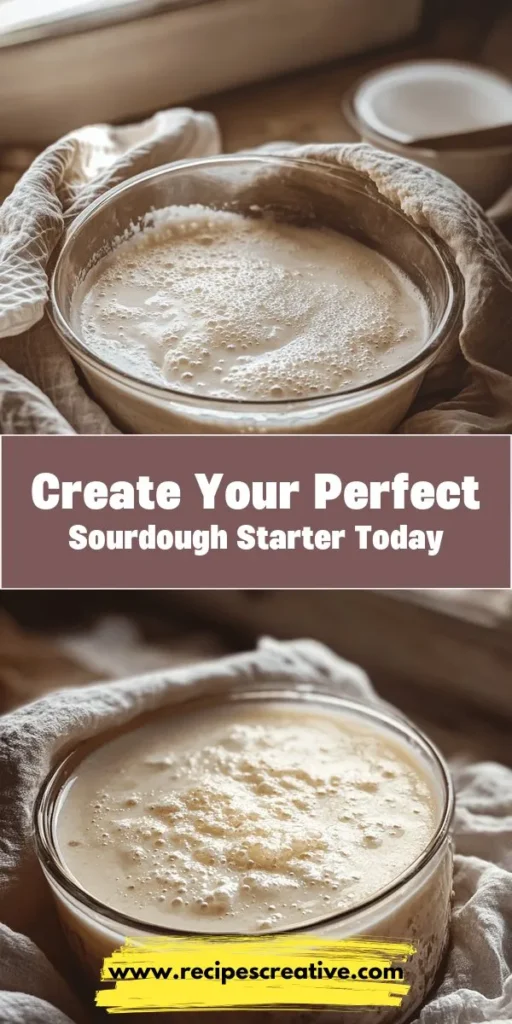
Introduction to Sourdough Magic: The Perfect Starter
For anyone eager to embark on the journey of sourdough baking, understanding the foundational element of this art form—the sourdough starter—is absolutely essential. A sourdough starter is more than just a mixture of flour and water; it is a living culture that harnesses the power of wild yeast and beneficial bacteria present in the environment. This unique combination is what sets sourdough apart from other types of bread, imparting a depth of flavor and a distinctive texture. In this article, we will delve into the world of sourdough starters, providing you with a comprehensive guide to creating the perfect starter from scratch. Whether you are a novice baker or someone with more experience, our step-by-step instructions and insights into the science of fermentation will equip you with the knowledge needed to master this delightful craft.
Understanding Sourdough Starters
The Importance of a Sourdough Starter
The sourdough starter is the backbone of any sourdough bread. Unlike commercial yeast, which is a single strain of yeast that works quickly to leaven bread, wild yeast thrives in a variety of environments and contributes to the unique characteristics of your sourdough. The presence of wild yeast is crucial because it not only helps the dough rise but also plays a significant role in the flavor development of the bread.
When you use a sourdough starter, you invite a diverse community of microorganisms into your baking. This includes not only yeast but also lactic acid bacteria, which contribute tangy flavors and enhance the bread’s texture. The resulting bread has a complex taste profile, with a delightful balance of acidity and sweetness that is often missing in bread made with commercial yeast.
How Wild Yeast and Bacteria Work Together
The science behind sourdough fermentation is fascinating and involves a delicate interplay between wild yeast and bacteria. When you mix flour and water to create your starter, you are essentially providing an environment for these microorganisms to flourish. Over time, the wild yeast begins to consume the sugars in the flour, producing carbon dioxide gas as a byproduct. This gas is what causes the dough to rise, resulting in a light and airy loaf of bread.
Simultaneously, the lactic acid bacteria in the starter ferment the sugars, producing lactic acid and acetic acid. These acids not only contribute to the tangy flavor of sourdough but also help to strengthen the gluten structure, resulting in a chewy texture. This dual fermentation process is what makes sourdough so unique and beloved by bakers around the world.
Ingredients for Your Sourdough Starter
Creating a successful sourdough starter begins with the right ingredients. While the process is simple, the ingredients you choose can significantly impact your starter’s success.
Essential Ingredients for a Successful Starter
1. Flour: The type of flour you use will affect the flavor and activity of your starter. All-purpose flour is a common choice for beginners due to its availability and ease of use. However, whole wheat flour is often recommended for starting a sourdough culture because it contains more nutrients and wild yeast, which can help jumpstart the fermentation process. Many bakers eventually transition to using a blend of both flours for optimal results.
2. Water: The quality of water is equally important. Filtered or bottled water is preferred because it is free from chlorine and other chemicals that can inhibit yeast growth. If you must use tap water, let it sit out for at least 24 hours to allow any chlorine to dissipate.
3. Optional Ingredients: Some bakers choose to incorporate a small amount of existing sourdough starter or even a pinch of commercial yeast into their mixture to kickstart the fermentation process. While this is not necessary, it can be helpful for those who are anxious about their starter not developing properly.
Step-by-Step Instructions to Create Your Sourdough Starter
Now that you understand the importance of the sourdough starter and have gathered your ingredients, it’s time to dive into the step-by-step process of creating your own starter. This process usually takes about 5 to 7 days, during which you will monitor and feed your starter to cultivate a robust culture.
Day 1: Combining Ingredients for the First Time
On the first day, you will create your initial mixture of flour and water. The key here is to achieve the right texture—your mixture should resemble a thick pancake batter.
1. Mixing Flour and Water: In a clean glass or plastic container (avoid metal containers as they can react with the acids formed during fermentation), combine 100 grams of flour (either all-purpose or whole wheat) with 100 grams of filtered water. Stir until there are no dry clumps, and the mixture is well combined. It is essential to mix thoroughly to ensure that the flour is adequately hydrated.
2. Cover and Store: After mixing, cover the container loosely with a lid or cloth to allow airflow while preventing contaminants from entering. Place the container in a warm environment, ideally between 70°F to 75°F (21°C to 24°C), where it will remain undisturbed for 24 hours.
3. Importance of Cleanliness and Container Choice: Throughout the process, cleanliness is paramount. Make sure all utensils, containers, and surfaces are thoroughly cleaned to prevent unwanted bacteria from interfering with your starter. Using a clear container can also help you observe the fermentation process as it progresses.
Day 2: Checking for Activity and Feeding the Starter
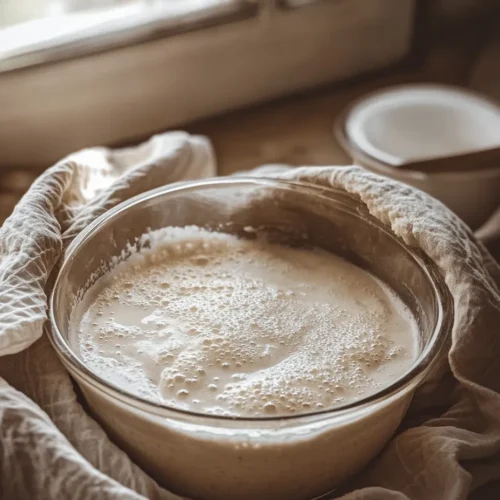
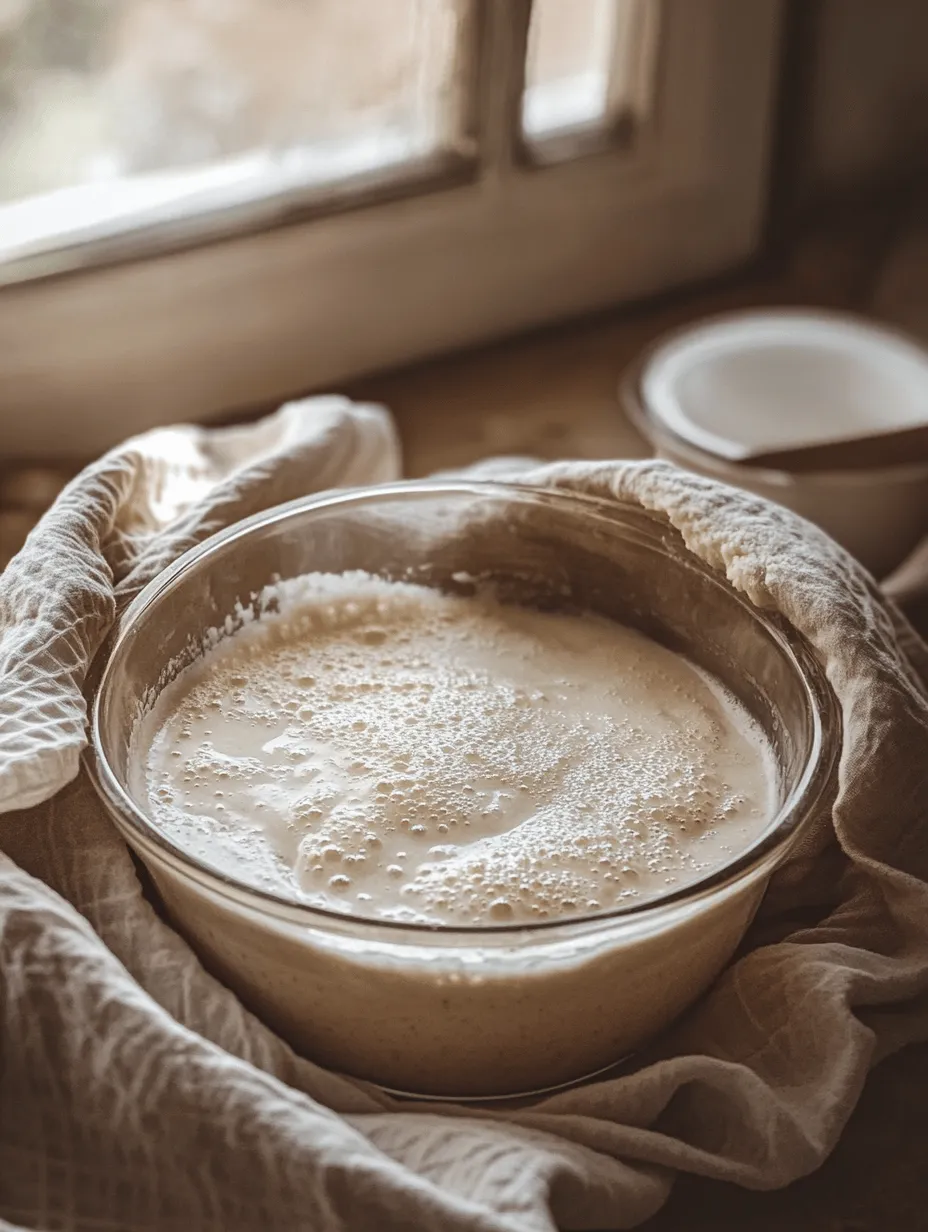
By the second day, you may begin to notice some activity in your starter. This could include small bubbles forming on the surface or a slight increase in volume, indicating that the wild yeast is starting to wake up.
1. What to Look For: Take a moment to observe your starter. Look for signs of bubbles, which indicate that fermentation is occurring. You may also notice a pleasant, slightly tangy aroma. If you see no signs of activity, don’t worry—this is common for a first-time starter, and it may take a few days for the yeast to establish itself.
2. Properly Discarding and Feeding the Mixture: To keep your starter healthy and thriving, you will need to feed it regularly. On Day 2, discard about half of your starter (approximately 100 grams), and then feed it with 100 grams of fresh flour and 100 grams of filtered water. Stir well to combine, cover loosely, and return it to its warm spot for another 24 hours. This feeding process not only provides fresh nutrients for the yeast but also helps to manage its acidity levels.
As you proceed through the upcoming days, you will continue to monitor your starter, discarding and feeding it regularly, until it becomes bubbly, active, and ready for baking. Stay tuned for the next section, where we will explore the subsequent days of the sourdough starter journey and provide you with additional insights and techniques for perfecting your starter.

Days 3 to 7: Daily Feeding Routine
As you progress with your sourdough starter, the feeding routine becomes crucial for developing a strong, active culture. During the days 3 to 7, you should notice significant changes in your starter’s texture, smell, and overall activity. This stage requires careful observation and consistent feeding practices.
Observing Changes in Your Starter
By day 3, you should see some bubbles forming on the surface of your starter, indicating that fermentation is taking place. As the days go on, the starter will rise and fall in volume, which is a good sign that the wild yeasts and bacteria are working together. Here are some key observations to make during this period:
1. Bubbles: Look for both small and large bubbles throughout the mixture. The presence of bubbles shows that carbon dioxide is being produced, a byproduct of fermentation.
2. Volume Increase: Each time you feed your starter, it should ideally double in size within a few hours. This is a strong indicator that your starter is becoming more active.
3. Aroma: The smell of your starter will evolve from a mild floury scent to a tangy, slightly sour smell. This indicates the development of lactic acid bacteria, which are essential for sourdough flavor.
Tips for Maintaining Consistency in Feeding
To ensure your starter thrives, follow these tips for consistency:
– Same Time Daily: Feed your starter at the same time each day to establish a routine. This helps the yeast and bacteria become accustomed to a schedule.
– Use a Scale: For accuracy in feeding, use a kitchen scale to measure your flour and water. This ensures that you maintain the correct ratios and ultimately leads to a healthier starter.
– Temperature Control: Maintain a stable temperature for your starter, ideally between 70°F and 75°F (21°C to 24°C). If your kitchen is cooler, consider placing your starter in a slightly warmer spot, such as near the stove or on top of the refrigerator.
– Hydration Level: Keep the hydration level consistent. If you started with a 1:1:1 ratio (equal parts flour, water, and starter), continue using that ratio unless you plan to adjust for specific recipes later on.
Day 7: Knowing When Your Starter is Ready
As you reach Day 7, it’s important to assess whether your starter is ready for baking. Knowing the signs of a mature starter can save you from disappointment in your baking endeavors.
Signs of a Mature Starter: Size and Smell
1. Doubling in Size: A mature starter should reliably double in size within 4 to 6 hours of feeding. If it’s doing this consistently, that’s a great sign of activity.
2. Pleasant Aroma: The smell should be tangy but not overpoweringly sour or unpleasant. If it smells off, it could be a sign of an imbalance in the microbial community.
3. Bubbles and Texture: Your starter should exhibit a network of bubbles, indicating active fermentation. The texture should be thick and somewhat elastic, a sign that it’s developing the right balance of yeast and bacteria.
How to Test Your Starter’s Readiness for Baking
To test your starter before you start making sourdough bread, you can perform the “float test”:
1. Take a Small Sample: Use a spoon to scoop out a small amount of your starter.
2. Drop in Water: Fill a glass of water and gently drop the sample into it.
3. Observe: If the starter floats, it is ready for baking! If it sinks, it may need more time or another feeding before you can start your bread-making journey.
Maintaining Your Sourdough Starter
Once you’ve established a thriving sourdough starter, it’s important to know how to maintain it long-term. You can choose from different storage options based on your baking frequency.
Long-term Storage Options
– Refrigeration vs. Room Temperature: If you plan to bake frequently (every few days), keeping your starter at room temperature is ideal. For less frequent bakers, refrigeration is a better choice. This slows down fermentation and reduces the need for daily feedings.
– Feeding Schedule for Different Storage Methods:
– Room Temperature: Feed your starter once every 24 hours, discarding half before each feeding.
– Refrigeration: Feed your starter once a week. Before using it, take it out, let it come to room temperature, and feed it at least once to reactivate the yeast.
Reviving a Dormant Starter
If your starter has been neglected or not fed for a while, it may appear dormant. Recognizing the signs that your starter needs attention can help you revive it effectively.
1. Signs That Your Starter Needs Attention: Look for a lack of bubbles, a significant drop in volume, or an unpleasant smell.
2. Step-by-Step Guide to Reactivating Your Starter:
– Feed the Starter: Remove it from the refrigerator and let it sit at room temperature for a few hours. Discard half, then feed it with equal parts flour and water.
– Repeat Feeding: For the next few days, continue to feed it daily until you see signs of activity, such as bubbling and rising.
– Monitor Progress: After several feedings, it should regain its strength and be ready for baking.
Common Challenges and Solutions
While the journey of maintaining a sourdough starter can be rewarding, it may also present some challenges. Here are some common issues and how to troubleshoot them.
Troubleshooting Common Issues
1. No Bubbles After a Few Days: What to Do
– Ensure that your starter is kept at a warm temperature, as cold conditions can slow down fermentation.
– Check the quality of your flour; fresh, unbleached flour is preferable as it contains more natural yeast.
– Consider using a different type of flour, such as whole wheat or rye, which can boost fermentation due to their higher nutrient content.
2. A Starter That Smells Off: Understanding Fermentation Problems
– An off smell can indicate that your starter has developed unwanted bacteria. If it has a strong, unpleasant odor, it may be best to discard it and start over.
– If it smells slightly sour but not offensive, feeding it more frequently may help restore balance.
Adjusting Your Starter for Different Recipes
Once you have a healthy starter, you can use it for various baked goods beyond just sourdough bread.
1. Modifying Hydration Levels for Various Doughs: Depending on the recipe, you may need to adjust the hydration level. For example, a wetter dough will require a more liquid starter, while a stiff dough may benefit from a thicker starter.
2. Using Your Starter in Other Baked Goods: Your sourdough starter can be used in pancakes, waffles, muffins, and even pizza dough. The tangy flavor it imparts can elevate these dishes, making them more delicious.
Conclusion: Embracing the Sourdough Journey
Creating your own sourdough starter is an enriching experience that connects you to traditional baking practices. It requires patience, observation, and a touch of love, but the rewards are plentiful. With a thriving starter, you’ll be well on your way to baking delicious, homemade sourdough bread that will impress family and friends.
Embrace the journey of sourdough baking, and let your creativity flourish in the kitchen. Enjoy experimenting with different recipes, learning from each batch you bake, and sharing the fruits of your labor with loved ones. Whether it’s a warm loaf of bread or a stack of fluffy pancakes, your sourdough starter will be the foundation of many delightful meals to come. Happy baking!