
When it comes to quick and healthy meal options, Crispy Air Fryer Tilapia Delight stands out as a delicious choice that suits a variety of dietary preferences. This dish combines the mild flavor of tilapia with a crispy, golden crust, all achieved in the convenience of an air fryer. The air frying method has surged in popularity over recent years, and for good reason: it allows home cooks to achieve that coveted crunchy texture without the excess oil typically associated with traditional frying. This means you can enjoy your favorite crispy fish without compromising your health goals.
Tilapia, a versatile fish known for its delicate taste and flaky texture, is a fantastic ingredient for this recipe. Its mild flavor makes it adaptable, allowing it to absorb a variety of seasonings and spices, which is perfect for families and individuals looking to satisfy different palates. Additionally, tilapia is widely regarded as a sustainable fish option, making it a responsible choice for health-conscious consumers. Whether you are following a low-calorie diet, looking for a source of lean protein, or simply wanting a tasty dinner, Crispy Air Fryer Tilapia Delight is sure to please.
Understanding the Ingredients
To create this delightful dish, it’s essential to understand the role each ingredient plays in the recipe. The combination of fresh tilapia fillets, crunchy panko breadcrumbs, and a carefully curated blend of spices not only enhances the flavor but also contributes to the overall appeal of the meal.
Tilapia Fillets
At the heart of this recipe are tilapia fillets. Renowned for their mild flavor, tilapia is a great fish for those who may be hesitant about seafood. It’s rich in protein, low in calories, and contains essential nutrients like omega-3 fatty acids, which are beneficial for heart health. Moreover, tilapia is a sustainable seafood choice, often farmed in environmentally responsible ways. When selecting tilapia, look for fresh, firm fillets with a mild aroma, and avoid any that smell overly fishy.
Panko Breadcrumbs
Next up are panko breadcrumbs, which are crucial for achieving that satisfying crunch. Unlike traditional breadcrumbs, panko is made from crustless bread that is processed into large, airy flakes. This unique texture allows for a lighter, crispier coating when air-fried, contributing to the delightful crunch that elevates the tilapia. Additionally, panko breadcrumbs are often less dense than regular breadcrumbs, allowing them to adhere better to the fish without becoming soggy.
All-Purpose Flour
All-purpose flour plays a vital role in the breading process, providing a base layer for the coating. It helps to dry the surface of the fish, allowing the egg mixture and breadcrumbs to stick more effectively. Flour also contributes to the overall texture of the crust when it’s air-fried, ensuring that it becomes crispy and golden. For those with gluten sensitivities, alternatives like almond flour or gluten-free breadcrumbs can be utilized.
Eggs and Dijon Mustard
The combination of eggs and Dijon mustard serves as a binding agent in this recipe. Eggs provide moisture and help the breadcrumbs adhere to the tilapia, while Dijon mustard adds a subtle tang and depth of flavor. This layer not only enhances the taste but also provides an extra dimension to the crust. The mustard can also be adjusted according to personal preference; for a milder flavor, you can reduce the amount or opt for yellow mustard instead.
Spices and Seasonings
The spices and seasonings in this recipe are where the magic happens. A blend of garlic powder, onion powder, smoked paprika, and dried oregano creates a flavor profile that elevates the tilapia beyond just a basic breaded fish.
– Garlic powder and onion powder add savory depth, enhancing the overall taste.
– Smoked paprika introduces a subtle smokiness that pairs beautifully with the fish.
– Dried oregano contributes an aromatic quality that complements the dish.
These spices not only make the fish flavorful but also offer health benefits; for example, garlic is known for its anti-inflammatory properties, while oregano is rich in antioxidants.
Setting Up Your Breading Station
To streamline the cooking process and ensure an efficient workflow, it’s essential to set up a proper breading station. This organized approach will save time and make the breading process much smoother.
Preparation Steps
Begin by gathering three shallow dishes, which will be used for the coating process: one for seasoned flour, one for the egg mixture, and one for the panko breadcrumbs. This setup will allow you to easily dredge the fish fillets without creating a messy workspace.
– First Dish: Fill the first shallow dish with all-purpose flour and season it with a pinch of salt and pepper. This seasoning is crucial, as it infuses the fish with flavor from the very beginning.
– Second Dish: In the second dish, whisk together eggs and Dijon mustard until smooth. This egg mixture will help the panko breadcrumbs adhere to the tilapia.
– Third Dish: Finally, pour the panko breadcrumbs into the third dish. If desired, you can mix in additional spices to the breadcrumbs for extra flavor.
Seasoning the Flour
The flour’s seasoning is a critical step that shouldn’t be overlooked. By adding salt and pepper to the flour, you enhance the foundational flavor of the dish. This initial layer of seasoning will ensure that every bite of the tilapia is flavorful, not just the outer coating.
Mixing the Egg and Mustard
The egg and mustard mixture is where the binding magic happens. By whisking these ingredients together, you create a smooth, cohesive mixture that will coat the tilapia fillets. The mustard not only adds flavor but also acts as an emulsifier, helping to create a rich, even coating that clings well to the fish.
Coating the Tilapia Fillets
Once your breading station is set up, it’s time to coat the tilapia fillets. This step is crucial for creating the perfect crispy texture that makes this dish so appealing.
Drying the Fillets
Start by patting the tilapia fillets dry using paper towels. This important step removes any excess moisture, allowing the breading to adhere better. If the fillets are wet, the coating may slide off during the cooking process, leading to uneven breading and less crispy results.
Dredging Technique
The dredging process involves three simple steps:
1. Flour Coating: Take a tilapia fillet and dip it into the seasoned flour, ensuring it is fully coated. Shake off any excess flour to prevent clumping.
2. Egg Mixture: Next, transfer the flour-coated fillet to the egg and mustard mixture. Ensure that both sides are well-coated, as this layer is essential for the breadcrumbs to stick.
3. Panko Coating: Finally, press the fillet into the panko breadcrumbs, ensuring an even and thorough coating. Gently press the breadcrumbs onto the surface to create a robust crust that will hold up during cooking.
Pressing the Panko
The final touch in coating your tilapia fillets is pressing the panko breadcrumbs onto the fish. This simple technique ensures that the breadcrumbs adhere firmly, creating a thick and crunchy texture once air-fried. Ensure that the fillets are evenly coated for optimal cooking results. If you find that there are some bare spots, sprinkle additional breadcrumbs over those areas and press down gently.
By following these steps, you’ll prepare your tilapia fillets for a delicious and crispy finish in the air fryer. Stay tuned for the next part of this article, where we will delve into cooking instructions and tips for achieving the best results with your Crispy Air Fryer Tilapia Delight.
Preheating the Air Fryer
Preheating your air fryer is an essential step that should not be overlooked when preparing your crispy air fryer tilapia. By bringing your air fryer to the optimal cooking temperature of 400°F (200°C), you set the stage for perfectly cooked fish with a delectable golden crust. Preheating ensures that the tilapia starts cooking immediately when placed in the basket, promoting even heat distribution. This practice not only enhances the texture but also helps the fish develop that much-desired crispiness.
To preheat your air fryer, simply set it to 400°F (200°C) and allow it to run empty for about 3-5 minutes. This short duration is sufficient for most air fryers to reach the desired temperature. Once preheated, lightly spray the basket with a cooking spray to prevent sticking. This step is crucial, as it aids in achieving a perfectly crispy exterior while making cleanup a breeze. The cooking spray creates a thin layer of oil that not only helps in browning but also ensures that the tilapia fillets release easily from the basket once cooked.
Air Frying the Fish
Now that your air fryer is preheated and ready, it’s time to move on to the air frying process. Start by carefully arranging the tilapia fillets in the air fryer basket. For the best results, lay the fillets in a single layer without overlapping. This arrangement allows hot air to circulate freely around each fillet, promoting even cooking and maximizing crispiness. If you have more fillets than can fit in a single layer, consider cooking them in batches.
Set the timer for 10-12 minutes for cooking the tilapia. It’s important to monitor the cooking time closely, as air fryers can vary in performance. About halfway through the cooking process, around the 5-6 minute mark, gently flip the fillets using a spatula. This action helps ensure that both sides brown evenly and reach that perfect level of crispiness.
To determine if your tilapia is done, use a fork to flake the fish at the thickest part. It should flake easily and appear opaque. If the fish still looks translucent or resists flaking, give it an additional minute or two, checking frequently until done. Remember, overcooking can lead to a dry texture, so keep a close watch.
Serving Suggestions
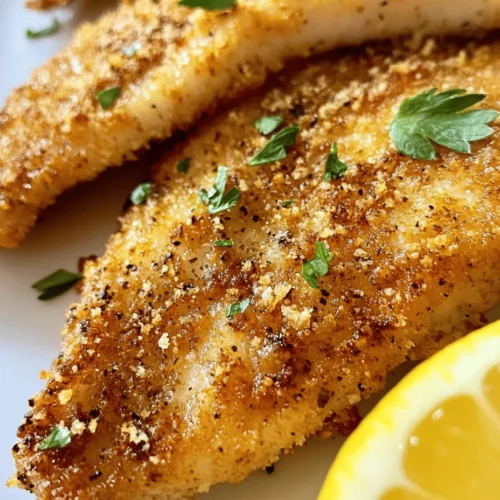
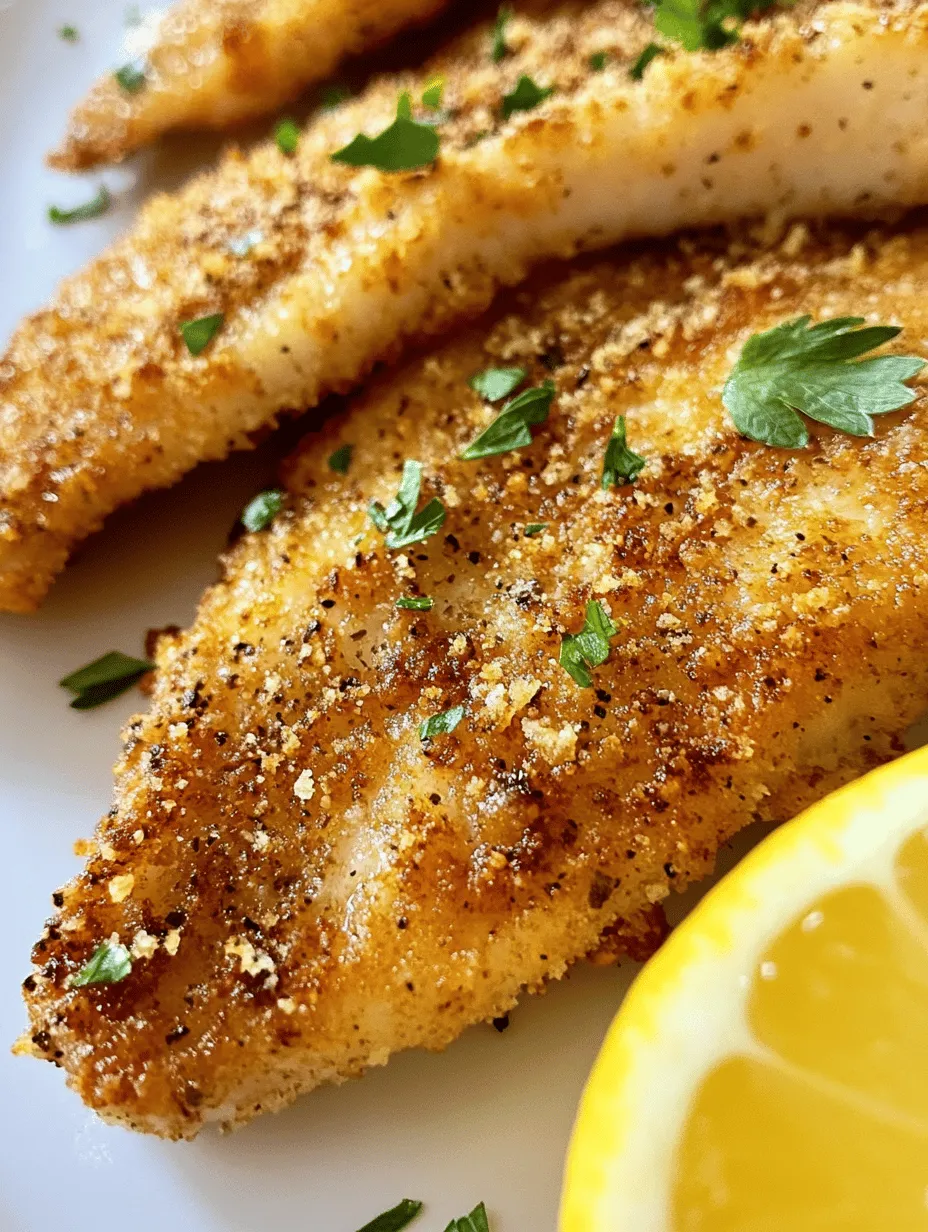
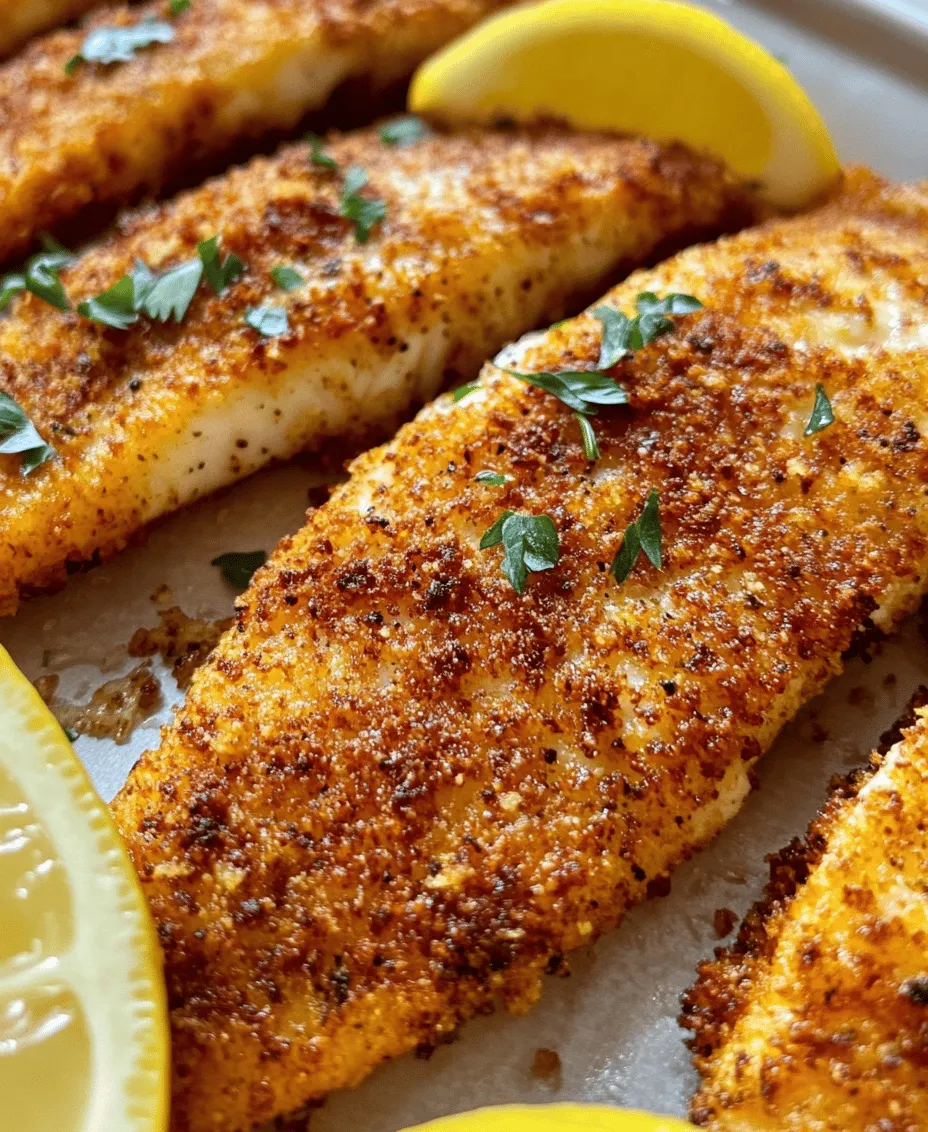
Once your crispy air fryer tilapia is ready, it’s time to think about how to serve this delightful dish. For a well-rounded meal, consider pairing the tilapia with a variety of side dishes. Steamed vegetables, such as broccoli or asparagus, not only add vibrant color but also provide essential nutrients and fiber. Alternatively, you could serve the fish over a bed of fluffy rice or with a fresh salad to complement the meal’s lightness.
To elevate your serving experience, don’t forget to include lemon wedges on the plate. Squeezing fresh lemon juice over the crispy tilapia adds a refreshing contrast that brightens the dish and enhances the fish’s natural flavors. The acidity of the lemon cuts through the richness of the fish, creating a harmonious balance that is both flavorful and satisfying.
Nutritional Information
When it comes to health, crispy air fryer tilapia is not only delicious but also packed with nutritional benefits. A standard serving of tilapia (about 4 ounces) contains approximately 145 calories, making it a low-calorie protein option compared to other meats. The macronutrient breakdown is typically around 30 grams of protein, 2 grams of fat, and negligible carbohydrates. This makes tilapia an excellent choice for those seeking to maintain or lose weight while ensuring adequate protein intake.
Moreover, tilapia is a great source of essential nutrients, including omega-3 fatty acids, which are beneficial for heart health. The fish is also rich in vitamins and minerals such as vitamin B12, niacin, phosphorus, and selenium. These nutrients play vital roles in energy metabolism, cellular function, and immune support, making tilapia a nutritious addition to your diet.
Conclusion: Enjoying Your Crispy Air Fryer Tilapia Delight
In summary, the crispy air fryer tilapia delight is a perfect example of how you can enjoy a quick, nutritious, and flavorful meal right at home. The simplicity of the recipe, combined with the health benefits of tilapia, makes it a go-to option for busy weeknights or casual gatherings. With just a few ingredients and minimal preparation time, you can create an impressive dish that satisfies both the palate and the body.
As you experiment with this recipe, feel free to explore variations by adding your favorite herbs and spices to the seasoning blend. The versatility of air fryer recipes opens up a world of possibilities, allowing you to modify the dish to match your taste preferences. Whether you pair the tilapia with vibrant sides or explore different flavor profiles, the air fryer remains a healthy alternative to traditional frying methods.
So, gather your ingredients, preheat your air fryer, and get ready to savor a crispy, flavorful tilapia delight that’s sure to become a staple in your kitchen. Enjoy the satisfaction of preparing a delightful meal that not only nourishes but also brings joy to your dining experience. Give it a try today and discover just how easy and rewarding air frying can be!