
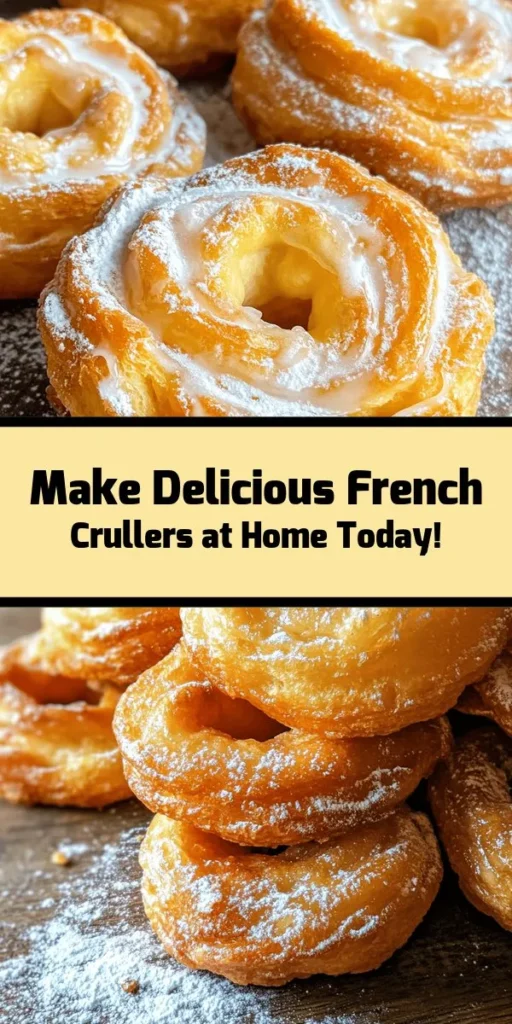
Introduction to Delightful French Crullers
In the world of pastries, few treats can rival the elegance and charm of French crullers. Renowned for their light, airy texture and sweet glaze, these delightful doughnuts have captured the hearts of pastry lovers worldwide. The experience of biting into a freshly made cruller is nothing short of sublime; the outer layer is crisp, while the inside is soft and tender, creating a harmonious contrast that leaves one wanting more.
But what makes French crullers particularly special? Beyond their delicious taste, they embody a rich culinary tradition that dates back centuries. Making crullers at home not only allows you to enjoy this classic treat fresh out of the fryer, but it also invites you into the intricate world of French pastry-making—a rewarding experience for any home cook or baking enthusiast.
Understanding French Crullers: A Culinary Journey
The origins of crullers can be traced back to France, where they were initially made as a way of repurposing leftover dough. The name “cruller” is believed to derive from the Dutch word “krullen,” meaning “to curl,” which reflects the distinctive twisted shape of the pastry. Traditionally, crullers were made using a choux pastry, a method that involves cooking flour and water with butter before incorporating eggs, resulting in a dough that puffs beautifully when fried.
Over time, crullers have evolved and taken on various forms across different cultures. In France, they are often enjoyed as a breakfast pastry or an afternoon treat, served alongside a cup of coffee or tea. Their lightness and sweetness make them a perfect accompaniment to a leisurely morning or a celebratory brunch. The significance of crullers extends beyond their taste; they represent the artistry and craftsmanship of French baking, celebrating the use of quality ingredients and traditional techniques.
As crullers gained popularity beyond France, they found their way into bakeries around the globe, each culture adding its own twist to the classic recipe. From the American cruller, which is often larger and denser, to variations infused with unique flavors and glazes, the adaptability of the cruller is a testament to its universal appeal.
The Allure of Crullers: What Makes Them Special?
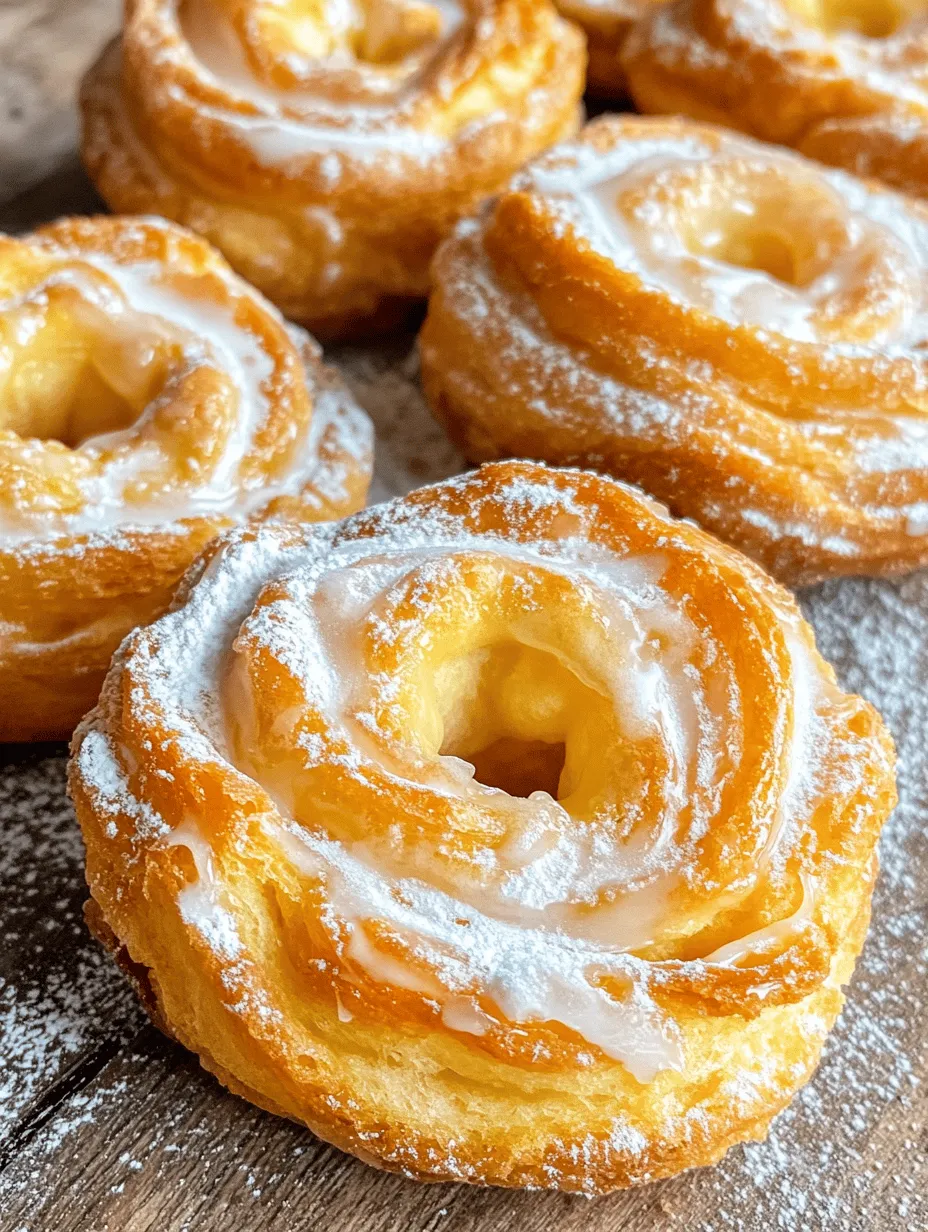
What sets French crullers apart from other pastries is their unique characteristics that come together to create a one-of-a-kind experience. First and foremost is their shape; crullers are typically formed into a twisted ring, which not only looks appealing but also allows for even cooking and a delightful texture. This distinct shape is a defining feature, making crullers instantly recognizable among an array of pastries.
The texture of a cruller is another standout quality. Unlike cake doughnuts, which can be denser and heavier, crullers are made from a light choux pastry that puffs up during frying. This results in an airy, almost ethereal quality that melts in your mouth. The crisp outer layer, achieved through frying, encases a tender, flavorful interior—a combination that is simply irresistible.
Flavor also plays a key role in the allure of crullers. Traditionally, they are flavored with vanilla, but the versatility of this pastry allows for endless variations. Some bakers infuse their crullers with citrus zest, almond extract, or even spices like cinnamon, enhancing the overall flavor profile. The sweet glaze that often adorns crullers adds another layer of taste, providing a glossy finish that is both visually appealing and delicious.
In addition to the classic French cruller, variations exist around the world. For instance, in the United States, the cruller has been adapted into a cake-like version that is denser and often topped with chocolate or maple glaze. Similarly, in other cultures, you might find crullers filled with creams or custards, showcasing the pastry’s versatility and ability to adapt to different culinary traditions.
Ingredient Breakdown for Perfect Crullers
Creating the perfect French cruller requires a careful selection of ingredients, each playing a crucial role in achieving the desired texture and flavor. Let’s break down these essential components:
– Water: The base for the dough, water is crucial for creating the steam that helps the crullers puff up during frying. It also helps dissolve other ingredients, ensuring a smooth dough.
– Unsalted Butter: This ingredient is vital for imparting flavor and richness to the crullers. Using unsalted butter allows you to control the salt level in the recipe, ensuring a balanced taste.
– Salt: A small but important addition, salt enhances the overall flavor of the crullers. It helps to bring out the sweetness and balances the richness of the butter.
– All-Purpose Flour: The backbone of the cruller dough, all-purpose flour provides the necessary structure and consistency. It should be measured accurately for the best results.
– Eggs: Eggs are what make crullers light and airy. They create steam during cooking, which contributes to the puffiness of the pastry, while also adding moisture and richness.
– Vanilla Extract: This ingredient adds depth of flavor and aromatic qualities to the crullers. Vanilla is a classic addition that complements the sweetness of the glaze.
– Oil for Frying: Choosing the right type of oil is essential for frying crullers. A neutral oil with a high smoke point, such as canola or vegetable oil, works best to ensure that the pastries fry evenly without imparting any unwanted flavors.
– Powdered Sugar: Essential for the glaze, powdered sugar dissolves easily to create a smooth, sweet coating that enhances the overall appeal of the crullers.
– Milk: Milk is used to create the perfect glaze consistency. It adds moisture and helps achieve a glossy finish that makes the crullers look irresistible.
Step-by-Step Instructions for Making French Crullers
Now that we’ve explored the allure and ingredients of French crullers, let’s dive into the detailed steps of making them at home. Follow these instructions closely to ensure your crullers turn out perfectly:
Preparing the Dough
1. Boil Water: Start by bringing a pot of water to a boil. You’ll need about 1 cup of water for this recipe.
2. Add Butter and Salt: Once the water is boiling, remove it from the heat and add in the unsalted butter and salt. Stir until the butter has completely melted.
3. Incorporate Flour: Gradually add the all-purpose flour to the pot, stirring continuously. This will create a thick paste known as a “panade.” Keep stirring until the mixture pulls away from the sides of the pot and forms a cohesive ball.
4. Cool the Mixture: Transfer the panade to a mixing bowl and allow it to cool for about 10 minutes. This step is crucial to prevent the eggs from cooking when added.
Cooling and Mixing
5. Add the Eggs: Once the mixture has cooled slightly, start incorporating the eggs one at a time, mixing thoroughly after each addition. This will create a smooth, glossy batter.
6. Mix in Vanilla Extract: After all the eggs have been added, stir in the vanilla extract until well combined. The batter should be thick yet pipeable, resembling a choux pastry consistency.
7. Prepare for Frying: While you finish the dough, set up your frying station. Fill a deep pot or fryer with oil, about 2-3 inches deep, and heat it to 350°F (175°C). Use a thermometer to ensure the oil is at the right temperature for frying.
By following these steps, you are well on your way to creating your own delightful French crullers. The next phase will involve shaping and frying the crullers, which will be covered in the continuation of this recipe article. Stay tuned for the final steps, including glazing and serving your crullers to family and friends!
Piping the Dough: Techniques for Achieving the Perfect Shape
Piping dough for French crullers is a critical step that not only impacts the final appearance but also the texture. To achieve the signature twisted shape of crullers, you’ll need a piping bag fitted with a large star tip (preferably a 1M or 2D tip). This will create the lovely ridges that are characteristic of crullers, allowing for optimal glaze adherence.
Start by filling the piping bag with the prepared dough. It’s crucial not to overfill the bag; a half-full bag allows for better control and precision. Hold the piping bag vertically above your parchment-lined baking sheet, applying even pressure. Begin by piping a small circle to create the base, then move upwards in a spiral motion, gradually creating a twisted shape. The dough should flow effortlessly from the bag, forming a beautiful, continuous ribbon.
When making crullers, it’s essential to keep the piping consistent. Practice piping on a piece of parchment first if you’re new to this technique. Aim for crullers that are about 3-4 inches long. Once piped, refrigerate the crullers for about 15-30 minutes before frying. This chilling process firms up the dough, preventing it from losing its shape during frying.
Frying to Perfection: Maintaining Oil Temperature and Cooking Tips
Frying is where the magic happens. The ideal oil temperature for frying crullers is between 350°F to 375°F (175°C to 190°C). Use a deep skillet or a Dutch oven filled with oil, ensuring you have enough depth to allow the crullers to float freely. A candy or deep-fry thermometer is invaluable for maintaining the correct temperature.
To check if the oil is ready, drop a small piece of dough into the oil. If it sizzles and rises to the surface, the oil is hot enough. If it sinks, the oil needs more heat. If the dough browns too quickly, reduce the heat slightly; if it browns too slowly, increase the heat.
Carefully place a few crullers in the hot oil, ensuring not to overcrowd the pan, which can lower the oil temperature. Fry them for about 3-4 minutes on each side, turning them with a slotted spoon until they achieve a beautiful golden-brown color. The crullers should puff up nicely, creating that airy texture inside.
Once cooked, transfer them to a cooling rack lined with paper towels to drain excess oil. Allow them to cool slightly before glazing.
Glazing: Achieving a Smooth Finish for the Crullers
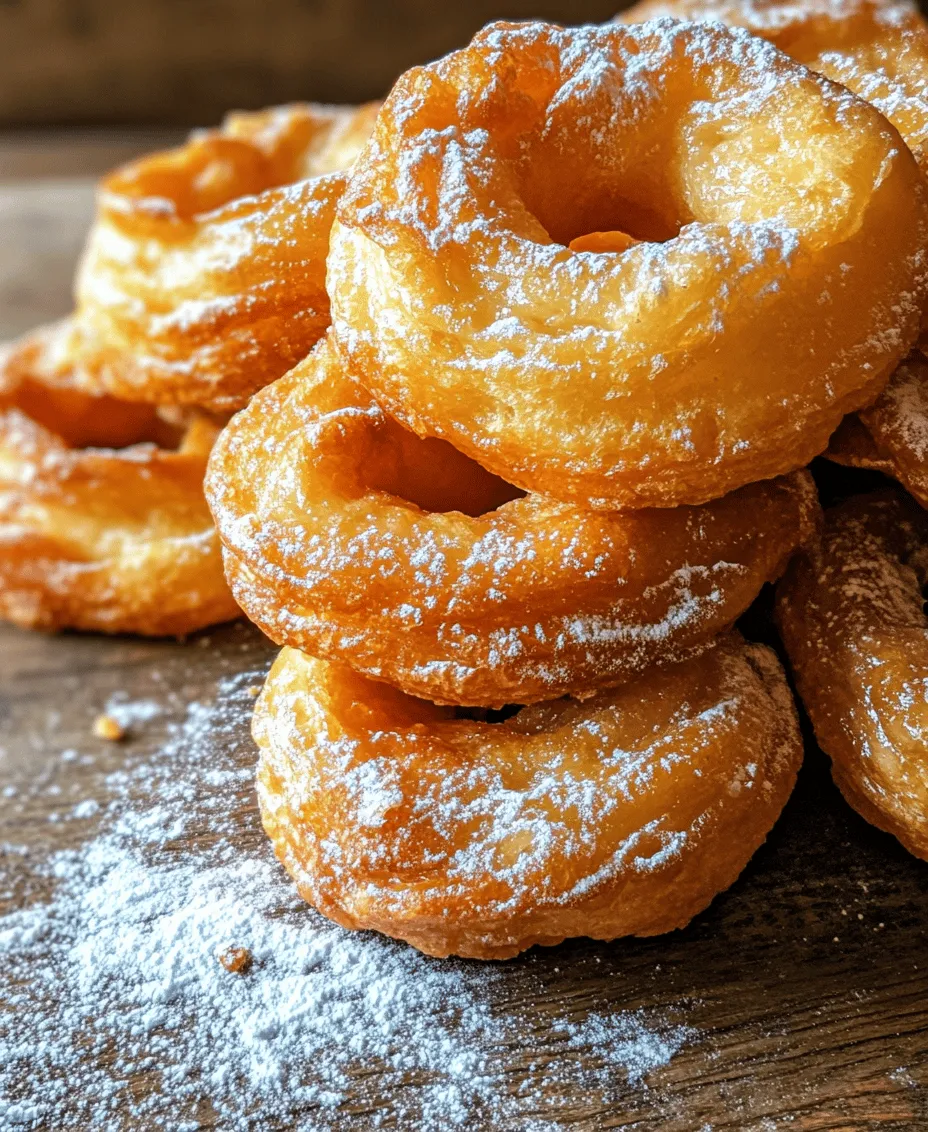
The final touch to your French crullers is the glaze, which adds sweetness and visual appeal. A simple glaze can be made by whisking together powdered sugar and milk or cream until smooth. For a classic vanilla glaze, add a splash of vanilla extract.
To glaze the crullers, dip the tops while they are still warm but not hot, ensuring that they absorb the glaze without causing it to run off. Allow the glaze to set for a few minutes before serving. For added flair, consider drizzling melted chocolate or adding colorful sprinkles on top of the glaze.
Essential Tools and Equipment for Cruller Success
To ensure a successful cruller-making experience, gather the following essential tools and equipment:
– Medium Saucepan: For preparing the dough, a medium saucepan is necessary to combine the ingredients efficiently.
– Mixing Utensils: A sturdy spatula or wooden spoon will help you mix the dough thoroughly.
– Piping Bags and Star Tips: These are crucial for shaping the crullers; a large star tip creates the desired texture.
– Deep Skillet or Dutch Oven: To fry the crullers, you need a vessel deep enough to hold oil and allow for safe frying.
– Slotted Spoon: Ideal for turning the crullers and transferring them from the oil to the cooling rack.
– Cooling Racks: These allow the crullers to cool evenly after frying, preventing sogginess.
The Science Behind Frying: Achieving the Ideal Cruller
Understanding the science of frying is essential for achieving the perfect cruller. The Maillard reaction plays a crucial role in developing flavor and color during the frying process. This complex chemical reaction occurs between amino acids and reducing sugars when exposed to heat, resulting in that coveted golden-brown hue and a rich, toasted flavor.
Maintaining the correct oil temperature is vital. At higher temperatures, the outside of the cruller cooks too quickly, leading to a burnt exterior while leaving the inside uncooked. Conversely, if the oil is too cool, the crullers absorb too much oil, resulting in greasy, soggy pastries. Aim to keep the oil at a steady 350°F to 375°F (175°C to 190°C) for the best results.
Troubleshooting Common Cruller Issues
Even the most experienced bakers encounter challenges when making crullers. Here are some common pitfalls and how to avoid them:
1. Dough Consistency: If your dough is too runny, it may not hold its shape when piped. Ensure you measure your ingredients accurately. Adding a bit more flour can help achieve the right consistency if needed.
2. Frying Temperature: If your crullers are browning too quickly, reduce the heat immediately. Conversely, if they are taking too long to cook, increase the heat slightly. Use a thermometer for precise control.
3. Glazing Mishaps: If your glaze is too thin and runs off the crullers, add more powdered sugar to thicken it. If too thick, a little more milk or cream can help.
4. Crullers Not Puffing Up: This can happen if the oil temperature is too low. Ensure the oil is hot enough before adding the crullers, and avoid overcrowding the pan.
By addressing these issues proactively, you can create a batch of delightful crullers that are sure to impress.
Serving Suggestions and Pairings
French crullers are a delightful treat on their own, but they can also be enhanced with a few serving suggestions. They pair exceptionally well with coffee, tea, or a cold glass of milk, making them an ideal breakfast or afternoon snack.
For a creative twist, consider filling your crullers with flavored creams, custards, or fruit preserves before glazing. A light lemon or raspberry filling can add a refreshing contrast to the sweetness of the glaze.
Presentation matters, especially for special occasions. Arrange your crullers on a decorative plate or tiered stand, and dust them lightly with powdered sugar for an elegant touch. Pairing them with fresh fruit, like berries or citrus slices, not only adds color but also a burst of flavor.
Nutritional Information for Crullers
While French crullers are undoubtedly a treat, it’s essential to be mindful of their nutritional content. Here’s a brief overview per serving (one cruller):
– Calories: Approximately 150-180
– Total Fat: 8-10 grams
– Saturated Fat: 1-2 grams
– Cholesterol: 25-30 mg
– Sodium: 50-70 mg
– Total Carbohydrates: 20-25 grams
– Dietary Fiber: 0-1 gram
– Sugars: 5-8 grams
– Protein: 2-3 grams
Enjoy these delightful pastries in moderation, as they are best savored as an occasional indulgence.
Conclusion: The Joy of Making French Crullers at Home
Creating homemade French crullers is a rewarding culinary experience. The process, from mixing the dough to piping, frying, and glazing, invites creativity and skill in the kitchen. The satisfaction of pulling warm, perfectly fried crullers from the oil and witnessing the glaze transform them into a work of art is unparalleled.
As you embark on this delightful baking journey, remember that practice makes perfect. Each batch is an opportunity to refine your technique and discover your unique take on this classic pastry. So roll up your sleeves, gather your ingredients, and enjoy the sweet rewards of your labor with friends and family. Indulge in the joy of homemade French crullers, celebrating the delightful flavors and textures that make them a beloved treat.
