Introduction
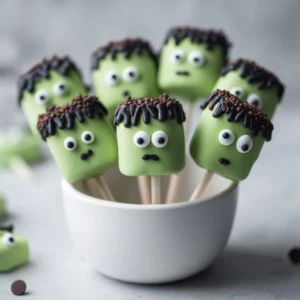
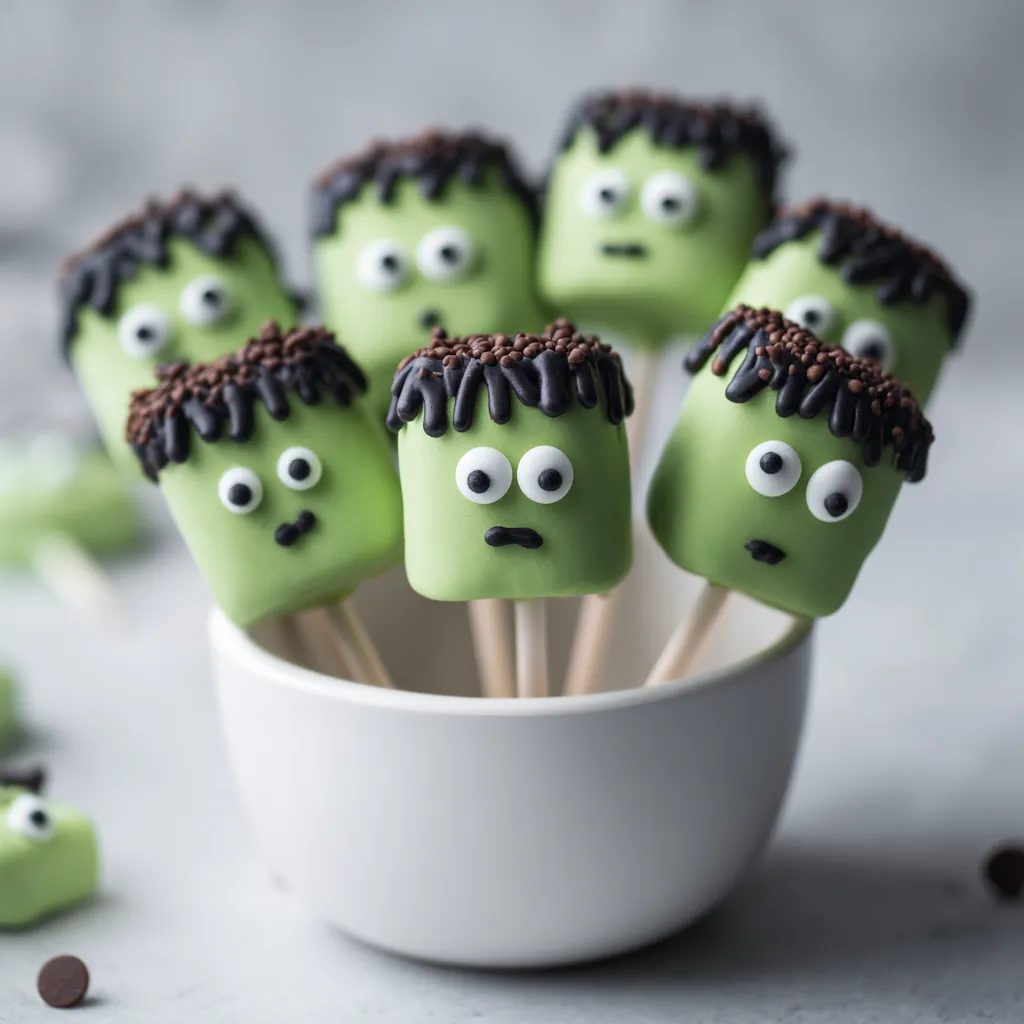
Exploring the delightful world of Halloween treats, one can’t overlook the fun and festive Frankenstein Marshmallow Pops. These vibrant green treats are not only visually appealing but also incredibly easy to make, making them perfect for any Halloween gathering. With a combination of colorful candy melts, sweet marshmallows, and creative decorations, these pops are sure to enchant both kids and adults alike.
These spooky marshmallow pops are an excellent addition to any Halloween party or festive event. Their fun and playful appearance captures the spirit of Halloween while being a sweet indulgence that pleases the palate. The combination of textures—from the soft marshmallow center to the smooth candy coating—creates a delightful contrast that will have everyone reaching for seconds.
Whether you are throwing a Halloween bash, attending a school event, or simply looking for a sweet activity to enjoy with the family, making Frankenstein Marshmallow Pops is an engaging project that fosters creativity and fun. They also make great party favors, enticing treats for trick-or-treaters, or unique additions to dessert tables.
Recipe Overview
– Total Time: 45 minutes
– Prep Time: 20 minutes
– Servings: 12
– Difficulty: Not specified in the recipe.
Ingredients
– 12 large marshmallows
– 1 cup green candy melts
– 12 lollipop sticks
– ½ cup black fondant
– ¼ cup white chocolate chips
– 24 mini chocolate chips (for eyes)
– Edible green glitter (optional)
– Parchment paper
Instructions
1. Prepare Your Workspace: Begin by lining a baking sheet with parchment paper to ensure easy cleanup and proper setting of the pops. Set this aside.
2. Melt the Candy: In a microwave-safe bowl, heat the green candy melts according to the package instructions. Stir until completely smooth and melted, ensuring there are no lumps.
3. Coat the Marshmallows: Take each marshmallow and dip it into the melted green candy. Make sure to cover it entirely. You can use a fork to help coat it evenly. Allow any excess candy to drip back into the bowl before placing the coated marshmallow on the parchment paper.
4. Insert the Sticks: While the candy coating is still soft, carefully push a lollipop stick into the base of each marshmallow. Let them sit for about 10 minutes, or until the coating has hardened completely.
5. Create Frankenstein’s Features: Take small portions of the black fondant and roll them into shapes for hair and a mouth. To make spiky hair, pinch the fondant into points and attach it to the top of the marshmallow. For the mouth, create a jagged shape and securely stick it to the marshmallow using a bit of melted candy as glue.
6. Add Eyes: Microwave the white chocolate chips until smooth and creamy. Using a toothpick, place two small blobs of the melted white chocolate on each marshmallow for eyes. Gently press a mini chocolate chip into each blob to create pupils, giving your Frankenstein pops a spooky expression.
7. Finish the Pops: Once your decorations are applied and set, sprinkle a light dusting of edible green glitter over the top of each pop for an eerie, festive finish.
8. Chill and Serve: Place the completed marshmallow pops in the refrigerator for 15 minutes to solidify all the decorations. Once they’re fully set, they’re ready to be enjoyed!
Equipment Needed
Creating your Frankenstein Marshmallow Pops requires some essential kitchen equipment. Below is a list of the tools you’ll need to make this festive treat.
Mixing Bowls
Having several mixing bowls on hand is crucial for melting chocolate and mixing ingredients. A microwave-safe bowl specifically is recommended for both the candy melts and the white chocolate.
Microwave-Safe Containers
To ensure safe and easy melting of your candy melts and white chocolate chips, it’s essential to use microwave-safe containers. These can be ceramic or glass bowls that are designed to withstand heat without cracking.
Baking Sheet
A baking sheet will be necessary for holding the coated marshmallows while they set. It’s best to line this sheet with parchment paper to make for easy cleanup and to prevent the pops from sticking.
Toothpicks
Toothpicks can be quite helpful during the decorating stages. They can assist in placing details on the marshmallow pops and are particularly useful when creating small features out of fondant.
Rolling Pin
While not absolutely necessary, a rolling pin can aid in rolling out fondant into shapes for the facial features of Frankenstein. If you prefer, you can also use your hands to shape the fondant.
Sharp Knife
For precision in cutting fondant, a sharp knife will be useful. This tool makes it easier to achieve the desired shapes for Frankenstein’s mouth and hair, ensuring the pops look as fantastic as possible.
Preparing Your Workspace
A well-organized workspace can make the process of creating Frankenstein Marshmallow Pops much more enjoyable and efficient. Proper preparation will minimize mess and help streamline your workflow.
Cleaning and Organizing
Before starting, it is essential to clear your workspace. A clean counter allows for a more organized and pleasant cooking experience, reducing distractions and chaos during the fun and detailed process of marshmallow pop creation.
Parchment Line Setup
When lining your baking sheet with parchment paper, cut a piece that fits snugly within the confines of the sheet. This will help prevent the pops from sticking to the surface, making it easier to remove them after they have set.
Gather Ingredients
Assembling all ingredients and tools before you begin working is highly recommended. Have everything within reach, from your marshmallows and candy melts to your fondant and decorating tools. This will speed up the preparation process and keep the focus on candy-making fun rather than searching for items halfway through.
Melting the Candy
Melting the green candy melts is a core part of transforming simple marshmallows into delightful Halloween treats with vibrant colors.
Choosing the Right Bowl
Using the right bowl for melting is key to avoiding messes and ensuring even melting. A bowl that is both microwave-safe and has enough depth to hold the candy melts without overflowing when melted is ideal.
Melting Techniques
When melting candy melts, always start with shorter intervals. Heat the bowl in the microwave for 30 seconds, then stir, checking the consistency. Continue to heat in 15-second intervals until the candy is liquefied and smooth. This method prevents overheating, which can cause the candy to seize up and become unusable.
Checking Consistency
The melted candy should be smooth and glossy. It’s important to ensure no lumps remain; a perfectly melted candy will coat the marshmallows evenly, giving them a professional finish. Use a spatula or fork to stir and break up any lumps before dipping your marshmallows.
In the upcoming part, we will delve deeper into the decorating techniques that will bring your Frankenstein Marshmallow Pops to life. From shaping the fondant into features to applying the eyes and final touches, each step will be explored in detail for perfect party treats.
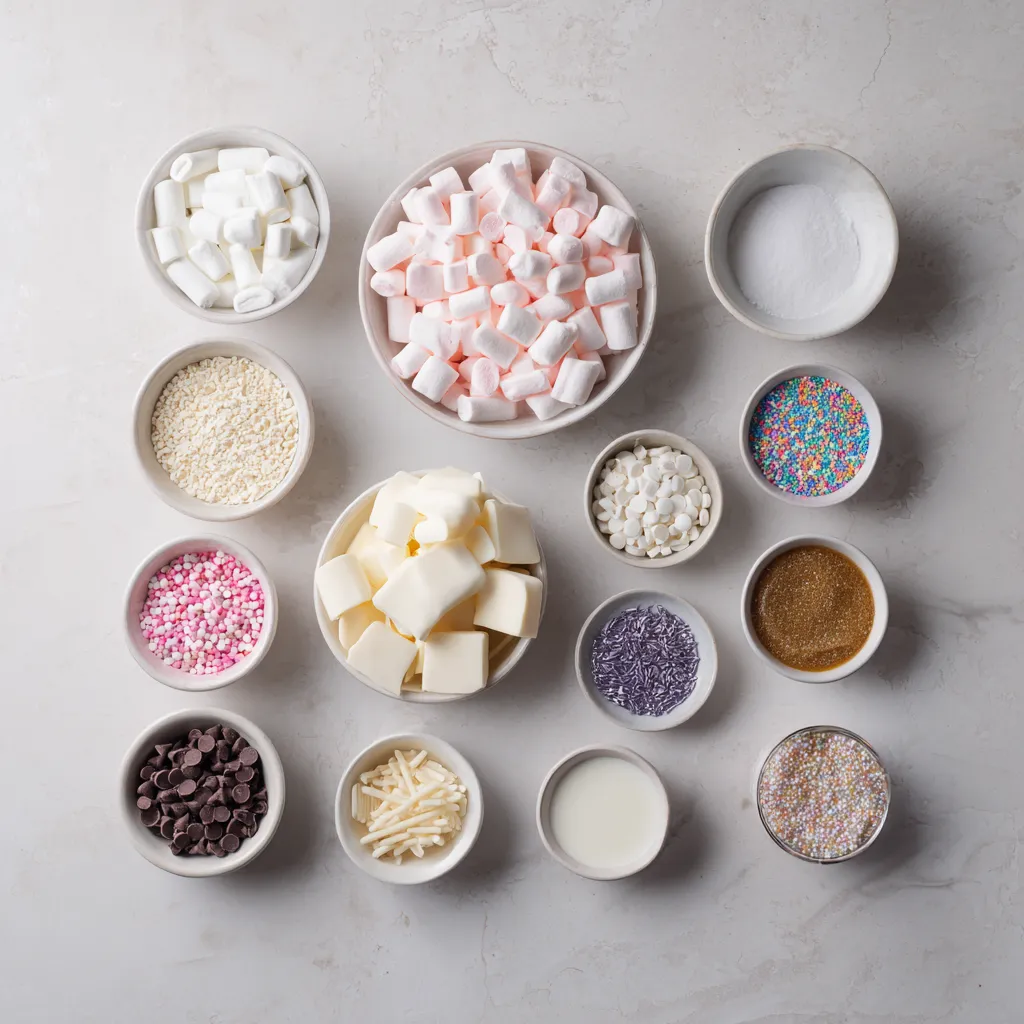
{{image_3}}
bring together delightful flavors and a fun, creative design perfect for Halloween gatherings. Their soft marshmallow center combined with the sweet, creamy candy coating makes for an irresistible treat that can be enjoyed by kids and adults alike.
Tips to Ensure the Candy is Smooth and Lump-Free Before Coating
Properly melting the candy is key to achieving a velvety smooth coating for your marshmallow pops. It’s crucial to follow the manufacturer’s instructions carefully, as different types of candy melts may vary in their melting requirements. Start by breaking the candy melts into smaller pieces and placing them in a microwave-safe bowl. Heat in short bursts of 20-30 seconds, stirring between intervals until completely smooth. This process prevents overheating, which can cause the candy to seize. If your melts do become too thick, a small amount of vegetable oil or shortening can be stirred in to achieve a better consistency.
Coating the Marshmallows
To successfully coat your marshmallows with melted candy, you should focus on an even and thorough coverage to allow for a delightful snap when biting into the pops.
Dipping Method
When dipping the marshmallows, hold each marshmallow by the stick and dip it straight down into the melted candy. Rotate it slightly to ensure all sides are covered. It’s advisable to do a gentle twist while pulling it back out to create an even layer on the surface.
Using a Fork
A fork can be your best friend during the coating process. If you find it tricky to manage the marshmallow with just your fingers, gently insert a fork into the bottom of the marshmallow for extra grip. Dipping it with a fork also allows for easier maneuvering and prevents your hands from becoming sticky.
Dripping Excess Candy
After coating the marshmallow, lift it from the candy melts and hold it above the bowl for a few seconds to allow any excess coating to drip off. When too much candy remains, it may pool at the base of the pops when set, making them look less appealing.
Inserting the Sticks
Inserting the lollipop sticks at the right moment is crucial for a successful Frankenstein Marshmallow Pop.
Timing for Insertion
The best time to insert the sticks is immediately after coating while the melted candy is still soft. This ensures that the stick will bond well with the chocolate and won’t slide out after setting. If you wait too long, the coating will harden, making it difficult to insert the stick.
Positioning Sticks
When placing the sticks into the marshmallows, aim to insert them straight, ensuring easy handling and the stability of the pops later on. Positioning them at a slight angle can cause the pops to lean and may affect presentation.
Setting Time
After inserting the sticks, allow the pops to set for about 10 minutes until the coating hardens completely. Setting them upright will ensure even hardening and prevent any surface sticking.
Creating Frankenstein’s Features
Crafting clever facial features for your pops not only makes them fun but also allows for individual creativity.
Rolling Fondant
To create elements like hair and a mouth, take small portions of black fondant and knead it until pliable. Roll the fondant into thin strips or desired shapes for the hair and a jagged edge for the mouth; you can also use a small knife to cut specific shapes.
Attaching Features
Using a dab of melted candy as glue can help firmly adhere the fondant onto your coated marshmallows. Press gently but firmly, ensuring they won’t fall off after setting.
Design Variation Ideas
Experiment with various expressions or hairstyles by altering the shapes of the fondant. For example, you could create curls for the hair or experiment with different mouth shapes like smiles or frowns to give your pops varied personalities.
Adding Eyes
The eyes of Frankenstein pops play a critical role in bringing them to life.
Melting the White Chocolate
When melting white chocolate chips, follow the same method as with the candy melts: heat in short bursts and stir frequently until smooth. Ensure not to overheat, as white chocolate can burn easily.
Eye Placement
Using a toothpick, apply small dollops of melted white chocolate on the marshmallow where you want to place the eyes. Pressing mini chocolate chips into these dollops will create a contrast that enhances the spooky yet charming look.
Adding Pupils
Once the white chocolate is set slightly, carefully press the mini chocolate chips into the eye bases. The chocolate should hold firm, giving the pops a lively expression.
Finishing Touches
Add those final details that take your Frankenstein Marshmallow Pops from good to extraordinary.
Applying Edible Glitter
For an added pop of festivity, lightly sprinkle edible green glitter over the completed pops. This will not only make them sparkle but will also amplify the Halloween theme, creating a visually appealing dessert.
Presentation Tips
Display your completed marshmallow pops in a decorative Styrofoam block or an eye-catching holder. Creating an upright arrangement will provide an appealing view and allow each pop to shine individually.
Inspection Before Serving
Before serving, assess the integrity of the decorations. Ensure that all components are securely attached and that no candy is dripping excessively.
Chilling and Serving
Proper chilling ensures that all aspects of your Frankenstein pops are set correctly.
Setting in the Fridge
Once your embellishments are complete, refrigerate the pops for about 15 minutes. This will help them firm up and will make them easier to handle and serve later.
Enjoying Fresh
When you’re ready to serve, let them sit at room temperature for a few minutes if they’ve been in the fridge too long. This will bring out the full flavor and softness of the marshmallow.
Storage Recommendations
Leftover pops should be stored in an airtight container at room temperature to maintain their freshness. Be cautious to place parchment paper between stacks if layering, so they don’t stick to one another.
Conclusion
Frankenstein Marshmallow Pops are a delightful treat that offer a combination of sweet textures and flavors that evoke the spirit of Halloween. With creative decoration options and easy preparation, they can be a highlight at any festive gathering. The total time of approximately 45 minutes makes them a quick and enjoyable project, perfect for decorating alongside friends or family.