
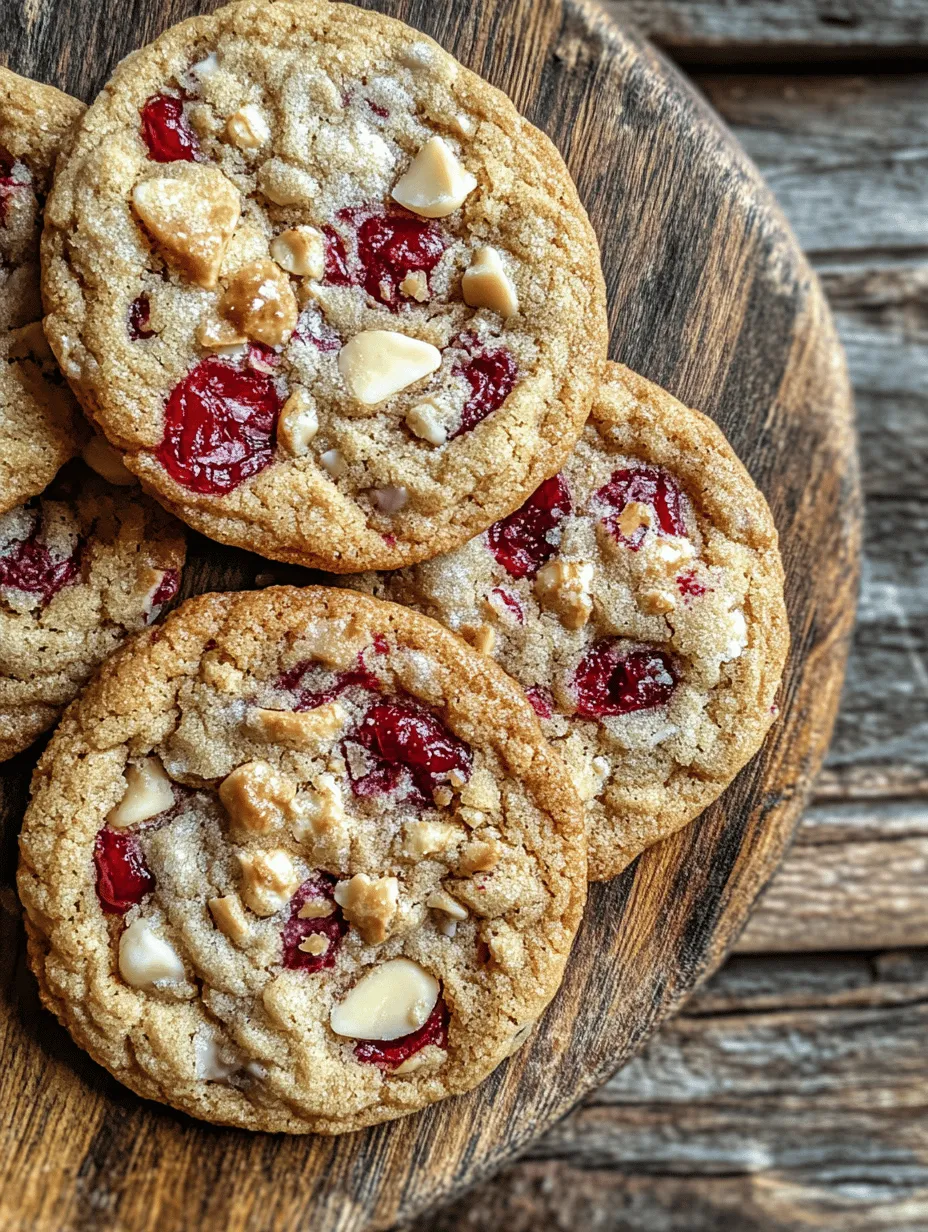

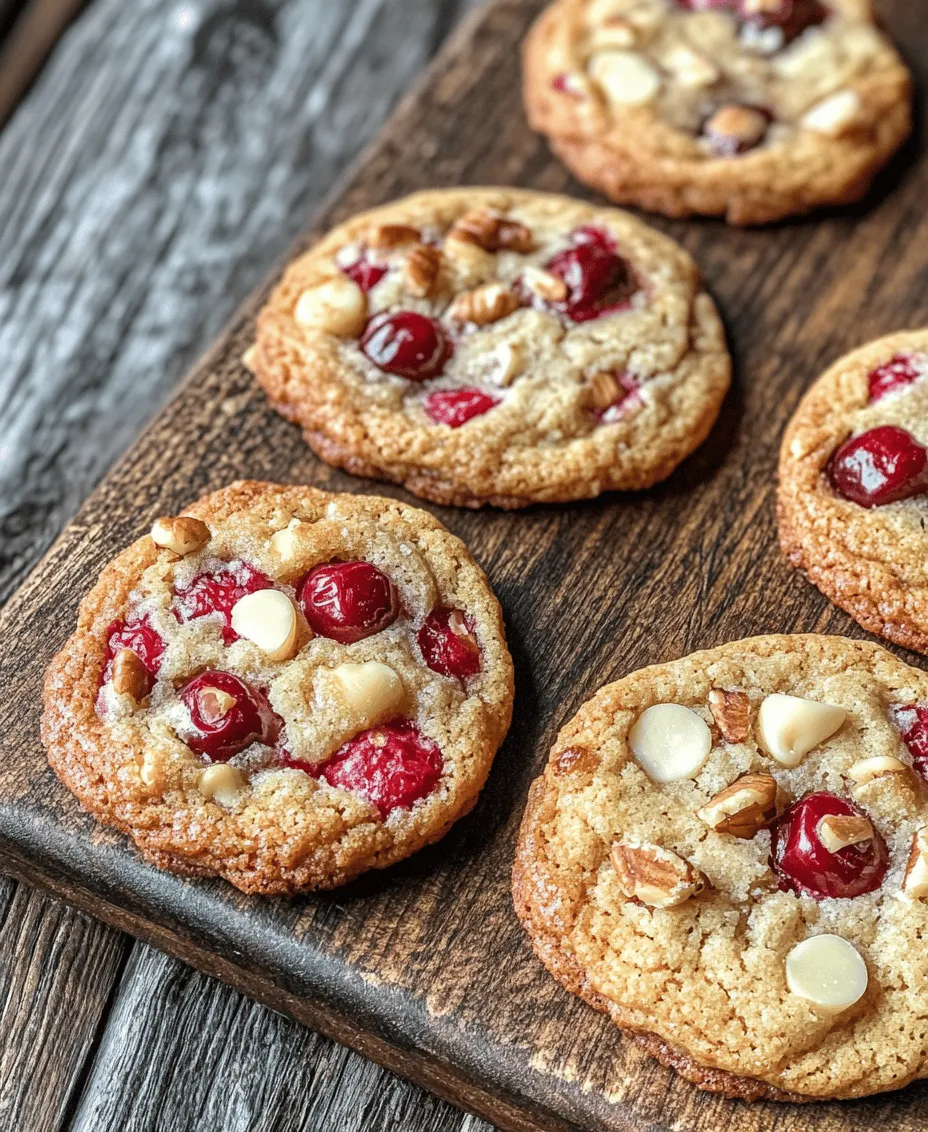
When it comes to indulging in delightful baked goods, few creations can rival the charm and flavor of Cherry Bliss Cookies. These delectable treats showcase a harmonious blend of tart cherries and creamy white chocolate, creating a cookie that is not only visually appealing but also bursting with flavor. The unique combination of sweet and sour from the cherries, paired with the richness of white chocolate, makes these cookies an experience in every bite.
Cherry Bliss Cookies are perfect for a variety of occasions, whether you’re hosting a festive gathering, celebrating a birthday, or simply treating yourself to something special. Their vibrant color and delightful flavor profile make them a standout addition to any dessert table. Plus, the aroma of freshly baked cookies wafting through your home brings a sense of warmth and nostalgia that is hard to resist. Baking at home not only allows you to enjoy these cookies freshly made but also creates an opportunity for bonding moments with family or friends.
The best part? Making Cherry Bliss Cookies is a straightforward process that doesn’t require advanced baking skills. With a handful of simple ingredients and a bit of time, you can whip up a batch of these delightful cookies that will impress everyone, from your family to your guests.
Understanding the Ingredients
To create the perfect Cherry Bliss Cookies, it is essential to understand the role each ingredient plays in the overall flavor, texture, and structure of the cookies.
Butter and Sugars: The Foundation of Flavor
At the heart of any cookie recipe lies butter, and for Cherry Bliss Cookies, unsalted butter is the star of the show. Using unsalted butter allows you to control the salt levels in your recipe, ensuring a balanced taste. Butter contributes to a tender texture and rich flavor, making cookies melt in your mouth.
The sugars in the recipe also play a crucial role. Granulated sugar creates a crisp exterior, while brown sugar adds moisture and chewiness due to its molasses content. The combination of these two sugars results in cookies that are perfectly balanced—crispy on the outside and soft in the middle.
Eggs: Binding Agents and Leaveners
Eggs are another essential component of Cherry Bliss Cookies. They not only act as binding agents, holding the ingredients together, but they also provide richness and moisture. The proteins in eggs help create structure in the cookies, allowing them to hold their shape while baking. Additionally, eggs contribute to the overall flavor, enriching the sweet notes of the cherries and white chocolate.
Flour: The Backbone of the Recipe
All-purpose flour is the backbone of any cookie recipe, including Cherry Bliss Cookies. It provides the necessary structure and stability for the cookies. The right amount of flour is critical; too much can lead to dry cookies, while too little can result in overly flat cookies. The balance of flour in the cookie dough ensures that the cookies rise properly, maintaining a soft, chewy interior.
Leavening Agents: Baking Powder and Baking Soda
To achieve the perfect texture, Cherry Bliss Cookies rely on the careful use of leavening agents such as baking powder and baking soda. Baking soda is a natural leavening agent that helps cookies spread and rise during baking, while baking powder adds additional lift. The combination of these agents ensures that your cookies achieve the desired thickness and chewiness, resulting in the ultimate cookie experience.
Salt: Enhancing Sweetness
While it may seem counterintuitive, salt is an essential ingredient in sweet recipes, including Cherry Bliss Cookies. A small amount of salt enhances the overall flavor profile by balancing out the sweetness. It brings out the natural flavors of the cherries and white chocolate, making each bite more dynamic and enjoyable.
Cherries: The Star Ingredient
The cherries used in this recipe are undoubtedly the star of the show. Whether you choose fresh or frozen cherries, both options bring unique benefits. Fresh cherries provide a juicy burst of flavor and a delightful texture, while frozen cherries can be more convenient and often have a more concentrated flavor. When using frozen cherries, it’s essential to thaw and drain them properly to prevent excess moisture in the cookie dough.
Optional Additions: White Chocolate Chips and Nuts
To elevate your Cherry Bliss Cookies even further, consider adding white chocolate chips or nuts. The creaminess of white chocolate complements the tartness of the cherries beautifully, creating a rich flavor experience. Nuts, such as chopped walnuts or pecans, can add a delightful crunch and additional flavor complexity to the cookies. These optional additions allow for customization, ensuring that your Cherry Bliss Cookies are tailored to your taste preferences.
Step-by-Step Guide to Making Cherry Bliss Cookies
Now that we understand the essential ingredients that make up Cherry Bliss Cookies, let’s dive into the step-by-step process of creating these sweet treats.
Preheating the Oven and Preparing the Baking Sheet
Before you begin mixing ingredients, it’s crucial to preheat your oven to 350°F (175°C). Preheating ensures that your cookies bake evenly, allowing them to rise and develop a beautiful golden-brown color. While the oven is heating, prepare your baking sheet by lining it with parchment paper. Parchment paper not only prevents sticking but also makes for easy cookie removal once they’re baked.
Creaming Butter and Sugars: Achieving the Perfect Texture
The creaming process is one of the most critical steps in cookie-making. In a large mixing bowl, combine the softened unsalted butter with both granulated sugar and brown sugar. Using a hand mixer or stand mixer, beat the mixture on medium speed until it becomes light and fluffy. This process incorporates air into the butter, which helps to create a light and tender cookie texture.
Aim for a creamy consistency where the sugars and butter are fully blended without any visible sugar granules. This step is essential, as it lays the foundation for the overall texture and flavor of the cookies.
Incorporating Eggs and Vanilla: Adding Flavor and Moisture
Once the butter and sugars are creamed to perfection, it’s time to incorporate the eggs and vanilla extract into the mixture. Add one egg at a time, mixing well after each addition to ensure a smooth and unified batter. The eggs contribute moisture and richness, while the vanilla extract adds depth and enhances the overall flavor profile of the cookies.
After the eggs are fully incorporated, it’s important to scrape down the sides of the bowl to ensure that all ingredients are well combined. This little detail can make a significant difference in the final outcome of your cookies.
With the base of your Cherry Bliss Cookies now complete, you’re well on your way to creating a delicious batch that will undoubtedly be a hit at your next gathering or simply as a sweet treat to enjoy at home. As we continue with the recipe, we’ll delve deeper into the remaining steps that will guide you in baking the perfect Cherry Bliss Cookies. Stay tuned for more delicious details!
Cherry Bliss Cookies: The Baking Process Continued
As we delve deeper into the art of creating Cherry Bliss Cookies, it’s essential to understand the techniques that ensure a perfectly blended dough and the delightful flavors that will emerge from the oven. With each step, we’ll focus on achieving a uniform mixture and the desired textures that make these cookies an unforgettable treat.
Adding Eggs and Vanilla: The Right Technique
To begin, when incorporating eggs and vanilla into your cookie dough, it’s crucial to do so in a manner that guarantees an even mixture. Start by cracking the eggs into a small bowl; this allows you to check for any eggshell fragments before introducing them to the larger mixture. Once you’ve ensured the eggs are intact, add them to your creamed butter and sugar blend.
Next, pour in the vanilla extract. Using a whisk or an electric mixer on low speed, blend the eggs and vanilla into the mixture until fully combined. The goal here is to achieve a smooth consistency without over-mixing, which can lead to tough cookies. The light, airy nature of this mixture is key to the overall texture of your Cherry Bliss Cookies.
Mixing Dry Ingredients: Creating the Cookie Base
The next crucial step in cookie baking is preparing the dry ingredients. In a separate bowl, whisk together your flour, baking powder, baking soda, and a pinch of salt. This step is vital for several reasons. Firstly, whisking these ingredients together helps to evenly distribute the leavening agents, which is essential for achieving the perfect rise.
Incorporating the dry mixture into the wet ingredients should be done gradually. Start by adding about one-third of the flour mixture to the creamed butter, eggs, and vanilla. Mix on low speed until just combined, then repeat this process until all the dry ingredients are incorporated. The key here is to mix until the flour is barely visible; over-mixing can lead to dense cookies.
Folding in Cherries and Optional Ingredients: Ensuring Even Distribution
With your cookie dough now complete, it’s time to fold in the star ingredient: the cherries. If you’re using fresh cherries, make sure they are pitted and chopped into small pieces. If you opt for dried cherries, chop them roughly to ensure they blend well into the dough.
Using a spatula, gently fold in the cherries and any optional ingredients like chocolate chips or nuts. The folding technique is critical here; it preserves the airiness of the dough while ensuring that the cherries are evenly distributed throughout. Be careful not to overwork the dough, as this can lead to a tough texture. Just enough folding until the cherries are incorporated is all you need.
Scoop and Bake: The Final Steps
Now that your dough is ready, it’s time to scoop and bake. Using a cookie scoop or two spoons, portion out the dough onto a baking sheet lined with parchment paper. Be sure to leave enough space between each scoop—about two inches—allowing the cookies to spread as they bake. This spacing is crucial; overcrowded cookies can merge into one another, resulting in an unappetizing blob instead of the desired individual treats.
Preheat your oven to 350°F (175°C) and bake the cookies for about 10 to 12 minutes, or until the edges are lightly golden while the centers remain soft. Remember, cookies will continue to cook slightly on the baking sheet after being removed from the oven, so it’s better to err on the side of slightly underbaking them for that perfect chewy texture.
Cooling Process: Importance of Patience
Once your cookies are out of the oven, resist the temptation to dive in immediately. Allowing the cookies to cool on the baking sheet for about five minutes is crucial. This resting period enables them to firm up slightly, ensuring they don’t break apart when you transfer them to a wire rack for further cooling. Patience here pays off—too soon and you may end up with a delicious mess.
Flavor Profile and Texture Analysis
Taste Test: What to Expect from Cherry Bliss Cookies
Cherry Bliss Cookies are a delightful balance of flavors. The sweetness from the sugars combines harmoniously with the tartness of the cherries, creating a unique flavor profile that’s both refreshing and indulgent. The richness of the butter enhances the overall taste, while any chocolate chips you might add bring a creamy depth that perfectly complements the fruity notes.
Texture Breakdown: Crunchy Edges vs. Chewy Centers
In terms of texture, expect a delightful contrast. The edges of your Cherry Bliss Cookies will be slightly crunchy, giving way to a chewy center that melts in your mouth. The baking time significantly affects this texture—longer baking yields a firmer cookie, while shorter baking times allow for those chewy centers. For the best experience, aim for that golden edge with a soft, tender middle.
Serving Suggestions and Pairings
Best Ways to Serve Cherry Bliss Cookies
These cookies are best enjoyed warm, straight from the oven, perhaps with a refreshing glass of milk or a steaming cup of coffee. The warmth enhances the flavors and makes for a delightful treat that’s perfect for any occasion—be it a family gathering, a cozy night in, or a festive celebration.
Pairing Ideas: Enhancing the Experience
To elevate your Cherry Bliss Cookies further, consider serving them with a scoop of vanilla ice cream or a dollop of whipped cream. The creamy textures and complementary flavors will enhance the overall cherry experience, making your dessert truly decadent. You might also want to drizzle a bit of chocolate sauce over the top for an added touch of indulgence.
Storing Cherry Bliss Cookies
How to Store for Freshness
To maintain the freshness of your Cherry Bliss Cookies, store them in an airtight container at room temperature. This helps prevent them from becoming stale and keeps them delicious for several days. If the environment is particularly humid, consider placing a piece of bread in the container with the cookies. The bread will help absorb excess moisture, keeping your cookies soft.
Freezing Instructions for Longer Storage
If you’d like to save some for later, freezing is a great option. You can freeze both the dough and the baked cookies. For the dough, scoop out individual portions onto a baking sheet lined with parchment paper and freeze until solid. Once frozen, transfer the dough balls to a freezer-safe bag, and they can be stored for up to three months. When you’re ready to bake, simply add a few extra minutes to the baking time.
For baked cookies, allow them to cool completely before placing them in an airtight container. Layer them with parchment paper to prevent sticking, and freeze for up to three months. When you’re ready to enjoy, let them thaw at room temperature or pop them in the microwave for a few seconds for that fresh-out-of-the-oven taste.
Conclusion
Baking Cherry Bliss Cookies is not just about following a recipe; it’s about creating joy and delight with each step. From the moment you combine the ingredients to the moment you take that first bite, the process is filled with anticipation and satisfaction. Their delicious flavor, a perfect blend of sweetness and tartness, combined with the ease of preparation makes these cookies a go-to treat for any occasion.
Encourage your family and friends to join you in the baking process, and share the joy of savoring these delightful cookies together. Each batch is an opportunity to create lasting memories, so roll up your sleeves, gather your ingredients, and let the baking adventures begin!
