

Introduction
The classic chewiness of chocolate chip cookies is a beloved feature, but not all recipes deliver on that promise. This guide reveals a foolproof method for baking chewy chocolate chip cookies that remain soft for days. With a perfect balance of ingredients and a few insider tips, you’ll be able to whip up a batch that delights with every bite.
Chocolate chip cookies have the unique ability to evoke nostalgia, transporting us back to warm kitchens filled with the sweet aroma of baking. Whether you’re making them for a cozy family gathering or just as a late-night treat, these chewy chocolate chip cookies are always a crowd-pleaser. Their soft texture and rich chocolate flavor make them perfect for any occasion, from birthday parties to lazy afternoons.
Recipe Overview
– Total Time: 30-40 minutes
– Yield/Servings: About 24 cookies
– Difficulty: Not specified in the recipe
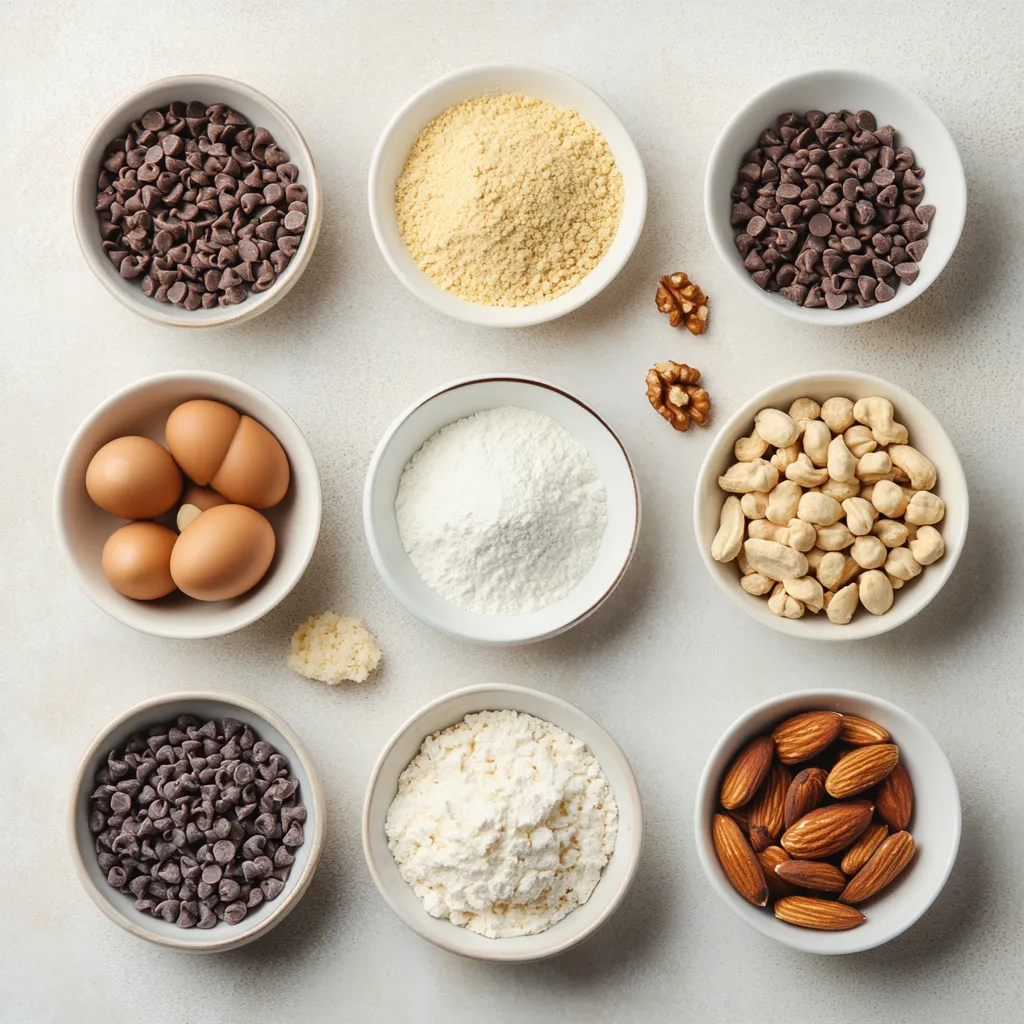
Ingredients
– 2 1/4 cups all-purpose flour
– 1/2 teaspoon baking soda
– 1 teaspoon salt
– 1 cup unsalted butter, softened to room temperature
– 3/4 cup granulated sugar
– 3/4 cup packed light or dark brown sugar
– 1 tablespoon pure vanilla extract
– 2 large eggs
– 2 cups semi-sweet chocolate chips
– 1/2 cup chopped nuts (optional)
– 1 tablespoon cornstarch
Instructions
1. Preheat the Oven: Begin by preheating your oven to 350°F (175°C). Prepare two baking sheets by lining them with parchment paper or silicone baking mats to prevent sticking.
2. Mix the Dry Ingredients: In a medium-sized mixing bowl, whisk together the all-purpose flour, baking soda, salt, and cornstarch until well combined. Set this mixture aside for later use.
3. Cream Together Butter and Sugars: In a large mixing bowl, use an electric mixer to cream the softened unsalted butter with the granulated sugar and brown sugar. Beat this mixture on medium speed until it becomes light and fluffy, which should take about 2-3 minutes.
4. Incorporate Eggs and Vanilla: Add the eggs to the butter-sugar mixture one at a time, ensuring that each egg is fully blended before introducing the next. Then, pour in the vanilla extract and mix until everything is smoothly combined.
5. Combine Wet and Dry Mixtures: Gradually incorporate the dry ingredients into the wet mixture, mixing at low speed. Stop mixing as soon as you see no more flour streaks to avoid overworking the dough.
6. Add Chocolate Chips and Nuts: Using a spatula, gently fold in the semi-sweet chocolate chips and the chopped nuts (if you choose to include them) until they are evenly distributed throughout the cookie dough.
7. Chill the Dough (Optional): For an extra chewy texture, cover the bowl with plastic wrap and place it in the refrigerator to chill for at least 30 minutes. You can also chill it for up to 24 hours to enhance the flavors.
8. Portion the Dough: Using a cookie scoop or a tablespoon, drop rounded balls of dough onto the prepared baking sheets, ensuring they are spaced about 2 inches apart to allow for spreading during baking.
9. Bake the Cookies: Place the baking sheets in the preheated oven and bake for 10-12 minutes. Keep an eye on them; they should be lightly golden around the edges while the centers remain soft and slightly underbaked.
10. Cool the Cookies: Once baked, take the cookies out of the oven and let them cool on the baking sheets for about 5 minutes. After that, transfer them to wire racks to cool completely.
11. Store for Freshness: After the cookies have cooled, store them in an airtight container at room temperature. They will maintain their soft texture for several days!
Prepping the Kitchen
Essential Baking Tools
When it comes to baking chewy chocolate chip cookies, having the right tools can significantly enhance the process. Key items include mixing bowls for preparing your ingredients, an electric mixer to cream the butter and sugars thoroughly, measuring cups, and spoons for precise ingredient amounts, as well as baking sheets lined with parchment paper or silicone mats to ensure a smooth baking experience. Utilizing these tools not only simplifies your workflow but also contributes to the overall success of the cookie recipe.
Setting Up the Workspace
Before you even start mixing ingredients, it is essential to establish a clean and spacious workspace. Clear away any clutter from your kitchen counters, and ensure all baking tools are easily accessible. Organizing your ingredients beforehand not only minimizes preparation time but also creates a more enjoyable baking experience. Measuring out the flour, sugars, and other ingredients in advance allows for a seamless mixing process that’s free of distractions, ensuring that your attention remains focused on achieving the perfectly chewy cookie texture.
Understanding the Key Ingredients
Role of Flour
All-purpose flour serves as the foundation of the cookie dough, providing essential structure without making the cookies dry. The gluten in the flour develops during mixing, which is crucial for creating the chewy texture characteristic of these cookies. To achieve the ideal balance, properly measure and sift your flour if needed, before incorporating it with the other ingredients. This way, you prevent any dry clumps while ensuring an even texture throughout the final product.
Importance of Sugars
The combination of granulated and brown sugars is key to achieving the perfect balance of sweetness and moisture in your cookies, ultimately enhancing their chewiness. Granulated sugar contributes to the cookie’s crisp exterior, while brown sugar—rich in molasses—adds depth of flavor and moisture. This synergy creates a delightful taste profile that elevates the classic chocolate chip cookie, making it both soft and satisfying in every bite.
Impact of Butter
Using softened unsalted butter is crucial for achieving that light, fluffy texture when creamed with the sugars. The fat from the butter not only contributes to the richness of the cookies but also serves to give them a moist and tender crumb. Make sure to allow the butter to reach room temperature before you begin; this step will enhance the creaming process, ensuring the mixture becomes airy and well-blended, which is essential for creating a rich and satisfying cookie.

Incorporating Eggs and Vanilla
Adding Moisture
In the preparation of chewy chocolate chip cookies, the incorporation of eggs is a key moment that significantly influences the final texture. By adding the eggs one at a time, you allow for better emulsification with the butter and sugar mixture. This step is crucial because properly incorporating the eggs ensures that the fats and liquids blend smoothly, leading to a cookie dough that is rich and moist. Eggs provide moisture, contributing to a tender crumb and helping the cookies rise during baking without becoming dry or dense.
Flavor Enhancement
Pure vanilla extract is not merely a flavoring agent; it elevates the entire cookie experience. The depth of flavor provided by vanilla complements the sweetness of the sugars and the richness of the chocolate, creating a well-rounded taste profile. It’s recommended to use high-quality vanilla extract for the best results, as artificial vanilla can lack the complexity that enhances the overall flavor of your cookies.
Combining Wet and Dry Mixtures
Technique for Mixing
When it comes to combining the wet and dry mixtures, the technique is just as important as the ingredients used. Gradually incorporating the dry mixture into the wet prevents overmixing, which is a common issue that can lead to tough cookies due to gluten development. By mixing at a low speed, you ensure that the dry ingredients are evenly dispersed without overworking the dough. This technique preserves the light, chewy texture that you desire in each cookie.
Recognizing the Right Moment
Knowing when to stop mixing is essential for achieving perfection. As soon as you see that there are no more visible flour streaks, stop mixing the dough. This ensures that the cookies will remain soft and tender after baking. If you notice any dry pockets of flour, use a spatula to gently fold those in without excessive mixing. This careful approach results in a cookie with a delightful chewiness and soft center.
Adding Chocolate Chips and Nuts
Chocolate Choices
While you are free to choose among various types of chocolate, semi-sweet chocolate chips are the star of this cookie recipe. Their balanced sweetness plays well against the sugars used in the dough, allowing for a satisfying chocolate experience without overwhelming the palate. The semi-sweet variety also adds richness and a hint of bittersweetness, which contrasts beautifully with the sugary dough.
Optional Ingredients
Incorporating nuts into your chocolate chip cookies can enhance texture and flavor. Chopped walnuts or pecans offer a delightful crunch and nutty taste that complements the chocolate. If you decide to add nuts, ensure that they are roughly chopped for even distribution throughout the dough. Keep in mind that this addition is optional, so you can enjoy the cookies in their pure chocolate chip form, or enhance them as you see fit.
Chilling the Dough
Benefits of Chilling
Chilling the cookie dough serves multiple purposes. Not only does it help to firm up the butter and thus reduce spreading during baking, but it also enhances flavors as the ingredients meld together. A chilled dough produces a slightly thicker cookie that emphasizes its chewiness—perfect for those seeking the ideal cookie texture.
Duration and Planning
Chilling the dough for about 30 minutes yields a noticeable difference, enhancing the flavor while improving the chew factor. If you chill the dough longer, such as overnight, you will further intensify the flavors as they fully develop. This longer chill can be factored into your baking schedule, allowing you to prepare the dough ahead of time for a quick bake later.
Portioning the Dough
Proper Sizing Technique
Uniformity in cookie size is crucial for even baking. Using a cookie scoop not only simplifies this process but also results in consistently shaped cookies. A well-portioned dough ball should be about 1.5 inches in diameter, allowing for a good balance between a chewy interior and a lightly crispy exterior after baking.
Spacing on Baking Sheets
When placing the dough on the prepared baking sheets, ensure there is adequate spacing—2 inches apart is recommended. This spacing allows the cookies to spread without merging into one another, giving each cookie the room it needs to achieve its perfect form during the baking process.
Baking the Cookies
Oven Temperature
Preheating your oven to 350°F (175°C) is crucial for achieving the right texture. An adequately hot oven ensures that the cookies begin to bake immediately upon entering, promoting a beautifully golden exterior while maintaining a soft center.
Doneness Indicators
To determine when your cookies are perfectly baked, look for an outer edge that is lightly golden while keeping the centers soft and slightly underbaked. This method creates a lovely contrast between the crisp edges and the chewy center that makes these cookies so appealing.
Cooling and Storing Cookies
The Cooling Process
Letting the cookies sit on the baking sheets for about 5 minutes after removal from the oven is an important step. This brief cooling period allows the cookies to set up, retaining their shape before being transferred to wire racks. Not allowing them to cool properly may result in breakage or crumble while moving.
How to Store for Freshness
Once cooled fully, store the cookies in an airtight container at room temperature. This storage method helps maintain their soft texture for several days, ensuring that they remain an enjoyable treat long after baking.
Presentation Tips
Serving Suggestions
To enhance your serving experience, consider presenting the cookies on a decorative platter or arranging them in a clear jar tied with a ribbon for a festive touch. If serving at a gathering, a tiered stand can add to the visual appeal while making it easy for guests to help themselves.
Beverage Pairings
Cookies pair exceptionally well with beverages; a classic choice is a tall glass of cold milk. The milk complements the richness of the chocolate and helps balance out the sweetness, making it a favorite among cookie lovers. However, consider other options like coffee or even hot chocolate for a cozy pairing experience.
Conclusion
These chewy chocolate chip cookies promise a delightful balance of softness and rich chocolate flavor, making them a favorite among cookie enthusiasts. With careful attention to mixing techniques and baking instructions, you can create a treat that remains irresistible for days. The use of quality ingredients and proper storage will help preserve their chewy texture, creating a sweet indulgence worth revisiting whenever a craving arises.

Chewy Chocolate Chip Cookies That Stay Soft for Days
Ingredients
- 2 ¼ cups all-purpose flour
- ½ teaspoon baking soda
- 1 teaspoon salt
- 1 cup unsalted butter softened
- ¾ cup granulated sugar
- ¾ cup packed light or dark brown sugar
- 1 tablespoon pure vanilla extract
- 2 large eggs
- 2 cups semi-sweet chocolate chips
- ½ cup chopped nuts optional
- 1 tablespoon cornstarch
Instructions
- Preheat the oven to 350°F (175°C) and prepare baking sheets.
- In a bowl, whisk together flour, baking soda, salt, and cornstarch.
- Cream butter with granulated and brown sugar until light and fluffy.
- Add eggs one at a time, mixing well after each, then add vanilla.
- Gradually mix in dry ingredients until just combined.
- Fold in chocolate chips and nuts until evenly distributed.
- Chill the dough for at least 30 minutes if desired.
- Drop rounded balls of dough onto baking sheets, spaced apart.
- Bake for 10-12 minutes until edges are golden and centers are soft.
- Cool on sheets for 5 minutes, then transfer to wire racks.