Introduction
Chocolate mousse cheesecake is a sumptuous dessert that marries the rich, creamy essence of traditional cheesecake with the airy lightness of chocolate mousse. This delectable treat offers a unique twist on classic desserts, making it a favorite among chocolate lovers and cheesecake enthusiasts alike. The combination of textures—crunchy, creamy, and velvety—creates an unforgettable experience for the palate, transforming any occasion into a celebration.
The popularity of chocolate desserts is undeniable; they bring comfort and indulgence, often evoking nostalgic memories of family gatherings or special celebrations. This chocolate mousse cheesecake not only satisfies a sweet tooth but also elevates the dessert game with its layered complexity. Each bite reveals a harmonious blend of flavors that are sure to impress your guests, leaving them craving more.
In this recipe, we will guide you through crafting this decadent delight from scratch, showcasing the distinctive layers and flavors that make it so special. From the rich chocolate cookie crust to the creamy cheesecake layer and the light, airy chocolate mousse, each step is essential in creating a dessert that’s as visually stunning as it is delicious.
Understanding the Ingredients
To achieve the perfect chocolate mousse cheesecake, understanding the role of each ingredient is critical. Each component contributes to the overall flavor, texture, and success of the dessert, ensuring a delightful experience with every bite.
Chocolate Cookie Crust
The chocolate cookie crust serves as the foundation of this dessert, providing a rich, chocolatey base that contrasts beautifully with the creamy layers above. Using quality chocolate cookies is essential; they not only influence the flavor but also add a satisfying crunch that complements the softer textures of the cheesecake and mousse. Look for cookies that are dense and rich in cocoa flavor to create a crust that is both flavorful and sturdy enough to hold the layers above.
When mixing the crust, the key is to achieve a consistency similar to wet sand. This will ensure that the crust presses together well and bakes into a cohesive layer. After baking, allowing the crust to cool completely before adding the filling is crucial; this patience will prevent any melting or mixing of layers, ensuring a clean and defined separation between the crust and the cheesecake.
Cream Cheese Layer
The cream cheese layer is the heart of the cheesecake component, providing a rich, tangy flavor that balances the sweetness of the dessert. Using softened cream cheese is vital; it ensures a smooth, lump-free mixture that will bake evenly. If the cream cheese is too cold, it can lead to lumps in the filling, which can detract from the silky texture we aim for.
In addition to cream cheese, this layer often includes sugar, eggs, and vanilla extract. Each of these ingredients plays a role in flavor and texture, with sugar sweetening the cheesecake and eggs providing structure. Proper mixing techniques are essential to incorporate air into the batter, allowing it to rise beautifully during baking, resulting in a light and fluffy cheesecake layer.
Chocolate Mousse Layer
The chocolate mousse layer is where the magic happens, introducing a light and airy texture that contrasts with the dense cheesecake beneath. A well-made chocolate mousse brings an intense chocolate flavor while maintaining a delicate consistency. This layer typically consists of high-quality chocolate, whipped cream, and egg whites—ingredients that work together to create a luxurious mouthfeel.
The chocolate used should be rich and flavorful; dark chocolate is often preferred for its intensity, but semi-sweet chocolate can also work well depending on your taste preferences. The process of folding in whipped cream and beaten egg whites is crucial for achieving that signature lightness in the mousse. This step requires care and precision, as overmixing can deflate the air bubbles that provide the mousse with its light texture.
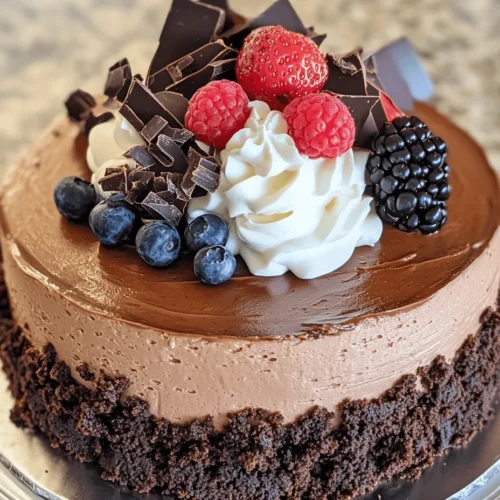
Garnishes
To elevate the presentation and taste of your chocolate mousse cheesecake, garnishes play an essential role. Fresh berries, chocolate shavings, or whipped cream can add visual appeal and contrast in flavors. A sprinkle of cocoa powder or a drizzle of chocolate sauce can enhance the chocolate experience, making your dessert not only delicious but also a feast for the eyes.
Preparing the Crust
Creating the perfect chocolate cookie crust begins with selecting the right cookies. For a rich flavor, consider using chocolate wafer cookies or Oreos, as their deep cocoa taste will provide a robust base for your cheesecake. Once you’ve chosen your cookies, follow these steps to create the crust:
1. Crush the Cookies: Begin by placing the cookies in a food processor and pulse until they are finely crushed. If you don’t have a food processor, you can also place the cookies in a resealable plastic bag and crush them with a rolling pin.
2. Mix with Butter: In a mixing bowl, combine the crushed cookies with melted butter. The butter acts as a binding agent, helping the crust hold its shape. Stir until the mixture resembles wet sand; it should hold together when pressed.
3. Press into the Pan: Transfer the crust mixture into a 9-inch springform pan. Using the back of a measuring cup or your fingers, firmly press the mixture into the bottom and slightly up the sides of the pan to create an even layer.
4. Bake: Preheat your oven to 350°F (175°C). Bake the crust for about 10 minutes, or until it is firm to the touch. This step enhances the flavor and ensures that the crust can support the layers above.
5. Cool: After baking, remove the crust from the oven and allow it to cool completely in the pan. This cooling period is essential; it helps the crust set and prevents it from becoming soggy once the filling is added.
By following these steps carefully, you’ll create a chocolate cookie crust that serves as a perfect base for your chocolate mousse cheesecake, providing both flavor and structure.
Crafting the Cheesecake Layer
Once the crust has cooled, it’s time to focus on the cheesecake layer. This layer is crucial for achieving the creamy, tangy flavor that defines a classic cheesecake. Follow these detailed steps to create a smooth and delicious cream cheese filling:
1. Prepare Your Ingredients: Ensure that your cream cheese is softened to room temperature. This can be achieved by leaving it out for about 30 minutes before you begin. Softened cream cheese will mix more easily, leading to a smoother texture.
2. Mix the Cream Cheese: In a large mixing bowl, beat the softened cream cheese using an electric mixer on medium speed until it is creamy and smooth. This process should take about 2-3 minutes. Scrape down the sides of the bowl to ensure even mixing.
3. Add Sugar: Gradually add granulated sugar to the cream cheese, continuing to mix until well combined. The sugar should dissolve completely, creating a smooth mixture.
4. Incorporate Eggs: Add the eggs one at a time, mixing well after each addition. This method ensures that the eggs are fully incorporated without overmixing, which can add air and cause the cheesecake to crack during baking.
5. Flavoring: Mix in vanilla extract to enhance the flavor. This step adds depth to the cheesecake, complementing the chocolate flavors above.
6. Pour into the Crust: Once the mixture is smooth and creamy, carefully pour it into the cooled chocolate cookie crust. Use a spatula to spread the filling evenly.
7. Bake: Place the cheesecake in the preheated oven and bake at 325°F (163°C) for about 45-50 minutes. The edges should be set, while the center may still have a slight jiggle—this is normal as it will firm up as it cools.
8. Cool Slowly: After baking, turn off the oven and crack the door open, allowing the cheesecake to cool in the oven for about an hour. This gradual cooling process helps prevent cracks from forming on the surface.
9. Chill: Once cooled, cover the cheesecake with plastic wrap and refrigerate for at least 4 hours or overnight. Chilling allows the flavors to meld and improves the overall texture.
By following these steps meticulously, you’ll create a cheesecake layer that is creamy and smooth, perfectly complementing the chocolate mousse that will follow.
Creating the Chocolate Mousse Layer
Now that your crust and cheesecake layer are complete and chilled, it’s time to prepare the chocolate mousse layer. This step is where the dessert truly comes to life, adding a lightness and rich chocolate flavor that will elevate the entire dish. Here’s how to create the perfect chocolate mousse:
1. Melt the Chocolate: Start by chopping your chosen chocolate into small pieces for even melting. Place the chocolate in a heatproof bowl and melt it using a double boiler or in the microwave in short intervals, stirring frequently. Allow the melted chocolate to cool slightly before using.
2. Whip the Cream: In a separate bowl, whip heavy cream until soft peaks form. This step is crucial for achieving that light, airy texture characteristic of mousse. Be careful not to overwhip, as this can lead to a grainy texture.
3. Prepare Egg Whites: In another clean bowl, whip egg whites until stiff peaks form. This process will incorporate air, creating a light texture for the mousse. Ensure that the bowl and beaters are free of grease to achieve the best results.
4. Combine Chocolate and Cream: Once the melted chocolate has cooled, gently fold half of the whipped cream into the chocolate. Use a spatula to combine, being careful not to deflate the cream. This step creates a chocolate mixture that retains some lightness.
5. Incorporate Egg Whites: Gently fold in the whipped egg whites, mixing until just combined. You may need to work quickly at this stage to maintain the airiness of the mousse.
6. Add Remaining Whipped Cream: Finally, fold in the remaining whipped cream, ensuring a uniform mixture while preserving the light texture.
7. Layer on Cheesecake: Once your mousse is ready, carefully pour it over the chilled cheesecake layer, spreading it evenly with a spatula.
8. Chill Again: Cover the assembled dessert with plastic wrap and refrigerate for an additional 4 hours or overnight. This chilling time allows the mousse to set and meld with the cheesecake beneath.
By following these detailed instructions, you will create a chocolate mousse layer that is both rich and airy, adding a delightful contrast to the dense cheesecake and crunchy cookie crust.
Now that the foundation of your chocolate mousse cheesecake is set, you are well on your way to creating a dessert that will impress family and friends alike. In the next part of this article, we will explore garnishing options and presentation tips that will make your dessert not only delicious but visually stunning as well.
Melting Chocolate and Butter
To achieve the luxurious texture of our chocolate mousse cheesecake, the first critical step involves melting the chocolate and butter together. This process must be executed with care to ensure that the mixture is smooth and free of lumps, which can detract from the overall texture of your cheesecake.
Begin by chopping your dark chocolate into small, uniform pieces. This will help the chocolate melt evenly and quickly. Next, combine the chopped chocolate with unsalted butter in a heatproof bowl. The best method for melting is a double boiler; fill a medium saucepan with water and bring it to a simmer. Place the bowl with the chocolate and butter over the saucepan, ensuring it doesn’t touch the water. Stir gently until the chocolate and butter have melted together into a silky mixture. If you don’t have a double boiler, you can also melt them in the microwave. Use a microwave-safe bowl and heat in short intervals of 20 seconds, stirring between each interval until completely melted.
Once melted, allow the mixture to cool slightly before proceeding to the next step. This cooling is essential to prevent the chocolate from seizing when mixed with the whipped cream.
Whipping Heavy Cream to Stiff Peaks
Achieving the perfect whipped cream is paramount in this recipe, as it provides the lightness that contrasts beautifully with the rich chocolate. Begin with cold heavy cream, which whips better than cream at room temperature. Pour the heavy cream into a large mixing bowl and, using an electric mixer or a whisk, start whipping at medium speed.
As you whip, the cream will begin to thicken. Gradually increase the speed to high and continue whipping until you reach stiff peaks. This means that when you lift the whisk, the peaks of cream hold their shape without collapsing. Be cautious not to overwhip, as this can lead to butter formation. Stiff peaks will ensure that your mousse remains airy and light, maintaining a delightful texture.
Folding Chocolate Mixture into Whipped Cream
Once your chocolate and butter mixture has cooled and your whipped cream is ready, it’s time to combine these two elements. This step is where the magic happens, but it’s crucial to do it correctly to preserve the airiness of the whipped cream.
Start by taking a small portion of the whipped cream and gently folding it into the chocolate mixture with a rubber spatula. This step lightens the chocolate mixture, making it easier to incorporate the rest of the whipped cream without deflating it. Fold gently, using a figure-eight motion, to combine the two mixtures. Gradually add the remaining whipped cream, continuing to fold until no streaks remain. The goal is to keep as much air in the whipped cream as possible, resulting in a fluffy mousse that will sit atop your cheesecake.
Assembling the Cake
Now that we have our chocolate mousse ready, it’s time to assemble the cheesecake and mousse layers. Start by ensuring your cheesecake base is fully cooled and set. If you’ve prepared the cheesecake layer in advance, it’s essential to work quickly to prevent it from warming up.
Spoon the chocolate mousse over the cheesecake layer. Using an offset spatula, spread the mousse evenly across the top, ensuring that it reaches the edges for an attractive finish. Take your time with this step, as a smooth and even layer will not only look appealing but will also enhance the overall texture when sliced.
Once you’ve achieved an even spread, it’s time to chill the assembled cheesecake. Cover it with plastic wrap or a cake dome to prevent any odors from the refrigerator affecting your dessert. Allow the mousse to set in the refrigerator for at least 4 hours, or preferably overnight. This chilling time is crucial, as it allows the mousse to firm up and meld beautifully with the cheesecake layer.
Garnishing and Presentation
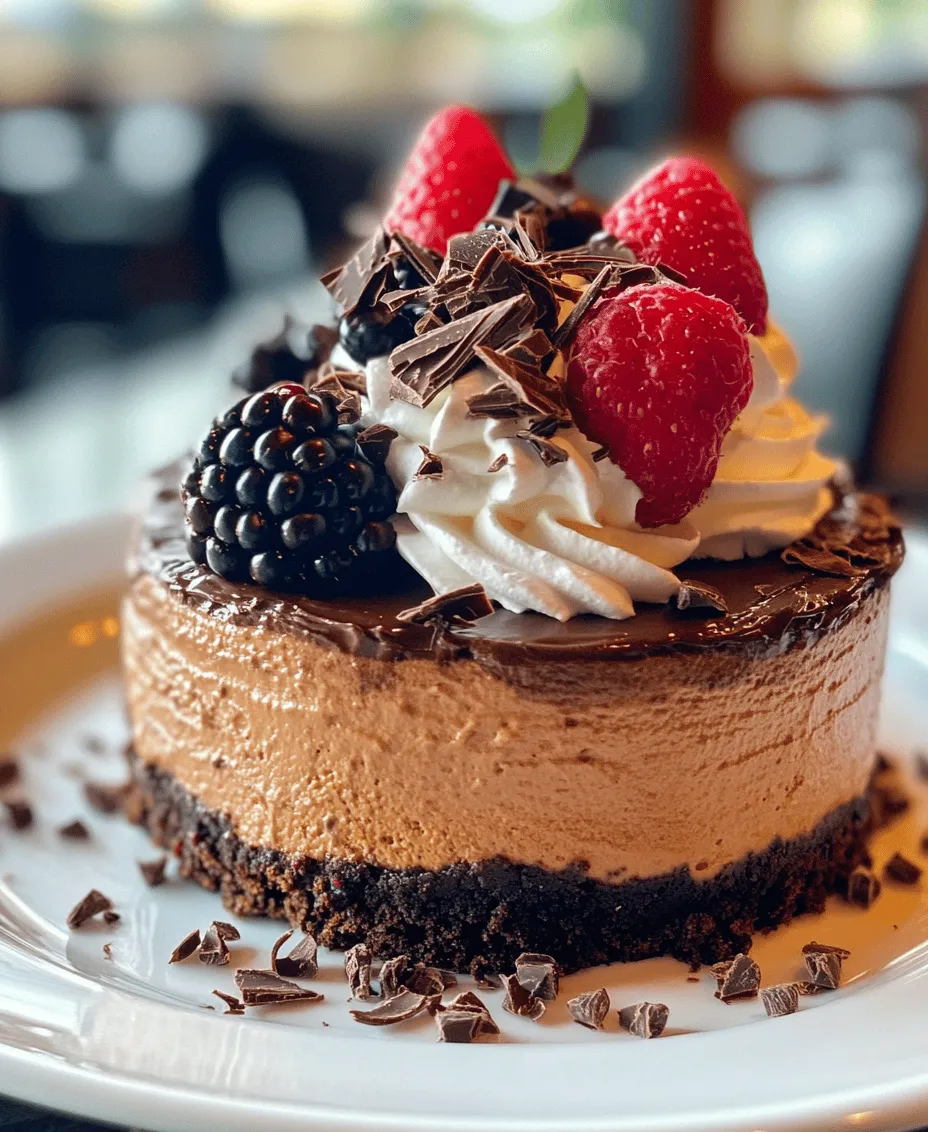
Presentation plays a vital role in the enjoyment of any dessert, and our chocolate mousse cheesecake is no exception. To elevate its appearance, consider various garnishing options. Chocolate shavings are a classic choice; simply use a vegetable peeler to shave dark chocolate over the top of the mousse. This adds an elegant touch and emphasizes the chocolate theme.
For a touch of freshness, add dollops of whipped cream around the edges or on top. You can also garnish with fresh berries, like raspberries or strawberries, which provide a beautiful color contrast and a burst of tartness that balances the richness of the cheesecake.
When plating your dessert, slice the cheesecake with a hot, dry knife to ensure clean edges. Serve each slice on a decorative plate, and consider drizzling a little chocolate sauce or raspberry coulis around the plate for an inviting touch. The visual appeal of your dessert will enhance the experience for your guests and make it a centerpiece for any occasion.
Serving Suggestions
Chocolate mousse cheesecake is a versatile dessert that shines in various settings, from intimate gatherings to festive celebrations. For casual occasions like family dinners, serve it with a scoop of vanilla ice cream or a dollop of whipped cream to complement the rich flavors.
When hosting a more formal gathering or dinner party, consider pairing the cheesecake with a glass of dessert wine or a rich coffee. A full-bodied red wine, like a Cabernet Sauvignon, enhances the chocolate flavors, while a smooth espresso or cappuccino provides a delightful contrast.
This cheesecake is perfect for special occasions such as birthdays, anniversaries, or holiday celebrations. Its decadent nature makes it a showstopper that will impress your guests and leave them craving more.
Nutritional Information
While chocolate mousse cheesecake is undoubtedly a decadent treat, understanding its nutritional aspects can help you enjoy it mindfully. A typical slice contains a significant amount of calories and fat due to the cream cheese, heavy cream, and chocolate. However, the joy of indulging in a homemade dessert can be part of a balanced diet.
Portion control is key; consider serving smaller slices, especially if you have rich accompaniments like ice cream or whipped cream. By savoring each bite, you can appreciate the flavors without overindulging.
For those with dietary restrictions, consider modifying the recipe. You can use gluten-free cookies for the crust and substitute a dairy-free cream cheese and whipped cream to create a vegan version. These alternatives allow everyone to enjoy this delightful dessert without compromising their dietary needs.
Conclusion
The chocolate mousse cheesecake is a delightful culmination of flavors and textures, balancing the creamy richness of cheesecake with the lightness of chocolate mousse. Its decadent profile makes it an unforgettable dessert for any occasion, inviting creativity and personal touches in its preparation and presentation.
As you embark on making this chocolate mousse cheesecake, remember that cooking is not just about following a recipe; it’s about experimenting, having fun, and sharing the joy of delicious food with loved ones. Homemade desserts bring warmth and happiness to gatherings, so embrace your creativity and enjoy the process.
Whether it’s a birthday celebration, a holiday feast, or a simple family dinner, this chocolate mousse cheesecake is bound to be a hit. So gather your ingredients, roll up your sleeves, and prepare to delight your taste buds and those of your guests with this decadent treat.