

Introduction
The allure of freshly baked bread fills homes with delightful aromas and offers a warm embrace that’s perfect for any occasion. Cinnamon Swirl Bread Delight transcends typical baking with its fluffy texture and rich flavor profile, ensuring it becomes a beloved centerpiece for brunch gatherings or a comforting sweet treat in your kitchen. This recipe infuses the comforts of home baking with the sweet warmth of cinnamon and sugar, making it a delightful offering any time of day.
Imagine the anticipation as the dough rises, the tantalizing spice of cinnamon wafting through the air, and the golden rolls emerging from the oven. This bread is not just about taste; it’s an experience, perfect for holidays, weekend breakfasts, or casual family get-togethers. In this article, we delve deep into the enchanting world of this classic recipe, dissecting each step and ingredient for an unforgettable baking journey.
Recipe Overview
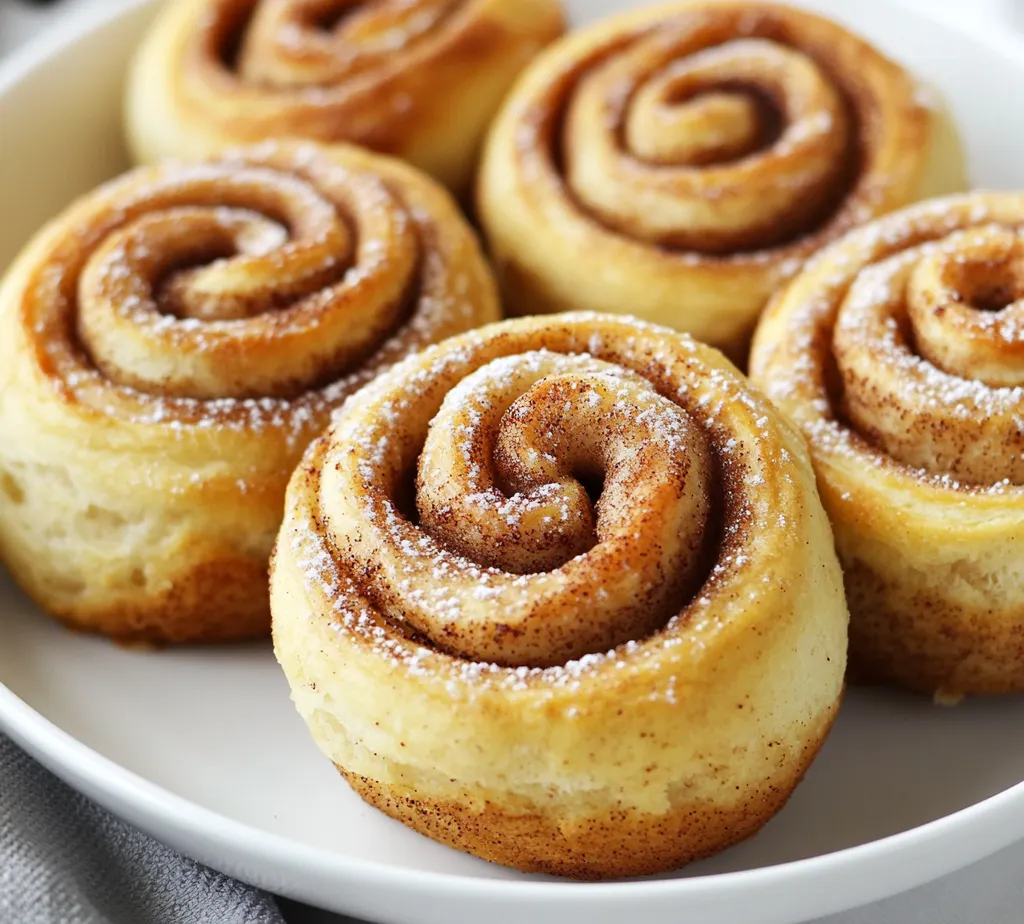
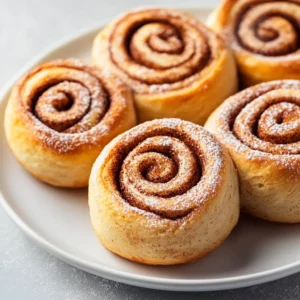
Cinnamon Swirl Bread Delight is a soft, pillowy bread infused with delightful cinnamon and sugar layers, creating an irresistible swirl pattern. With a generous sprinkling of nuts and a dusting of powdered sugar, this recipe yields 12 scrumptious rolls, perfect for sharing or savoring alone. Below, we will explore each component and method to ensure smooth preparation.
– Total Time: 2 hours
– Yield/Servings: 12 rolls
– Difficulty: Not specified in the recipe
Ingredients
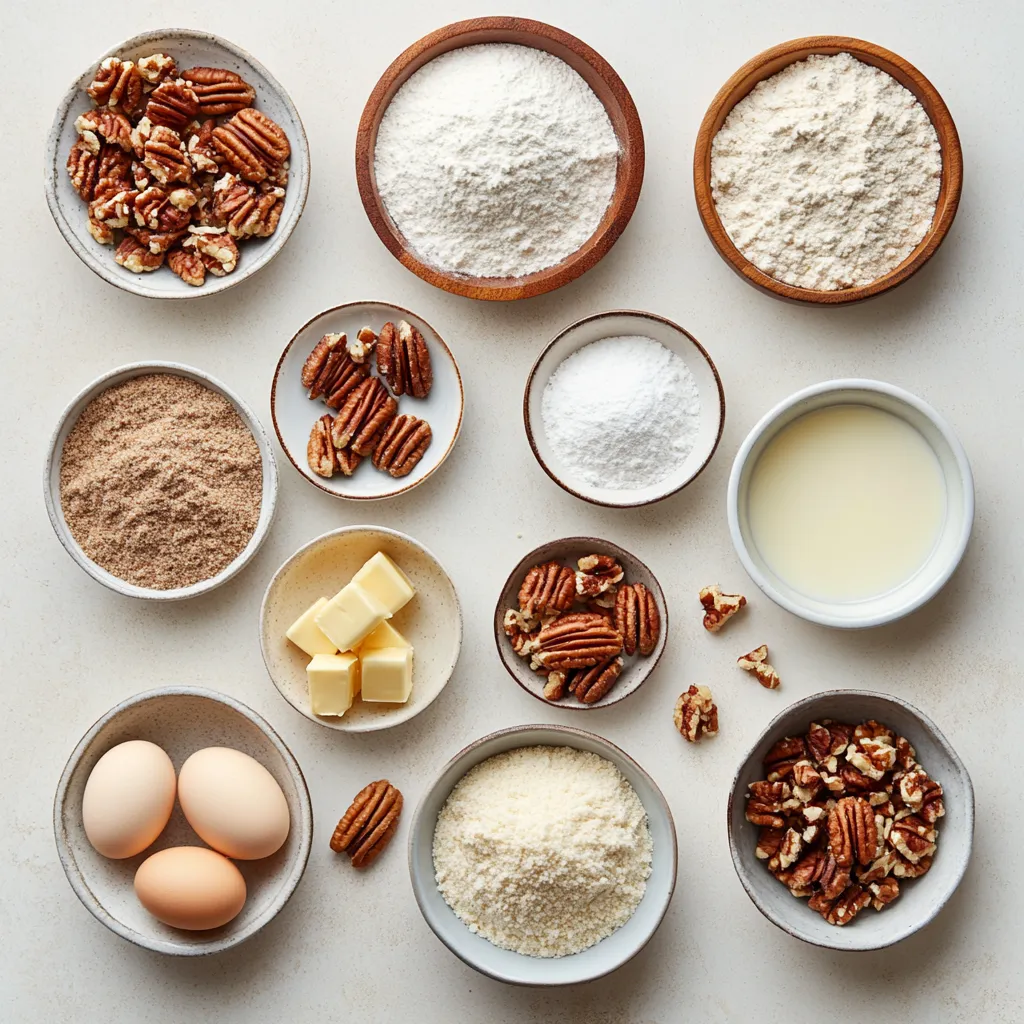
An optimal baking experience begins with the right ingredients. Gather the following:
– All-purpose flour: 4 cups, plus extra for dusting
– Active dry yeast: 1 packet (2 ¼ tsp)
– Granulated sugar: ½ cup
– Salt: 1 tsp
– Warm milk: 1 cup (110°F/43°C)
– Eggs: 2 large, at room temperature; plus 1 for egg wash
– Unsalted butter: ½ cup, melted
– Ground cinnamon: 1 tbsp
– Brown sugar: ½ cup, packed
– Nuts: ¼ cup chopped pecans or walnuts (optional)
– Powdered sugar: for dusting
Instructions
Here’s a detailed breakdown of the steps to create your Cinnamon Swirl Bread Delight.
1. Activate the Yeast: In a small bowl, combine the warm milk and active dry yeast. Allow the mixture to sit for about 5-10 minutes until it becomes frothy, indicating that the yeast is active.
2. Mix Dry Ingredients: In a large mixing bowl, whisk together the all-purpose flour, granulated sugar, and salt until well combined. This step is crucial for ensuring that the yeast has the right environment to flourish.
3. Combine Wet Ingredients: In another bowl, mix the melted butter and room temperature eggs. Pour in the frothy yeast mixture and whisk everything together until fully combined.
4. Form the Dough: Gradually pour the wet mixture into the dry ingredients, stirring with a wooden spoon or spatula until a cohesive dough begins to form. It’s important to mix until no dry flour remains.
5. Knead the Dough: Transfer the dough onto a floured surface and knead it for about 8-10 minutes, or until it becomes smooth and elastic. This process develops the gluten, providing structure to the bread.
6. First Rise: Place the kneaded dough into a lightly greased bowl. Cover it with a clean kitchen towel and let it rise in a warm environment for about 1 hour, or until it has doubled in size. An optimal rising temperature is between 75°F to 80°F, which can also be achieved by placing the bowl in an off oven with the light on.
7. Prepare the Filling: In a small bowl, combine the packed brown sugar, ground cinnamon, and chopped nuts (if using) to create the filling. This vibrant mixture adds depth to each slice of bread.
8. Shape the Dough: After the dough has risen, punch it down gently to release air. Roll it out on a floured surface into a rectangle measuring approximately 16×12 inches. The flattening process provides an ideal canvas for the filling.
9. Add the Filling: Evenly spread the cinnamon-sugar mixture over the rolled-out dough. Starting from the long side, carefully roll the dough into a tight log. This technique ensures a beautiful swirl pattern that will be stunning once baked.
10. Cut the Rolls: Using a sharp knife, slice the log into 12 equal pieces. Arrange the rolls cut-side up in a greased 9×13 inch baking dish. Each roll should be placed close but not touching to allow for rising.
11. Second Rise: Cover the baking dish with a towel and let the rolls rise again for another 30-45 minutes, or until they appear puffy and have expanded. This second rise is crucial for achieving a light, fluffy texture.
12. Preheat Oven: Preheat your oven to 350°F (175°C) while the rolls are rising. Ensuring the oven is at the right temperature allows for even baking.
13. Egg Wash: In a small bowl, beat the remaining egg and brush it generously over the tops of the rolls for a beautiful golden finish. This step enhances the visual appeal and adds a touch of richness.
14. Bake: Bake in the preheated oven for 25-30 minutes, or until the rolls are golden brown and fully cooked through. The aroma during baking will be irresistible.
15. Cool and Serve: Once baked, allow the rolls to cool in the pan for about 10 minutes. Before serving, dust them lightly with powdered sugar for an added touch of sweetness. This final flourish makes the bread visually enticing and palatable.
Preparing the Yeast
Understanding the importance of yeast activation is essential for achieving the perfect rise. Yeast is a living organism that plays a critical role in the fermentation process, transforming the dough by fermenting sugars and producing carbon dioxide. This gas forms bubbles, which give the bread its light and airy texture.
Understanding Yeast Activation
When mixed with warm milk, the yeast cells become active. It is essential to keep the milk at the proper temperature to avoid killing the yeast. Ideally, the liquid should be warm to the touch but not hot. Once activated, yeast creates bubbles that leaven the dough.
How to Activate
To activate yeast, mix warm milk with the active dry yeast and let it sit for 5-10 minutes. The frothy layer that forms on the surface indicates successful activation; this is the sign that the yeast is alive and ready to work its magic in the dough.
Mixing Dry Ingredients
Creating a solid foundation involves the careful integration of dry components. This step establishes the base flavor and texture of your bread.
Essential Dry Ingredients
All-purpose flour is the backbone of this recipe, while granulated sugar enhances sweetness, and salt balances flavors. Together, these ingredients create a harmonious blend that forms the structure of the bread.
Whisking Technique
Combining these dry ingredients thoroughly using a whisk ensures that there are no lumps of sugar or salt left, promoting even distribution when the wet ingredients are added. A well-mixed flour base is critical to achieving a uniform dough.
Combining Wet Ingredients
This step marries the rich flavors and moisture necessary for the dough.
Ingredients for the Wet Mixture
Melted butter adds richness and a velvety texture, while the room temperature eggs contribute to the structure and moisture of the dough. When combined with activated yeast, these ingredients work together to create a dough that’s both flavorful and tender.
Mixing Method
Using a whisk, blend the melted butter and eggs with the activated yeast mixture until the mixture is uniform and silky. Ensuring an even consistency at this stage will make the subsequent steps smoother, allowing you to create a beautiful dough free of dry patches or clumps.
Forming the Dough
This is the transitional phase where ingredients become a cohesive unit.
Gradual Incorporation
As you pour the wet mixture into the dry ingredients, it’s vital to stir gently until a cohesive dough begins to form. Too vigorous mixing can lead to an uneven texture, while being too gentle might not combine them well. A wooden spoon or spatula works best in this stage to gradually incorporate everything into a unified dough, ready to be kneaded into the perfect consistency.
Dough Consistency
When you combine the wet mixture with the dry ingredients, it’s important to pour gradually, stirring until a shaggy dough forms. This process allows for even distribution of moisture throughout the flour. The dough should begin to pull away from the sides of the bowl but remain slightly sticky. This stickiness is key to achieving a tender bread, as it provides the moisture necessary for a soft crumb.
Kneading the Dough
Kneading is an essential step in the bread-making process that develops gluten, which lends the cinnamon swirl bread its characteristic stretchy and elastic texture.
Importance of Kneading
By kneading the dough for approximately 8-10 minutes, the gluten strands are aligned and strengthened. This not only contributes to the final texture but also helps trap air bubbles during fermentation, creating that irresistible fluffy quality once baked.
Techniques for Success
To knead effectively, turn the dough out onto a floured surface. Use the heel of your hand to push the dough away from you before folding it back over itself. Give the dough a quarter turn and repeat the process. This technique ensures even gluten development throughout the dough, enhancing its structure and elasticity.
First Rise
Allowing the dough to rise for the first time is critical for developing the flavor and texture characteristics typical of cinnamon swirl bread.
Preparing for the First Rise
Place the kneaded dough into a lightly greased bowl. Cover the bowl with a clean kitchen towel to retain warmth, which is vital for the yeast to activate and for fermentation to occur. The dough needs a cozy environment to thrive.
Timing the Rise
Let the dough rise for about 1 hour, or until it has doubled in size. This rising phase indicates that the yeast is actively producing gases, which create air pockets within the dough. This step is essential for the lightness and fluffiness of the final bread.
Preparing the Filling
The filling is what elevates the humble bread into a delightful treat saturated with flavor and aroma.
Components of the Filling
For this recipe, the filling is composed of packed brown sugar, ground cinnamon, and optional chopped nuts. The combination of brown sugar and cinnamon creates a warm, sweet flavor profile that perfectly complements the rich bread.
Mixing Techniques
To achieve an even distribution of flavor across every bite, mix the brown sugar and cinnamon thoroughly before adding any nuts. This ensures that no single piece of bread is left without that sweet, aromatic swirl.
Shaping the Dough
In this stage, proper shaping is not just about aesthetics; it plays a significant role in achieving even baking and a delightful presentation.
Punching Down
After the first rise, gently punch down the dough to release excess air. This step is necessary for shaping and ensures uniform texture in the final rolls.
Rolling Technique
Roll out the dough into a rectangle approximately 16×12 inches in size. It’s crucial to achieve an even thickness, allowing the rolls to bake uniformly. A rolling pin can help create consistent pressure, while a floured surface will prevent sticking.
Adding the Filling
Integrating the filling effectively is a crucial step for building flavor layers in the bread.
Spreading the Mixture
Once you’ve rolled out the dough, spread the cinnamon-sugar mixture evenly across the surface. Be sure to cover the dough edges; this will allow for optimal flavor in every bite.
Rolling the Dough
With the filling spread across the dough, begin rolling from the long side to create a tight log. A tight roll is vital as it builds layers of filling that will swirl beautifully in the cut rolls.
Cutting the Rolls
Precision in cutting the rolled dough ensures that the beautiful spirals remain intact.
Slicing Technique
Using a sharp knife, cut the rolled dough into 12 equal pieces. A serrated knife can offer smooth cuts, preserving the spiral design better than a flat knife.
Arranging in Baking Dish
Place the cut pieces, cut-side up, in a greased 9×13 inch baking dish. The rolls should fit snugly, which allows them to rise together, creating a wonderfully soft texture.
Second Rise
The second rise is where the rolls become puffy and light, setting them up for baking.
Covering for the Second Rise
Cover the baking dish with a towel once arranged to keep the warmth in. Allow the rolls to rise for 30-45 minutes until they appear puffy and have expanded noticeably.
Baking and Serving Ideas
Preheat your oven to 350°F (175°C) during the final rise to ensure it’s ready once the rolls are done rising. Brush the top of the rolls with an egg wash, which contributes to a beautiful golden finish as they bake.
Texture and Aroma
Once baked for 25-30 minutes, the rolls will emerge golden brown, and the kitchen will be filled with an enticing aroma of cinnamon and sugar. Allow the cinnamon swirl bread to cool for about 10 minutes before serving to allow the flavors to settle.
Serving Suggestions
Present the rolls elegantly on a rustic wooden board, lightly dusted with powdered sugar for a touch of sweetness. For an added indulgence, consider serving them alongside whipped butter or cream cheese, enhancing the overall experience.
Scaling and Storage
The recipe is easily scalable; you can double or halve the ingredients based on your needs. If you have leftovers or want to prep ahead, store the rolls in an airtight container. They will keep well at room temperature for about 2 days or can be refrigerated for up to a week.
Reheating
To enjoy the rolls after storing, reheat in the oven at a low temperature (about 300°F/150°C) for about 10-15 minutes, until warmed through. This helps restore some of the original texture and warmth.
Troubleshooting
If your dough doesn’t rise as expected, ensure that the yeast is fresh and that the milk was at the correct temperature. If the rolls turn out too dense, it may indicate insufficient kneading or that the dough was overworked.
FAQs
**Can I use whole wheat flour instead of all-purpose flour?**
While it’s possible, the texture will differ significantly. Whole wheat flour creates a denser product; if you wish to use it, consider mixing in some all-purpose flour for better texture.
**What if I don’t have active dry yeast?**
You can substitute with instant yeast using the same quantity. The dough will rise as quickly but skip the activation phase since instant yeast can be mixed directly with the dry ingredients.
**How can I make the rolls sweeter?**
Adjust the sugar to your liking in the filling. You can add more brown or granulated sugar for increased sweetness, particularly if you enjoy a richer flavor.
The cinnamon swirl bread is an exemplary blend of soft, rich dough and a warm, sweet filling, with a rise time of about 1 hour and a baking time of 25-30 minutes. Its delightful aroma and appealing texture make it a treat that’s both comforting and memorable.
Cinnamon Swirl Bread Delight Recipe
Ingredients
- 4 cups all-purpose flour
- 1 packet active dry yeast
- ½ cup granulated sugar
- 1 tsp salt
- 1 cup warm milk
- 2 large eggs
- ½ cup unsalted butter
- 1 tbsp ground cinnamon
- ½ cup packed brown sugar
- ¼ cup chopped pecans or walnuts
- 1 egg for egg wash
- powdered sugar
Instructions
- Activate the yeast by combining warm milk and yeast, letting it sit until frothy.
- Mix dry ingredients: flour, sugar, and salt in a large bowl.
- Combine wet ingredients: mix melted butter and eggs, then add the yeast mixture.
- Form the dough by combining wet and dry ingredients until cohesive.
- Knead the dough on a floured surface for 8-10 minutes until smooth.
- Let the dough rise in a greased bowl for 1 hour until doubled in size.
- Prepare the filling by mixing brown sugar, cinnamon, and nuts.
- Roll out the dough into a rectangle, spread the filling, and roll it up tightly.
- Cut the log into 12 pieces and place them in a greased baking dish.
- Let the rolls rise for another 30-45 minutes until puffy.
- Preheat the oven to 350°F while the rolls rise.
- Brush the rolls with egg wash and bake for 25-30 minutes until golden.
- Cool for 10 minutes and dust with powdered sugar before serving.