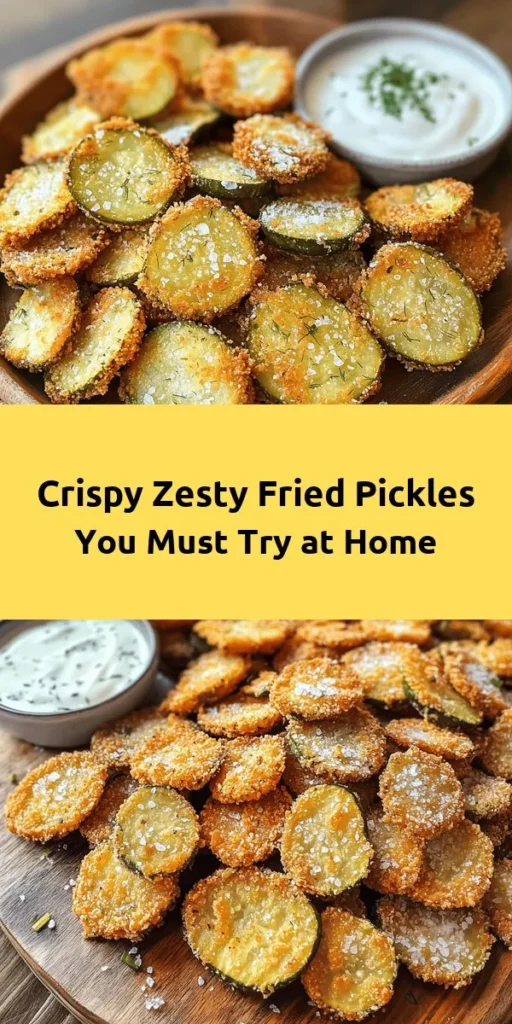
Introduction
Fried pickles have surged in popularity, transforming from a Southern staple into a beloved snack and appetizer across the United States. Whether you’re at a county fair, a local pub, or a gourmet restaurant, these crunchy delights often make an appearance on menus, captivating taste buds with their unique flavor profile. The irresistible combination of tangy, briny dill pickles enveloped in a crispy, seasoned coating creates a snack that is hard to resist.
What makes fried pickles particularly appealing is their versatility. They can be enjoyed as an appetizer at a casual gathering, a bar snack paired with your favorite dip, or even as a side dish to complement your meal. Their adaptability knows no bounds, making them a favorite among home cooks and chefs alike. If you’re looking to impress your guests or simply indulge in a delicious treat, learning to make crispy zesty fried pickles at home is a must.
In this article, we will explore the key ingredients that contribute to the distinct taste and texture of fried pickles, as well as the preparation steps you need to follow to achieve that perfect crunch. Let’s dive into the world of fried pickles and discover how you can create this delightful snack in your own kitchen.
Understanding the Ingredients
To make crispy zesty fried pickles, it’s essential to understand the role of each ingredient in the recipe. Here’s a breakdown of the main components that come together to create this flavorful dish.
Dill Pickles: The Star Ingredient
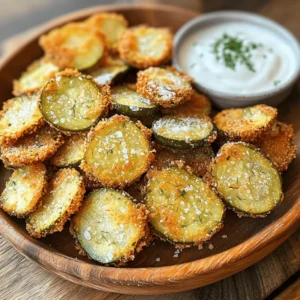
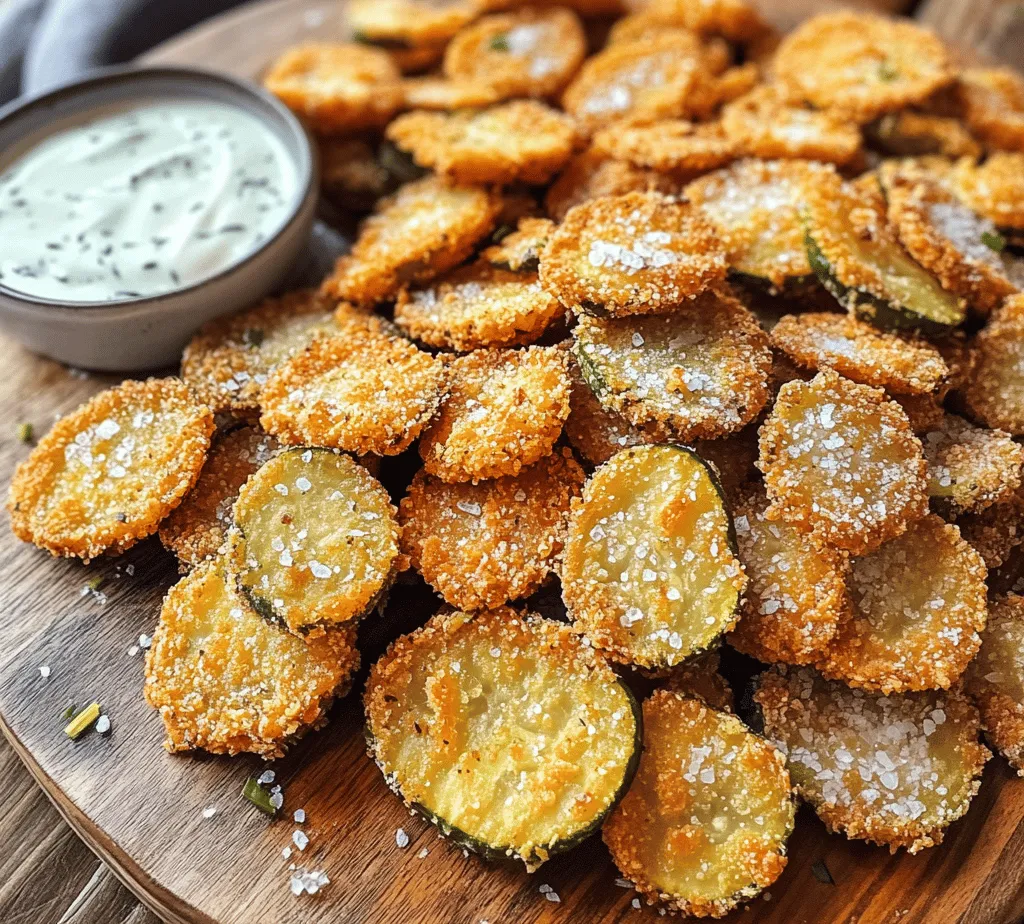
Dill pickles are undeniably the star of this recipe. Their tangy, sour flavor provides a delightful contrast to the crunchy exterior. When selecting dill pickles for frying, it’s best to choose whole or spears rather than slices, as they hold up better during the frying process. The brine in which pickles are packed adds an extra layer of flavor, making them even more delicious when fried.
All-Purpose Flour: Importance in the Breading Process
All-purpose flour plays a crucial role in the breading process of fried pickles. It serves as the first layer of coating, helping the subsequent layers stick to the pickles. When the pickles are dredged in flour, it creates a base that enhances the adherence of the buttermilk and the seasoned breadcrumbs, resulting in a crispy and flavorful crust once fried.
Buttermilk: Achieving Moist Interior and Flavor
Buttermilk is another key ingredient that elevates the flavor and texture of fried pickles. When pickles are soaked in buttermilk before frying, it not only helps to tenderize the pickles but also adds a touch of tanginess. The acidity in buttermilk allows the breading to cling better while contributing to that moist interior that contrasts beautifully with the crunch of the fried coating.
Seasonings: A Flavorful Blend
The seasonings you choose to use will significantly impact the final flavor of your fried pickles. In this recipe, we recommend a blend of garlic powder, onion powder, smoked paprika, and cayenne pepper.
– Garlic Powder: Adds a savory depth that enhances the overall flavor.
– Onion Powder: Offers a subtle sweetness and complexity.
– Smoked Paprika: Provides a hint of smokiness, contributing to a well-rounded taste.
– Cayenne Pepper: Delivers a touch of heat, which balances the tanginess of the pickles.
Feel free to adjust the seasonings to your taste, as this blend is meant to complement the pickles without overwhelming them.
Breadcrumbs: Texture Matters
Choosing the right type of breadcrumbs is vital for achieving that perfect crunch. You can opt for seasoned breadcrumbs for added flavor or panko breadcrumbs, which are lighter and crispier. Panko breadcrumbs tend to create a flakier texture that many find irresistible. Regardless of your choice, ensure that the breadcrumbs are evenly distributed and adequately coat the pickles for optimal crunchiness.
Vegetable Oil for Frying: Impact on Final Product
The choice of oil for frying is essential for achieving crispy fried pickles. Vegetable oil is a popular choice due to its high smoke point, allowing it to reach the necessary temperature for frying without burning. Oils like canola or peanut oil are also excellent options, providing a neutral flavor that won’t overpower the pickles. The oil should be heated sufficiently to create a bubble around the pickles when they are added, ensuring they fry evenly and develop that coveted crispy exterior.
Preparation Steps Explained
Now that we’ve covered the key ingredients, let’s delve into the preparation steps that will guide you in making the perfect crispy zesty fried pickles. Each step is crucial to achieving the ultimate crunch and flavor.
Importance of Prepping the Pickles
Before frying, proper preparation of the pickles is essential for achieving the desired crispiness. Start by draining the dill pickles from their brine. Excess moisture can lead to soggy fried pickles, so it’s important to get rid of it. After draining, place the pickles on paper towels and pat them dry thoroughly. This step helps to ensure that the breading adheres properly during frying and that the pickles develop that satisfying crunch.
Creating the Breading Station
Setting up an efficient breading station is key to a smooth cooking process. You will need three shallow dishes or bowls for the breading process:
1. First Dish: Place all-purpose flour in this dish. You may want to season the flour with a pinch of salt and some of your chosen spices for added flavor.
2. Second Dish: Pour buttermilk into the second dish. This is where the pickles will be dipped to ensure they are evenly coated before breading.
3. Third Dish: In the final dish, combine your breadcrumbs with the remaining seasonings. Mix well to ensure even distribution.
By organizing your ingredients in this manner, you streamline the breading process, making it easier to coat each pickle efficiently.
Tips on Properly Coating the Pickles
Coating the pickles correctly is vital for achieving maximum crunch. Start by taking a pickle spear or whole pickle and dredging it in the flour, ensuring that it is fully coated. Shake off any excess flour before dipping it into the buttermilk. Allow any excess buttermilk to drip off before moving on to the final step.
Next, transfer the pickle into the breadcrumb mixture, pressing gently to ensure that the breadcrumbs adhere well. Make sure each pickle is generously coated with breadcrumbs to create that crunchy exterior. Repeat this process for all your pickles, and once they are all coated, allow them to rest for a few minutes. Resting helps the coating set, which will result in a better crunch when fried.
With the preparation steps complete, you’re now ready to move on to the frying process, which will transform your coated pickles into the crispy zesty fried pickles that everyone loves. Stay tuned for the next part, where we’ll dive into the frying technique and serving suggestions that will elevate your fried pickles from ordinary to extraordinary.
The Frying Process
Achieving the perfect crispy zesty fried pickles hinges on mastering the frying process. The key to delectable fried pickles lies in the temperature of the oil and the technique used during frying. You want your oil heated to a precise temperature of 350°F to 375°F. This temperature range is optimal for creating that golden-brown crust while ensuring the pickles inside remain crisp and juicy.
To test if your oil is ready, you can drop a small amount of batter into the oil; if it sizzles and rises to the surface quickly, you’re good to go. Using a deep-frying thermometer can help maintain the correct oil temperature throughout the frying process, which is crucial for consistent frying.
When it comes to frying, always opt for small batches. Frying in smaller portions allows for even cooking and avoids overcrowding the pan. Overcrowding can cause the oil temperature to drop, leading to soggy pickles rather than the desired crispy texture. Ideally, you should fry about 4 to 5 pickles at a time, depending on the size of your frying vessel. This technique not only ensures each pickle gets the attention it deserves but also helps maintain that perfect crispy coating.
Serving Suggestions
Ideal Dipping Sauces
Fried pickles are often adored for their crispy texture and tangy flavor, but they truly shine when paired with the right dipping sauce. The classic choice is ranch dressing, whose creamy texture and herby flavor complement the zesty pickles beautifully. To elevate your fried pickles experience, consider offering a variety of dipping sauces.
Alternative options include:
– Chipotle Mayo: A spicy and smoky twist that pairs well with the acidity of the pickles.
– Honey Mustard: The sweetness balances the tanginess of the pickles, making for a delightful combination.
– Buffalo Sauce: For those who enjoy a kick, buffalo sauce adds a fiery flair to the dish.
– Garlic Aioli: This rich and savory dip enhances the flavor profile while adding a touch of gourmet sophistication.
Presentation Ideas
Presentation can elevate your fried pickles from a simple snack to an impressive appetizer. Consider serving them in a rustic basket lined with parchment paper, which adds a touch of charm and absorbs excess oil. Garnish with fresh herbs like parsley or dill for a pop of color and extra flavor.
For gatherings or parties, you can create a fried pickle platter, featuring an assortment of pickles and sauces. Arrange the fried pickles in a circular pattern, placing small bowls of various dipping sauces in the center. This not only looks inviting but also encourages guests to sample different flavors, making it a fun communal dish.
Pairing Suggestions
To create a full meal experience, consider pairing your crispy fried pickles with complementary dishes and beverages. They make an excellent appetizer alongside a hearty sandwich, such as a pulled pork or fried chicken sandwich.
Drink pairings can also enhance the enjoyment of fried pickles. A cold, crisp lager or a tangy sour beer offers a refreshing contrast to the salty, zesty pickles. If you prefer cocktails, a classic gin and tonic or a spicy margarita can provide a delightful balance of flavors.
Nutritional Information
When indulging in crispy fried pickles, it’s important to be mindful of their nutritional aspects. Typically, fried pickles are relatively high in calories and fat due to the frying process. A standard serving of fried pickles can contain around 300-400 calories, depending on the batter and the amount of oil absorbed during frying.
While enjoying fried pickles is a delightful experience, moderation is key. To strike a balance between indulgence and health, consider making a few modifications. One excellent alternative is to bake the pickles instead of frying them. Baked fried pickles can still achieve a satisfying crunch by using a light coating of oil and a hot oven. This method reduces the calorie and fat content significantly while still allowing you to enjoy the flavors you love.
For those looking to enhance the nutritional value without compromising taste, consider using whole-grain breadcrumbs in your batter. This small change can provide additional fiber and nutrients, making your fried pickles a bit healthier.
Cultural Significance of Fried Pickles
Fried pickles hold a special place in American cuisine, with a history that traces back to the Southern United States. They are often credited to the state of Arkansas, where they were popularized in the 1960s. Since then, they have become a beloved snack and appetizer in various restaurants and bars across the nation.
Regional variations of fried pickles can be found throughout the United States. In the South, fried pickles are often served alongside fried catfish or as a staple at barbecue joints. In contrast, some variations feature different types of pickles, such as dill or bread-and-butter. These variations reflect the diverse culinary traditions and preferences found in various parts of the country.
Fried pickles have also gained popularity beyond the southern states, appearing at food festivals, fairs, and in restaurants as a quintessential American comfort food. Today, they are celebrated not only for their taste but also for their ability to bring people together around shared culinary experiences.
Conclusion
Crispy zesty fried pickles offer a delightful combination of flavors and textures that make them a satisfying treat for any occasion. Whether you’re enjoying them as a snack during a movie night or serving them at a gathering, this recipe is sure to impress. The process of making fried pickles is accessible, making it a great choice for home cooks looking to experiment in the kitchen.
With their rich cultural significance and delightful crunch, fried pickles can easily become a family favorite. The joy of sharing this dish with loved ones, combined with the delicious flavor, showcases the essence of home cooking. So, gather your ingredients, follow the steps, and enjoy the crispy satisfaction of homemade fried pickles that are perfect for any occasion.