
Introduction
Chimichangas are a beloved Mexican dish that embody the perfect blend of flavors and textures. Originating from the Southwestern United States, these deep-fried burritos are a staple in Tex-Mex cuisine and are loved for their crispy exterior and savory filling. Traditionally filled with beans, meats, and cheese, chimichangas have become a popular choice in restaurants and homes alike, embodying comfort food at its best.
The Crunchy Chicken Chimichangas Delight recipe showcases a simple yet flavorful take on this classic dish. It’s a fantastic option for family gatherings, casual get-togethers, or even a quick weeknight dinner. The enticing aroma of sautéed vegetables and spices will fill your kitchen, making this dish not only a meal but an experience to savor. With its crunchy texture and savory filling, you might find yourself making this dish a regular part of your culinary repertoire.
Whether you are a seasoned chef or a kitchen novice, this recipe is straightforward and rewarding. With a blend of shredded chicken, refried beans, and flavorful spices enveloped in a crispy tortilla, every bite is a satisfying delight. If you’re looking for a dish that combines ease and deliciousness, these crunchy chicken chimichangas are sure to please.
Recipe Overview
– Total Time: 40 minutes
– Prep Time: 20 minutes
– Servings: 4
– Difficulty: Not specified in the recipe
This recipe is ideal for various occasions, including family dinners, parties, or as a hearty weeknight meal. Nutritionally, the combination of chicken and beans offers a good source of protein, while the cheese provides richness and flavor. With the addition of colorful vegetables, these chimichangas also bring a delightful array of textures and tastes to the table.
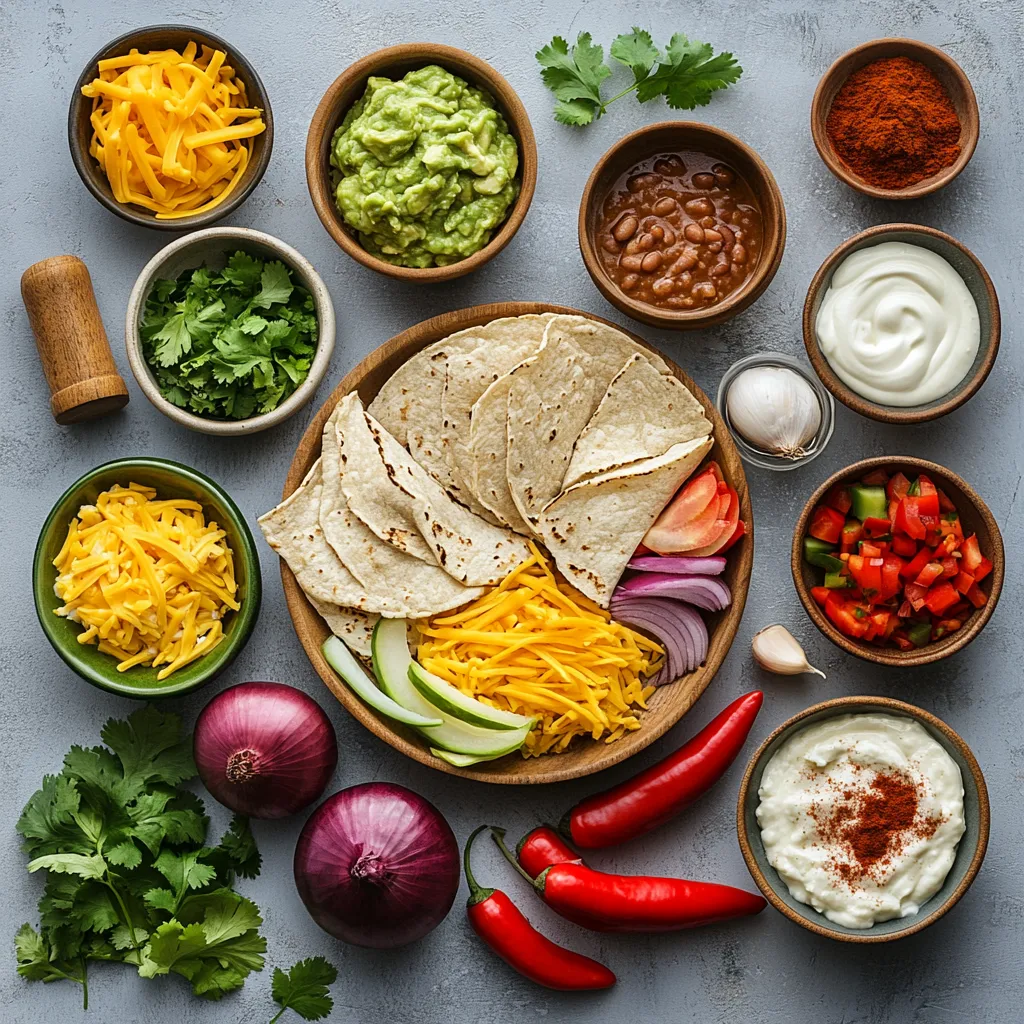
Ingredients
– 2 cups cooked, shredded chicken
– 1 cup refried beans
– 1 cup shredded cheese (choose between cheddar or Monterey Jack)
– 1/2 cup diced onions
– 1/2 cup diced bell peppers (any color)
– 2 cloves garlic, minced
– 1 tsp ground cumin
– 1 tsp chili powder
– Salt and pepper to taste
– 4 large flour tortillas
– Oil for frying (vegetable or canola)
– Optional toppings: sour cream, guacamole, salsa, chopped cilantro
Each ingredient plays an essential role in the overall flavor and texture of the dish. The cooked shredded chicken adds a hearty element, while refried beans lend creaminess. Cheese, whether you choose cheddar or Monterey Jack, contributes a melt-in-the-mouth experience paired with the crunchy outside. The diced onions and bell peppers not only enhance the dish with their natural sweetness but also provide a contrast to the rich filling.
Instructions
1. Prepare the Filling: In a large skillet, heat a splash of oil over medium heat. Add the diced onions, bell peppers, and minced garlic. Sauté for approximately 5 minutes until the vegetables are soft and aromatic.
2. Mix the Ingredients: In a spacious mixing bowl, combine the shredded chicken, refried beans, sautéed vegetables, ground cumin, chili powder, and a sprinkle of salt and pepper. Stir well until all the ingredients are thoroughly mixed.
3. Assemble the Chimichangas: Take one tortilla and place about 1/4 of the chicken filling in the center. Top the filling with a generous amount of shredded cheese. Fold the sides of the tortilla inward, then roll it up tightly from the bottom to the top, creating a burrito shape. Repeat this process with the remaining tortillas and filling.
4. Heat the Oil: In a deep skillet or pot, pour in about 2 inches of oil and heat it over medium-high heat until it reaches a temperature of 350°F (175°C).
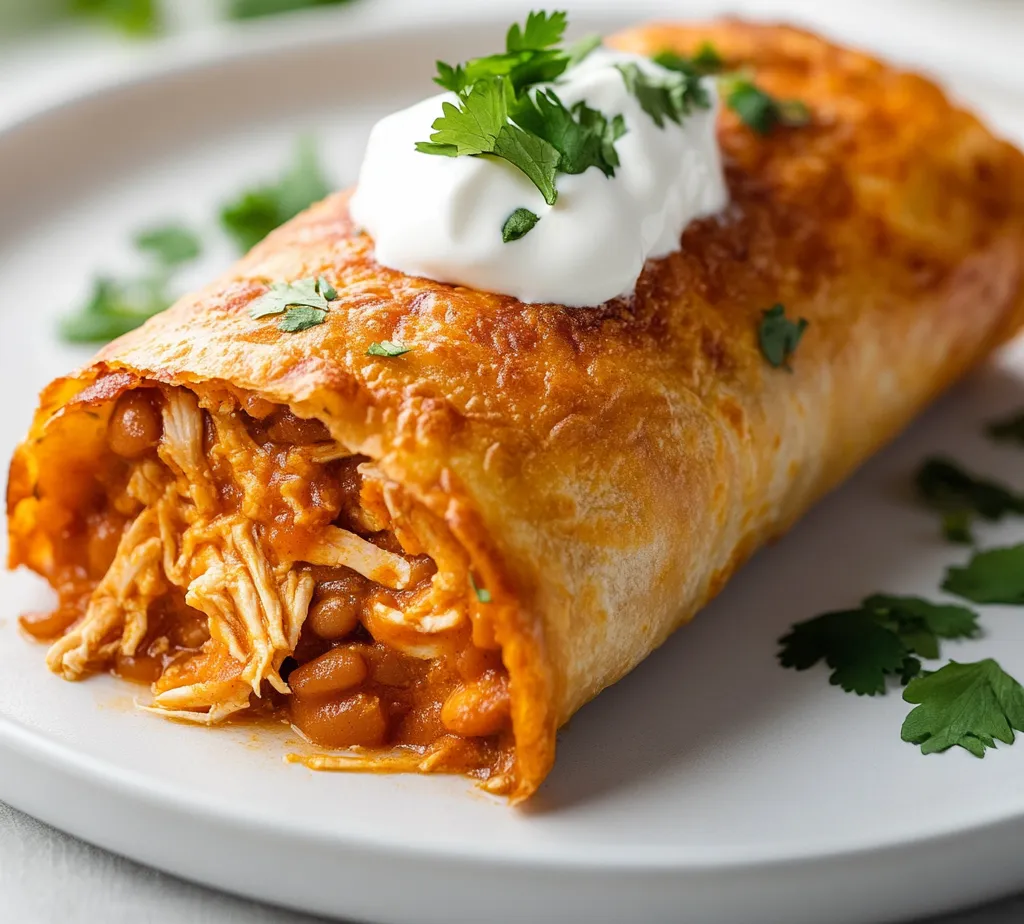
5. Fry the Chimichangas: Carefully place the assembled chimichangas seam-side down into the hot oil, frying in batches if needed. Cook for 3-4 minutes on each side, or until they turn a beautiful golden brown and achieve a crispy texture. Use a slotted spoon to remove them from the oil and place them on a paper towel-lined plate to absorb any excess oil.
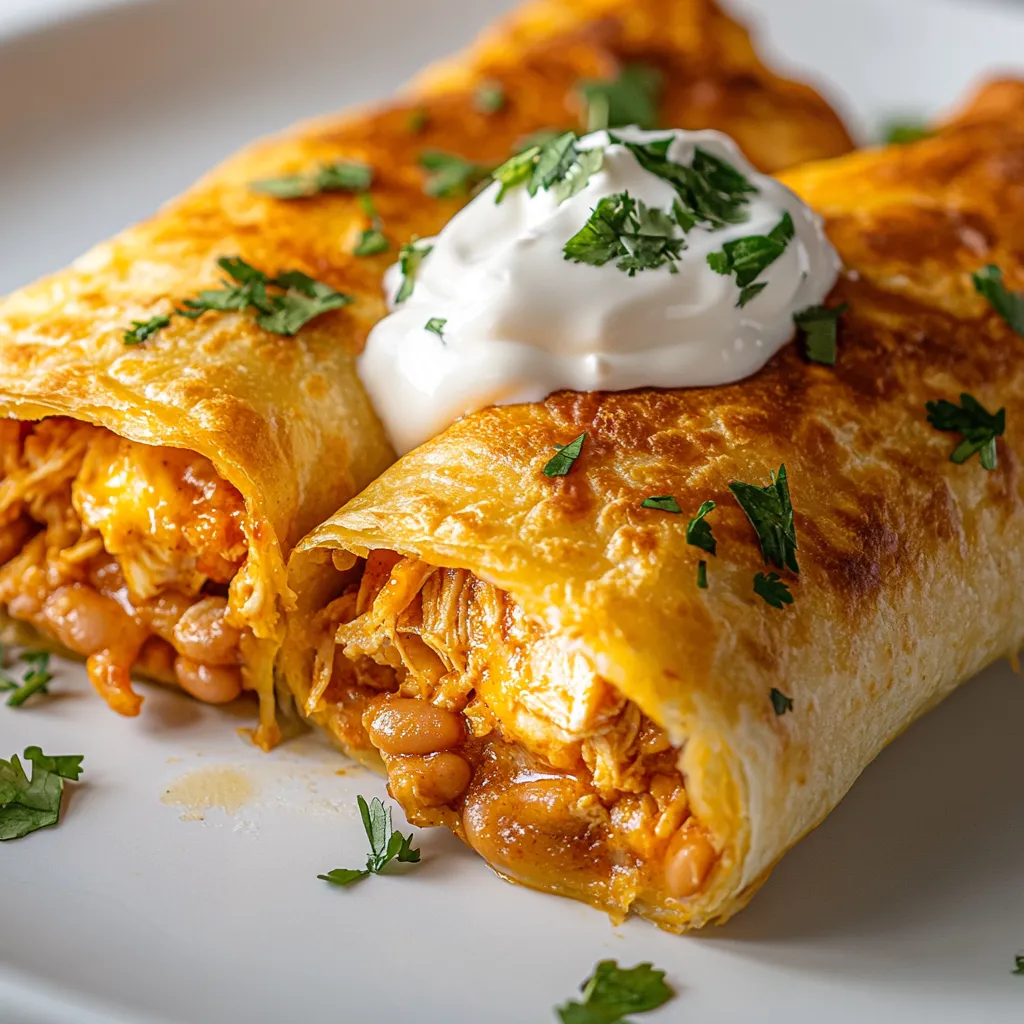
6. Serve: For a delightful presentation, cut the chimichangas in half and arrange them on a serving platter. Serve them hot, accompanied by your choice of toppings such as sour cream, guacamole, salsa, or a sprinkle of fresh cilantro.
As you prepare the filling, the sizzling garlic and vegetables will create a mouthwatering aroma that sets the stage for this enjoyable dish. Frying the chimichangas until golden brown ensures that each bite gives that perfect crunch, contrasting beautifully with the tender filling hidden within.
The optional toppings you choose to serve alongside this dish can elevate the overall experience, enhancing the flavors and providing varying textures that complement the chimichangas beautifully.
Stay tuned for the next part, where we will delve deeper into specific techniques and tips to elevate your chimichanga-making skills even further.
Visual Cues for Assembly Success
When assembling chimichangas, certain visual cues can guide you to ensure each piece is constructed perfectly. The filling should be heaped generously in the center of the tortilla, allowing ample room for folding while avoiding overstuffing. A good portion is about 1/4 of the tortilla’s area, providing a balanced bite with each serving. As you fold, aim for a snug roll; the tortilla should envelop the filling without creating any rips.
Additionally, ensure the tortillas you use are pliable. If they feel stiff or have been refrigerated, you can warm them slightly in a skillet or microwave to make them more flexible and easier to manage. Properly folded chimichangas should have clean seams, holding their structure during frying.
Heating the Oil
The oil must reach the right temperature for the best frying results, with 350°F (175°C) being the sweet spot. At this temperature, the chimichangas will cook evenly, developing a deliciously crisp exterior while keeping the filling moist and flavorful. You can use a kitchen thermometer to monitor the heat accurately; this will help avoid the pitfalls of undercooked or overly dark chimichangas.
Safety tips for frying include keeping a close watch on the oil as it heats and restricting children and pets from the cooking area. Additionally, never leave the frying oil unattended. The splatter can be significant, so consider using a splatter guard or screen to minimize mess and maintain safety.
To manage splatter and reduce risk, gently ease the chimichangas into the oil instead of dropping them in. This minimizes the splashback and allows for a steady temperature drop. Using long-handled tongs helps add your chimichangas safely.
Frying the Chimichangas
Achieving that ideal crispy texture hinges on several frying techniques. First, maintain a consistent oil temperature to ensure that the chicken chimichangas cook evenly. Frying them seam-side down initially helps seal the edges, preventing leaks and allowing for an even golden-brown color all around.
Avoid overcrowding the pan, as this can lower the oil temperature, resulting in soggy chimichangas. Fry in batches if necessary, giving each piece adequate room to fry properly without steaming.
You can tell the chimichangas are done when they reach a rich golden-brown color. Look for a surface that’s bubbling lightly and a texture that appears crisp. A golden hue will result from frying the chimichangas in hot oil for about 3-4 minutes per side.
Presenting the Dish
An attractive presentation elevates the dining experience for your crunchy chicken chimichangas. For plating, consider using a colorful plate to enhance the visual appeal. Cut each chimichanga in half to reveal the vivid filling inside, and arrange the pieces slightly overlapping or stacked to create depth.
To enhance color contrasts, drizzle fresh salsa over the chimichangas in a zigzag pattern. Garnishing with a dollop of sour cream alongside a sprinkle of vibrant cilantro not only adds flavor but also provides an inviting look. When serving, consider offering toppings on the side so guests can customize their chimichangas to their taste.
For added flair, you may arrange a small bowl of guacamole, sour cream, and salsa on the platter, inviting everyone to dip or top their chimichangas as they wish. This creates a communal feel and allows each person to tailor the dish to their flavor preferences.
Flavor Pairings and Serving Suggestions
Pairing beverages with chimichangas can greatly enhance the overall meal. Light, refreshing drinks like a cold Mexican lager or a fruity margarita complement the flavors in the dish beautifully. If you prefer non-alcoholic options, a limeade or sparkling water paired with a slice of lime provides a refreshing contrast to the richness of the chimichangas.
When it comes to side dishes, a crisp salad featuring mixed greens, cherry tomatoes, and a simple vinaigrette can balance out the meal. Alternatively, roasted corn or a flavorful Mexican rice pilaf pairs well as satisfying sides. For a simple option, tortilla chips with salsa make for an enjoyable accompaniment, enhancing the Tex-Mex theme.
Variations of the Recipe
To diversify your chimichangas, consider alternative filling options. For those who enjoy beef, slow-cooked shredded beef creates a rich flavor profile that perfectly complements the other ingredients. Vegetarians can easily switch out the chicken for extra beans or sautéed mushrooms for a hearty filling, ensuring everyone can enjoy this dish.
Cheese substitutions can also shift flavors significantly; using pepper jack cheese adds a delightful kick, while cream cheese can create a rich and creamy texture. Experimenting with different spice combinations, such as smoked paprika or oregano, can yield unique and exciting results.
For a vegan adaptation, replace refried beans with a bean purée and use dairy-free cheese to keep the essence of the recipe while meeting dietary needs.
Storing and Reheating Leftovers
If you find yourself with leftover chimichangas, proper storage is key to maintaining their flavor and texture. They can be placed in an airtight container in the refrigerator for up to three days. For longer-term storage, consider wrapping them tightly in plastic wrap and placing them in a freezer bag, where they can last for up to three months.
When reheating chimichangas, maintaining their crispy texture can be challenging. The best method is to preheat the oven to 375°F (190°C) and place them on a baking sheet for about 15 minutes, flipping them halfway through to ensure even heating. Alternatively, an air fryer works wonderfully to re-crisp the chimichangas. Set the temperature to 350°F (175°C) and air fry for 5-7 minutes.
Conclusion
Crunchy Chicken Chimichangas offer a delightful balance of textures and flavors, making them a popular choice for various dining occasions. With approximately 40 minutes of preparation time, they are both quick and satisfying, perfect for casual gatherings or weeknight dinners. Enjoy the satisfying crunch and the rich fillings that these treats deliver, bringing comfort to any table.

Crunchy Chicken Chimichangas Delight Recipe
Ingredients
- 2 cups cooked shredded chicken
- 1 cup refried beans
- 1 cup shredded cheese
- ½ cup diced onions
- ½ cup diced bell peppers
- 2 cloves garlic minced
- 1 tsp ground cumin
- 1 tsp chili powder
- Salt and pepper to taste
- 4 large flour tortillas
- Oil for frying
- Optional toppings: sour cream guacamole, salsa, chopped cilantro
Instructions
- Heat oil in a skillet and sauté onions, bell peppers, and garlic for 5 minutes.
- In a bowl, mix chicken, refried beans, sautéed vegetables, cumin, chili powder, salt, and pepper.
- Place ¼ of the filling on a tortilla, add cheese, fold sides, and roll tightly.
- Heat 2 inches of oil in a pot to 350°F (175°C).
- Fry chimichangas seam-side down for 3-4 minutes on each side until golden brown.
- Remove from oil and drain on paper towels.
- Cut chimichangas in half and arrange on a platter.
- Serve hot with optional toppings.