Introduction
As the holiday season approaches, the air fills with the sweet scent of peppermint and chocolate, evoking a sense of nostalgia and warmth. One treat that embodies this delightful combination is peppermint bark. This festive favorite has become synonymous with the holidays, gracing tables and gift baskets alike. With its vibrant layers of rich dark chocolate and crunchy peppermint, it’s no wonder that peppermint bark has captured the hearts (and taste buds) of many.
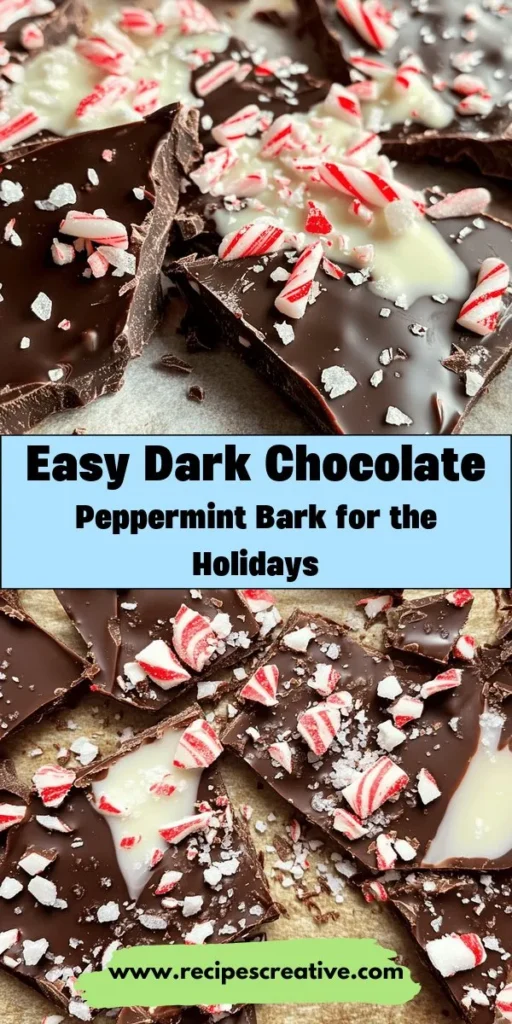
This recipe for Decadent Dark Chocolate Peppermint Bark is not only a visual delight but also an easy-to-make indulgence that is perfect for sharing with friends and family or savored in the comfort of your own home. Whether you’re looking for a thoughtful DIY gift or a sweet addition to your holiday dessert spread, this recipe offers both simplicity and indulgence in every bite.
Understanding the Ingredients
To create the perfect peppermint bark, it’s essential to understand the key components that contribute to its rich flavor and delightful texture. Let’s dive into the main ingredients that make this treat truly special:
Dark Chocolate
The star of the show is undoubtedly dark chocolate. For this recipe, a chocolate with a cacao content of 60-70% is ideal. This range ensures a balanced flavor profile that is both rich and slightly bitter, which pairs beautifully with the sweetness of the peppermint. Dark chocolate is not only delicious but also offers several health benefits, including antioxidants that promote heart health and improve brain function.
When selecting your dark chocolate, opt for high-quality brands that use minimal additives. This will enhance the overall flavor of your peppermint bark and provide a more luxurious experience.
Peppermint Extract and Crushed Peppermint Candies
Next up is peppermint flavoring, which is crucial for achieving that classic taste associated with peppermint bark. You can achieve this by using peppermint extract, which adds a concentrated burst of minty freshness. The extract should be used sparingly, as it can be quite potent. A little goes a long way in elevating the chocolate’s flavor.
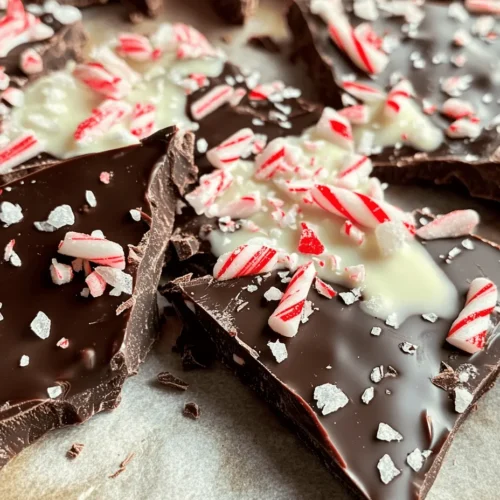
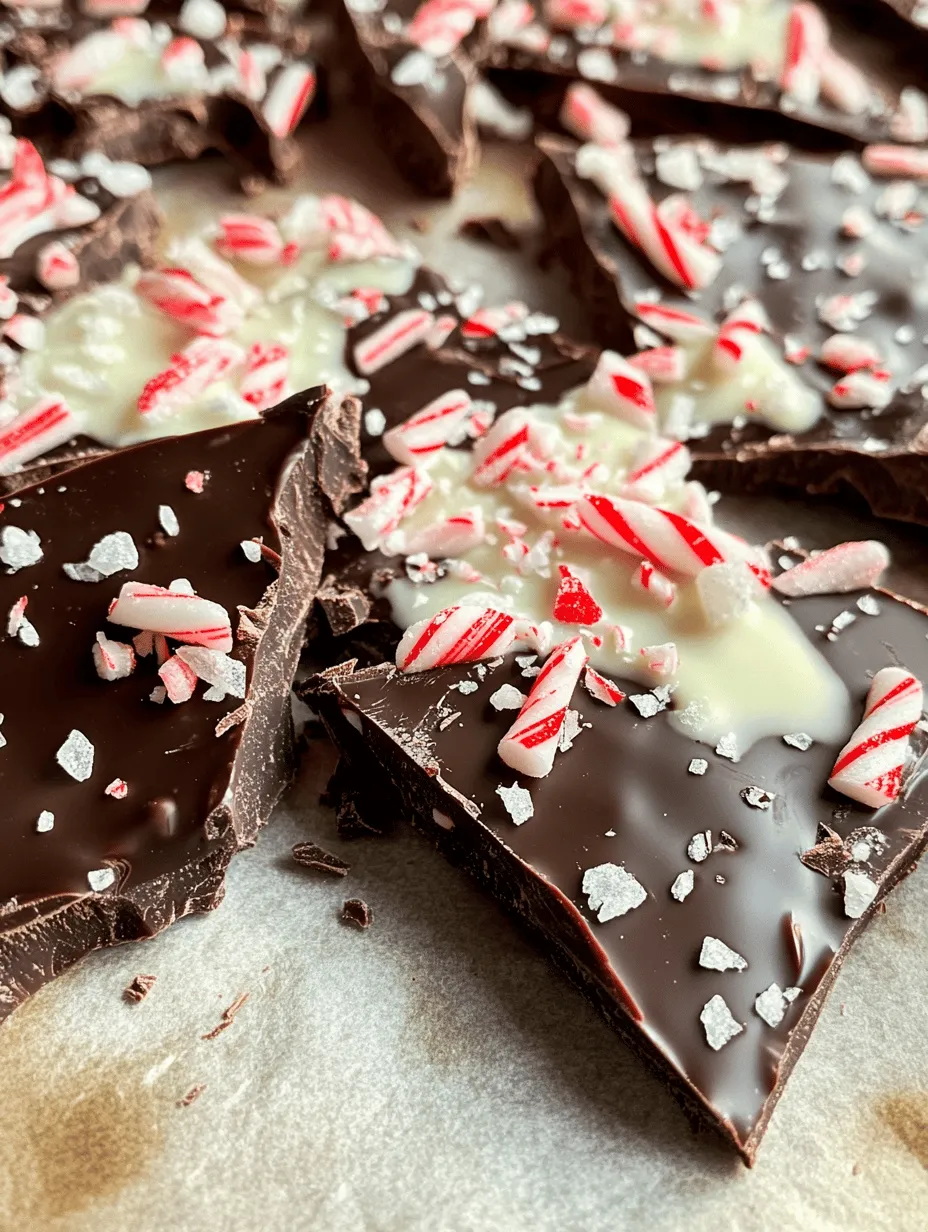
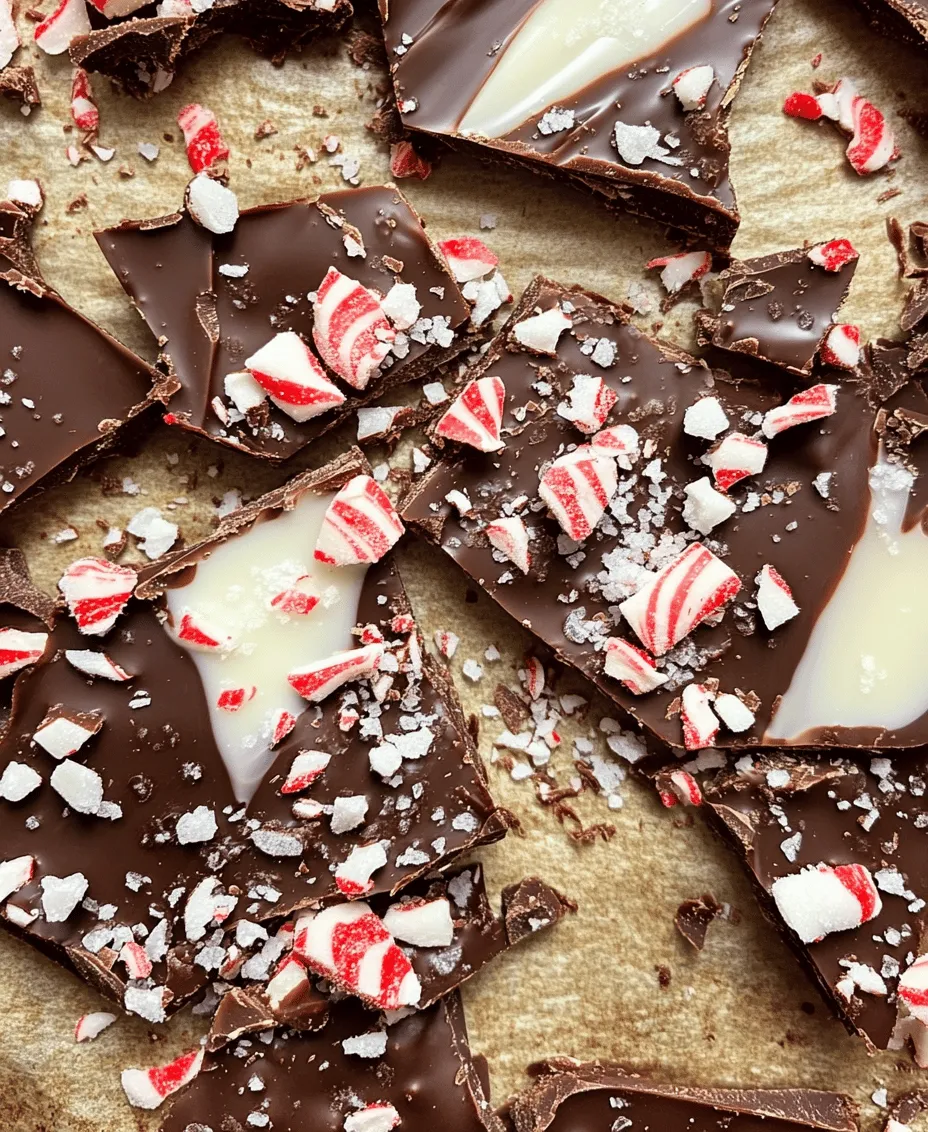
In addition to the extract, crushed peppermint candies add a delightful crunch and visual appeal to your bark. These candies are typically made from sugar and peppermint oil, providing a sweet and refreshing contrast to the dark chocolate. When crushed, they create a festive sprinkle that not only enhances the aesthetic but also contributes to the overall texture.
Optional Additions: White Chocolate and Sea Salt
For a touch of elegance, consider adding a layer of white chocolate over your dark chocolate bark. This creates a beautiful contrast in color and adds an extra layer of sweetness. The creamy texture of white chocolate complements the richness of dark chocolate, making for a harmonious blend of flavors.
Furthermore, a sprinkle of sea salt can elevate your peppermint bark to new heights. The salt enhances the sweetness of the chocolate and the peppermint, creating a more complex flavor profile. It’s a simple addition that can make a significant difference in the final product.
Step-by-Step Instructions
Now that we’ve covered the essential ingredients, it’s time to dive into the step-by-step instructions for making your own Decadent Dark Chocolate Peppermint Bark. Follow these detailed steps to ensure your bark turns out perfectly every time.
Step 1: Prepare Your Baking Sheet
Begin by lining a baking sheet with parchment paper or a silicone baking mat. This will prevent the chocolate from sticking and make it easier to lift the bark once it has cooled. Make sure to spread the parchment paper evenly across the sheet, leaving no exposed areas.
Step 2: Chop the Dark Chocolate
Next, take your dark chocolate and chop it into small, uniform pieces. This step is crucial, as smaller pieces melt more evenly, reducing the risk of burning. If you’re using chocolate bars, aim for pieces that are about 1 inch in size. If you prefer chocolate chips, you can skip this step, as they are already in a manageable size.
Step 3: Melt the Dark Chocolate
Now it’s time to melt the chocolate. There are two popular methods to do this: the microwave and the double boiler.
The Microwave Method
1. Place the chopped dark chocolate in a microwave-safe bowl.
2. Microwave on high for 30 seconds, then stir.
3. Continue heating in 15-second intervals, stirring after each interval until the chocolate is completely melted and smooth. Be cautious not to overheat, as this can cause the chocolate to seize.
The Double Boiler Method
1. Fill a saucepan with a couple of inches of water and bring it to a simmer over medium heat.
2. Place a heatproof bowl over the saucepan, ensuring that the bottom of the bowl doesn’t touch the water.
3. Add the chopped dark chocolate to the bowl and stir continuously until melted and smooth.
Whichever method you choose, be sure to keep a close eye on the chocolate to avoid burning. Once melted, remove the chocolate from heat and let it cool slightly before moving on to the next step.
Step 4: Spread the Chocolate
After your dark chocolate has melted and cooled slightly, pour it onto the prepared baking sheet. Using a spatula or the back of a spoon, spread the chocolate evenly across the surface, aiming for a thickness of about 1/4 inch. Make sure to spread it all the way to the edges for a uniform bark.
Step 5: Add the Peppermint Extract
Before the chocolate sets, it’s time to enhance the flavor. Drizzle a small amount of peppermint extract over the melted chocolate. Use a toothpick or the tip of a knife to swirl the extract into the chocolate gently, ensuring it’s evenly distributed. Be careful not to overmix, as you want to maintain a beautiful marbled effect.
Step 6: Sprinkle the Crushed Peppermint Candies
Once the peppermint extract is incorporated, it’s time to add the crushed peppermint candies. Evenly sprinkle the crushed candies over the melted chocolate while it’s still soft. You can press them down lightly with your hands to ensure they adhere to the chocolate as it hardens.
The Art of Melting Chocolate
Melting chocolate is a crucial step in creating your peppermint bark, and mastering this technique can make all the difference in your final product. Here are some tips to keep in mind when melting chocolate:
Choosing the Right Type of Chocolate
Opt for high-quality chocolate with a cacao content between 60-70% for the best flavor. Avoid using chocolate chips that are labeled as “baking” chocolate, as they often contain stabilizers that can affect the melting process.
Techniques for Melting Chocolate
1. Microwave: The microwave is a quick and convenient method, but you must be vigilant to avoid overheating. Stirring frequently helps distribute heat evenly.
2. Double Boiler: This classic method provides more control over the melting process. The indirect heat prevents chocolate from scorching, resulting in a smooth and glossy texture.
3. Chop Finely: For quicker melting, chop the chocolate into small, uniform pieces. This allows for even heat distribution and reduces the risk of burning.
4. Avoid Water Contact: Ensure no moisture comes into contact with the chocolate, as even a small amount of water can cause chocolate to seize. Keep bowls and utensils dry when measuring and melting.
By mastering these techniques, you’ll be well on your way to creating a smooth and delicious peppermint bark that will impress friends and family alike.
As we continue with this recipe, we will explore additional steps and tips that will further enhance your peppermint bark-making experience. Stay tuned for the next part, where we will dive into the optional ingredients and finishing touches to make your bark truly decadent.
Common Pitfalls to Avoid When Melting Chocolate
Melting chocolate may seem straightforward, but there are several common pitfalls that can lead to a less-than-perfect result. Here are some tips to ensure that your chocolate melting experience is flawless:
1. Avoid Water Contact: Chocolate is highly sensitive to moisture. Even a drop of water can cause chocolate to seize, turning it grainy and unworkable. Make sure all utensils, bowls, and surfaces are completely dry before you start melting.
2. Use Low Heat: Whether you choose to melt chocolate in the microwave or on the stovetop, always opt for low heat. High temperatures can scorch the chocolate, giving it a burnt taste and ruining its smooth texture.
3. Chop Evenly: To ensure even melting, chop your chocolate into uniform pieces. Smaller, similarly-sized chunks will melt more consistently, reducing the risk of overheating some pieces while others remain unmelted.
4. Stir Frequently: If you’re using the microwave, heat in short bursts of 20-30 seconds and stir in between. This helps distribute the heat evenly and prevents hot spots that can cause the chocolate to seize.
5. Use the Right Equipment: A double boiler is ideal for melting chocolate on the stovetop. If you don’t have one, you can create your own by placing a heatproof bowl over a pot of simmering water. This gentle heat method will help you achieve that smooth, glossy finish.
Creating the Perfect Peppermint Bark
Tips on Achieving the Ideal Thickness of the Bark for a Perfect Snap
The thickness of your peppermint bark is crucial for achieving that satisfying snap when broken apart. The ideal thickness is typically around 1/4 inch. Here’s how to ensure you get it just right:
– Layering Technique: Pour half of your melted dark chocolate onto a parchment-lined baking sheet, spreading it out evenly. Allow it to set slightly before adding the white chocolate layer. This technique not only creates a beautiful contrast but also helps control the thickness of each layer.
– Use a Ruler: If you want to be precise, use a ruler or a straight edge to gauge the thickness of your layers as you spread them. This can help you achieve uniformity in your bark, making it more visually appealing.
The Role of Refrigeration in Setting the Bark and Ensuring the Right Texture
Refrigeration is an essential step in creating perfect peppermint bark. Here’s how it contributes to the overall quality:
– Quick Setting: After pouring each layer of chocolate, place the baking sheet in the refrigerator. This allows the chocolate to harden quickly and helps maintain a glossy finish.
– Texture Control: Cooling the chocolate layers thoroughly before adding additional toppings or layers ensures that they adhere well without melting into each other. This also helps in achieving the right texture—firm yet melt-in-your-mouth delicious.
Suggestions for Customizing Flavors
One of the joys of making peppermint bark is its versatility. Here are some ideas for customizing your bark to suit different tastes:
– Add Nuts: Chopped pecans, walnuts, or almonds can add a delightful crunch and a nutty flavor that complements the chocolate and peppermint. Simply sprinkle them onto the melted chocolate layer before it sets.
– Flavor Extracts: Besides peppermint extract, consider experimenting with other flavor extracts like almond, vanilla, or orange. Just a few drops can elevate your bark and introduce new layers of flavor.
– Dried Fruits: For a fruity twist, add dried cranberries, cherries, or orange zest. These can add a chewy texture and a burst of flavor that balances the richness of the chocolate.
Visual Appeal and Presentation
Importance of Aesthetics in Homemade Treats
The visual appeal of your peppermint bark is just as important as its taste. Beautifully presented treats can enhance the enjoyment of the dessert, making it a standout addition to any occasion. Here’s how to make your peppermint bark visually stunning:
– Layering Colors: The contrasting colors of dark chocolate and white chocolate not only look appealing but also create a dramatic effect. Consider using colored candy melts for added vibrancy.
– Texture Variation: Incorporating various toppings like crushed candy canes, nuts, or a sprinkle of sea salt adds texture and visual interest that draws the eye.
Ideas for Drizzling White Chocolate and Adding Finishing Touches
A simple drizzle of white chocolate can elevate your peppermint bark from ordinary to extraordinary. Here’s how to do it:
– Drizzling Technique: Use a piping bag or a fork to drizzle melted white chocolate over the set bark. The key is to move your hand in a zig-zag motion, creating an artistic pattern.
– Sea Salt Sprinkle: A sprinkle of flaky sea salt on top not only enhances the flavor but adds a gourmet touch that elevates the overall presentation. The salt contrasts beautifully with the sweetness of the chocolate and peppermint.
Suggestions for Packaging the Bark as Gifts
Homemade peppermint bark makes a delightful gift, especially during the holiday season. Here are some creative packaging ideas:
– Cellophane Bags: Place pieces of bark in clear cellophane bags, tied with a festive ribbon. This allows the beautiful layers to show while making it easy to gift.
– Decorative Boxes: Use small decorative boxes or tins to package your bark. Line the box with tissue paper for an added touch of elegance.
– Personalized Tags: Attach a handmade tag with a personal message or the recipe to your gift. This adds a thoughtful touch that recipients will appreciate.
Storage and Shelf Life
Best Practices for Storing Peppermint Bark
To maintain the freshness and quality of your peppermint bark, proper storage is essential. Here are some best practices:
– Cool, Dry Place: Store the bark in an airtight container in a cool, dry place. Avoid areas with heat or humidity, as these can affect the texture and flavor of the chocolate.
– Layering: If you’re stacking pieces of bark in a container, place parchment paper between layers to prevent them from sticking together.
Discussion on the Shelf Life of the Bark
When stored correctly, peppermint bark can last for several weeks. Here’s how to tell if your bark has gone bad:
– Visual Inspection: Check for any signs of bloom, which appears as a white or grayish film on the surface. While this is harmless, it can affect the texture and taste.
– Smell Test: If the chocolate has an off or rancid smell, it’s best to discard it.
Suggestions for Using Leftover Bark in Other Recipes
If you find yourself with leftover peppermint bark, don’t let it go to waste! Here are some delicious ways to repurpose it:
– Toppings: Crumble the bark over ice cream or yogurt for a festive treat. The combination of flavors adds a delightful crunch.
– Dessert Incorporation: Incorporate pieces of peppermint bark into cookies, brownies, or cake batters for a unique twist on traditional desserts.
– Hot Chocolate Mix-In: Chop the bark into smaller pieces and stir it into hot chocolate for an indulgent drink that combines rich chocolate and refreshing peppermint.
Conclusion
Making decadent dark chocolate peppermint bark is not only simple but also a rewarding experience that brings joy to both the creator and the recipient. The ease of preparation, combined with the ability to customize flavors and create beautiful presentations, makes this treat a perfect addition to any celebration.
This delightful bark has a special place in holiday traditions, bringing warmth and cheer during festive gatherings. However, its appeal extends far beyond the holidays; it can be enjoyed year-round, making it a versatile treat for any occasion.
As you embark on your peppermint bark journey, we encourage you to experiment with different flavors and presentations. Whether you keep it classic or get creative with your variations, the joy of sharing this homemade treat is sure to be a highlight. Enjoy the process, delight in the results, and savor every last bite of your homemade peppermint bark!