

Introduction
Chocolate-covered strawberries have long been a beloved dessert, captivating hearts and taste buds alike. Their unique combination of luscious fruit and rich chocolate creates a delightful contrast that is both pleasing to the eye and the palate. Whether you’re celebrating a special occasion, looking for a thoughtful gift, or simply indulging in a sweet treat after dinner, chocolate-covered strawberries are versatile enough to fit any scenario.
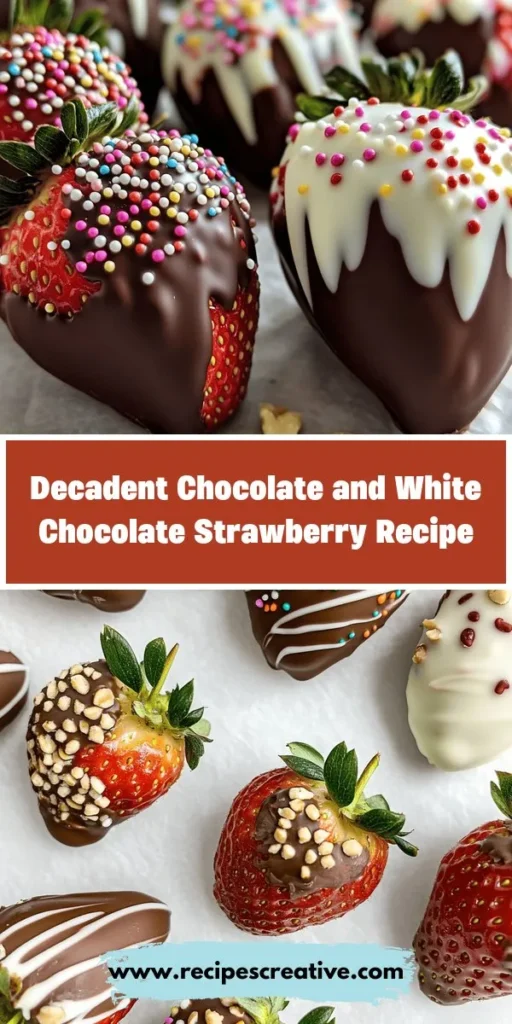
In this recipe, we elevate the classic chocolate-covered strawberry by introducing a delightful duo: semi-sweet chocolate and white chocolate. This pairing not only enhances the flavor but also adds a stunning visual element to the dish. The rich, dark chocolate pairs beautifully with the creamy, sweet white chocolate, making each strawberry a feast for the senses. The vibrant red of the strawberries, contrasted with the dark and light chocolate, creates an irresistible presentation that is sure to impress.
Whether you’re hosting a romantic dinner, planning a festive gathering, or preparing a delightful gift for someone special, these chocolate-covered strawberries are sure to be a hit. Follow along as we guide you through the steps to create this decadent treat.
Understanding the Ingredients
To create the perfect chocolate and white chocolate-covered strawberries, it’s essential to understand the role of each ingredient. This knowledge will not only help you achieve the best flavor but also ensure that your strawberries look as good as they taste.
Fresh Strawberries
The star of this recipe is undoubtedly the strawberries. Choosing ripe, high-quality strawberries is crucial for achieving the best flavor and texture. Look for strawberries that are bright red, firm, and free of blemishes. The ideal strawberries should be sweet and juicy, as they provide a natural contrast to the richness of the chocolate. It’s best to purchase strawberries just before you plan to make the recipe, as they are highly perishable. Additionally, make sure to wash them thoroughly and dry them completely before dipping, as excess moisture can prevent the chocolate from adhering properly.
Semi-Sweet Chocolate Chips
Semi-sweet chocolate chips are a favorite among bakers and confectioners due to their balanced flavor profile. They provide a rich chocolate taste without being overly sweet, making them the perfect choice for dipping strawberries. When melted, semi-sweet chocolate becomes smooth and glossy, creating a beautiful coating for your strawberries. It’s important to use high-quality semi-sweet chocolate chips for the best melting properties and flavor. Look for brands that list cocoa solids and cocoa butter as primary ingredients, as these will yield the best results.
White Chocolate Chips
White chocolate chips add a creamy sweetness that contrasts beautifully with the semi-sweet chocolate. While technically not chocolate since they don’t contain cocoa solids, white chocolate is made from cocoa butter, sugar, and milk solids, giving it a rich, sweet flavor and creamy texture. When melted, white chocolate can be a bit trickier to work with than semi-sweet chocolate, as it can seize if overheated. However, its visual appeal and contrasting taste make it an essential component for this recipe.
Coconut Oil
Adding coconut oil to your chocolate can help achieve a glossy finish and ensure a smooth consistency when melting. The oil can also help prevent the chocolate from hardening too quickly, making the dipping process easier. A small amount of coconut oil (usually about one teaspoon per cup of chocolate) will do the trick. Not only does it enhance texture, but it also adds a subtle hint of coconut flavor that complements the strawberries beautifully.
Optional Garnishes
To elevate your chocolate-covered strawberries further, consider using optional garnishes. Finely chopped nuts, crushed cookies, or sprinkles can add texture and visual interest. Drizzling additional melted chocolate over the strawberries in a contrasting color can also create a stunning presentation. The possibilities are endless and can be tailored to suit any occasion or personal preference.
Preparation Steps: A Comprehensive Guide
Preparation is key to achieving successful results when making chocolate-covered strawberries. A little attention to detail can make a significant difference in the final product.
Washing and Drying Strawberries
Start by rinsing the strawberries gently under cool running water. Avoid soaking them, as this can lead to waterlogging and make them mushy. After washing, place the strawberries on a clean kitchen towel or paper towels and pat them dry thoroughly. It’s crucial that the strawberries are completely dry before dipping; otherwise, the chocolate may not adhere properly, leading to unsightly drips or spots.
Ensuring Chocolate Doesn’t Seize
One of the common pitfalls when melting chocolate is seizing, which occurs when moisture comes into contact with the chocolate. To avoid this, ensure that all your utensils, bowls, and the strawberries themselves are completely dry. Additionally, avoid using any steam or moisture when melting the chocolate. Working in a dry environment and using dry hands will help keep your chocolate silky smooth.
Melting Chocolate: Techniques for Success
Melting chocolate may seem straightforward, but it requires a bit of technique to achieve the perfect consistency. Here’s a step-by-step guide for melting both semi-sweet and white chocolate.
Melting Semi-Sweet Chocolate
1. Choose the Right Bowl: Use a microwave-safe bowl that is large enough to hold the chocolate chips and allow for easy stirring.
2. Measure the Chocolate Chips: For this recipe, a cup of semi-sweet chocolate chips is typically sufficient for coating around a dozen strawberries. Adjust the quantity based on your needs.
3. Microwave Carefully: Place the bowl in the microwave and heat on medium power (50%) for 30 seconds.
4. Stir and Repeat: After the initial heating, remove the bowl and stir the chocolate. This helps distribute the heat evenly and prevents hot spots that can lead to burning. Return it to the microwave and heat in increments of 15 seconds, stirring after each interval until the chocolate is fully melted.
5. Check for Consistency: The chocolate should be smooth and glossy, with no visible lumps. If it appears too thick, you can add a teaspoon of coconut oil to thin it out.
Melting White Chocolate
1. Use a Different Bowl: As with semi-sweet chocolate, use a microwave-safe bowl for the white chocolate.
2. Measure the Chocolate Chips: Similar to the semi-sweet chocolate, one cup of white chocolate chips works well for most recipes.
3. Microwave with Care: Heat the white chocolate in the microwave on medium power for 30 seconds, just like the semi-sweet chocolate.
4. Stir Gently: Remove the bowl from the microwave and stir the chocolate gently. Be cautious, as white chocolate can seize more easily than semi-sweet chocolate.
5. Heat in Short Intervals: Return the bowl to the microwave, heating in 15-second increments and stirring after each one until smooth.
6. Avoid Overheating: Pay close attention to the texture; white chocolate can become grainy and thick if overheated. If you find that it’s too thick, adding a small amount of coconut oil can help restore its smoothness.
Mastering the Dipping Technique
Dipping strawberries in chocolate is an art that can be mastered with a bit of practice. Here’s a detailed guide to help you achieve perfectly dipped strawberries.
1. Prepare Your Workspace: Before you start dipping, lay out parchment paper on a baking sheet. This will be where you place your dipped strawberries to set.
2. Hold the Strawberry by the Stem: Grasp the green stem or leaves of the strawberry, ensuring that you have a firm grip without touching the fruit itself, as this can lead to slippery fingers.
3. Dip into the Chocolate: Hold the strawberry at a slight angle and dip it into the semi-sweet chocolate. Submerge about two-thirds of the berry into the chocolate, allowing the excess to drip back into the bowl.
4. Twist for Even Coating: Gently twist the strawberry as you lift it out of the chocolate. This action helps to create a smooth, even coating and allows any excess chocolate to fall away.
5. Place on Parchment Paper: Carefully set the dipped strawberry on the prepared parchment paper to cool and harden.
6. Repeat the Process: Continue dipping the remaining strawberries in the semi-sweet chocolate before moving onto the white chocolate.
By following these steps, you can create a stunning array of chocolate and white chocolate-covered strawberries that are not only delicious but also visually appealing. Each bite offers a delightful burst of flavor, making them a perfect treat for any occasion.

Tips for Achieving an Even Coat
Achieving a smooth and even coat of chocolate on your strawberries is essential for both aesthetics and taste. Here are some tips to help you get it just right:
1. Dry the Strawberries Thoroughly: Before dipping, ensure your strawberries are completely dry. Any moisture can cause the chocolate to seize up or create an uneven coating. Pat them with a paper towel or let them air dry for a few minutes after washing.
2. Use a Deep Bowl: When melting your chocolate, choose a deep bowl. This allows you to dip the strawberries fully and gives you the room to twirl them as you lift them out, ensuring an even coat.
3. Dip Quickly: Once the chocolate is melted and at the right temperature (between 85°F and 90°F for dark and milk chocolate, and around 80°F for white chocolate), dip the strawberries quickly. This helps to prevent the chocolate from thickening before you’re done.
4. Twirl and Tap: After dipping, gently twirl the strawberry in the chocolate and then lift it out. Tap the excess chocolate off gently against the side of the bowl. This helps prevent clumping and creates a smoother finish.
Techniques for Removing Excess Chocolate
Removing excess chocolate is crucial for a clean and professional look. Here are some techniques to consider:
– The Side Tap Method: After lifting the chocolate-covered strawberry from the bowl, hold it over the bowl and tap the base of the strawberry lightly against the edge. This action allows excess chocolate to drip back into the bowl.
– Swirl Method: Instead of tapping, you can gently swirl the strawberry in the melted chocolate before lifting it out. This helps to create a thinner coat and ensures the chocolate is evenly distributed.
– Spatula Assistance: Use a small offset spatula to scrape off any excess chocolate from the bottom of the strawberry. This helps to create a flat base, making your strawberries more stable when placed on a serving platter.
Importance of Timing When Layering with White Chocolate
If you’re planning to layer your chocolate-covered strawberries with white chocolate, timing is critical. The key is to wait until the first layer of chocolate has set slightly but is still tacky. Here’s how to approach it:
– Let the Dark Chocolate Set: After dipping your strawberries in dark or milk chocolate, let them sit for about 10-15 minutes at room temperature until they are no longer wet but still tacky.
– Drizzle or Dip: Once the initial layer has set, you can either drizzle the melted white chocolate over the strawberries or dip them again in white chocolate for a thicker coat. If drizzling, ensure your white chocolate is warm but not too hot, as it should flow smoothly without melting the underlying layer.
– Layering Technique: For an artistic look, consider drizzling using a fork or piping bag, as described in the following section.
Creating Visual Appeal: Drizzling and Garnishing
The presentation of your chocolate-covered strawberries can elevate them from simple treats to stunning desserts. Here’s how you can achieve that visual appeal:
Techniques for Drizzling White Chocolate Over the Chocolate-Covered Strawberries
1. Using a Piping Bag: Fill a piping bag with melted white chocolate. Snip a small hole in the tip and gently drizzle over the chocolate-covered strawberries in a back-and-forth motion. This creates a beautiful pattern.
2. Fork Drizzle: If you don’t have a piping bag, use a fork instead. Dip the fork into the white chocolate and wave it back and forth over the strawberries for a more rustic look.
Tools Needed
– Piping Bag: Ideal for precision drizzling.
– Fork: A simple alternative for creating a more casual design.
– Baking Sheet: Line it with parchment paper to place your strawberries on as you work.
Tips for Achieving an Artistic Look
– Practice Makes Perfect: If you’re unsure about your drizzling technique, practice on a piece of parchment paper first.
– Use Contrasting Colors: For extra flair, try using colored melting chocolate or sprinkles that contrast with the white chocolate.
– Be Creative: Experiment with different drizzling patterns—zig-zags, spirals, or dots can all add to the visual interest.
Suggestions for Garnishing with Nuts and Sprinkles
Adding nuts and sprinkles can enhance both flavor and appearance. Here are some ideas:
Types of Nuts That Pair Well with Chocolate Flavors
– Almonds: Sliced or chopped, they add a crunchy texture and nutty flavor.
– Pistachios: Their green color contrasts beautifully with the white chocolate.
– Hazelnuts: Chopped hazelnuts provide a classic pairing with chocolate.
Choosing the Right Sprinkles for Aesthetic Appeal
– Colorful Sprinkles: Rainbow or pastel sprinkles can make your strawberries fun and festive.
– Chocolate Sprinkles: For a more elegant look, use dark or milk chocolate sprinkles that blend seamlessly with the chocolate coating.
– Coconut Flakes: Shredded coconut adds texture and a tropical touch.
Setting the Chocolate: Chilling and Serving
Once your strawberries are decorated, it’s time to set the chocolate. This step is crucial for achieving that perfect glossy finish.
Explanation of the Chilling Process
– Why Chill?: Chilling allows the chocolate to harden properly, giving your strawberries a beautiful sheen and making them easier to handle.
Optimal Chilling Time for Best Results
– Timing: Place your decorated strawberries in the refrigerator for about 30 minutes. This should be sufficient for the chocolate to set completely.
How to Tell When the Chocolate is Properly Set
– Visual Cues: The chocolate should look glossy and firm to the touch. Gently press a finger on the chocolate; if it leaves an imprint, it needs more time.
Serving Suggestions to Enhance Presentation
The way you present your chocolate-covered strawberries can make a big difference in their appeal. Here are some serving ideas:
– Platter Arrangement: Arrange the strawberries on a decorative platter, alternating between dark and white chocolate to create a striking visual effect.
– Individual Servings: Place each strawberry in a small cupcake liner for individual servings. This is perfect for parties or gifts.
Pairing Suggestions for Drinks or Additional Desserts
– Wine: Pair your strawberries with a glass of sparkling wine or dessert wine for a luxurious experience.
– Coffee: A rich dark coffee can complement the sweetness of the strawberries and chocolate beautifully.
Nutritional Insights
While chocolate-covered strawberries are undeniably a treat, they also offer some nutritional benefits worth noting.
Overview of the Nutritional Aspects of Chocolate-Covered Strawberries
– Strawberries: These berries are low in calories and high in vitamin C, fiber, and antioxidants. They promote heart health and may help regulate blood sugar levels.
Benefits of Strawberries as a Fruit
– Health Benefits: Eating strawberries can improve heart health, reduce inflammation, and even help with weight management due to their high fiber content.
Consideration of Chocolate Types and Their Health Implications
– Dark vs. Milk Chocolate: Dark chocolate, which contains more cocoa solids and less sugar, is often considered healthier due to its higher antioxidant content.
Balancing Indulgence with Health-Conscious Choices
– Mindful Eating: Enjoy chocolate-covered strawberries in moderation. They can be a part of a balanced diet when consumed mindfully.
Conclusion
Creating decadent chocolate and white chocolate-covered strawberries is not only a delightful culinary endeavor but also a meaningful way to share joy with friends and loved ones. By following the steps outlined in this guide—selecting the right strawberries, mastering the chocolate coating, and enhancing the presentation with artistic drizzling and garnishing—you can craft a visually stunning and delicious treat.
Experiment with different flavors, colors, and presentations to make this classic dessert your own. Whether for a special occasion or simply to indulge, these chocolate-covered strawberries are sure to impress. So gather your ingredients, unleash your creativity, and enjoy the sweet satisfaction of making and sharing these delightful treats.
