
Introduction
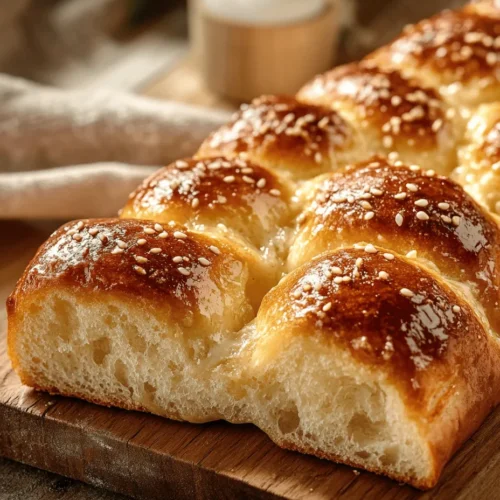
Sweet bread rolls, known as Shoreek in some cultures, are more than just a delightful treat; they represent a cherished tradition that spans across various culinary landscapes. These rolls are soft, fluffy, and slightly sweet, making them a perfect accompaniment to breakfast, a delightful snack, or a festive addition to any meal. The allure of these rolls lies not only in their taste but also in their rich cultural significance, as they are often prepared for special occasions, family gatherings, and celebrations.
The versatility of sweet bread rolls is truly remarkable. They can be enjoyed plain, filled with sweet or savory fillings, or topped with an array of toppings, such as sesame seeds or powdered sugar. You can embrace countless variations to cater to your taste and preference. Whether you prefer them with a hint of cinnamon or adorned with a sprinkle of nuts, sweet bread rolls offer endless opportunities for creativity in the kitchen.
Moreover, baking at home provides a sense of satisfaction and health benefits that store-bought options often lack. When you make your sweet bread rolls from scratch, you have complete control over the ingredients, allowing you to avoid preservatives and additives. The process of kneading, shaping, and baking can be incredibly therapeutic, transforming your kitchen into a haven of warmth and delicious aromas. So, if you’re ready to embark on a delightful baking journey, let’s explore the ingredients and the step-by-step guide to creating perfect sweet bread rolls.
Understanding the Ingredients
Before diving into the baking process, it’s essential to understand the role each ingredient plays in creating these delectable rolls. Each component contributes uniquely to the flavor, texture, and overall success of the recipe.
All-Purpose Flour
All-purpose flour is the backbone of sweet bread rolls, providing the necessary structure and texture. It contains a moderate amount of protein, which helps develop gluten, the network that gives bread its chewy texture. When kneading the dough, the gluten strands align and strengthen, resulting in rolls that are tender yet hold their shape. Choosing high-quality all-purpose flour is vital, as it will significantly impact the final product.
Warm Milk
Warm milk serves a dual purpose in this recipe. Firstly, it activates the yeast, creating the ideal environment for fermentation. Yeast thrives in warmth, and when mixed with warm milk, it begins to bubble and grow, which is crucial for the rising process. Secondly, the milk adds moisture to the dough, resulting in soft and tender rolls. Always ensure the milk is warm but not hot, as excessive heat can kill the yeast.
Granulated Sugar
Sugar is not just a sweet ingredient; it also plays a critical role in the fermentation process. It feeds the yeast, enabling it to produce carbon dioxide, which is responsible for the dough rising. Additionally, sugar contributes to the overall flavor of the rolls, helping to create a delicious balance between sweetness and the other ingredients. Using granulated sugar is standard in sweet bread recipes; however, you can experiment with honey or brown sugar for a different flavor profile.
Unsalted Butter
Unsalted butter adds richness and flavor to sweet bread rolls, making them irresistibly delicious. The fat in butter tenderizes the dough, resulting in a softer texture. By using unsalted butter, you have better control over the salt level in your rolls. It’s essential to allow the butter to soften at room temperature before incorporating it into the dough, as this will help it blend more easily.
Eggs
Eggs are a crucial binding agent in the recipe, providing structure and stability to the rolls. They also contribute richness and moisture, enhancing the overall flavor and texture. When using eggs, it’s best to bring them to room temperature before mixing them into the dough, as this ensures they incorporate evenly.
Active Dry Yeast
The star of the show, active dry yeast, is responsible for the leavening of sweet bread rolls. It works by consuming the sugar in the dough and producing carbon dioxide gas, which causes the dough to rise. Activating the yeast properly is vital; it should bubble and foam when mixed with warm liquid, indicating that it’s alive and ready to work its magic. Always check the expiration date on your yeast to ensure optimal performance.
Vanilla Extract
Vanilla extract is a flavor enhancer that elevates the taste of sweet bread rolls. Its warm, sweet aroma complements the other ingredients and adds depth to the overall flavor profile. Opt for pure vanilla extract whenever possible, as it offers a richer taste compared to imitation vanilla.
Salt
While it may seem counterintuitive to add salt to sweet rolls, it serves an essential purpose. Salt balances the sweetness of the sugar and enhances the overall flavor of the rolls. It also strengthens the gluten structure, contributing to the chewy texture. It’s crucial to measure salt accurately, as too much can inhibit yeast activity.
Ground Cinnamon
Ground cinnamon is an optional ingredient that can infuse your sweet bread rolls with warmth and spice. This aromatic spice pairs beautifully with the sweetness of the dough and can be added to the dough or used as a topping for an extra layer of flavor. If you’re a fan of cinnamon, don’t hesitate to include it in your recipe.
Sesame Seeds
Finally, sesame seeds make for a delightful topping that adds both flavor and texture to sweet bread rolls. They provide a nutty crunch and enhance the visual appeal of the rolls. You can toast the sesame seeds lightly before sprinkling them on top for an even richer flavor.
Step-by-Step Guide to Making Sweet Bread Rolls
Now that we’ve explored the ingredients, it’s time to roll up our sleeves and get into the baking process. Making sweet bread rolls is a rewarding experience, and by following these step-by-step instructions, you’ll create rolls that are both delicious and visually appealing.
Activating the Yeast
The first step in making sweet bread rolls is activating the yeast. This process is essential for ensuring your rolls rise properly. In a small bowl, combine the warm milk with a teaspoon of granulated sugar, then sprinkle the active dry yeast over the top. Allow it to sit for about 5 to 10 minutes. During this time, you should see the mixture become frothy, indicating that the yeast is alive and ready to work. If it doesn’t foam, your yeast may be expired, and you should start over with fresh yeast.
Mixing Wet Ingredients
Once the yeast is activated, it’s time to mix the wet ingredients. In a large mixing bowl, combine the yeast mixture with the softened unsalted butter, eggs, and vanilla extract. Use a whisk or a fork to blend the ingredients until they are well combined. The butter should be fully incorporated, creating a smooth mixture. This step is crucial, as it ensures that the flavor is evenly distributed throughout the dough.
Combining Dry Ingredients
In a separate bowl, sift together the all-purpose flour and salt. Sifting not only helps to remove any lumps but also aerates the flour, resulting in lighter rolls. If you’re using ground cinnamon, you can add it to the dry ingredients at this stage. Mix the dry ingredients thoroughly to ensure an even distribution of salt and any spices.
Making the Dough
With both wet and dry ingredients ready, it’s time to make the dough. Gradually add the dry ingredients to the wet mixture, stirring with a wooden spoon or spatula. Begin by adding one cup of flour, followed by the remaining flour in increments. This method helps prevent lumps and ensures that the dough comes together smoothly. You’re looking for a soft, slightly sticky dough that pulls away from the sides of the bowl.
Kneading the Dough
Once the dough has come together, it’s time to knead. Turn the dough out onto a lightly floured surface and begin kneading it with your hands. Kneading is a vital step, as it develops the gluten network, giving your rolls their characteristic chewiness. Continue kneading for about 8 to 10 minutes, or until the dough is smooth and elastic. If the dough is too sticky, you can sprinkle a little more flour on the surface, but be careful not to add too much, as this can result in dense rolls.
As you knead, you should notice the dough becoming more cohesive and elastic. To test if the dough is ready, perform the “windowpane test”: stretch a small piece of dough between your fingers; if it stretches thin enough to let light through without breaking, it’s perfect!
Now that we have covered the introduction to our delicious sweet bread rolls and the initial steps involved, we can proceed to the next stages of shaping, rising, and baking in the subsequent sections of this article. Stay tuned for the delightful continuation of this baking journey!
First Rise: Ideal Conditions for Yeast Fermentation
The first rise, or bulk fermentation, is a critical phase in the bread-making process. For your sweet bread rolls, achieving ideal conditions for yeast fermentation is essential to develop flavor and texture. Start by placing your dough in a warm, draft-free environment. The optimal temperature for yeast activity is around 75°F to 80°F (24°C to 27°C). If your kitchen is cool, you can preheat your oven to the lowest setting for a few minutes, then turn it off and place the dough inside. Cover the bowl with a damp cloth or plastic wrap to retain moisture and help the dough rise without forming a crust.
During this first rise, allow the dough to double in size, which usually takes about 1 to 2 hours, depending on the ambient temperature. This fermentation phase allows the yeast to produce carbon dioxide, which contributes to the light, airy texture of the rolls.
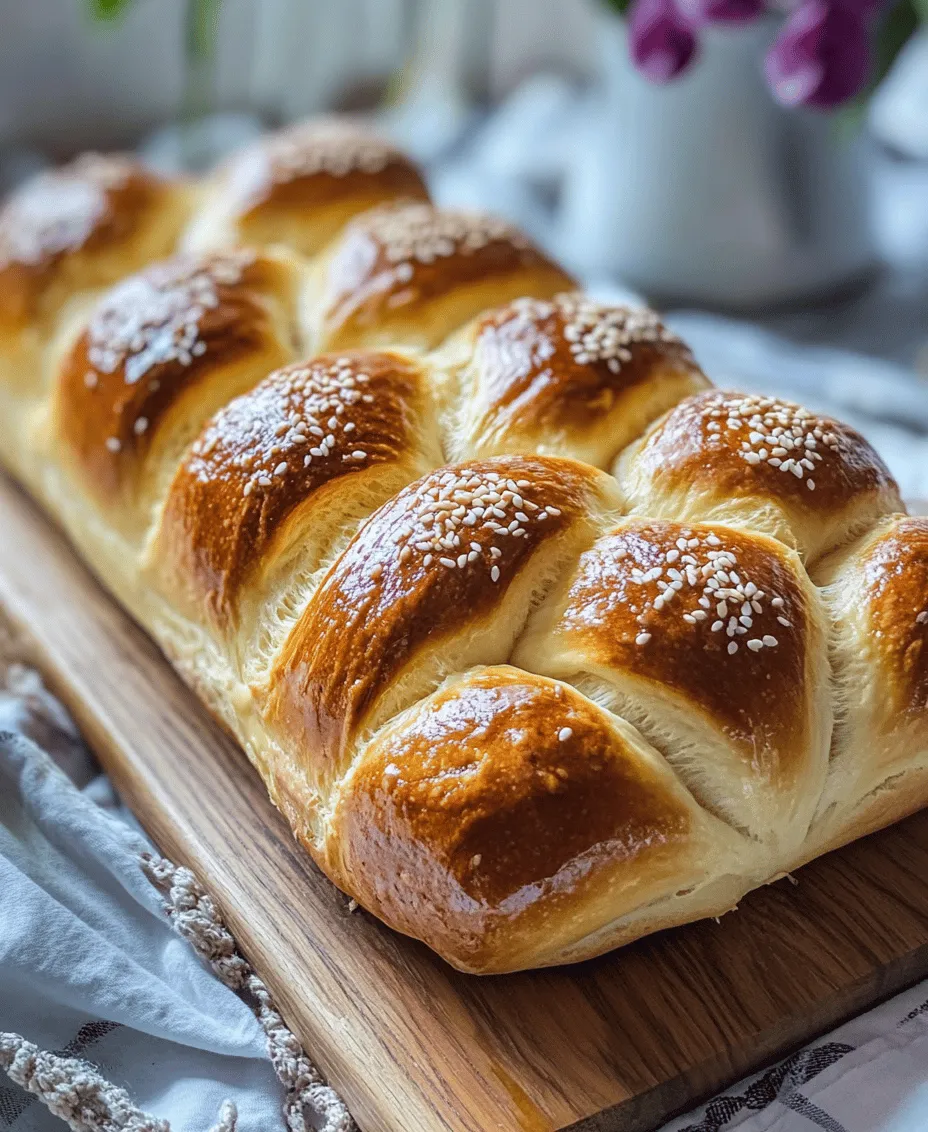
Shaping the Rolls: Techniques for Uniformity and Aesthetics
Once your dough has completed its first rise, it’s time to shape your sweet bread rolls. This step is not only vital for uniformity but also adds an aesthetic appeal to your final product. Begin by gently deflating the dough on a lightly floured surface. Divide the dough into equal portions, typically about 2 ounces each, for standard-sized rolls.
To shape each roll, take a piece of dough and flatten it slightly. Fold the edges toward the center, creating a round shape. Then, flip the dough over so the seam is on the bottom and gently roll it in your hands to form a smooth ball. This technique helps create tension on the surface of the dough, leading to a better rise during the second proof. Arrange the shaped rolls on a baking sheet lined with parchment paper, ensuring they are spaced apart to allow for expansion.
Second Rise: Importance of the Final Proofing Stage
The second rise, or final proof, is crucial for achieving the desired texture and flavor in your sweet bread rolls. After shaping, cover the rolls with a clean kitchen towel or plastic wrap, and allow them to rise again in a warm environment. This stage typically takes 30 to 60 minutes, depending on the room temperature. The rolls should puff up, nearly doubling in size again.
During this phase, the yeast continues to ferment, producing more carbon dioxide, which gives the rolls their light and airy texture. Skipping this step or rushing it can result in dense rolls. To check if your rolls are ready, gently press a finger into the side; if the indentation springs back slowly, they are perfectly proofed and ready for baking.
Preheating the Oven: Ensuring Readiness for Baking
While the rolls are completing their second rise, preheat your oven to 350°F (175°C). Preheating is essential to ensure that the rolls start baking at the right temperature, which helps achieve that golden-brown crust while keeping the inside soft and fluffy. Using an oven thermometer can help verify that your oven reaches the desired temperature accurately.
For even baking, it’s ideal to place the oven rack in the center position, allowing for proper air circulation around the rolls. If you have a baking stone or a cast-iron skillet, consider placing it in the oven while it preheats. This can help maintain a consistent temperature and improve the overall baking results.
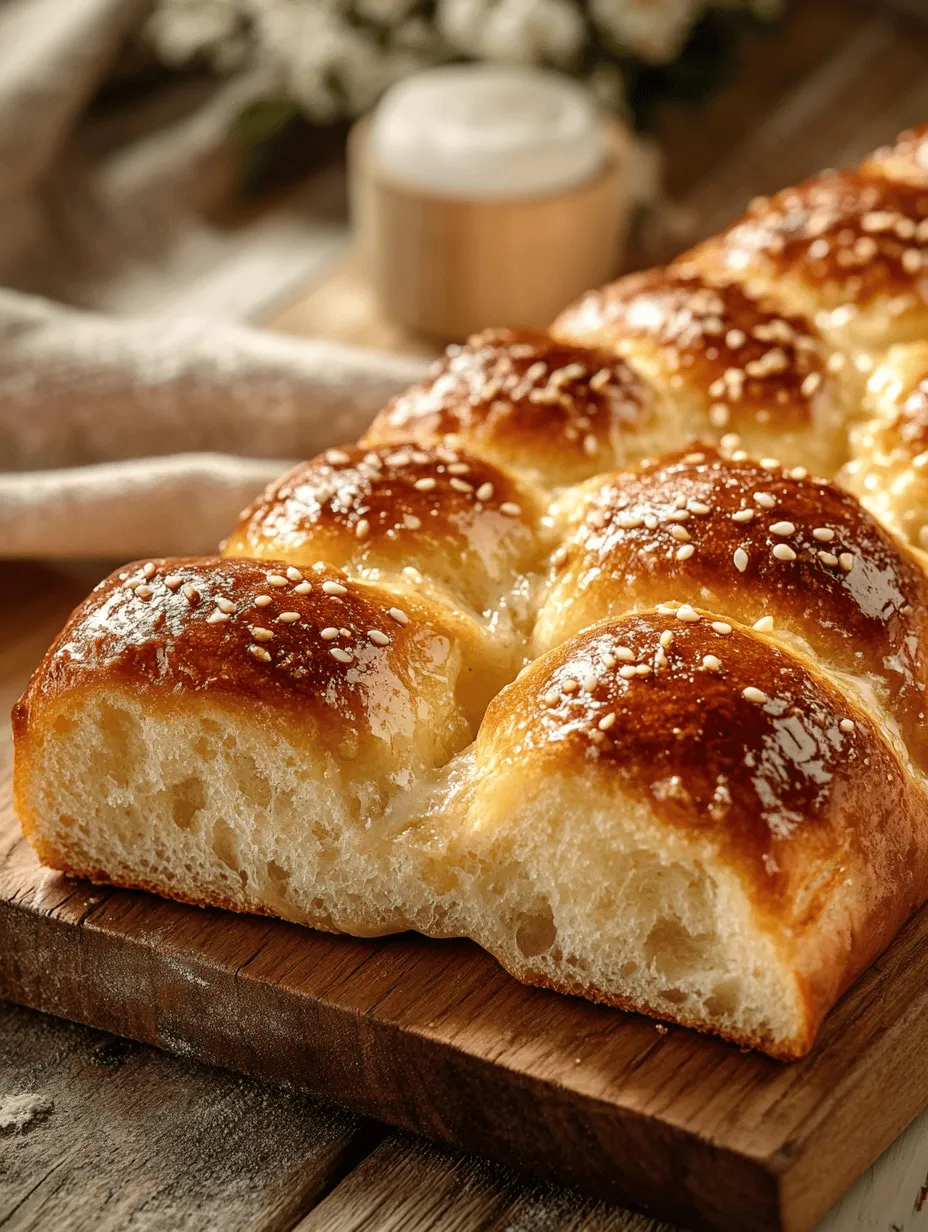
Preparing for Baking: The Role of Egg Wash and Sesame Seeds
Before placing your rolls in the oven, prepare them for baking by applying an egg wash. This step is crucial for achieving a shiny, golden crust. To create an egg wash, whisk together one egg with a tablespoon of water or milk until well combined. Using a pastry brush, gently apply the egg wash to the tops of the rolls, being careful not to deflate them.
For added texture and flavor, sprinkle sesame seeds on top of the egg wash. Sesame seeds not only enhance the visual appeal of the rolls but also provide a delightful crunch. Feel free to experiment with other toppings as well, such as poppy seeds, coarse sea salt, or even a sprinkle of cinnamon sugar for a sweet twist.
Baking: Understanding Doneness and Color Indicators
Once your rolls are prepped and the oven is ready, it’s time to bake! Place the baking sheet in the oven and set a timer for about 15 to 20 minutes. Keep an eye on the rolls as they bake, as oven temperatures can vary. You’ll know the rolls are done when they are golden brown on top and sound hollow when tapped on the bottom.
Another indicator of doneness is the internal temperature. For perfectly baked sweet bread rolls, an internal temperature of about 190°F to 200°F (88°C to 93°C) is ideal. If you don’t have a thermometer, just trust your eyes and ears. When they look beautiful and sound hollow, they’re ready to come out of the oven.
Cooling and Serving: Best Practices for Enjoying the Rolls
After baking, remove the sweet bread rolls from the oven and allow them to cool on a wire rack for at least 10 minutes. This cooling period is essential as it allows the steam to escape, preventing the rolls from becoming soggy.
Serve the rolls warm or at room temperature. They are incredibly versatile and can be enjoyed in various ways. Freshly baked sweet bread rolls can be served plain, slathered with butter, or paired with an array of spreads such as butter, cream cheese, jam, or honey. Their soft texture makes them perfect for breakfast items or as a delightful addition to any meal.
Baking Tips for Perfect Sweet Bread Rolls
– Importance of Ingredient Temperature: Ensure your ingredients are at room temperature, particularly the milk, eggs, and butter, for optimal yeast activation and dough consistency.
– Common Pitfalls to Avoid During Dough Preparation: Be careful not to over-knead the dough, as this can lead to tough rolls. Monitor the dough’s elasticity and smoothness instead. Also, avoid adding too much flour; the dough should be slightly tacky, which is key for a soft texture.
– Adjusting Baking Time and Temperature for Different Ovens: Ovens can vary significantly. If you’re using a convection oven, reduce the temperature by about 25°F (14°C) to prevent over-browning. Keep an eye on the rolls as they bake and adjust the time accordingly.
– Storing Leftovers: Best Practices for Freshness: If you have any leftover rolls, store them in an airtight container at room temperature for up to 3 days. For longer storage, you can freeze them. Wrap each roll individually in plastic wrap and place them in a freezer-safe bag; they’ll stay fresh for up to 3 months. To reheat, thaw at room temperature and warm in the oven for a few minutes.
Cultural Variations and Serving Suggestions
Sweet bread rolls have numerous regional adaptations across cultures, each with its unique twist. For instance, the Brazilian “pão de queijo” incorporates cheese into the dough, while the Italian “brioche” is enriched with eggs and butter, resulting in a richer flavor. Exploring these variations can expand your culinary repertoire and introduce new flavors into your baking.
When it comes to serving suggestions, sweet bread rolls are incredibly versatile. They can be served as a breakfast option alongside fresh fruit or yogurt, making for a balanced start to the day. Alternatively, pair them with savory cheeses or meats for a delightful brunch spread. For festive occasions, consider filling the rolls with sweet fillings like chocolate or fruit preserves, creating a special treat that can be enjoyed by family and friends.
Nutritional Information
Understanding the nutritional profile of your homemade sweet bread rolls is essential for those mindful of their dietary choices. On average, one roll contains approximately 150-200 calories, depending on the size and ingredients used. The breakdown of macronutrients per roll typically includes about 4g of protein, 6g of fat, and 25g of carbohydrates.
Homemade rolls tend to be more nutritious than store-bought alternatives, as you have full control over the ingredients. You can select high-quality flour, reduce sugar, or substitute healthier fats, making them a better option for those seeking wholesome bread. Moreover, by baking at home, you can avoid preservatives and artificial ingredients often found in commercial bread products.
Conclusion
Baking sweet bread rolls from scratch is a deeply satisfying experience that combines creativity, tradition, and the joy of sharing food. The process, from mixing the dough to the final bake, is a celebration of culinary skills that produces warm, fluffy rolls perfect for any occasion. The aroma of freshly baked bread wafting through your home is an invitation to gather around the table, creating memories with family and friends.
As you experiment with this recipe, feel free to make it your own. Whether it’s incorporating different flavors, adjusting the sweetness, or trying unique toppings, the possibilities are endless. Embrace the tradition of baking and share the love that goes into each roll. Happy baking!