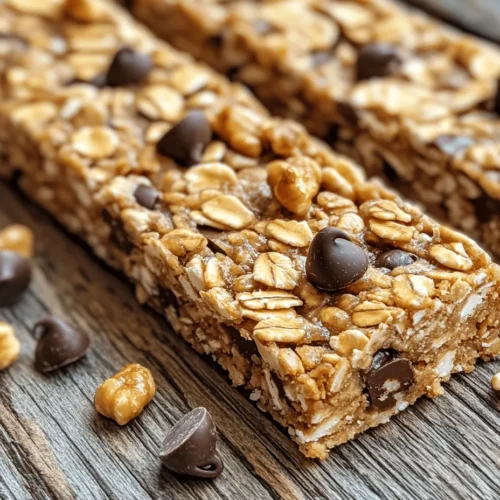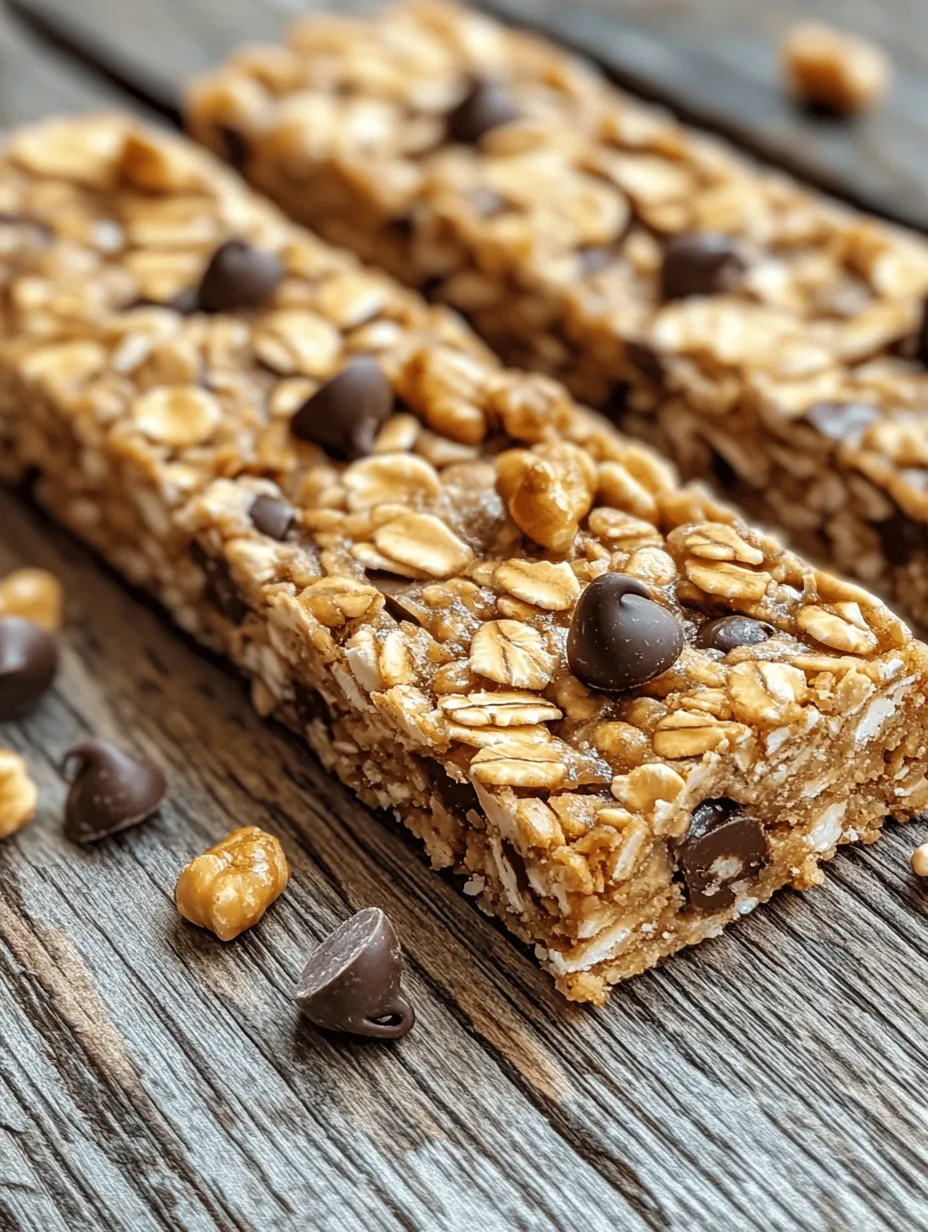
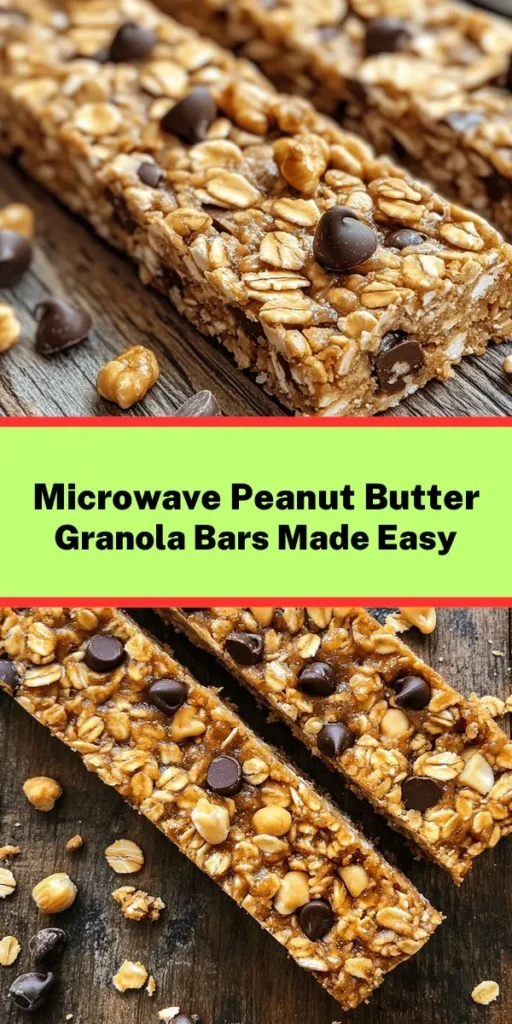
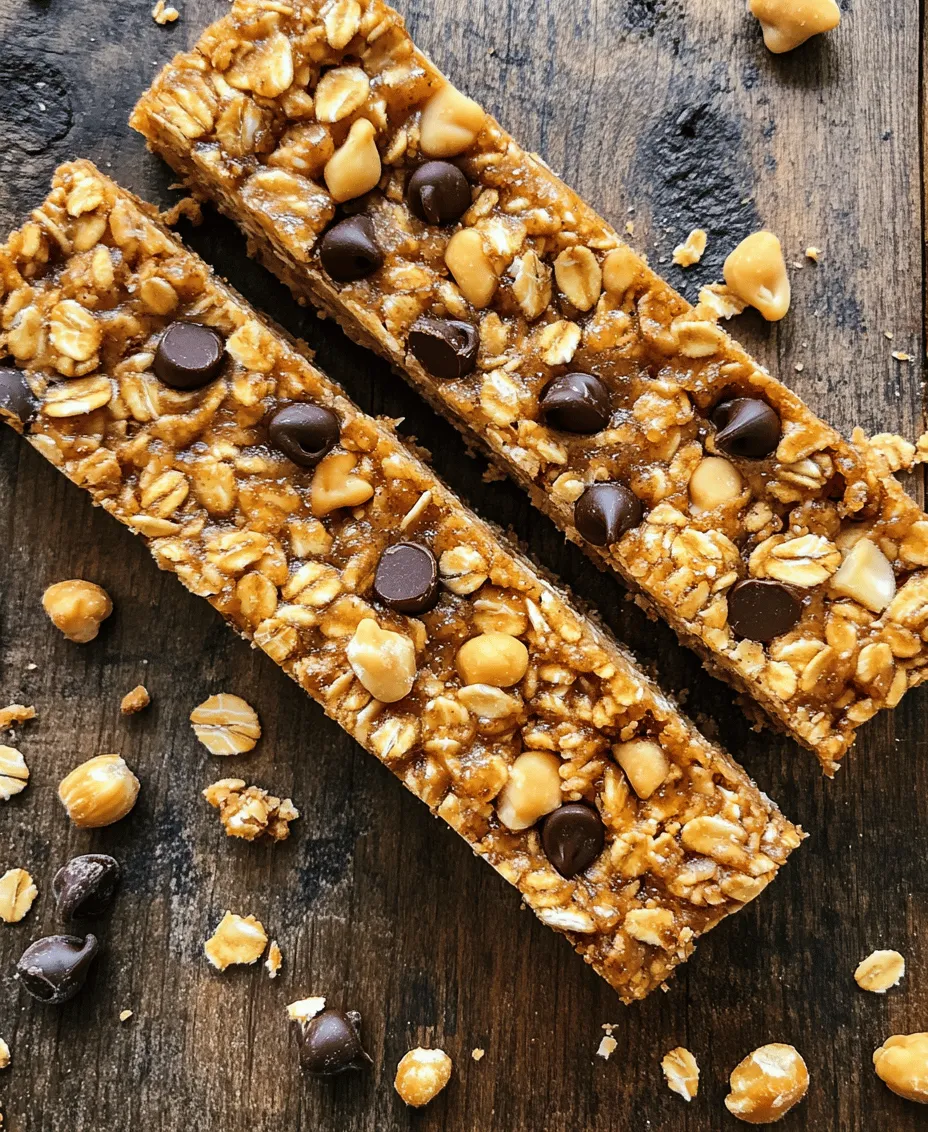
Introduction to Easiest Microwave Chewy Peanut Butter Granola Bars
In today’s fast-paced world, finding nutritious snacks that are both easy to prepare and satisfying can be a formidable challenge. Many individuals struggle with balancing their busy schedules while also seeking to maintain a healthy diet. Enter the Easiest Microwave Chewy Peanut Butter Granola Bars—a delightful blend of wholesome ingredients that provide both energy and satisfaction. These bars are not just a snack; they can serve as a quick breakfast option, a post-workout replenishment, or even a convenient treat to pack in your kids’ lunchboxes.
What sets these granola bars apart is their simplicity. With just a few key ingredients and minimal cooking time, you can whip up a batch of delicious, chewy granola bars that rival any store-bought version. Furthermore, by making them at home, you can control the ingredients, ensuring that they are not only delicious but also tailored to your dietary preferences. This article will guide you through the process of making these delectable bars, exploring their benefits, and offering insights into ingredient substitutions and variations to suit your taste.
Understanding the Appeal of Granola Bars
Granola bars have gained immense popularity as a convenient snack choice, and for good reason. They are portable, easy to eat on the go, and can provide a quick boost of energy when needed. Whether you’re headed to work, out for a hike, or simply need a snack to tide you over until your next meal, granola bars are a versatile option.
The Health Benefits of Homemade Granola Bars Versus Store-Bought
While store-bought granola bars may seem like a convenient option, they often come with hidden sugars, preservatives, and artificial ingredients that can detract from their health benefits. In contrast, homemade granola bars allow you to control what goes into them. You can choose whole, natural ingredients, and adjust the sweetness to your liking.
Homemade granola bars can be tailored to be gluten-free, vegan, or protein-packed, depending on your dietary needs. By making your own bars, you can also avoid the common allergens and additives that may be present in pre-packaged options, making them a healthier choice for yourself and your family.
The Versatility of Granola Bars in Different Dietary Preferences
Another compelling reason to whip up a batch of homemade granola bars is their versatility. These bars can be easily customized to cater to various dietary preferences. For instance, if you’re following a gluten-free diet, you can use certified gluten-free oats and avoid any fillers that may contain gluten. If you’re vegan, you can substitute honey with maple syrup or agave nectar.
Furthermore, the flavor combinations are virtually limitless. You can opt to add nuts, seeds, dried fruits, or even a sprinkle of dark chocolate chips for an indulgent touch. This adaptability makes granola bars a beloved option for individuals with diverse dietary needs and preferences.
Key Ingredients Breakdown
Now that we understand the appeal of granola bars, let’s take a closer look at the key ingredients that make up the Easiest Microwave Chewy Peanut Butter Granola Bars. Each component plays a vital role in the final product, contributing to both flavor and texture.
Rolled Oats
Rolled oats are the backbone of any granola bar recipe. They are packed with nutrients, providing a good source of fiber, protein, and essential vitamins and minerals. The fiber content in rolled oats can help promote digestive health and keep you feeling full longer. Additionally, they are low in calories and can help regulate blood sugar levels, making them an excellent choice for a snack.
Using rolled oats instead of quick oats is also essential for achieving the desired chewy texture in these granola bars. Quick oats tend to break down more during the cooking process, resulting in a denser, less chewy bar.
Peanut Butter
Peanut butter is not only a delicious addition to these granola bars, but it also contributes healthy fats and protein. It is a fantastic source of monounsaturated fats, which are heart-healthy and can help reduce bad cholesterol levels. Additionally, peanut butter is rich in protein, making these granola bars a satisfying snack that will keep you energized throughout the day.
When selecting peanut butter, opt for natural varieties that contain minimal ingredients—ideally just peanuts and a pinch of salt. This will ensure that you avoid added sugars and hydrogenated oils commonly found in many commercial peanut butter brands.
Honey or Maple Syrup
Both honey and maple syrup serve as natural sweeteners in this recipe, helping to bind the ingredients together while providing a touch of sweetness. Honey is a great source of antioxidants and has antibacterial properties, while maple syrup contains essential minerals such as manganese and zinc.
When choosing between the two, consider your dietary preferences. Honey is not suitable for vegans, so if you’re following a plant-based diet, opt for pure maple syrup instead. Both options can be used interchangeably in this recipe, making it easy to adjust based on what you have available.
Brown Sugar
Brown sugar is used in this recipe to enhance the flavor and contribute to the chewy texture of the granola bars. It adds a slight caramel flavor and moisture, which is crucial for achieving that perfect balance between crunchy and chewy.
While you can use granulated sugar as a substitute, brown sugar’s unique flavor profile makes it an ideal choice for these granola bars. If you’re looking to reduce overall sugar content, you can experiment with using less brown sugar or substituting with coconut sugar for a more natural sweetener.
Optional Add-ins
One of the best aspects of making your own granola bars is the ability to incorporate various add-ins to enhance flavor and nutrition. Consider adding chocolate chips for a sweet treat, nuts for extra crunch and protein, or dried fruits like cranberries or apricots for a burst of flavor and additional vitamins.
These optional add-ins not only elevate the taste but also offer additional health benefits. For example, nuts provide healthy fats and protein, while dried fruits can add fiber and antioxidants to your snack. Feel free to get creative and tailor the recipe to suit your taste preferences.
Step-by-Step Guide to Making Easiest Microwave Chewy Peanut Butter Granola Bars
Now that we’ve covered the ingredients and their benefits, let’s dive into the step-by-step process of making these Easiest Microwave Chewy Peanut Butter Granola Bars. This guide will provide detailed instructions to ensure your granola bars turn out chewy, delicious, and perfectly set.
Melting the Base Mixture
The first step in making these granola bars is to create the base mixture. In a microwave-safe bowl, combine the peanut butter, honey (or maple syrup), and brown sugar. Microwave the mixture in 30-second increments, stirring in between, until it is fully melted and combined. This process typically takes about 1 to 1.5 minutes.
Achieving the right consistency is crucial at this stage. You want the mixture to be smooth and well-blended without any clumps of sugar. This ensures that your granola bars will have an even sweetness and flavor throughout.
Incorporating Oats and Flavorings
Once your base mixture is melted and smooth, it’s time to add in the rolled oats and any optional flavorings you wish to include. Stir in the rolled oats until they are evenly coated with the peanut butter mixture. This step is essential for ensuring that every bite of your granola bar is packed with flavor.
If you’re using any optional add-ins, such as chocolate chips, nuts, or dried fruits, now is the time to fold them into the mixture as well. Be careful not to overmix; just enough to combine everything will suffice.
Pressing the Mixture
After the ingredients are well combined, transfer the mixture to a parchment-lined baking dish. Use a spatula or your hands to firmly press the mixture into the dish, creating an even layer. It’s important to compact the mixture well, as this will help the bars hold their shape once set.
You can use a flat-bottomed glass or measuring cup to help press down evenly. The more compact the mixture, the chewier your bars will be.
Microwaving and Setting
Finally, place the baking dish in the microwave and cook for an additional 1-2 minutes. The exact time will depend on your microwave’s wattage, so keep a close eye on the mixture. You want it to be slightly puffed and set, but not overcooked, as this can result in dry bars.
Once microwaved, allow the granola bars to cool completely in the dish before cutting them into squares or rectangles. This cooling period is crucial, as it allows the bars to firm up and makes them easier to handle.
By following these simple steps, you’ll be well on your way to enjoying homemade Easiest Microwave Chewy Peanut Butter Granola Bars that are both nutritious and delicious. In the following sections, we will discuss the best storage methods, longevity of your bars, and additional tips for perfecting your granola bar experience.
Best Practices for Storing Granola Bars to Maintain Freshness
Once you’ve crafted your Easiest Microwave Chewy Peanut Butter Granola Bars, proper storage is crucial to ensure they stay fresh and delicious for as long as possible. Here are some effective tips to help you store them correctly:
Refrigeration vs. Room Temperature
The choice between refrigeration and room temperature storage can significantly affect the texture and longevity of your granola bars. If you prefer a softer, chewier texture, storing the bars at room temperature in an airtight container is ideal. Keep them in a cool, dry place away from direct sunlight. They can remain fresh for up to one week.
On the other hand, if you want to extend their shelf life, consider refrigerating them. When stored in the fridge, your granola bars can last for up to two weeks. However, refrigeration can make the bars a bit firmer, so if you enjoy that chewy bite, you might want to let them sit at room temperature for a few minutes before indulging.
Tips for Wrapping and Keeping Granola Bars Handy for Snacking
To keep your granola bars fresh and ready for snacking, wrapping them individually is a smart strategy. Use parchment paper, wax paper, or plastic wrap to wrap each bar securely, which helps prevent them from sticking together and keeps them from drying out. If you’re preparing them in advance, consider storing your wrapped bars in a resealable plastic bag or an airtight container.
For even more convenience, you can store them in your bag or lunch box, making them the perfect on-the-go snack. They are ideal for busy mornings, post-workout fuel, or a midday pick-me-up.
Nutritional Information and Benefits of the Recipe
One of the many reasons people love granola bars is their nutritional value. Here’s a breakdown of the calories and macronutrients per serving (assuming one serving is one granola bar):
– Calories: Approximately 180-200 calories
– Protein: 6-8 grams
– Carbohydrates: 25-30 grams
– Fat: 8-10 grams
– Fiber: 2-4 grams
Highlighting the Health Advantages of Snacking on Granola Bars
These Easiest Microwave Chewy Peanut Butter Granola Bars are not only delicious but also packed with nutrients that can support a healthy lifestyle. The peanut butter provides a good source of healthy fats and protein, keeping you satiated longer. The oats used in the recipe are a great source of whole grains, which can aid in digestion and reduce the risk of chronic diseases.
Snacking on homemade granola bars can help you avoid processed snacks that are often high in sugar and unhealthy fats. This recipe allows you to control the ingredients, ensuring you know exactly what you’re consuming.
Discussing How This Recipe Fits into Various Dietary Plans
These granola bars are highly versatile and can fit into various dietary plans. For those looking to reduce their sugar intake, you can adjust the amount of sweetener or substitute with a sugar alternative. If you follow a gluten-free diet, simply ensure you use certified gluten-free oats, which can be easily found in most grocery stores.
For vegan eaters, you can substitute honey with maple syrup or agave nectar, and if you’re looking for nut-free options, sunflower seed butter is an excellent alternative to peanut butter. This adaptability makes these granola bars a suitable choice for almost anyone!
Customization Options for Your Granola Bars
The beauty of homemade granola bars lies in their customization potential. Here are some ingredient substitutions and variations to fit different dietary needs and flavor preferences:
Gluten-Free Alternatives for Oats
If you or someone in your household is sensitive to gluten, you can still enjoy these granola bars by using gluten-free oats. Many brands offer certified gluten-free oats that are processed in facilities separate from gluten-containing grains. This simple swap allows everyone to enjoy the deliciousness without worry.
Nut-Free Options for Allergies
For those with nut allergies, swapping out peanut butter for sunflower seed butter or soy nut butter works perfectly. These alternatives provide a similar texture and taste, ensuring no one misses out on the enjoyment of granola bars.
Vegan Substitutions for Honey and Peanut Butter
To make these granola bars vegan, replace the honey with maple syrup or agave nectar, which provides sweetness without the use of animal products. You can also explore different nut butters like almond or cashew butter, or even seed butters for a nut-free version.
Creative Variations to Try
While the original recipe is fantastic, experimenting with different flavors can elevate your granola bars to a whole new level. Here are some creative ideas to inspire your culinary adventures:
Adding Spices Like Cinnamon or Nutmeg
Incorporating spices can enhance the flavor profile of your granola bars. A teaspoon of cinnamon or nutmeg can add warmth and a hint of sweetness, making the bars even more delightful. Spices not only enhance flavor but also offer additional health benefits, such as anti-inflammatory properties.
Utilizing Different Nut Butters for Variety
Switching out peanut butter for other nut butters can create entirely new taste experiences. Almond butter, cashew butter, or even tahini can lend unique flavors and textures to your bars. Each nut butter provides its own nutritional benefits, so feel free to experiment!
Mixing in Seeds Like Chia or Flax for Added Nutrition
To boost the nutritional profile of your granola bars, consider mixing in seeds like chia, flax, or pumpkin seeds. These tiny powerhouses are rich in omega-3 fatty acids, fiber, and protein. They can also add a nice crunch to the texture and make your bars even more satisfying.
Conclusion: Enjoying Your Easiest Microwave Chewy Peanut Butter Granola Bars
In summary, making your own Easiest Microwave Chewy Peanut Butter Granola Bars is a simple and rewarding endeavor. With a few basic ingredients and a microwave, you can create a wholesome snack that not only satisfies your sweet tooth but also nourishes your body.
These granola bars are versatile, easy to customize, and perfect for any dietary preference, making them a fantastic addition to your snacking repertoire. Whether you need an on-the-go breakfast, a post-workout snack, or simply something to satisfy mid-afternoon cravings, these bars are the ideal solution.
We encourage you to explore your creativity in the kitchen with this recipe. Try out different flavors, ingredient substitutions, and toppings to discover your version of the perfect granola bar. With the health benefits and convenience of having these bars on hand, you’ll never go back to store-bought snacks again! Enjoy your homemade treats and the satisfaction that comes with nourishing your body with wholesome ingredients.