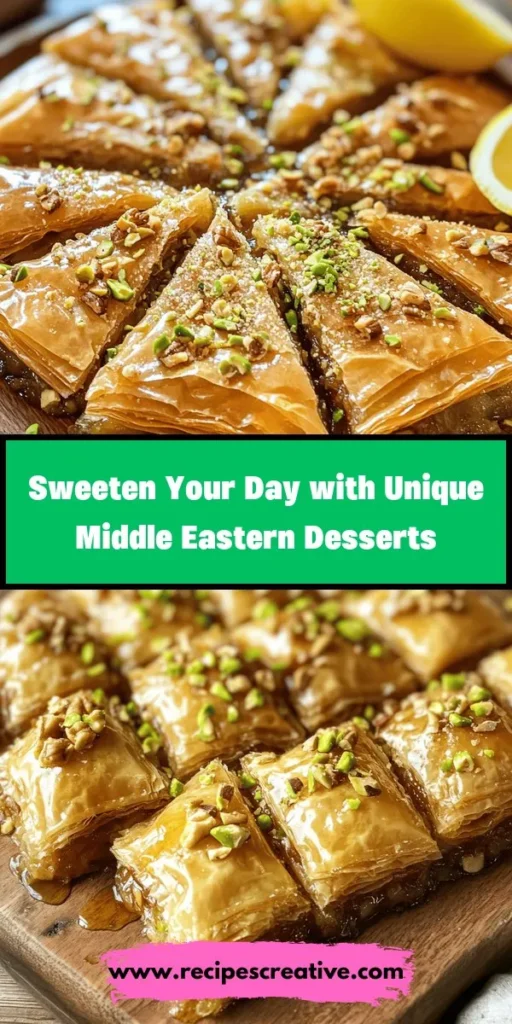
Introduction
The world of Middle Eastern desserts is a treasure trove of flavors, textures, and aromas that tantalize the taste buds. With a rich heritage steeped in tradition, these sweet treats often feature ingredients like nuts, honey, and spices, creating an irresistible allure. Middle Eastern desserts are not just about satisfying a sweet tooth; they embody stories of culture, family, and celebration. Each recipe has its own unique background and significance, often enjoyed during festive occasions or as part of daily life.
In this article, we will explore five unique Middle Eastern dessert recipes that you can easily recreate at home. From the flaky goodness of Baklava to the creamy delight of Saffron Rice Pudding, each recipe offers a unique experience that celebrates the culinary artistry of the region.
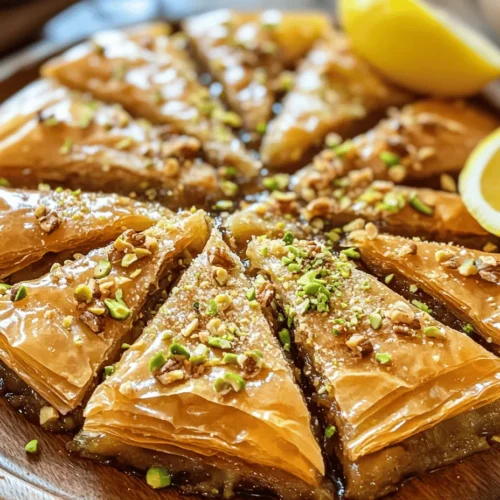
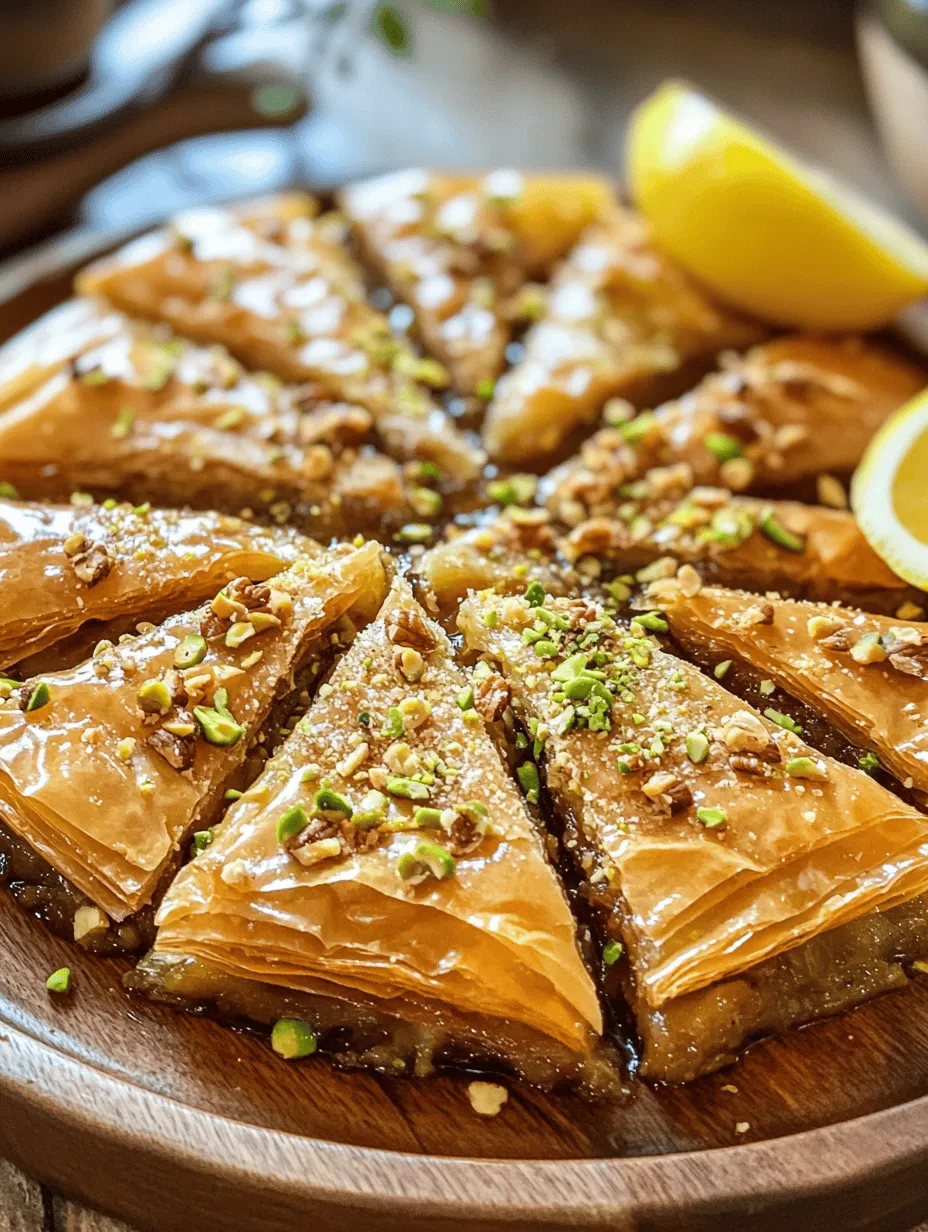
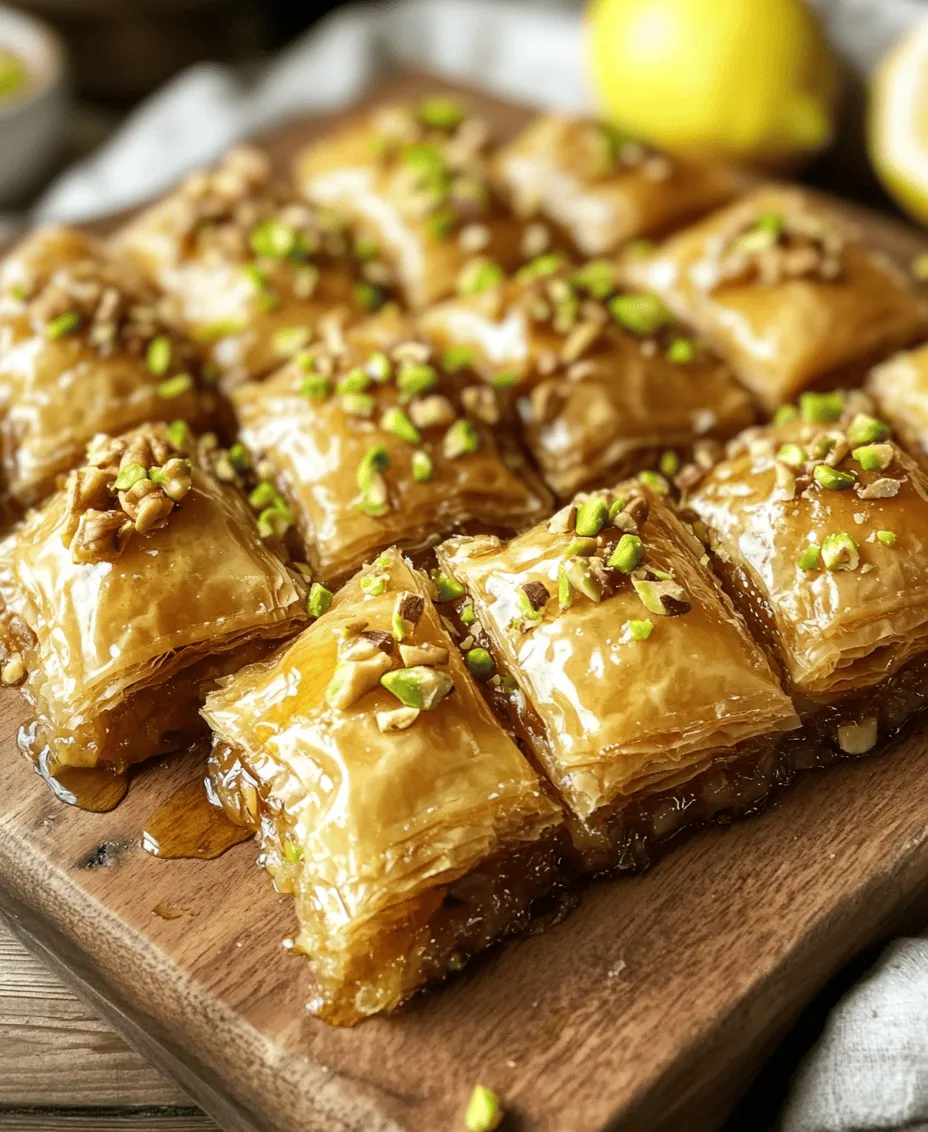
Baklava Bliss: A Flaky Delight
Understanding Baklava’s Rich History
Baklava holds a place of honor in the rich tapestry of Middle Eastern cuisine, often regarded as the crown jewel of desserts. Its origins can be traced back to ancient civilizations, with roots in both the Ottoman Empire and the Byzantine Empire. Over the centuries, various cultures have adapted the recipe, leading to a myriad of regional variations. In Turkey, for instance, you might find baklava made with walnuts and flavored with rosewater, while in Greece, almonds and cinnamon could take center stage.
The significance of Baklava extends beyond its delectable taste. It is a staple at festive gatherings, weddings, and religious celebrations, symbolizing hospitality and abundance. Whether served on a special occasion or enjoyed as an everyday treat, Baklava is a testament to the artistry and craftsmanship of Middle Eastern sweets.
Ingredients and Preparation
To create this flaky delight, you’ll need a selection of simple yet essential ingredients that come together to form the layers of flavor and texture that Baklava is known for. Here’s what you’ll need:
Ingredients:
– 1 package of phyllo dough (about 16 oz, thawed)
– 2 cups of finely chopped nuts (traditionally walnuts, pistachios, or almonds)
– 1 cup of unsalted butter, melted
– 1 cup of granulated sugar
– 1 cup of water
– 1/2 cup of honey
– 1 teaspoon of vanilla extract
– 1 teaspoon of ground cinnamon
– A pinch of salt
Preparation Steps:
1. Preheat the Oven: Begin by preheating your oven to 350°F (175°C). This ensures that your Baklava bakes evenly and achieves that perfect golden brown color.
2. Prepare the Nut Mixture: In a mixing bowl, combine the chopped nuts, cinnamon, and a pinch of salt. This aromatic mixture will form the filling of your Baklava, providing a delightful crunch and flavor.
3. Assemble the Phyllo Dough: Lay out your phyllo dough sheets on a clean work surface. It’s important to keep the sheets covered with a damp towel while you work to prevent them from drying out. Begin by brushing the bottom of a 9×13 inch baking dish with melted butter.
4. Layer the Phyllo Sheets: Place one sheet of phyllo dough in the baking dish and brush it lightly with melted butter. Repeat this process, layering about 8 sheets of phyllo, brushing each layer with butter. This creates a flaky base for your Baklava.
5. Add the Nut Mixture: Once you have your base prepared, evenly spread a layer of the nut mixture over the phyllo sheets. Follow this with another layer of phyllo dough, brushing each sheet with butter as you go. Repeat this process, alternating between layers of nuts and phyllo dough, until all the nuts are used. Top with at least 8 more layers of phyllo, ensuring that each sheet is brushed with butter.
6. Cut the Baklava: Before baking, use a sharp knife to cut the assembled Baklava into diamond or square shapes. This allows for even cooking and makes it easier to serve later on.
7. Bake the Baklava: Place the baking dish in the preheated oven and bake for about 45-50 minutes, or until the Baklava is golden brown and crisp.
8. Prepare the Syrup: While the Baklava is baking, prepare the syrup. In a saucepan, combine sugar, water, and honey. Bring to a boil, then reduce the heat and let it simmer for about 10 minutes. Stir in the vanilla extract and remove from heat. Allow the syrup to cool slightly.
9. Soak the Baklava: Once the Baklava is out of the oven, immediately pour the cooled syrup over the hot Baklava. This will allow the syrup to seep into the layers, creating a sweet and sticky finish.
10. Cool and Serve: Allow the Baklava to cool completely before serving. This dessert is best enjoyed at room temperature, where the flavors can truly shine.
Tips for Handling Phyllo Dough Effectively
Working with phyllo dough can be a bit daunting for first-timers, but with a few tips, you’ll find it easier to manage:
– Thaw Properly: Always thaw your phyllo dough in the refrigerator overnight. Bring it to room temperature before using to ensure it is pliable.
– Keep it Covered: As mentioned, keep the phyllo sheets covered with a damp towel while you work to prevent them from drying out. Dried phyllo can become brittle and difficult to work with.
– Brush Generously: Don’t skimp on the melted butter. It not only adds flavor but also helps achieve that signature flaky texture.
– Experiment with Fillings: While nuts are traditional, feel free to experiment with different fillings, such as dried fruits or spices, to customize your Baklava according to your taste.
Serving and Enjoying Baklava
Baklava is traditionally served cut into small pieces, allowing guests to indulge without overwhelming their taste buds. It pairs beautifully with a variety of beverages, including strong coffee or aromatic teas, which help to balance the sweetness of the dessert.
For a delightful presentation, consider garnishing your Baklava with finely chopped pistachios or a drizzle of extra honey before serving. When stored properly in an airtight container at room temperature, Baklava can last for several days, allowing you to enjoy this exquisite dessert long after it’s made.
As we delve into the next recipe, prepare yourself for the creamy comforts of Saffron Rice Pudding, another Middle Eastern delight that captures the essence of the region’s culinary heritage.
1. Baklava Bliss
Comprehensive Ingredient List
To create the perfect Baklava, you will need the following ingredients:
– For the Baklava:
– 1 package (16 oz) of phyllo dough, thawed
– 2 cups of unsalted butter, melted
– 2 cups of finely chopped nuts (walnuts, pistachios, or almonds)
– 1 cup of granulated sugar
– 1 teaspoon of ground cinnamon
– 1/4 teaspoon of ground cloves (optional)
– For the Syrup:
– 1 cup of water
– 1 cup of granulated sugar
– 1/2 cup of honey
– 1 teaspoon of vanilla extract
– 1 teaspoon of lemon juice
Detailed Preparation Steps for Achieving the Perfect Texture
1. Prepare the Nut Mixture:
– In a mixing bowl, combine the finely chopped nuts with sugar, ground cinnamon, and ground cloves (if using). Stir until well mixed. Set aside.
2. Prepare the Phyllo Dough:
– Unroll the phyllo dough carefully and cover it with a damp cloth to prevent it from drying out. Preheat your oven to 350°F (175°C).
3. Layer the Baklava:
– Brush a 9×13 inch baking dish with melted butter. Place one sheet of phyllo dough into the pan and brush it lightly with butter. Repeat this process, layering 8 sheets of phyllo, brushing each layer with melted butter.
– After layering, spread about 1 cup of the nut mixture over the phyllo. Continue layering with 4 more sheets of phyllo, brushing each with butter. Add another cup of the nut mixture, followed by 4 more sheets of phyllo. Repeat until all the nuts are used, finishing with a top layer of 10 sheets of phyllo, each brushed with butter.
4. Cut the Baklava:
– Using a sharp knife, cut the layered baklava into diamond or square shapes. This will make it easier to serve once baked.
5. Bake:
– Bake in the preheated oven for 45-50 minutes, or until the top is golden brown and crisp.
6. Prepare the Syrup:
– While the baklava is baking, prepare the syrup. In a saucepan over medium heat, combine water, sugar, honey, vanilla extract, and lemon juice. Bring to a boil, then reduce to a simmer for about 10 minutes. Remove from heat and let it cool.
7. Drizzle the Syrup:
– Once the baklava is done, remove it from the oven and immediately pour the cooled syrup over the hot baklava. Allow it to soak for several hours or overnight for the best flavor.
Tips for Selecting the Right Cheese for Melting
When making variations of Middle Eastern desserts like Kunafa, selecting the right cheese is crucial for achieving the ideal texture and taste. Here are a few tips:
– Opt for Mozzarella or Akkawi Cheese: These cheeses have a great melting quality and are mild in flavor, which complements the sweetness of Kunafa well.
– Mix Cheeses: For a unique flavor profile, consider combining mozzarella with a bit of ricotta or mascarpone cheese for creaminess.
– Soaking the Cheese: If using Akkawi cheese, soak it in water for several hours to reduce its saltiness and improve texture before using it in your dessert.
Serving Kunafa with a Twist
Traditional Serving Methods with Syrup
Kunafa is traditionally served warm, drizzled with a generous amount of syrup made from sugar, water, and a hint of rose or orange blossom water for a fragrant touch. To serve, cut the Kunafa into small squares or wedges and place them on a serving plate. Drizzle the syrup over the top, allowing it to soak into the layers for added sweetness.
Ideas for Innovative Garnishes
Elevate your Kunafa presentation by adding innovative garnishes:
– Chopped Pistachios or Almonds: Sprinkle finely chopped nuts on top for a crunchy finish.
– Fresh Berries: Add a handful of fresh berries like strawberries or raspberries for a pop of color and tartness.
– Mint Leaves: Garnish with fresh mint leaves to add a refreshing aroma.
How to Incorporate Kunafa into Festive Gatherings
Kunafa can be a delightful centerpiece at any festive gathering. Consider the following ideas:
– Serve as a Dessert Station: Set up a dessert station with Kunafa alongside other Middle Eastern sweets, offering guests a variety of flavors.
– Pair with Tea or Coffee: Kunafa pairs beautifully with Arabic coffee or mint tea, enhancing the overall experience.
– Festive Plating: Use decorative plates and serve in individual portions for a touch of elegance.
—
2. Date and Nut Truffles: Healthy Indulgence
Exploring the Nutritional Benefits of Dates and Nuts
Overview of Medjool Dates and Their Health Properties
Medjool dates are not only sweet and delicious but also packed with nutrition. They are a great source of natural sugars, fiber, and essential minerals like potassium, magnesium, and copper. Their high fiber content aids digestion and helps maintain a healthy gut, making them a perfect addition to your diet.
Benefits of Nuts in a Balanced Diet
Nuts such as almonds, walnuts, and pistachios are rich in healthy fats, protein, and antioxidants. They contribute to heart health, support brain function, and can help manage weight when consumed in moderation. Incorporating nuts into your diet promotes overall well-being and adds a delightful crunch to your desserts.
Ingredients and Preparation Process
Complete Ingredient Breakdown with Possible Substitutes
To make Date and Nut Truffles, gather the following ingredients:
– 1 cup of Medjool dates, pitted
– 1 cup of mixed nuts (almonds, walnuts, cashews—choose your favorites)
– 2 tablespoons of cocoa powder or carob powder (for a different flavor)
– 1 tablespoon of vanilla extract
– A pinch of sea salt
– Optional: shredded coconut or crushed nuts for rolling
Step-by-Step Guide to Creating the Truffles
1. Blend the Ingredients:
– In a food processor, combine the pitted Medjool dates, mixed nuts, cocoa powder, vanilla extract, and sea salt. Pulse until the mixture is well combined and sticky. If the mixture is too dry, add a tablespoon of water or nut butter to achieve the right consistency.
2. Form the Truffles:
– Using your hands, scoop small portions of the mixture and roll them into bite-sized balls. Place them on a lined baking sheet.
3. Coat the Truffles:
– For added texture, roll each truffle in shredded coconut, crushed nuts, or cocoa powder. This step is optional but adds a delightful finish.
4. Chill:
– Refrigerate the truffles for at least 30 minutes to firm up before serving.
Tips for Achieving the Right Consistency
– Check the Texture: The mixture should be sticky enough to hold together but not too wet. Adjust by adding more nuts or dates if needed.
– Don’t Overprocess: Be careful not to over-process the nuts, as this can turn them into nut butter. Aim for a coarse texture for the best results.
Creative Ways to Serve Date and Nut Truffles
Ideas for Presentation
– Elegant Platter: Arrange the truffles on a decorative platter, garnished with fresh mint leaves or edible flowers for a stunning display.
– Mini Cupcakes: Serve each truffle in mini cupcake liners for an added touch of sophistication.
Pairing Options with Teas or Coffees
– Complement with Beverages: Pair your Date and Nut Truffles with a warm cup of herbal tea or a rich espresso. The sweetness of the truffles balances perfectly with the bitterness of coffee.
Storing and Gifting Suggestions
– Storage: Keep the truffles in an airtight container in the refrigerator for up to two weeks. For longer storage, freeze them for up to three months.
– Gift Ideas: Package the truffles in cute boxes or jars with a ribbon for a thoughtful homemade gift.
—
3. Halva Cake: A Unique Take on a Classic
Understanding Halva and Its Cultural Importance
The History of Halva in Middle Eastern Cuisine
Halva has a rich history in Middle Eastern cuisine, often made from tahini or semolina and flavored with nuts and spices. It is a versatile dessert that can be enjoyed in many forms, from crumbly to soft and creamy. Halva has been a part of Middle Eastern culture for centuries, symbolizing hospitality and celebration.
Variants of Halva and Its Uses in Desserts
There are many varieties of halva, including flour-based, nut-based, and those made with different sweeteners. In desserts, halva can be used as a filling, topping, or even as a key ingredient in cakes, providing a unique flavor and texture that is both satisfying and indulgent.
Ingredients and Baking Instructions
Full Ingredient List with Measurements
To make Halva Cake, you will need:
– 1 cup of tahini (or halva paste)
– 1 cup of granulated sugar
– 1/2 cup of all-purpose flour
– 1/2 cup of semolina
– 1 teaspoon of baking powder
– 1/2 cup of milk (or dairy-free alternative)
– 1/4 cup of vegetable oil
– 3 large eggs
– 1 teaspoon of vanilla extract
– Optional: chopped nuts for garnish (pistachios or almonds)
Step-by-Step Baking Instructions for Beginners
1. Preheat the Oven:
– Preheat your oven to 350°F (175°C). Grease a round cake pan and set aside.
2. Mix Dry Ingredients:
– In a bowl, combine flour, semolina, and baking powder. Mix well.
3. Combine Wet Ingredients:
– In a separate large bowl, whisk together tahini, sugar, milk, vegetable oil, eggs, and vanilla extract until smooth and creamy.
4. Combine Mixtures:
– Gradually add the dry ingredients to the wet mixture, stirring until just combined. Avoid overmixing.
5. Pour into Pan:
– Pour the batter into the prepared cake pan and smooth the top. Sprinkle chopped nuts on top if desired.
6. Bake:
– Bake in the preheated oven for 30-35 minutes, or until a toothpick inserted in the center comes out clean.
7. Cool and Serve:
– Allow the cake to cool in the pan for 10 minutes, then transfer it to a wire rack to cool completely before slicing.
Tips for Ensuring a Moist Cake
– Do Not Overbake: Keep an eye on the cake as it bakes and test for doneness early to prevent it from drying out.
– Add Moisture: If the cake seems dry, consider adding a simple syrup soaked with rose or orange blossom water to enhance moisture and flavor.
Serving Halva Cake with Style
Suggestions for Toppings and Accompaniments
– Frosting Options: Consider topping the cake with a light icing made from powdered sugar and lemon juice, or serve it plain with a dusting of powdered sugar.
– Creamy Accompaniments: Serve with a dollop of whipped cream or a scoop of vanilla ice cream for an indulgent treat.
Ideas for Celebrating Special Occasions with Halva Cake
– Cultural Celebrations: Halva Cake is perfect for Middle Eastern celebrations such as Ramadan, weddings, or family gatherings. Serve it alongside traditional teas or coffees for a complete experience.
Cultural Significance of Cake in Middle Eastern Festivities
In Middle Eastern culture, sweets and desserts like Halva Cake play a crucial role in celebrations, symbolizing joy, family unity, and hospitality. Sharing these treats during gatherings fosters community and strengthens bonds among family and friends.
—
Conclusion
Middle Eastern desserts are not just sweet treats; they are a celebration of tradition, culture, and community. From the flaky layers of Baklava to the comforting warmth of Date and Nut Truffles, each recipe embodies the heart and soul of the region’s culinary heritage. By trying your hand at these unique recipes, you can bring a taste of the Middle East into your home, creating memorable experiences for yourself and your loved ones. Whether for a special occasion or a simple family gathering, these desserts are sure to delight and satisfy.