

Introduction
Discover the joy of homemade baking with our delightful Melt In Your Mouth Glazed Donuts recipe. These fluffy, sweet treats are not only easy to make but also perfect for any occasion—whether it’s a weekend breakfast, a special celebration, or simply a sweet craving. The experience of biting into a freshly made donut is unparalleled, and with this recipe, you’ll be able to achieve that melt-in-your-mouth texture that will leave everyone asking for more.
In this article, we will delve into the step-by-step process of creating these delectable donuts, along with insights on ingredients, baking techniques, and serving suggestions. We believe that everyone should have the opportunity to enjoy a warm, homemade donut, and we’re here to guide you through each stage of the baking journey.
Understanding the Allure of Glazed Donuts
Exploring the Popularity of Donuts in Various Cultures
Donuts have a rich history and a place in various culinary traditions around the world. From the American classic glazed donut to the Portuguese “bolas de berlim” and the German “berliner,” the concept of frying sweet dough dates back centuries. Each culture has its own unique spin on this beloved treat, showcasing local flavors and ingredients. In the United States, donuts have become an iconic breakfast item, often enjoyed with a cup of coffee, symbolizing comfort and indulgence.
Their popularity can be attributed to their versatility; donuts can be filled, topped, or glazed in countless ways, making them suitable for a wide range of palates and occasions. Whether enjoyed plain or adorned with chocolate, sprinkles, or fruit, donuts have a universal appeal that transcends age and cultural backgrounds.
The History of Glazed Donuts and Their Evolution Over Time
The glazed donut, in particular, has a fascinating backstory. While the exact origin is debated, it is believed that the modern glazed donut as we know it began to take shape in the early 19th century. The first recorded recipe for a yeast donut appeared in a New England cookbook published in 1847. However, it wasn’t until the invention of the donut cutter in the early 20th century that these beloved treats gained immense popularity.
The glazed variety, characterized by its shiny, sweet topping, became a staple in bakeries across America, thanks to their delightful combination of fluffy dough and sugary glaze. Over the years, the donut has evolved further, with innovations such as the cronut and gourmet versions appearing in bakeries worldwide. Still, the classic glazed donut remains a cherished favorite, embodying simplicity and indulgence.
The Unique Flavor and Texture Profile of Melt-In-Your-Mouth Donuts
What sets melt-in-your-mouth donuts apart from others is their light and airy texture, coupled with a sweet, glossy glaze that complements the dough perfectly. The secret to achieving this desirable quality lies in the balance of ingredients and precise baking techniques. The use of buttermilk adds moisture and a subtle tang, while a combination of baking powder and baking soda ensures that the donuts rise beautifully.
The glaze, typically made from powdered sugar and milk, provides a sweet contrast to the slightly savory dough, enhancing the overall flavor experience. When done right, each bite should feel like a cloud of sweetness, leaving a lasting impression on your taste buds.
Ingredients Breakdown
Before diving into the baking process, let’s take a closer look at the essential ingredients that will bring our Melt In Your Mouth Glazed Donuts to life. Each component plays a crucial role in the overall flavor and texture of the final product.
All-Purpose Flour: The Foundation of the Donuts
All-purpose flour serves as the backbone of our donut recipe. It provides the necessary structure and stability, allowing our donuts to rise and maintain their shape during baking. The gluten content in flour contributes to a chewy yet tender texture, making it an ideal choice for this recipe.
Granulated Sugar: Sweetness and Texture
Granulated sugar is responsible for the sweetness in our donuts, but it also plays a significant role in the texture. Sugar helps to create a tender crumb by inhibiting gluten formation during mixing, resulting in a softer donut. Additionally, it caramelizes during baking, contributing to the lovely golden color of the final product.
Baking Powder and Baking Soda: The Leavening Agents for Fluffiness
The combination of baking powder and baking soda is essential for achieving the perfect rise in our donuts. Baking powder is a double-acting leavening agent that releases carbon dioxide when mixed with wet ingredients and again when exposed to heat. Meanwhile, baking soda requires an acidic component (in this case, buttermilk) to activate its leavening properties. Together, they ensure that our donuts are light and fluffy.
Buttermilk: Adding Moisture and Flavor
Buttermilk is a key ingredient in this recipe that not only adds moisture but also enhances the flavor profile of the donuts. Its acidity reacts with baking soda, promoting a tender crumb and a subtle tanginess that balances the sweetness. If you don’t have buttermilk on hand, you can easily make a substitute by mixing milk with a splash of vinegar or lemon juice.
Eggs: Binding and Enriching the Batter
Eggs serve multiple functions in our donut recipe. They act as a binding agent, holding the ingredients together, while also enriching the batter with fat and protein. This contributes to a richer flavor and a more tender texture. Additionally, eggs help with leavening, providing extra lift during baking.
Unsalted Butter: Enhancing Flavor and Moisture
Unsalted butter is another crucial component, adding richness and moisture to our donuts. The fat in butter contributes to a tender texture and a delightful flavor, making each bite a pleasure. Since we are using unsalted butter, we have control over the amount of salt in the recipe, ensuring a balanced taste.
Vanilla Extract: The Secret Ingredient for Aromatic Depth
Vanilla extract is the secret ingredient that elevates the flavor of our donuts. Its warm, sweet aroma complements the other ingredients beautifully, enhancing the overall taste experience. Always opt for pure vanilla extract for the best flavor; artificial vanilla can lack the complexity of the real thing.
Powdered Sugar: The Base of a Perfect Glaze
Powdered sugar is essential for creating the smooth, glossy glaze that adorns our donuts. Its fine texture dissolves easily in liquid, allowing us to achieve the right consistency for drizzling or dipping. To elevate the glaze further, consider adding a splash of vanilla or almond extract for an extra layer of flavor.
Whole Milk: Achieving the Right Glaze Consistency
Whole milk is used to thin the powdered sugar into a smooth glaze. The fat content in whole milk helps create a richer texture, ensuring that our glaze clings beautifully to each donut. Adjust the amount of milk to achieve your desired consistency—thicker for dipping or thinner for drizzling.
Optional Ingredients: Food Coloring and Sprinkles for Decoration
To make your donuts even more festive, consider adding food coloring to the glaze for a pop of color, or top them with sprinkles for a playful touch. These optional ingredients allow you to customize your donuts for any occasion, whether it be a birthday party, holiday celebration, or simply a fun weekend treat.
Preparing for Success: Equipment and Preparation
Before you begin the baking process, it’s essential to gather the right equipment and prepare your workspace. This will ensure an efficient and enjoyable baking experience.
Essential Tools Needed for Baking Donuts
1. Donut Pan vs. Silicone Molds: Pros and Cons
– Donut Pan: A traditional metal donut pan is a great choice for baking donuts, providing even heat distribution and a classic shape. Look for a non-stick variety to make removal easier.
– Silicone Molds: Silicone molds offer flexibility and easy release, making them a popular choice for many home bakers. They are also easy to clean and can withstand high temperatures. However, they may not provide the same crispness on the outside as metal pans.
2. Mixing Bowls and Whisk: Importance of Proper Mixing
– A set of mixing bowls in various sizes is essential for measuring and mixing ingredients. A whisk will help you incorporate the ingredients smoothly, ensuring a well-combined batter. For best results, mix the dry ingredients separately from the wet ones before combining them.
3. Cooling Racks: Ensuring the Donuts Cool Perfectly
– A cooling rack is crucial for allowing your donuts to cool evenly after baking. This prevents them from becoming soggy and helps maintain their texture. If you don’t have a cooling rack, a plate or baking sheet can work in a pinch, but be sure to keep the donuts spaced apart.
Tips for Preparing Your Workspace and Ingredients for an Efficient Baking Experience
– Pre-measure Ingredients: Take the time to measure out all your ingredients before you start mixing. This will streamline the process and minimize the risk of forgetting an essential component.
– Organize Your Workspace: Clear your countertops and gather all your tools and ingredients. A tidy workspace can help you focus better and avoid unnecessary distractions while baking.
– Read Through the Recipe: Familiarize yourself with the entire recipe before you begin. This will help you anticipate each step and prevent any surprises during the baking process.
– Keep Ingredients at Room Temperature: For optimal mixing, ensure that your eggs, butter, and buttermilk are at room temperature. This will help them combine more easily and result in a smoother batter.
With everything prepared, you’re now ready to embark on the delicious journey of making your Melt In Your Mouth Glazed Donuts. Follow along as we guide you through the step-by-step instructions, ensuring you achieve perfect results every time. Get ready to impress your family and friends with your baking skills, and enjoy the sweet rewards of your efforts!
Step-by-Step Guide to Making Melt In Your Mouth Glazed Donuts
Preheating the Oven: Why Temperature Matters
Before diving into the mixing and baking process, it’s essential to preheat your oven to 350°F (175°C). Preheating the oven ensures that your donuts will bake evenly, giving them a perfect structure and that delightful rise. An oven that isn’t at the right temperature can lead to uneven cooking, resulting in donuts that are either undercooked or overly dry. Take this time to prepare your donut pan by lightly greasing it or using non-stick spray to ensure that your donuts release easily after baking.
Mixing Dry Ingredients: Achieving the Right Consistency
In a large mixing bowl, combine the following dry ingredients:
– 2 cups all-purpose flour
– 1 cup granulated sugar
– 2 teaspoons baking powder
– ½ teaspoon baking soda
– ½ teaspoon salt
– 1 teaspoon ground nutmeg (optional for added flavor)
Using a whisk, mix these ingredients thoroughly until they are well combined. The key here is to aerate the flour, which will contribute to a lighter, fluffier donut. Ensure there are no lumps of baking powder or baking soda, as these can lead to uneven rises.
Combining Wet Ingredients: The Importance of Proper Emulsification
In another bowl, whisk together the wet ingredients:
– 2 large eggs
– 1 cup buttermilk (or milk with a tablespoon of vinegar for a buttermilk substitute)
– ¼ cup unsalted butter, melted and slightly cooled
– 1 teaspoon pure vanilla extract
Mix the wet ingredients until they are fully combined. Proper emulsification is crucial as it allows for a smooth batter that incorporates air, leading to a tender, melt-in-your-mouth texture. If using buttermilk, the acidity helps to activate the baking soda, providing further leavening.
Filling the Donut Pan: Techniques for Even Baking
Once your wet and dry ingredients are prepared, pour the wet mixture into the dry ingredients. Gently fold the two mixtures together until just combined. Be careful not to overmix; a few lumps are perfectly fine.
To fill your donut pan, use a piping bag or a zip-top bag with a corner snipped off. This method allows for a neat and even distribution of batter into the pan. Fill each cavity about two-thirds full to allow space for the donuts to rise without overflowing.
Baking the Donuts: Knowing When They’re Done
Place the filled donut pan in the preheated oven and bake for approximately 10-12 minutes. Donuts are done when they are golden brown and spring back lightly when touched. You can also check for doneness by inserting a toothpick into the center of a donut; it should come out clean or with just a few crumbs attached.
Cooling the Donuts: Importance of Proper Cooling for Glazing
Once baked, remove the donut pan from the oven and let it cool for about 5 minutes. Then, gently turn the donuts out onto a wire rack to cool completely. Cooling is vital before glazing, as warm donuts can cause the glaze to melt away instead of setting nicely. This cooling process also helps to maintain the structure of the donut, ensuring a delightful texture that melts in your mouth.
Crafting the Perfect Glaze
Creating a Smooth Glaze: Techniques for Avoiding Lumps
To make the glaze, you will need:
– 2 cups powdered sugar
– 2-3 tablespoons milk (or heavy cream for a richer glaze)
– 1 teaspoon pure vanilla extract
In a medium bowl, whisk together the powdered sugar and vanilla extract. Gradually add the milk, one tablespoon at a time, until you reach a smooth, pourable consistency. The goal is to create a glaze that is thick enough to stick to the donut but thin enough to drizzle smoothly over the top. If you encounter lumps, continue whisking until they are fully incorporated.
Adjusting Glaze Consistency: How to Make It Thicker or Thinner
If your glaze turns out too thick, simply add a bit more milk until you achieve the desired consistency. Conversely, if it’s too thin, add more powdered sugar to thicken. Remember that the glaze should coat the back of a spoon without dripping off too quickly.
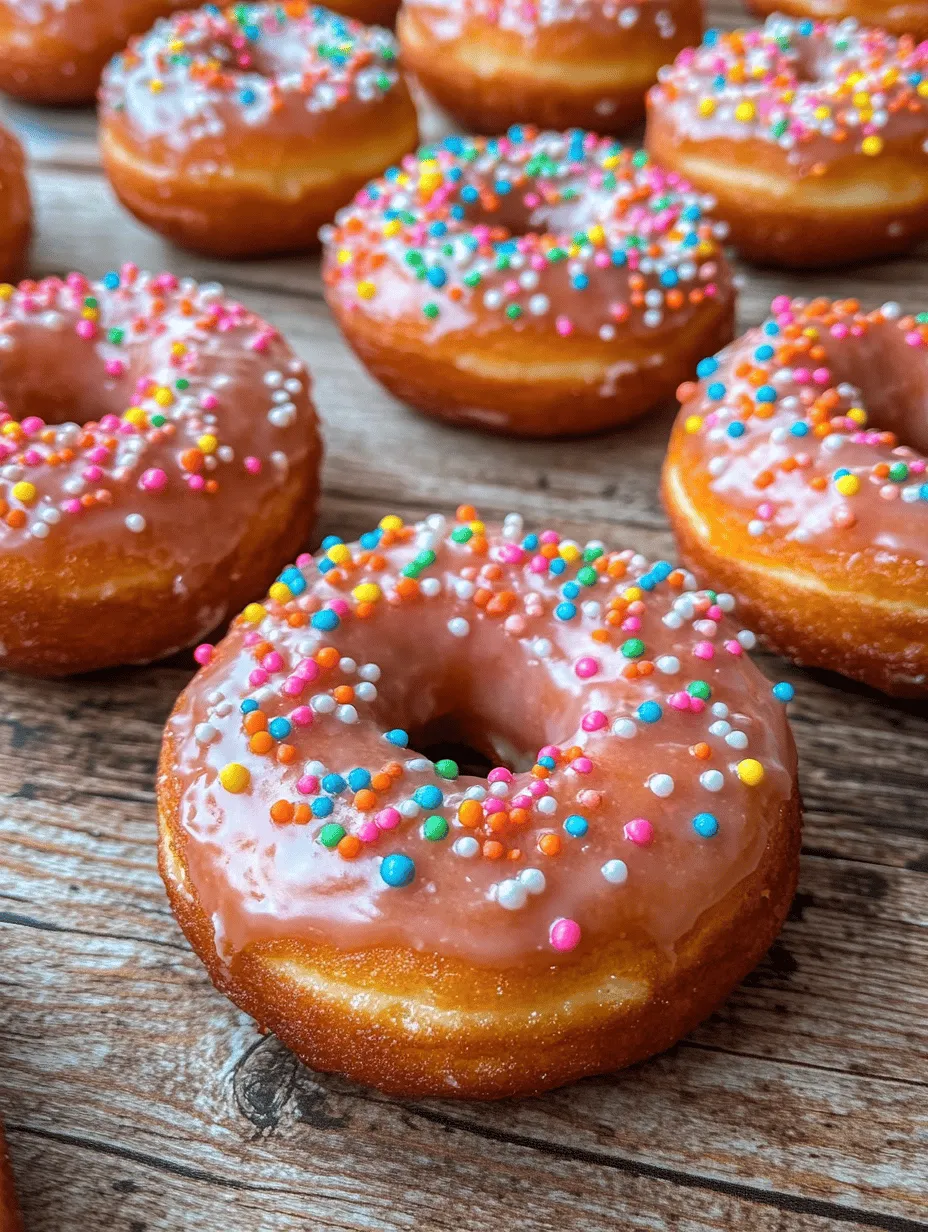
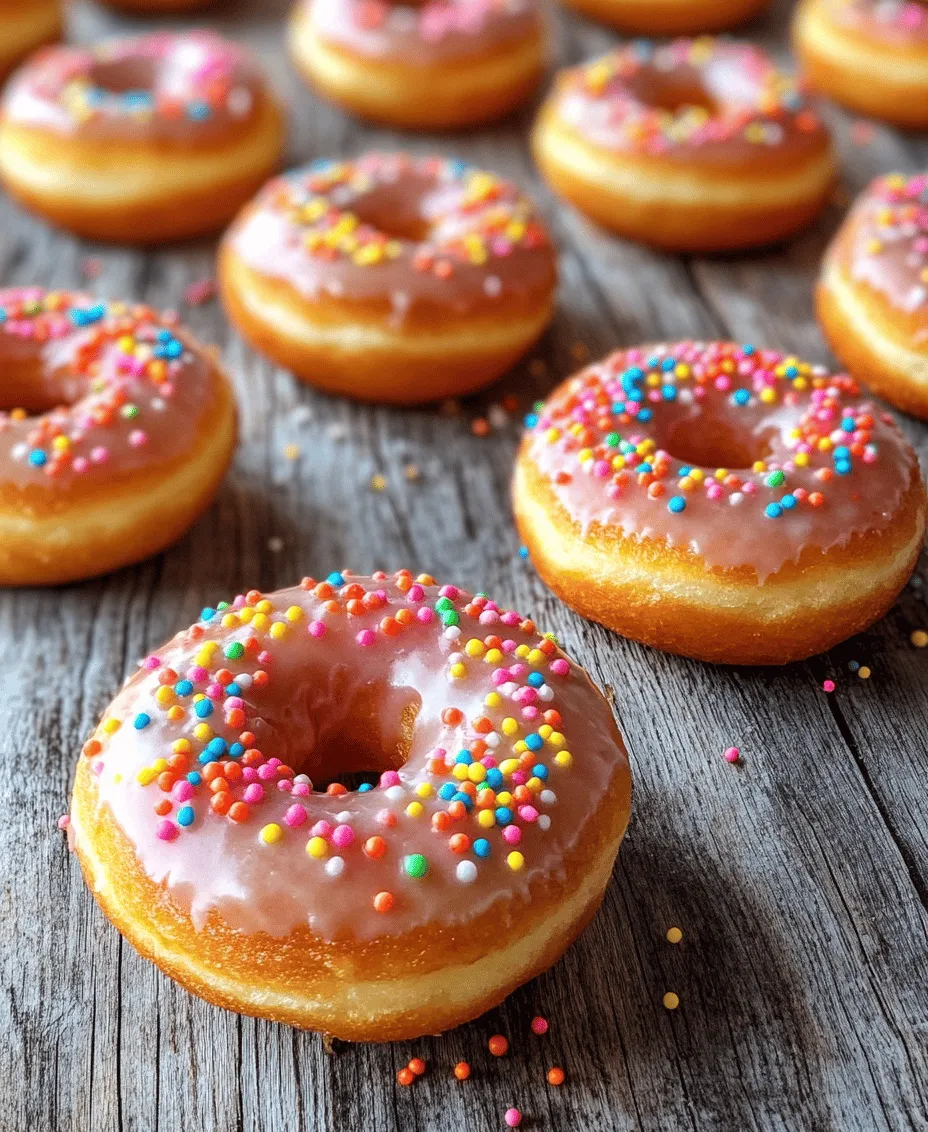
Adding Color and Sprinkles: Tips for Decoration and Visual Appeal
For added flair, consider incorporating food coloring into your glaze to match themes or occasions. A few drops of gel food coloring can transform your glaze into a vibrant masterpiece. After glazing your donuts, sprinkle on your favorite toppings such as rainbow sprinkles, crushed nuts, or coconut shavings to enhance both the flavor and visual appeal.
Serving Suggestions and Variations
Ideas for Serving Your Glazed Donuts
Melt in Your Mouth Glazed Donuts are perfect as a breakfast treat or an afternoon snack. Serve them on a beautiful platter for brunch gatherings or alongside a warm beverage for an inviting dessert option.
Pairing Options: Coffee, Tea, or Milk
These donuts pair beautifully with a variety of beverages. For a classic combination, serve them with freshly brewed coffee or tea. The slight bitterness of coffee balances the sweetness of the glazed donut, creating a harmonious flavor experience. For a more indulgent treat, pair them with a glass of cold milk or a creamy hot chocolate.
Variation Ideas: Adding Flavors Like Chocolate, Lemon, or Spices
To elevate your donut experience, consider adding flavors to the batter. Swapping out some of the vanilla for lemon extract can provide a zesty twist. Alternatively, fold in mini chocolate chips for a rich, chocolatey bite or a teaspoon of cinnamon for a warm spice note. You can also experiment with different glazes, such as chocolate ganache or a maple glaze, to keep things exciting.
Creative Toppings: Exploring Different Sprinkles and Garnish Options
Toppings don’t have to stop at sprinkles. Consider drizzling your glazed donuts with melted chocolate or caramel for an extra layer of sweetness. You can also top them with crushed candies, toasted coconut, or even a dusting of powdered sugar for a classic finish.
Storage and Shelf Life
Best Practices for Storing Glazed Donuts
To maintain the freshness of your glazed donuts, store them in an airtight container at room temperature. This will help keep them soft while preventing them from drying out. Avoid refrigeration, as this can alter the texture and make them stale quickly.
Understanding How to Maintain Freshness
For optimal freshness, consume your donuts within 2-3 days. If you have leftovers, you can freeze them. For freezing, individually wrap each donut in plastic wrap and then place them in a freezer-safe bag. They can be stored in the freezer for up to a month.
Reheating Tips for Optimal Enjoyment
To enjoy a frozen donut, simply remove it from the freezer and let it thaw at room temperature for about 30 minutes. If you prefer a warm treat, you can pop it in the microwave for 10-15 seconds. This will revitalize the donut, making it taste freshly baked again.
Nutritional Information
Overview of Nutrition Facts per Serving
Each melt-in-your-mouth glazed donut contains approximately:
– Calories: 200
– Total Fat: 8g
– Saturated Fat: 5g
– Cholesterol: 40mg
– Sodium: 150mg
– Total Carbohydrates: 30g
– Dietary Fiber: 1g
– Sugars: 10g
– Protein: 2g
Discussing the Balance of Indulgence and Moderation
While these donuts are undoubtedly a treat, enjoying them in moderation can be part of a balanced diet. Consider sharing them with family and friends, making it a delightful occasion rather than an everyday indulgence.
Conclusion
Melt In Your Mouth Glazed Donuts are a delightful addition to your baking repertoire, providing a sweet treat that is sure to bring smiles to faces. With this comprehensive guide, you can confidently create these delicious donuts from scratch, enjoy the rewarding experience of baking, and share them with family and friends. Embrace the art of donut-making, and relish in the joy of homemade goodness. As you master this recipe and its variations, you will find endless opportunities to customize and enjoy these delectable treats.
