
Introduction
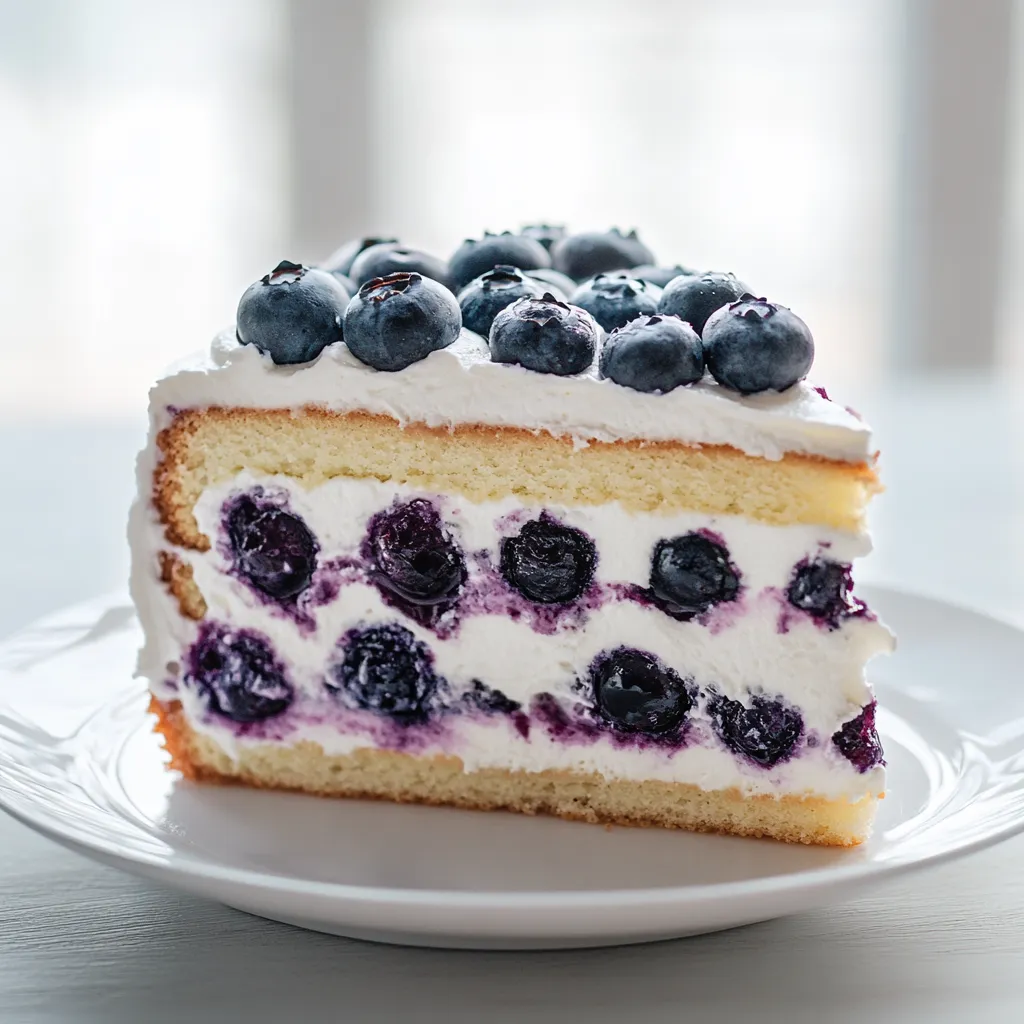
The allure of Nova Scotia Blueberry Cream Cake lies not only in its vibrant color but also in its deliciously balanced flavors. This delightful dessert combines the richness of whipped cream with the tartness of fresh blueberries, creating a memorable treat for any occasion. Whether you are hosting a summer gathering, celebrating a birthday, or simply indulging in a sweet bite after dinner, this cake is sure to impress. The flavors in this cake are enhanced by the freshness of the blueberries, the lightness of the whipped cream, and a hint of lemon zest that brings a refreshing brightness to each slice.
This cake is also a visual feast. When served, the blue hues of the blueberries contrast beautifully with the white whipped cream, making it an attractive centerpiece for your dessert table. It’s an easy-to-make treat that can become a family favorite, often requested for special occasions. The combination of creamy, fruity, and slightly tart flavors ensures that every bite is a delightful experience.
Recipe Overview
– Total Time: 1 hour 30 minutes
– Prep Time: 20 minutes
– Yield/Servings: 10 servings
– Difficulty: Not specified in the recipe
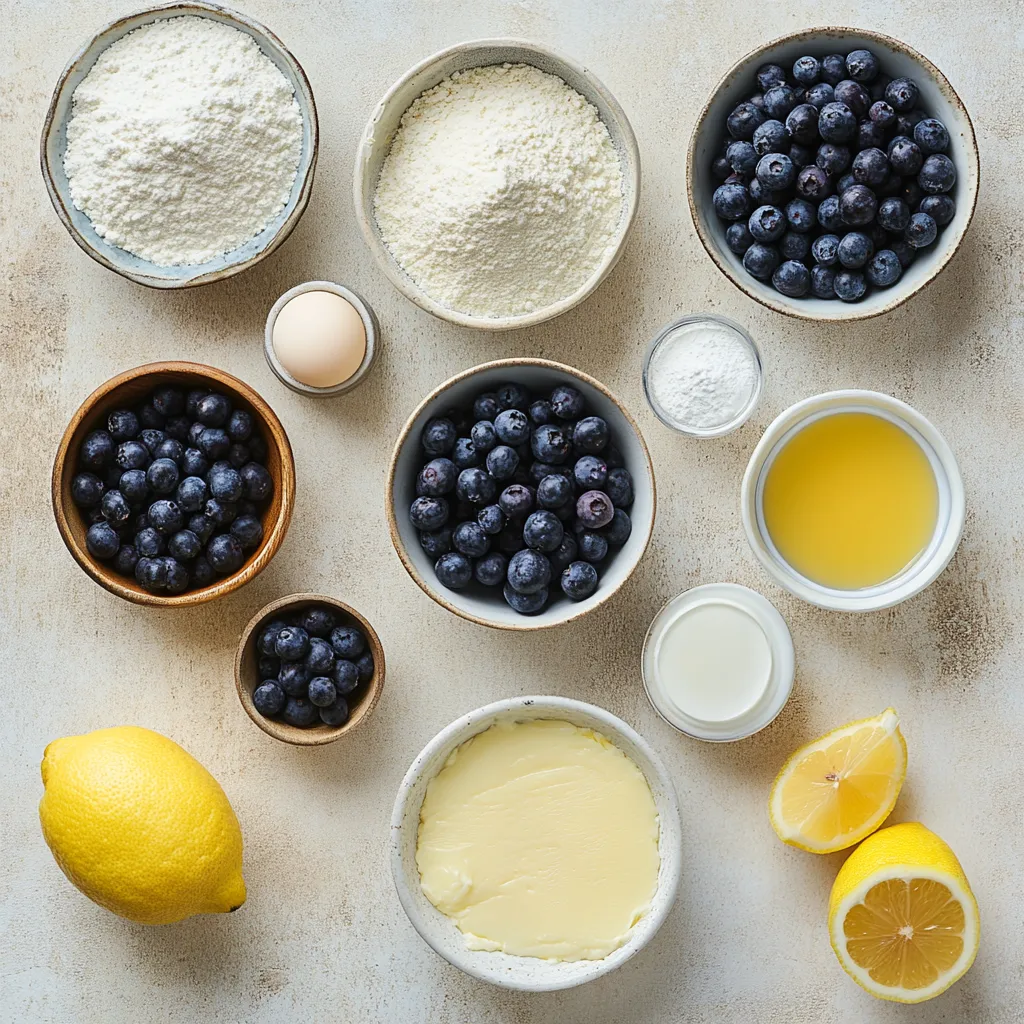
Ingredients
– 2 cups fresh Nova Scotia blueberries (or thawed frozen blueberries)
– 2 cups all-purpose flour
– 1 ½ cups granulated sugar
– ½ cup unsalted butter, softened to room temperature
– 1 cup buttermilk
– 3 large eggs
– 2 teaspoons vanilla extract
– 1 teaspoon baking powder
– 1 teaspoon baking soda
– ½ teaspoon salt
– 1 cup heavy cream
– 2 tablespoons powdered sugar
– Zest of 1 lemon
– 1 teaspoon fresh lemon juice
Instructions
1. Begin by preheating your oven to 350°F (175°C). Prepare two 9-inch round cake pans by greasing them with butter and lightly dusting them with flour.
2. In a large mixing bowl, combine the softened butter and granulated sugar. Beat them together using an electric mixer on medium speed until the mixture is light and fluffy, which should take about 3-5 minutes.
3. Add the eggs to the butter and sugar mixture one at a time, making sure to mix well after each addition. Then, stir in the vanilla extract until fully incorporated.
4. In a separate bowl, combine the all-purpose flour, baking powder, baking soda, and salt. Whisk these dry ingredients together until evenly mixed.
5. Gradually add the dry ingredients to the wet mixture, alternating with the buttermilk. Start and finish with the dry ingredients, mixing gently until just combined—be careful not to overmix.
6. Carefully fold in the blueberries with a spatula, ensuring you don’t break them apart.
7. Divide the batter equally between the prepared cake pans, using a spatula to smooth the tops.
8. Bake in the preheated oven for 25-30 minutes. The cakes are done when a toothpick inserted into the center comes out clean. Allow the cakes to cool in the pans for about 10 minutes before transferring them to wire racks to cool completely.
9. While the cakes are cooling, prepare the whipped cream. In a mixing bowl, use an electric mixer to beat the heavy cream, powdered sugar, lemon zest, and lemon juice together until stiff peaks form—this should take about 3-4 minutes.
10. Once the cakes are fully cooled, place one layer on a serving plate. Spread a generous layer of whipped cream on top, then carefully place the second layer on top.
11. Use the remaining whipped cream to frost the top and sides of the cake. For an extra touch, decorate the top with additional blueberries.
12. Chill the cake in the refrigerator for at least 30 minutes before serving. This allows the flavors to meld beautifully.
Preparing the Cake Pans
Greasing the Pans
To start your cake, the first step is to prepare your cake pans. Use unsalted butter to generously grease the inside of two 9-inch round cake pans. This ensures that the cakes will not stick when it comes time to remove them after baking.
Dusting with Flour
After greasing, lightly dust the greased pans with flour. This dusting acts as an additional layer of non-stick protection. By tapping out any excess flour, you’ll guarantee that your cakes come out smoothly and retain their beautiful shape.
Making the Cake Batter
Creaming Butter and Sugar
In a large mixing bowl, combine softened unsalted butter and granulated sugar. Beat on medium speed with an electric mixer until the mixture becomes light and fluffy, which typically takes approximately 3-5 minutes. This process is crucial as it incorporates air into the mixture, providing the cake with its desired light texture.
Incorporating Eggs
Next, add large eggs one at a time, ensuring to mix well after each addition. This gradual incorporation helps maintain the emulsion and create a smoother batter. After mixing in the eggs, stir in the vanilla extract until it is fully integrated, contributing to the cake’s depth of flavor.
Mixing Dry Ingredients
In a separate bowl, whisk together all-purpose flour, baking powder, baking soda, and salt. This step is essential for ensuring that your leavening agents are evenly distributed throughout the flour. Proper mixing at this stage can help prevent uneven rising during the baking process, which is key to achieving a perfectly structured cake.
Combining Ingredients
Alternating the Mixtures
Gradually add the dry ingredients to the wet ingredients, alternating with the buttermilk. By starting and finishing with the dry ingredients, you allow for optimal absorption and prevent the batter from becoming overly tough. Mix gently until just combined to maintain its airy texture—overmixing can lead to a dense cake.
Folding in Blueberries
Finally, after the batter has been combined, carefully fold in the blueberries with a spatula. It’s important to do this gently to avoid breaking the blueberries. This technique ensures that the flavors are distributed evenly while keeping the blueberries intact for a burst of freshness in every bite.
Baking the Cake
Dividing the Batter
Once your blueberry batter is ready, it’s essential to evenly divide it between the two greased and floured 9-inch round cake pans. Use a spatula to scoop out the batter and pour an equal amount into each pan. After pouring, gently shake each pan to level the batter, ensuring an even rise during baking. Smoothing the tops with a spatula will contribute to a nice, uniform cake appearance.
Oven Baking
With your oven preheated to 350°F (175°C), carefully place the cake pans on the middle rack. Baking for 25-30 minutes is the key to achieving a perfectly cooked cake. To test for doneness, insert a toothpick into the center of one of the cakes; it should come out clean or with a few moist crumbs attached. Avoid opening the oven door frequently, as this can cause uneven baking due to temperature fluctuations.
Cooling the Cakes
Initial Cooling in Pans
After the baking time is up, remove the pans from the oven and place them on a cooling rack. Let the cakes cool in the pans for about 10 minutes. This resting period allows the cakes to firm up slightly and makes them easier to remove without breaking.
Transferring to Wire Racks
Once the cakes have cooled for 10 minutes, carefully run a knife around the edges to loosen them. Invert each cake onto the cooling rack, tapping gently if necessary. Leave the cakes to cool completely on the rack, allowing air to circulate around them to prevent a soggy bottom.
Preparing the Whipped Cream
Mixing the Ingredients
While the cakes cool, it’s time to prepare the whipped cream. In a clean mixing bowl, add the heavy cream, powdered sugar, lemon zest, and lemon juice. The combination of flavors will elevate your whipped cream, providing it with depth and richness that complements the cake beautifully.
Creating Stiff Peaks
Using an electric mixer on medium-high speed, whip the mixture for about 3-4 minutes until stiff peaks form. Pay attention to the texture; the cream should hold its shape and not droop. Over-whipping can lead to a grainy texture, so stop mixing as soon as you achieve the desired consistency.
Assembling the Cake
First Layer Assembly
Once your cakes have cooled completely, select one layer and place it on a serving plate. Spread a generous layer of whipped cream on top of this first layer; aim for an even spread. Use an offset spatula or the back of a spoon to create smooth, even coverage.
Adding the Second Layer
Carefully lift the second cake layer and place it on top of the whipped cream-covered layer. Ensure that it’s centered to maintain a balanced look. Gently press down to secure both layers together, but be mindful not to squish the whipped cream out.
Frosting the Cake
Covering with Whipped Cream
Use the remaining whipped cream to frost the top and sides of the entire cake. This is your chance to create a lovely, smooth finish. If you desire a rustic look, you can create swirls or peaks in the frosting. Taking your time here pays off in aesthetics, ensuring a beautiful presentation.
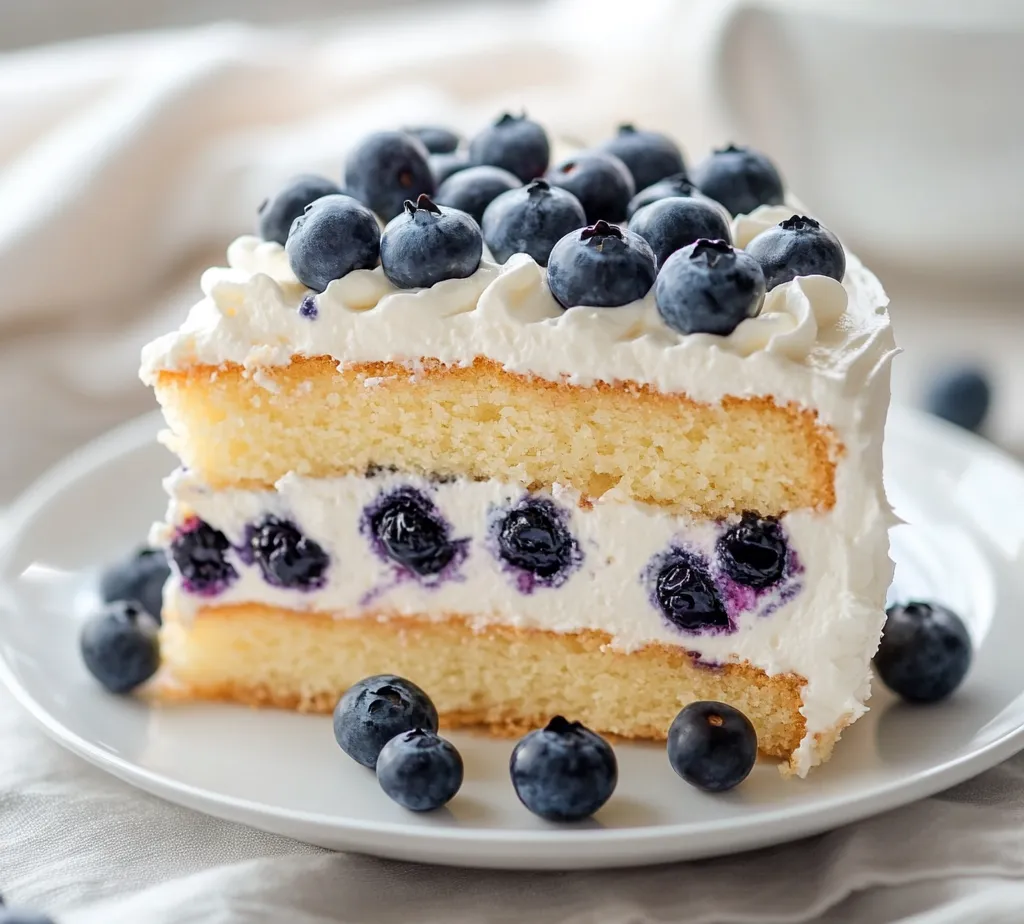
Decorating with Blueberries
For an eye-catching finish, top the frosted cake with additional fresh blueberries. Arrange them strategically for an appealing appearance, which adds a pop of color and visual interest. You might also consider creating a border around the cake’s edge for a classic look.
Chilling the Cake
Setting in the Refrigerator
To let all the flavors meld together and to help the cake set, chill the fully assembled cake in the refrigerator for at least 30 minutes. This chilling step is essential for allowing the whipped cream to firm up slightly, making it easier to slice and serve later on.
Serving Suggestions
Presentation Ideas
When serving your Nova Scotia Blueberry Cream Cake, aim for a sophisticated presentation. Use chilled plates to enhance the cake’s coolness and refreshing flavor. This small detail can make a significant difference in your serving experience.
Garnishes
To elevate the presentation further, consider garnishing with a sprig of mint or a sprinkle of fresh lemon zest, adding vibrant color and zest. These garnishes not only beautify the dish but can also complement the cake’s sweet and tart balance.
Scaling
Not specified in the recipe. For larger gatherings, consider doubling the ingredients to create a two or three-tier cake, taking care to adjust baking times accordingly.
Storage
To maintain the freshness of the Nova Scotia Blueberry Cream Cake, store any leftovers in an airtight container in the refrigerator. The cake is best enjoyed within 2-3 days to ensure the whipped cream remains firm and the blueberries stay fresh.
Reheating
Not specified in the recipe. It is advisable to serve the cake cold or at room temperature right out of the refrigerator.
Troubleshooting
If your cake sinks in the middle, it may be due to overmixing or inadequate baking time. Ensure to carefully follow mixing instructions and check doneness with a toothpick. For a dry cake, consider double-checking your oven temperature, as an oven that is too hot can bake the outside too quickly and leave the inside undercooked.
FAQs
What can I substitute if I don’t have buttermilk?
You can create a makeshift buttermilk by adding one tablespoon of lemon juice or white vinegar into a measuring cup and then filling it with milk until you reach one cup. Let it sit for about 5-10 minutes before using.
Can I use frozen blueberries instead of fresh?
Yes, you can use thawed frozen blueberries in place of fresh ones. Just make sure to drain any excess moisture.
What should I do if my whipped cream isn’t thickening?
Ensure that your bowl and beaters are clean and free from any oil residues, as these can hinder whipping. Additionally, start with very cold heavy cream for better volume.
How can I keep my cake from drying out?
Store any leftover cake in an airtight container and consume it within a few days for the best taste and texture.
Conclusion
The Nova Scotia Blueberry Cream Cake is a delightful dessert that offers a perfect blend of fluffy cake, rich whipped cream, and fresh blueberries with a hint of citrus. With its moist, tender crumb and creamy texture, this cake can be enjoyed at various occasions, making it a versatile addition to any dessert table. Its preparation time allows for easy assembly and chilling, ensuring a wonderful flavor profile ready to impress any guest.
Nova Scotia Blueberry Cream Cake Recipe
Ingredients
- 2 cups fresh Nova Scotia blueberries
- 2 cups all-purpose flour
- 1 ½ cups granulated sugar
- ½ cup unsalted butter
- 1 cup buttermilk
- 3 large eggs
- 2 teaspoons vanilla extract
- 1 teaspoon baking powder
- 1 teaspoon baking soda
- ½ teaspoon salt
- 1 cup heavy cream
- 2 tablespoons powdered sugar
- 1 piece lemon zest
- 1 teaspoon fresh lemon juice
Instructions
- Preheat your oven to 350°F (175°C) and prepare two 9-inch round cake pans.
- In a large bowl, beat softened butter and granulated sugar until light and fluffy.
- Add eggs one at a time, mixing well after each addition, then stir in vanilla extract.
- In a separate bowl, whisk together flour, baking powder, baking soda, and salt.
- Gradually add dry ingredients to the wet mixture, alternating with buttermilk.
- Fold in blueberries gently with a spatula.
- Divide batter between prepared pans and smooth the tops.
- Bake for 25-30 minutes until a toothpick comes out clean; cool in pans for 10 minutes.
- Prepare whipped cream by beating heavy cream, powdered sugar, lemon zest, and lemon juice until stiff peaks form.
- Layer the cakes with whipped cream and chill for at least 30 minutes before serving.