Introduction
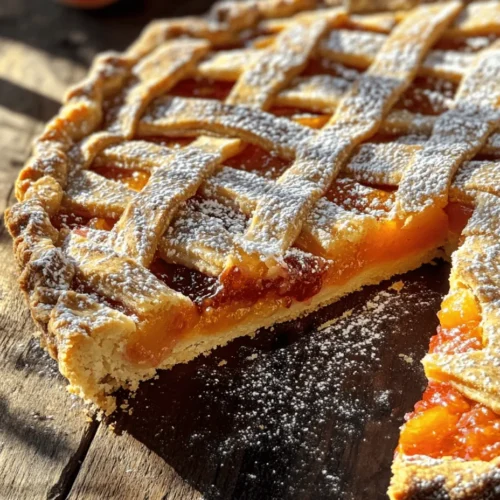
Pasta Flora, a beloved traditional Greek dessert, is a delightful jam tart that has captured the hearts and taste buds of pastry lovers around the world. With its crisp, buttery crust and luscious fruit filling, this dessert is not just a treat for the senses but also a symbol of Greek hospitality and tradition. Its appeal lies in its versatility; Pasta Flora can be prepared with a variety of jams, allowing for endless flavor combinations that suit every palate. Whether you’re hosting a festive gathering or simply indulging in a sweet craving, this tart is sure to impress.
In this article, we will delve into the rich history of Pasta Flora, explore the key ingredients that make this dessert so special, and provide a step-by-step guide to crafting the perfect tart from scratch. By the end, you’ll be well-equipped to bring a piece of Greek culinary tradition into your own kitchen.
Understanding Pasta Flora
Pasta Flora has deep roots in Greek culture, with origins that can be traced back to ancient times when fruits were preserved in sugar. The name “Pasta Flora” itself is derived from the Italian term for “flour paste,” highlighting the influence of Italian cuisine on Greek desserts. Over the centuries, this tart has evolved into a staple in Greek households, often enjoyed during special occasions such as family gatherings, holidays, and festivals.
One of the most charming aspects of Pasta Flora is its communal nature; it is often shared among family and friends, making it a beloved centerpiece at celebratory events. From Easter feasts to birthday parties, this tart brings people together, offering a sweet taste of nostalgia and tradition.
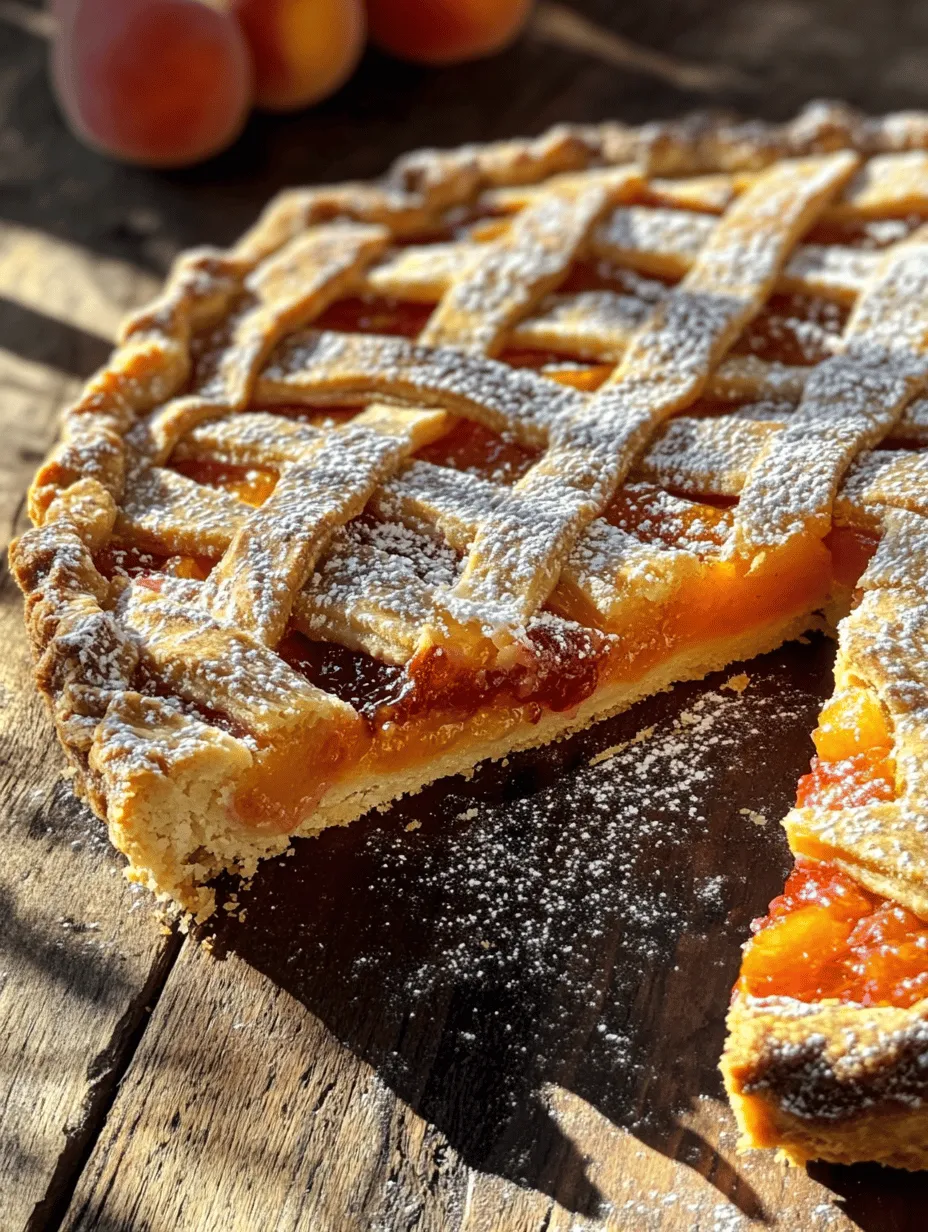
Regional variations of Pasta Flora abound across Greece, with each area showcasing its own preferred fruit fillings. While apricot jam is a classic choice, raspberry and quince jams are also popular selections, each bringing a unique flavor profile that complements the buttery crust beautifully. The tart can also be embellished with additional toppings, such as nuts or a dusting of powdered sugar, further enhancing its appeal.
Ingredient Breakdown
Creating a perfect Pasta Flora begins with understanding the role of each ingredient. The combination of high-quality components is essential to achieve the desired texture and flavor profile.
All-Purpose Flour
All-purpose flour serves as the foundation for the tart’s crust. It provides the necessary structure and stability while allowing for a tender, flaky texture. Choosing the right flour is crucial; look for a brand that has a balanced protein content to ensure a perfect balance between crispiness and tenderness.
Unsalted Butter
Unsalted butter is key to achieving a rich, buttery flavor in the crust. It contributes to the overall texture, making the pastry tender and flaky. Using unsalted butter allows for better control over the tart’s saltiness, as you can adjust the salt levels according to your taste preferences.
Granulated Sugar
Granulated sugar plays a dual role in Pasta Flora. Not only does it sweeten the crust, but it also helps to create a delicate texture by aiding in the creaming process. The sugar’s ability to aerate the butter during mixing results in a light and tender crust that contrasts beautifully with the fruit filling.
Egg
The egg acts as a binding agent in the dough, providing moisture and richness. It also contributes to the structure of the tart, helping it hold its shape during baking. When combined with the other ingredients, the egg ensures a cohesive dough that is easy to work with.
Vanilla Extract
Vanilla extract is a flavor enhancer that elevates the overall taste of the tart. Its warm, aromatic notes complement both the buttery crust and the sweetness of the jam filling. Using pure vanilla extract, rather than imitation vanilla, will yield the best flavor.
Baking Powder
Baking powder is essential for achieving the right texture in Pasta Flora. It acts as a leavening agent, helping the crust rise slightly during baking and creating a tender crumb. This is particularly important to balance the density of the jam filling.
Salt
A pinch of salt is crucial in any baked good, and Pasta Flora is no exception. Salt enhances the flavors of the other ingredients, providing a well-rounded taste that prevents the dessert from becoming overly sweet.
Jam Options
The choice of jam is where Pasta Flora truly shines, offering a myriad of flavor possibilities. Traditional options include:
– Apricot Jam: Known for its sweet and slightly tart flavor, apricot jam pairs beautifully with the buttery crust, creating a harmonious balance.
– Raspberry Jam: With its vibrant color and tangy profile, raspberry jam adds a refreshing twist to the tart. The slight tartness of the berries complements the sweetness of the crust perfectly.
– Quince Jam: A less common but equally delightful choice, quince jam brings a unique floral sweetness and a slightly grainy texture to the tart.
Each of these jams not only adds flavor but also a beautiful visual appeal to the final product.
Lemon Zest
Incorporating lemon zest into the dough or the filling brightens the overall flavor profile of Pasta Flora. The citrus notes cut through the sweetness of the jam, providing a refreshing contrast that makes the tart even more enjoyable.
Step-by-Step Instructions
Creating a delicious Pasta Flora starts with preparing the dough, which is the cornerstone of this delightful tart. Follow these detailed steps to ensure success.
Preparing the Dough
1. Creaming Butter and Sugar: Begin by taking your unsalted butter out of the refrigerator to soften at room temperature. In a large mixing bowl, combine the softened butter and granulated sugar. Using an electric mixer or a whisk, beat the two together until the mixture is light and fluffy. This process typically takes about 3-5 minutes and is crucial for incorporating air into the dough, which will help achieve a tender crust.
2. Incorporating Egg and Vanilla Extract: Once the butter and sugar are creamed, add the egg and vanilla extract to the mixture. Continue to beat until fully combined. The egg will help bind the ingredients together, while the vanilla will enhance the flavor of the dough.
Combining Dry Ingredients
3. Sifting and Mixing Dry Ingredients: In a separate bowl, sift together the all-purpose flour, baking powder, and salt. Sifting not only removes lumps but also aerates the flour, ensuring a light texture. Gradually add the dry ingredients to the wet mixture, mixing on low speed until just combined. Be careful not to overmix, as this can lead to a tough crust.
4. Incorporating Dry Ingredients: When the dough begins to come together, switch to a spatula or wooden spoon to finish mixing. This gentle approach will prevent overworking the dough, which is key to maintaining a flaky texture. If the dough feels too sticky, you can add a little more flour, a tablespoon at a time, until it reaches the right consistency.
5. Chilling: Once the dough is combined, shape it into a disk, wrap it in plastic wrap, and refrigerate for at least 30 minutes. Chilling the dough helps relax the gluten, making it easier to roll out and ensuring a tender crust when baked.
By following these steps, you will lay a solid foundation for your Pasta Flora, setting the stage for a delightful jam-filled dessert that embodies the essence of Greek culinary tradition.
Chilling the Dough
Chilling your dough is a crucial step in making Pasta Flora, as it significantly affects the texture and manageability of the crust. When the dough is chilled, the fats solidify, which helps prevent the dough from becoming too soft and sticky when you start rolling it out. This also contributes to a flakier crust once baked. By allowing the dough to chill for at least 30 minutes in the refrigerator, you’ll find it easier to handle, roll out smoothly, and fit into your tart pan without tearing or sticking.
Preheating the Oven
While your dough is chilling, it’s the perfect time to preheat your oven. Preheating is essential because it ensures that your tart bakes evenly from the moment it goes in. An oven that is not adequately preheated can lead to uneven baking, affecting the tart’s texture and flavor. Set your oven to 350°F (175°C) and give it at least 15-20 minutes to reach the desired temperature. This is also a good time to gather your baking equipment, including your tart pan and any tools you’ll need for rolling and cutting the dough.
Rolling the Dough
Once your dough has chilled, it’s time to roll it out. Start by lightly dusting your work surface with flour to prevent sticking. Divide the dough into two parts: one larger piece for the base and a smaller piece for the lattice topping. Roll the larger piece into a circle about 1/8 inch thick. To maintain an even thickness, use a rolling pin and apply gentle, consistent pressure while rotating the dough periodically.
When rolling out the dough, be cautious not to stretch it too much, which can cause it to shrink while baking. If you notice the dough is sticking to the surface, sprinkle a little more flour underneath. To transfer the rolled dough into your tart pan without tearing, you can use the rolling pin as a tool. Gently wrap the dough around the pin and then unroll it over the pan. Once in place, lightly press the dough into the corners and edges of the pan, trimming any excess dough hanging over the sides.
Assembling the Tart
Assembling your Pasta Flora is where the magic truly happens. Start by spreading your chosen jam evenly over the crust. For a classic approach, apricot or strawberry jams are excellent choices, but feel free to experiment with your favorites. Use a spatula to ensure an even layer across the entire surface, as this will ensure that every slice has a balanced flavor. If you prefer, you can also mix different jams for a unique flavor profile.
After spreading the jam, it’s essential to think about the lattice design that will top your tart. This not only adds aesthetic appeal but also allows some of the jam to peek through, creating a beautiful display.
Creating the Lattice
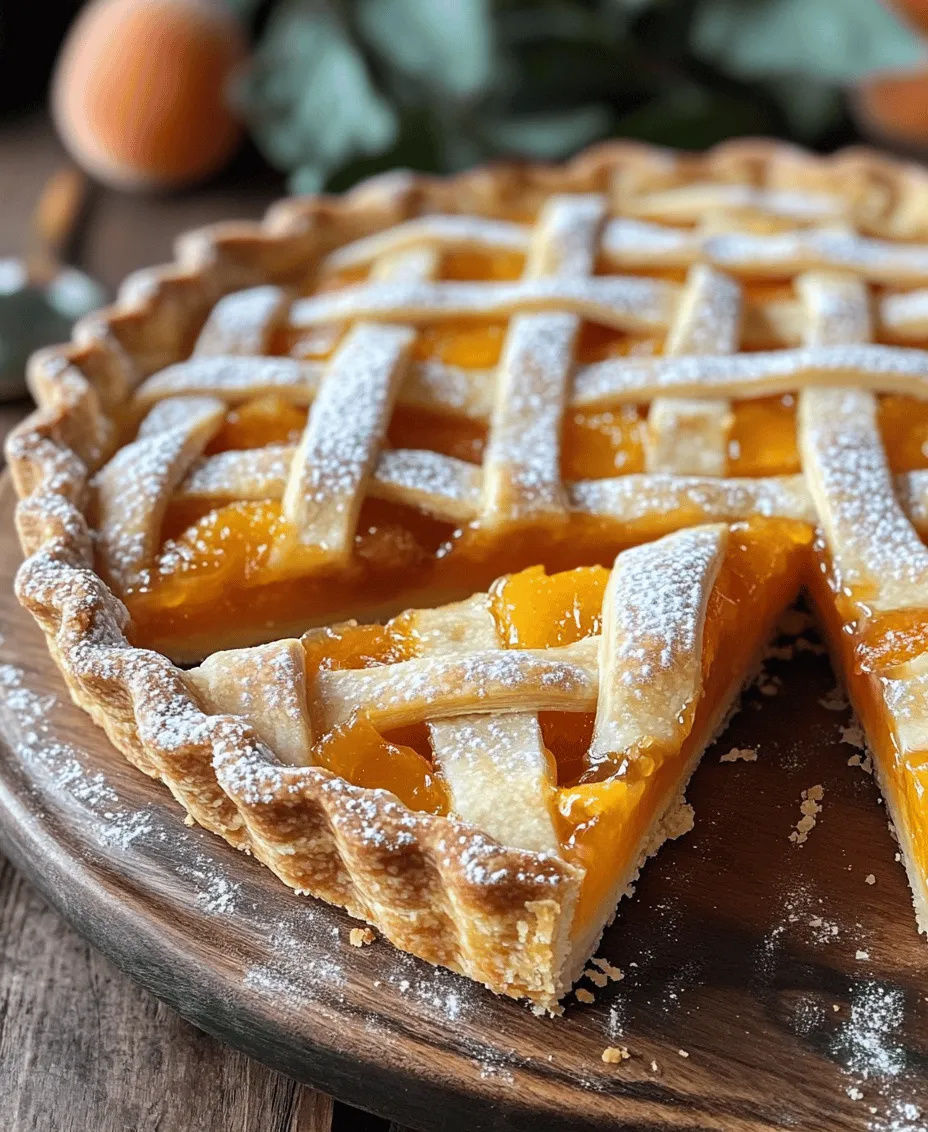
Creating a lattice on your Pasta Flora is an art in itself. Roll out your remaining dough to the same thickness as the base. Using a sharp knife or a pizza cutter, slice the dough into strips about 1/2 inch wide. The width can vary according to your preference, but consistency is key for an even look.
To assemble the lattice, lay half of the strips horizontally across the tart, spaced evenly apart. Start with the center strip and then add the others on either side, leaving gaps for the vertical strips. Next, take the remaining strips and place them vertically over the horizontal strips, weaving them in and out. This technique not only enhances the visual appeal but also allows for even baking as steam escapes during the cooking process.
Baking the Tart
With your tart fully assembled, it’s time for the baking stage. Place your tart in the preheated oven and bake for about 30-35 minutes. Keep a close eye on it, as baking times can vary depending on your oven. You’ll want to look for a golden-brown crust, indicating that it’s cooked through. The jam may bubble slightly, which is a good sign that it’s warm and ready to be enjoyed.
To assess doneness, gently shake the tart. If the filling jiggles slightly but the crust is firm, it’s ready to come out. Once baked, remove the tart from the oven and let it cool in the pan for about 10 minutes before transferring it to a wire rack to cool completely. This will help maintain its shape and prevent it from becoming soggy.
Cooling and Serving
Proper cooling techniques are essential for maintaining the beautiful shape of your Pasta Flora. Allow it to cool in the pan for a while, as mentioned, before transferring it. Once on the wire rack, it’s best to let it sit for at least an hour. This cooling period not only helps it set but also allows the flavors to meld together beautifully.
When it comes to serving, Pasta Flora is delightful at room temperature. You can dust the cooled tart with powdered sugar for an elegant touch. Serve slices paired with a dollop of whipped cream or a scoop of vanilla ice cream for a contrast in temperature and texture. For added flair, consider garnishing with fresh fruit or mint leaves.
Nutritional Information
A slice of Pasta Flora offers a delightful indulgence, blending sweetness with buttery pastry. On average, one slice contains approximately 200-250 calories, depending on the type of jam used and portion size. It provides a moderate amount of carbohydrates, making it a satisfying treat. While it’s a dessert to be enjoyed in moderation, Pasta Flora can be a part of a balanced diet when shared and savored as a special occasion treat. The combination of the crust and jam offers a balance of indulgence and enjoyment that makes it a cherished dessert.
Cultural Significance of Pasta Flora
Pasta Flora holds a special place in Greek culture, often featured in gatherings and celebrations. This delightful tart is more than just a dessert; it symbolizes hospitality and the warmth of sharing food with loved ones. Many Greeks have fond memories of gathering around a table adorned with various homemade pastries, with Pasta Flora frequently taking center stage.
Sharing this dessert with friends and family during holidays or casual get-togethers showcases the importance of togetherness in Greek tradition. It’s a reminder of the love and care that goes into home-cooked meals. Additionally, many families pass down their unique recipes through generations, each adding their personal touch to this beloved dish.
Conclusion
Creating and sharing Pasta Flora is a joyous culinary experience that connects us to our roots and traditions. The process of making this Greek jam tart is not just about following a recipe; it’s about embracing the joy of baking and the pleasure of sharing delicious food with those we care about.
As you embark on your Pasta Flora journey, feel free to experiment with different jams or even create your own unique filling. The beauty of this dessert lies in its versatility and the personal touches you can add to make it your own. By preserving recipes like Pasta Flora, we keep our culinary traditions alive, ensuring that the flavors and stories of our heritage continue to be shared for generations to come. So gather your ingredients, invite loved ones to join in, and delight in the creation of this timeless treat.