Introduction
Baking at home is not just about creating delicious treats; it’s also a rewarding experience that fills your kitchen with enticing aromas and brings a sense of accomplishment. Whether you’re an experienced baker or a novice in the kitchen, the joy of transforming simple ingredients into a delightful masterpiece is unmatched. One such delightful creation is the Pistachio Paradise Nut Bread, a unique and flavorful option that fits perfectly for various occasions—be it a cozy family breakfast, a festive holiday gathering, or a thoughtful gift for friends.
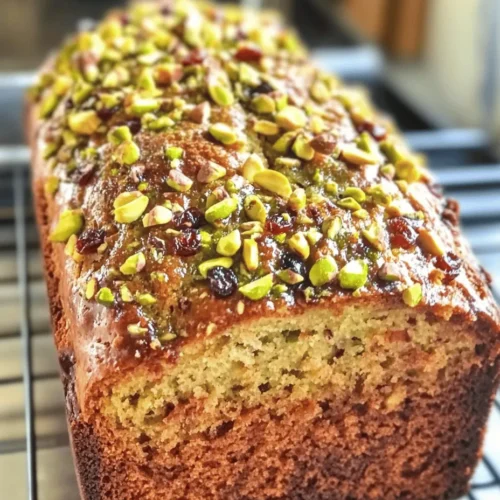
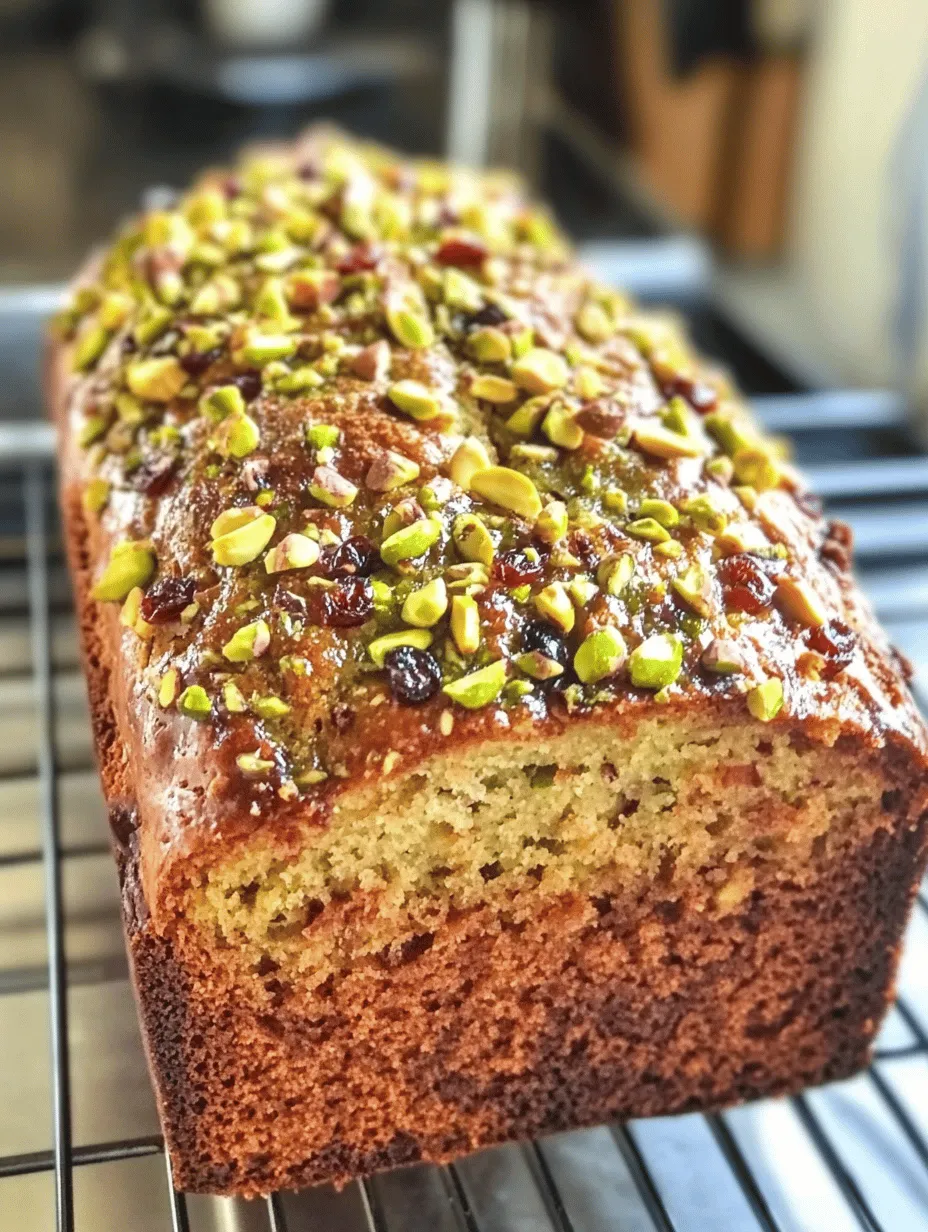
Pistachio Paradise Nut Bread stands out with its vibrant combination of textures and tastes. The crunchiness of shelled pistachios perfectly complements the creaminess of white chocolate, while the tangy cranberries add a burst of flavor that elevates the entire experience. This moist and tender bread is not only visually appealing but also offers a delightful balance of sweet and savory notes that will leave your taste buds dancing with joy.
In this comprehensive guide, we will explore the ingredients that make this bread so special, the essential equipment you’ll need, and a step-by-step breakdown of the baking process. By the end, you will be equipped with all the knowledge necessary to create this scrumptious Pistachio Paradise Nut Bread in your own kitchen.
Understanding the Ingredients
To craft the perfect Pistachio Paradise Nut Bread, it’s essential to understand the key ingredients that contribute to its unique flavor and texture. Let’s take a closer look at each component:
Shelled Pistachios
Pistachios are the star of this recipe. These green nuts not only provide a delightful crunch but also pack a nutritional punch. They are rich in healthy fats, protein, fiber, and antioxidants, making them a great choice for adding both flavor and nutrition to your bread. Their slightly sweet, nutty flavor pairs beautifully with the other ingredients, creating a harmonious blend of tastes. When baking, always opt for shelled pistachios to save time and effort.
All-Purpose Flour
All-purpose flour serves as the backbone of the bread, providing the necessary structure. It is versatile and ideal for a wide range of baked goods. When combined with the liquid ingredients, it forms gluten, which gives the bread its desirable texture. For best results, be sure to measure your flour accurately—using a kitchen scale can ensure consistency and prevent dense bread.
Baking Powder and Baking Soda
Leavening agents like baking powder and baking soda are crucial for achieving the perfect rise in your bread. Baking powder is a combination of an acid and a base that reacts when moistened, creating carbon dioxide bubbles that cause the bread to rise. Baking soda, on the other hand, requires an acidic ingredient (like yogurt or buttermilk) to activate. Together, these leavening agents ensure that your Pistachio Paradise Nut Bread is light and fluffy.
Greek Yogurt and Buttermilk
Both Greek yogurt and buttermilk play vital roles in this recipe by adding moisture and a subtle tanginess. Greek yogurt is thick and creamy, contributing to the bread’s tender crumb while also enhancing the flavor profile. Buttermilk, being acidic, reacts with baking soda to create lift and adds a rich, buttery taste. The combination of these two ingredients helps to keep the bread moist and extends its shelf life.
Optional Ingredients: Dried Cranberries and White Chocolate Chips
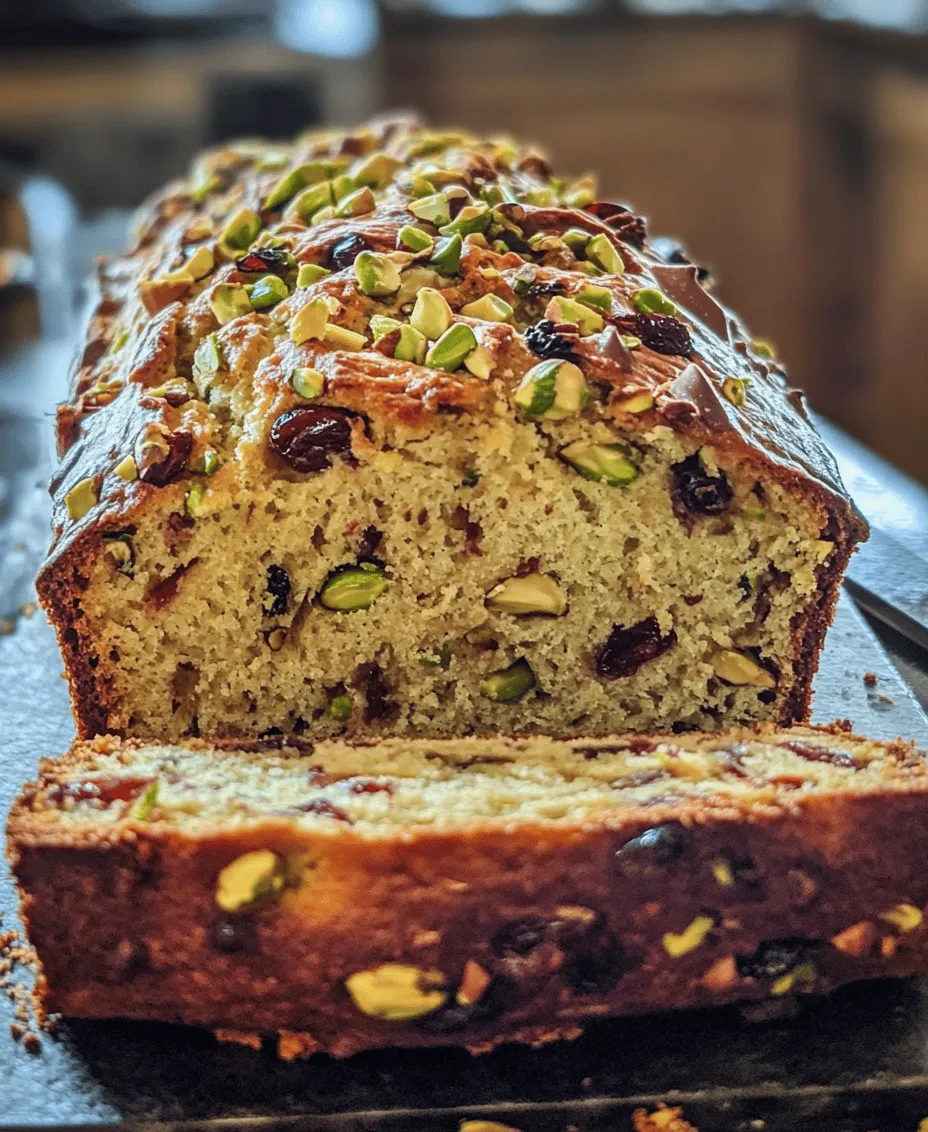
While the base recipe is delightful on its own, the addition of dried cranberries and white chocolate chips can take your Pistachio Paradise Nut Bread to the next level. Dried cranberries introduce a burst of tartness that balances the richness of the white chocolate, which melts into the bread, creating pockets of sweetness. These optional ingredients not only enhance the flavor but also add visual appeal with their vibrant colors.
Equipment Needed
Before diving into the baking process, it’s essential to gather the right tools to ensure a seamless experience. Below is a list of essential kitchen equipment you’ll need to make your Pistachio Paradise Nut Bread:
Mixing Bowls
Having a set of mixing bowls in various sizes is crucial for any baking endeavor. You’ll need a large bowl for mixing your dry ingredients and a medium bowl for the wet ingredients. Glass or stainless steel bowls are excellent choices as they are durable and non-reactive.
Electric Mixer
An electric mixer is invaluable for achieving the right texture in your batter, especially when creaming butter and sugar. A stand mixer or a handheld mixer will both work well—just ensure that it has a whisk attachment for optimal mixing.
Loaf Pan
Choosing the right loaf pan is key to baking this bread evenly. Opt for a non-stick metal loaf pan or a glass pan to ensure easy release and even browning. A standard 8.5 x 4.5-inch loaf pan is perfect for this recipe, but you can also use a 9 x 5-inch pan if that’s what you have on hand.
Cooling Rack
Once your Pistachio Paradise Nut Bread is baked, transferring it to a cooling rack is essential. Cooling racks allow air to circulate around the bread, preventing it from becoming soggy on the bottom. This step ensures that your bread develops a perfect crust and maintains its texture.
Step-by-Step Instructions for Baking
Now that you have a clear understanding of the ingredients and equipment needed, let’s walk through the step-by-step process of baking your very own Pistachio Paradise Nut Bread.
Preheating the Oven
The first step in any baking recipe is preheating your oven. For Pistachio Paradise Nut Bread, preheat your oven to 350°F (175°C). Preheating is crucial because it ensures that your bread begins baking at the optimal temperature, promoting even rising and proper cooking. While the oven heats up, you can prepare your ingredients and equipment.
Preparing Dry Ingredients
Next, prepare your dry ingredients. In a large mixing bowl, whisk together the all-purpose flour, baking powder, baking soda, and a pinch of salt. This step is vital for achieving an even distribution of leavening agents throughout the batter. Sifting the flour can also help eliminate any lumps and incorporate air, which contributes to a lighter bread.
Creaming Butter and Sugar
In a separate bowl, use your electric mixer to cream together the softened butter and granulated sugar until the mixture is light and fluffy. This process typically takes about 3 to 5 minutes. Creaming is an essential technique that incorporates air into the butter, which helps to create a tender, airy texture in the final product.
Incorporating Eggs and Vanilla
Once the butter and sugar are creamed, add in the eggs one at a time, mixing well after each addition. This allows for proper emulsification, which aids in the overall texture of the bread. After incorporating the eggs, add a splash of vanilla extract for added flavor. Mixing in stages like this ensures a smooth batter without overmixing.
With these initial steps complete, you are well on your way to creating a delightful Pistachio Paradise Nut Bread. Stay tuned for the next part, where we will continue with the remaining steps, ensuring that every aspect of this recipe is thoroughly covered.
Mixing Yogurt and Buttermilk
In the quest to create the perfect Pistachio Paradise Nut Bread, the role of yogurt and buttermilk cannot be understated. These two ingredients not only contribute to the moisture content of the bread but also enhance its flavor profile significantly. Yogurt adds a subtle tanginess, which complements the natural sweetness of the added ingredients. Moreover, the acidity in both yogurt and buttermilk helps to activate the baking soda, resulting in a lighter, fluffier texture. This combination ensures that the bread remains moist without becoming dense, giving it that sought-after tender crumb.
When incorporating these wet ingredients, it’s crucial to ensure they are at room temperature. This helps them blend smoothly into the batter, promoting a uniform consistency throughout the bread. The right amount of yogurt and buttermilk will yield a batter that is both pourable and thick enough to hold the add-ins without sinking to the bottom.
Combining Mixtures
Once you have successfully mixed your yogurt and buttermilk, it’s time to combine them with your dry ingredients. This step is vital for achieving the desired texture of your Pistachio Paradise Nut Bread. It’s important to follow a few key tips to avoid over-mixing, which can lead to a tough bread.
Start by adding the wet mixture to the dry ingredients gently. Using a spatula or wooden spoon, fold the ingredients together until just combined. You should still see a few streaks of flour; this is a good sign that you haven’t overworked the batter. Over-mixing activates the gluten in the flour, which can result in a rubbery texture in the final product. Aim for a batter that is slightly lumpy but fully incorporated. Remember, a few lumps are perfectly fine!
Folding in Add-ins
Folding in the add-ins is where the magic happens in Pistachio Paradise Nut Bread. This is the stage where you introduce the star ingredients: pistachios, white chocolate, and cranberries. Each of these components brings a unique flavor and texture to the bread.
To ensure even distribution of these ingredients, sprinkle them over the top of the batter and then gently fold them in using a spatula. The goal here is to avoid breaking the delicate white chocolate pieces or crushing the pistachios. Use a gentle hand to lift and fold the batter over the add-ins, rotating the bowl as you go. This technique will help to maintain the integrity of the pieces while ensuring that every slice of bread is filled with delightful textures and flavors.
Baking Process
The baking process is where your efforts come to fruition. Preheat your oven to the recommended temperature, usually around 350°F (175°C). Grease your loaf pan generously, or line it with parchment paper for easy removal after baking. Once your batter is poured into the prepared pan, place it in the oven and set a timer for the recommended baking time, generally around 50 to 60 minutes.
To check for doneness, insert a toothpick into the center of the bread. If it comes out clean or with only a few moist crumbs attached, your bread is ready. If the top appears to be browning too quickly, you can tent the bread with a piece of aluminum foil during the last 15 to 20 minutes of baking. This will prevent the crust from becoming too dark while allowing the inside to bake thoroughly.
Cooling
Once your Pistachio Paradise Nut Bread has finished baking, it’s essential to let it cool properly. Remove it from the oven and allow it to sit in the pan for about 10-15 minutes. This resting period helps the bread firm up slightly, making it easier to remove from the pan. After this initial cooling, turn the bread out onto a wire rack to cool completely.
Cooling on a wire rack allows air to circulate around the bread, preventing it from becoming soggy on the bottom. It’s tempting to dig in while it’s still warm, but waiting until the bread is fully cooled will improve its texture and allow the flavors to meld beautifully.
Flavor Profile and Texture
The flavor and texture of Pistachio Paradise Nut Bread are truly a celebration of contrasts. The crunchy pistachios provide a delightful bite against the soft, moist crumb of the bread, creating an enjoyable textural experience. The sweetness of white chocolate beautifully complements the nuttiness of the pistachios, while the addition of cranberries introduces a tartness that balances the overall flavor profile.
This combination of sweet and salty, along with the varied textures, makes the bread exceptionally versatile. It can be enjoyed as a breakfast item with a cup of coffee or served as an elegant dessert with a dollop of whipped cream. The interplay of flavors can also be enhanced with different pairings; for instance, a robust black tea or a lightly flavored herbal tea can accentuate the nutty and fruity notes of the bread.
Serving Suggestions
Pistachio Paradise Nut Bread is not only a treat for the palate but also a visually appealing addition to any table setting. Here are some creative ways to serve this delightful bread:
– As a Breakfast Item: Serve thick slices of the bread warm, with a spread of creamy butter or whipped cream cheese on top. You might also consider adding a drizzle of honey or a sprinkle of cinnamon for extra flavor.
– As a Snack: This nut bread makes for an excellent mid-day snack. Pack slices in lunchboxes or enjoy them with a cup of tea during afternoon breaks. It’s a satisfying treat that provides a delightful energy boost.
– Serving at Gatherings: To present your Pistachio Paradise Nut Bread elegantly, consider slicing it into thick pieces and arranging them on a serving platter. Garnish with fresh cranberries or a sprinkle of chopped pistachios for visual appeal. You could also serve it alongside a selection of cheeses for a sophisticated touch.
Storage and Freshness
To keep your Pistachio Paradise Nut Bread fresh, proper storage is key. Allow the bread to cool completely before wrapping it tightly in plastic wrap or aluminum foil. This will protect it from air exposure, helping to maintain its moisture. At room temperature, the bread can remain fresh for up to four days.
For longer preservation, consider freezing the bread. Wrap it tightly in plastic wrap, followed by aluminum foil to prevent freezer burn. When properly stored, it can last for up to three months in the freezer. To reheat, simply thaw it at room temperature or place it in a preheated oven at 350°F (175°C) for about 10-15 minutes. This will restore its soft, fresh-baked texture and warmth.
Conclusion
Pistachio Paradise Nut Bread is a delightful recipe that combines the richness of nuts, the sweetness of white chocolate, and the tartness of cranberries into a harmonious loaf. The process of making this bread is not only rewarding but also allows for creativity in flavor combinations and presentation. Whether enjoyed as a breakfast treat, a midday snack, or a centerpiece at gatherings, this bread is sure to impress.
We encourage you to try this recipe and experience the joy of homemade baked goods. The aroma of freshly baked bread, the warmth of sharing it with loved ones, and the satisfaction of creating something delicious are all part of the experience. So roll up your sleeves, gather your ingredients, and indulge in the delightful world of Pistachio Paradise Nut Bread!