Introduction
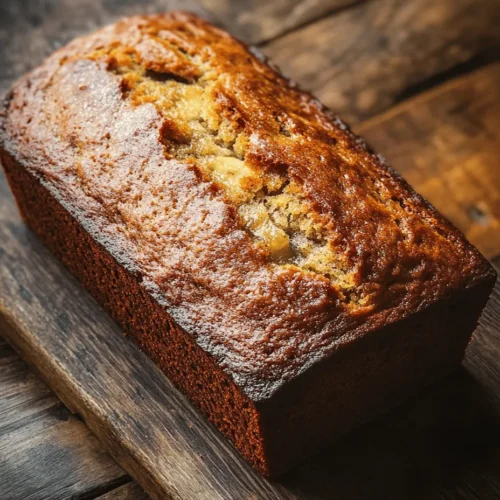
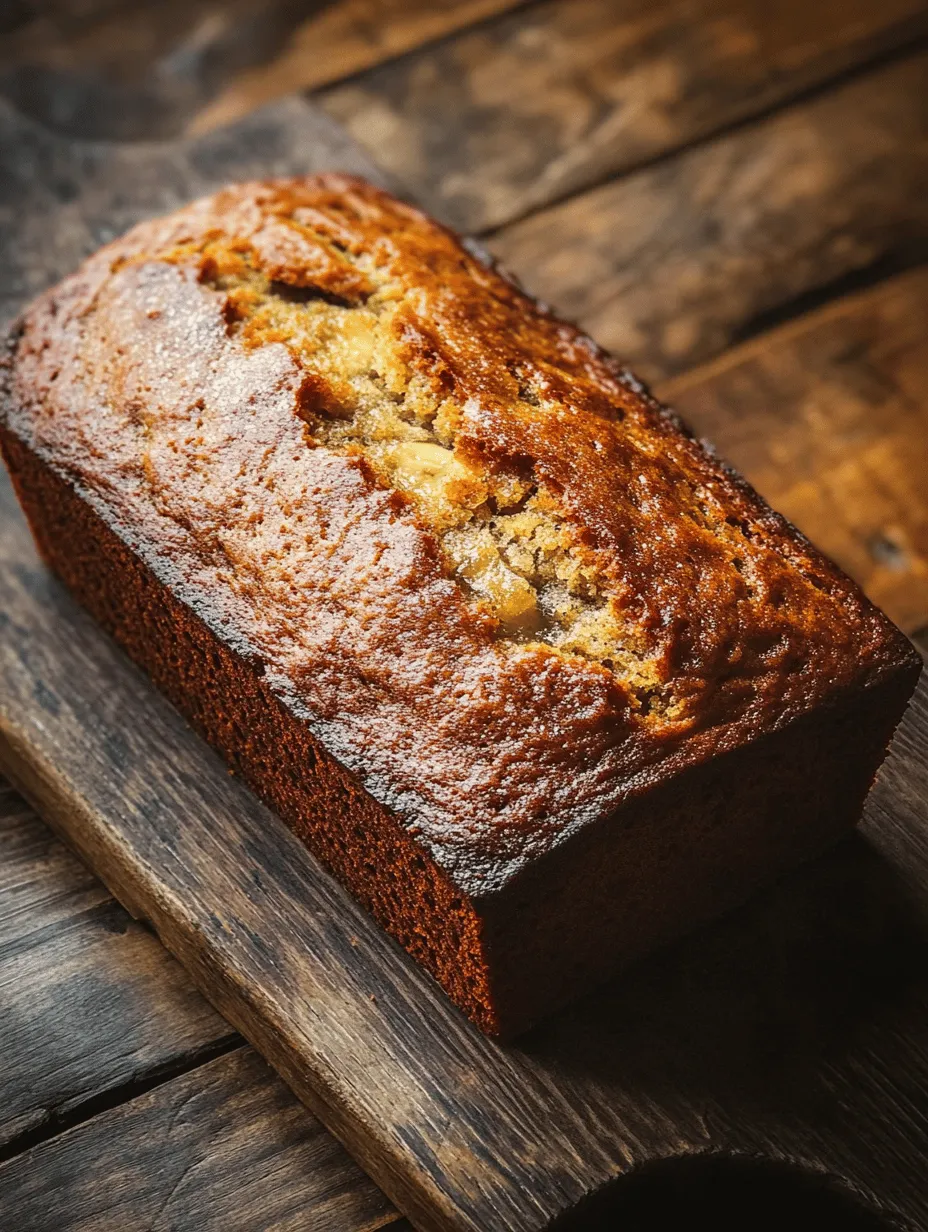
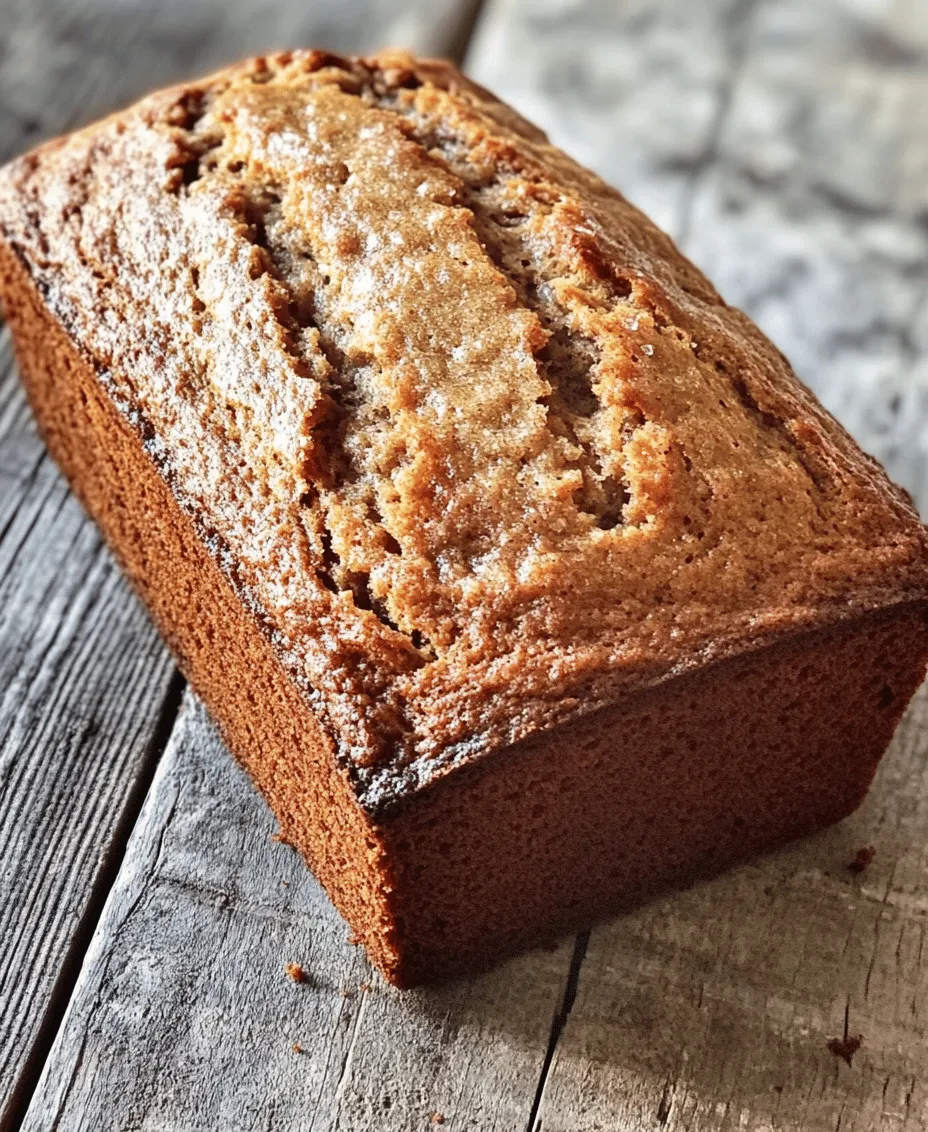
Banana bread is a cherished comfort food that has found a special place in kitchens across the globe. It’s more than just a delicious snack; it evokes warm memories of home, family gatherings, and the irresistible aroma of freshly baked goods wafting through the air. This beloved treat is the perfect way to use up overripe bananas, turning them into a moist, flavorful loaf that many people adore.
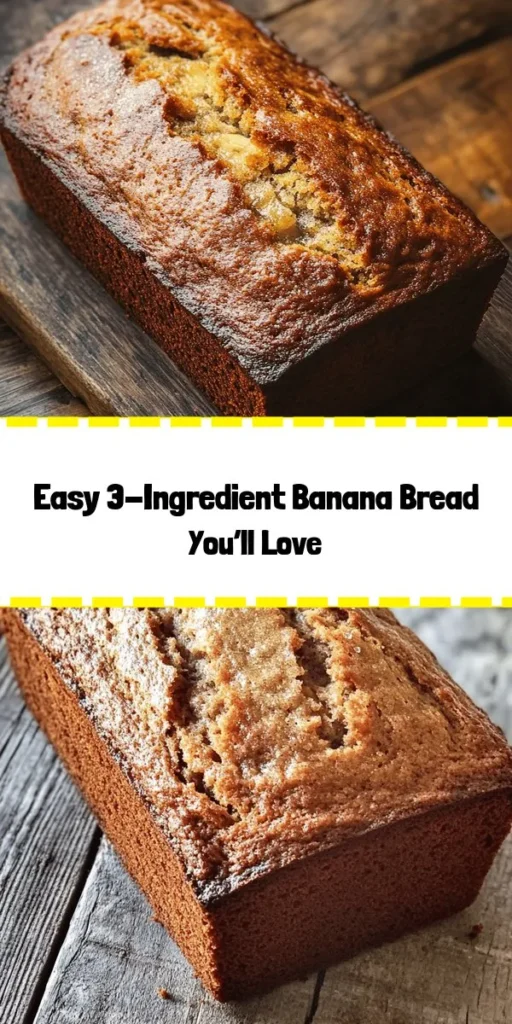
What makes this banana bread recipe especially appealing is its simplicity. With just three core ingredients—ripe bananas, self-rising flour, and sugar—it caters to both novice bakers and seasoned chefs looking for a quick and easy solution to satisfy their sweet tooth. This straightforward approach means you won’t need an extensive list of pantry items or complicated techniques. Instead, you can focus on the joy of baking and the anticipation of enjoying a freshly baked loaf.
The allure of homemade banana bread lies not only in its delightful taste but also in its texture. Each slice boasts a tender crumb and a slightly crisp crust, providing a satisfying bite that pairs perfectly with a cup of coffee or tea. Whether enjoyed warm from the oven or toasted with a pat of butter, banana bread is a timeless recipe that brings comfort and joy to any occasion.
Understanding the Ingredients
To create the perfect banana bread, it’s crucial to understand the role of each of the three ingredients. Each one contributes to the final result, ensuring you get that delicious loaf every time.
Ripe Bananas
The star of this recipe is undoubtedly the bananas. The importance of using ripe bananas cannot be overstated. As bananas ripen, their starches convert into sugars, making them sweeter and more flavorful. The brown spots on the peel indicate that the fruit is at its peak ripeness for baking. These overripe bananas not only enhance the sweetness of your banana bread but also provide moisture, which is essential for achieving that tender texture we all crave. If you find yourself with bananas that are too ripe, don’t hesitate to use them; they are perfect for this recipe.
Self-Rising Flour
Next up is self-rising flour, another key ingredient that simplifies the baking process. Self-rising flour is a mixture of all-purpose flour, baking powder, and salt. This means that you won’t need to measure out and add leavening agents separately, making the recipe even easier and faster. When combined with the moisture from the bananas, self-rising flour creates a light and fluffy loaf without the need for additional rising agents. If you don’t have self-rising flour on hand, you can easily make your own by combining all-purpose flour with baking powder and salt, but for this recipe, using premade self-rising flour provides the best results.
Sugar
The third and final ingredient is sugar. While the bananas contribute natural sweetness, adding sugar enhances the flavor and helps achieve that perfect crust on the loaf. The amount of sugar used can be adjusted based on your personal taste preference. If you prefer a less sweet bread, you can reduce the sugar quantity. Alternatively, you can experiment with different types of sugar, such as brown sugar for a deeper flavor or coconut sugar for a healthier option. Each variation will slightly change the taste and texture of the bread, allowing you to customize it to your liking.
Step-by-Step Guide to Making Banana Bread
Now that you have a solid understanding of the ingredients and their roles, it’s time to dive into the step-by-step process of making your simple 3-ingredient banana bread. This section will guide you through the essential steps to ensure a successful bake.
Preparing Your Workspace
Before you start baking, setting up an efficient workspace is crucial. Gather all your ingredients and tools, including a mixing bowl, a fork or potato masher for mashing the bananas, a loaf pan, and measuring cups. Ensuring that your kitchen is tidy and everything is within reach will make the process smoother and more enjoyable. Prepping your workspace also helps prevent any last-minute scrambles for ingredients and utensils while you’re in the middle of mixing.
Preheating the Oven
Once your workspace is set, it’s important to preheat your oven to 350°F (175°C). Preheating is a critical step in the baking process as it allows for even baking. An adequately heated oven ensures that your banana bread rises properly and develops a beautiful golden crust. While waiting for the oven to reach the desired temperature, you can focus on preparing your batter.
Mashing the Bananas
Next, it’s time to mash the bananas. Take your ripe bananas and place them in a mixing bowl. Using a fork or a potato masher, mash the bananas until there are no large chunks remaining. The goal is to achieve a smooth, pudding-like consistency. This not only incorporates the bananas into the batter evenly but also ensures that they blend perfectly with the other ingredients, contributing to a moist loaf. If you enjoy a few banana chunks in your bread, feel free to leave some smaller pieces intact for added texture.
Mixing the Ingredients
Once your bananas are mashed to your preference, it’s time to mix in the other ingredients. Add the self-rising flour and sugar directly to the bowl with the mashed bananas. Gently fold the ingredients together using a spatula or wooden spoon. Be careful not to overmix; the key to a tender banana bread is to mix just until the flour is incorporated. Overmixing can lead to a denser loaf, which is not the desired outcome. The batter should be slightly lumpy, and that’s perfectly okay!
Pouring and Smoothing the Batter
Now that your batter is mixed, it’s time to transfer it into your prepared loaf pan. Lightly grease the pan or line it with parchment paper for easy removal after baking. Pour the banana bread batter into the pan, using a spatula to scrape the sides of the bowl to ensure you don’t waste any of the delicious mixture. Once the batter is in the pan, gently smooth the top with the spatula to create an even surface. This will help the loaf bake uniformly and give it a nice appearance.
Baking Time and Temperature
Finally, it’s time to bake your banana bread. Place the loaf pan in the preheated oven and bake for approximately 50 to 60 minutes. Baking times can vary based on your oven and the size of your loaf pan, so keep an eye on it as it approaches the 50-minute mark. To check for doneness, insert a toothpick into the center of the loaf; if it comes out clean or with a few moist crumbs, your banana bread is ready. If the toothpick has wet batter clinging to it, continue baking and check again in a few minutes. Once baked, allow the bread to cool in the pan for about 10 minutes before transferring it to a wire rack to cool completely.
With these steps, you’re well on your way to creating a delightful loaf of simple 3-ingredient banana bread that will fill your kitchen with a mouthwatering aroma and provide a comforting treat for yourself or your loved ones. Stay tuned for more tips and variations that can help you customize this recipe even further!
Cooling Process: Why Cooling is Essential for Texture and Flavor Development
Once your banana bread has finished baking, it’s crucial to let it cool properly. Cooling is not just a matter of convenience; it plays a significant role in the final texture and flavor of your loaf. When banana bread comes out of the oven, it is still cooking due to residual heat. If you slice into it immediately, you might end up with a gummy and dense bread that doesn’t have the right crumb structure.
Allowing the bread to cool in the pan for about 10-15 minutes helps it to firm up, making it easier to remove without falling apart. After this initial cooling period, transfer the banana bread to a wire rack to cool completely. This step allows air to circulate around the loaf, preventing sogginess and ensuring an even texture. Cooling also allows the flavors to meld and develop, giving you a more delicious final product.
Nutritional Benefits of Banana Bread
Banana bread is not only a delightful treat but also a nutritious option, especially when made with wholesome ingredients. The primary component of this recipe, bananas, are a powerhouse of nutrients. They are rich in potassium, which is vital for heart health and maintaining proper muscle function. Additionally, bananas are a good source of dietary fiber, which aids in digestion and helps you feel full longer.
When analyzing the nutritional breakdown of this simple 3-ingredient banana bread recipe, you’ll find it is relatively low in calories compared to traditional recipes that often include added sugars and fats. One slice of banana bread typically provides about 100-150 calories, depending on the size and additional ingredients you might add.
To enhance the health aspects of your banana bread, consider incorporating modifications such as nuts or oats. Walnuts and almonds not only add a delightful crunch but also provide healthy fats and additional protein. Oats can boost the fiber content and give your banana bread a heartier texture. Both of these additions can elevate the nutritional profile while still allowing you to enjoy a delicious treat.
Variations to Explore
While the classic 3-ingredient banana bread is a fantastic base, there are numerous ways to customize it to suit your palate. Flavor variations can elevate your banana bread game. Here are a few ideas:
1. Adding Nuts: Chopped walnuts or pecans can introduce a satisfying crunch and enhance the overall flavor. Toasting the nuts lightly before adding them to the batter can intensify their flavor.
2. Chocolate Chips: For a sweeter twist, fold in semi-sweet or dark chocolate chips. This addition will make your banana bread a decadent dessert rather than just a snack.
3. Spices: Adding a pinch of cinnamon or nutmeg can bring warmth and depth to your banana bread. Consider experimenting with spices according to your preference.
4. Gluten-Free Alternatives: If you or someone you know is gluten-sensitive, you can easily modify this recipe. Substitute the self-rising flour with a gluten-free flour blend. Just be sure to include a gluten-free baking powder to ensure proper rise.
5. Vegan Adaptations: For a vegan version of this banana bread, replace the eggs (if you choose to add them for a richer texture) with a flaxseed meal or applesauce. To make one flax egg, mix 1 tablespoon of ground flaxseed with 2.5 tablespoons of water and let it sit for 5 minutes until it thickens.
Storing and Serving Your Banana Bread
To keep your banana bread fresh and flavorful, proper storage is essential. Here are some best practices:
1. Room Temperature: If you plan to eat your banana bread within a few days, store it wrapped in plastic wrap or in an airtight container at room temperature. This will help maintain its moisture and prevent it from drying out.
2. Refrigeration: If you live in a particularly warm or humid climate, it may be wise to refrigerate your banana bread. However, keep in mind that refrigeration can sometimes alter the bread’s texture, making it denser. Wrap it well to prevent it from absorbing other odors in the fridge.
3. Freezing: For longer storage, banana bread freezes exceptionally well. After it has cooled completely, wrap it tightly in plastic wrap and then in aluminum foil. Alternatively, place it in a freezer bag, removing as much air as possible. Your banana bread can last for up to three months in the freezer. When you’re ready to enjoy it, let it thaw in the refrigerator overnight or at room temperature for a few hours.
4. Serving Suggestions: Serve your banana bread warm or at room temperature. It’s delicious on its own but can be elevated with a pat of butter, a spread of cream cheese, or even a drizzle of honey. Consider pairing it with coffee or tea for a delightful breakfast or snack. Alternatively, serving it alongside yogurt and berries can create a wholesome breakfast spread.
Conclusion
In summary, the simple 3-ingredient banana bread recipe is not only easy to make but also incredibly versatile and delicious. The cooling process is vital for achieving the perfect texture and allowing the flavors to develop fully. With its numerous nutritional benefits, you can enjoy this treat guilt-free, especially when you explore various modifications and enhancements.
As you find joy in the baking process, don’t hesitate to experiment with different flavors and ingredients. Whether you prefer a classic version or one loaded with chocolate and nuts, the possibilities are endless. And remember, there’s something special about sharing homemade banana bread with loved ones—it’s a gesture of love that brings people together. So, gather your ingredients, preheat your oven, and enjoy the delightful experience of creating and savoring your very own banana bread. Happy baking!