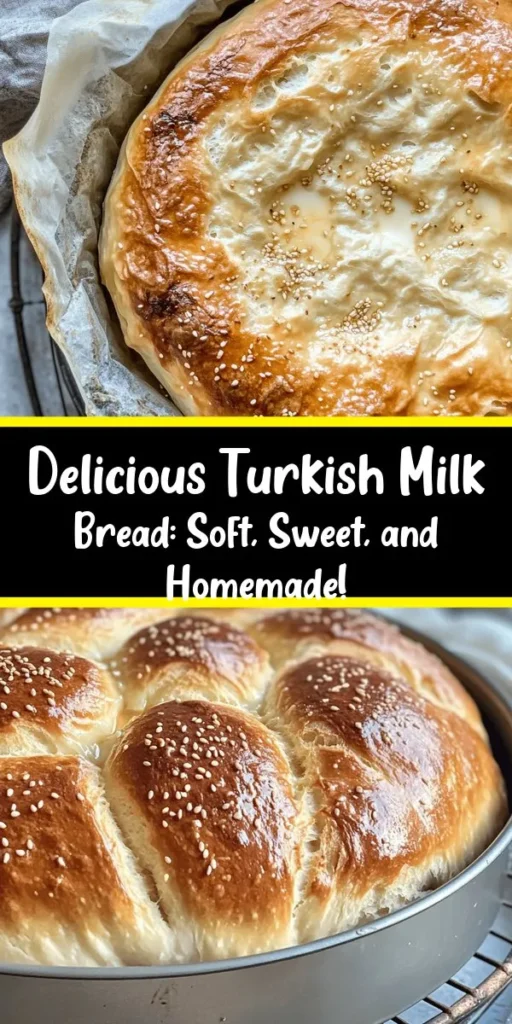
Exploring the diverse world of bread-making, Turkish Milk Bread stands out as a delightful addition that captivates with its soft texture and rich flavor. Originating from Turkey, this recipe is perfect for both novice bakers and seasoned chefs looking to expand their repertoire. Turkish Milk Bread, known locally as “sütlü ekmek,” is beloved not just for its delicious taste but also for its comforting qualities, making it a staple in many Turkish households. In this article, we will delve into the ingredients, step-by-step instructions, and cultural significance of this cherished bread, ensuring you can recreate it effortlessly in your own kitchen.
Understanding Turkish Milk Bread
The Cultural Significance of Milk Bread in Turkey
Turkish Milk Bread has a rich history woven into the fabric of Turkish cuisine. Traditionally, milk bread has been a staple for many families, often enjoyed during breakfast or served with meals. It is particularly popular during festive occasions, such as weddings and religious celebrations, where its soft texture and rich flavor symbolize prosperity and joy. The bread is often served alongside a variety of dishes, from savory to sweet, making it versatile and cherished in various contexts.
In different regions of Turkey, you may find regional variations of milk bread, each with its unique twist. For instance, some areas might incorporate local herbs or spices, while others may serve it with a drizzle of honey or a sprinkle of powdered sugar. This adaptability has allowed Turkish Milk Bread to remain a favored choice across generations, and its presence at family gatherings and celebrations underscores its significance in Turkish culture.
Characteristics of Turkish Milk Bread
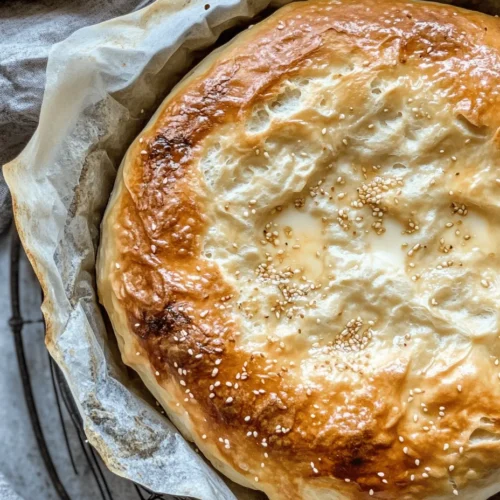
Turkish Milk Bread is known for its incredibly soft texture and slightly sweet flavor, which sets it apart from other types of bread. The use of milk and yogurt in the dough imparts a richness that is both comforting and satisfying. The bread typically has a golden-brown crust that gives way to a fluffy interior, making each bite a delightful experience.
When compared to other types of bread, such as sourdough or whole wheat, Turkish Milk Bread offers a milder taste profile that appeals to a wide range of palates. Its sweetness makes it an excellent accompaniment for breakfast spreads, such as jams, honey, or even savory toppings like cheese and olives. Additionally, this bread can be transformed into delicious sandwiches, French toast, or simply served warm with a pat of butter.
Ingredients Breakdown
Essential Ingredients for Turkish Milk Bread
Creating the perfect Turkish Milk Bread begins with selecting the right ingredients. Here’s a breakdown of the essential components:
– All-Purpose Flour: This is the backbone of the bread. All-purpose flour provides the necessary structure and gluten content, allowing the bread to rise and maintain its shape. For the best results, ensure your flour is fresh and properly measured.
– Instant Yeast: Using instant yeast simplifies the bread-making process, as it eliminates the need for proofing. Instant yeast activates quickly, producing the carbon dioxide necessary for the dough to rise effectively. This results in a light and airy loaf.
– Salt and Sugar: Salt enhances the flavor of the bread, while sugar adds a touch of sweetness, helping to balance the savory elements. Together, they create a harmonious flavor profile that elevates the overall taste of the bread.
The Role of Dairy: Milk and Yogurt
Dairy products play a crucial role in the creation of Turkish Milk Bread.
– Warm Milk: The use of warm milk in the dough not only adds moisture but also activates the yeast, promoting a better rise. Warm milk lends a subtle richness and contributes to the bread’s tender crumb.
– Yogurt: Yogurt is a key ingredient in achieving the desired tenderness of the bread. It adds a slight tanginess that complements the sweetness and moisture content of the dough. Additionally, yogurt is rich in probiotics, offering nutritional benefits that enhance the bread’s overall appeal.
The Magic of Eggs and Butter
Eggs and butter contribute significantly to the richness and flavor of Turkish Milk Bread.
– Eggs: Including eggs in the dough enriches the bread, providing a beautiful golden color and adding to its nutritional profile. Eggs also help bind the ingredients together, ensuring a cohesive dough.
– Melted Butter: Butter imparts a luscious flavor and helps create a tender texture. The fat from the butter coats the flour proteins, which results in a softer crumb. Using melted butter in the dough ensures it is evenly distributed, enhancing the overall taste of the bread.
Optional Ingredients: Sesame Seeds
For an authentic touch, sesame seeds are often sprinkled on top of Turkish Milk Bread before baking.
– Significance: Sesame seeds not only add a nutty flavor and crunch but also hold cultural significance in Turkish cuisine. They are frequently used in various baked goods and dishes, symbolizing health and prosperity.
– Alternative Toppings: While sesame seeds are traditional, feel free to experiment with other toppings. Poppy seeds, sunflower seeds, or even a light sprinkle of coarse salt can create delightful variations that suit your taste.
Step-by-Step Guide to Making Turkish Milk Bread
Preparing the Dough
Now that you have a good understanding of the ingredients, let’s move on to the essential steps involved in making Turkish Milk Bread.
1. Mixing Dry Ingredients: Begin by combining the all-purpose flour, instant yeast, sugar, and salt in a large mixing bowl. Use a whisk to blend these dry ingredients thoroughly, ensuring that the yeast and salt are evenly distributed. This step is crucial, as any clumps of salt or yeast can affect the rising process.
2. Incorporating Wet Ingredients: In a separate bowl, mix warm milk, yogurt, and beaten eggs. Ensure the milk is warm (not hot) to avoid killing the yeast. The warmth will help activate the yeast, leading to a successful rise. Gradually pour the wet ingredients into the bowl with the dry ingredients, stirring gently with a wooden spoon or spatula until a rough dough begins to form.
3. Kneading the Dough: Transfer the dough onto a lightly floured surface. Begin kneading the dough by pushing it away with the heel of your hand, folding it back over itself, and repeating the process. Knead for about 8-10 minutes until the dough becomes smooth and elastic. If the dough feels too sticky, add a little more flour, but be careful not to add too much, as this can result in a dense bread.
4. Incorporating Butter: Once the dough is smooth, create a well in the center and pour in the melted butter. Knead the dough again for another 5 minutes, ensuring the butter is fully incorporated. This will add richness and flavor to the bread.
5. First Rise: Form the kneaded dough into a ball and place it in a lightly greased bowl. Cover it with a damp cloth or plastic wrap and let it rise in a warm, draft-free place for about 1-2 hours, or until it has doubled in size. This step is essential for developing the bread’s texture and flavor.
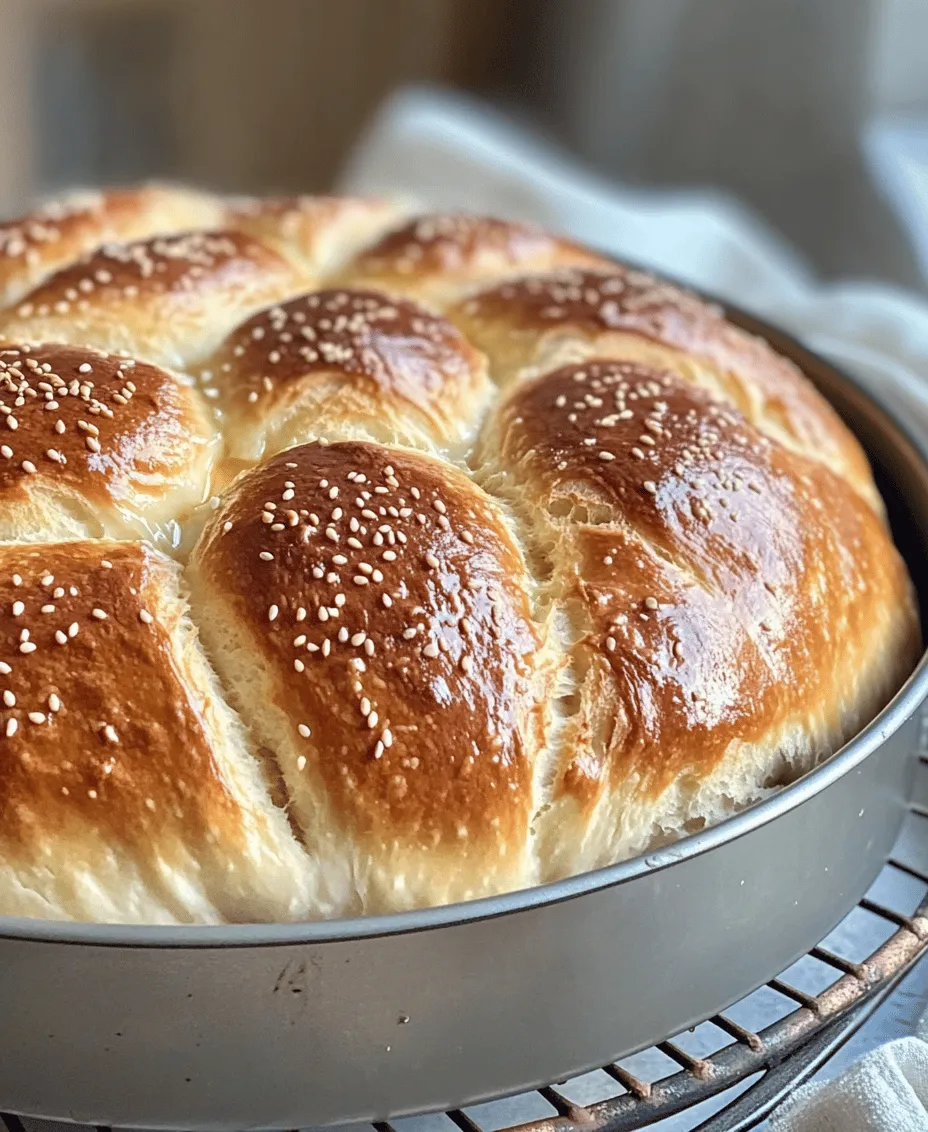
6. Shaping the Dough: After the first rise, gently punch down the dough to release any air bubbles. Turn it out onto a lightly floured surface and divide it into equal portions, depending on the size of the loaves you wish to make. Shape each portion into a smooth ball by tucking the edges underneath.
7. Second Rise: Place the shaped dough balls onto a greased or parchment-lined baking pan, leaving enough space between them for expansion. Cover the pan with a damp cloth and allow the dough to rise again for about 30-45 minutes. This second rise will enhance the bread’s fluffiness.
As you prepare the dough, you can also take this time to preheat your oven to ensure it reaches the desired temperature when your bread is ready to bake.
In the next section, we will cover the baking process, additional tips for achieving the perfect loaf, and how to serve and store your Turkish Milk Bread.
Combining Wet Ingredients: Temperature and Technique
The foundation of any great bread starts with the right combination of wet ingredients. For Turkish Milk Bread, ensuring that your milk is warm—around 110°F (43°C)—is crucial. This temperature activates the yeast effectively, allowing for a robust rise. If you don’t have a thermometer, a good rule of thumb is to heat the milk until it feels warm but not hot to the touch.
When combining wet ingredients, pour the warm milk into a mixing bowl and add sugar and yeast. Let this mixture sit for about 5-10 minutes until it becomes frothy, indicating that the yeast is active. Then, incorporate an egg and melted butter into the mixture, whisking until well combined. This step not only enhances the flavor but also adds richness to the bread, resulting in a tender crumb.
Creating a Shaggy Dough: Signs to Look For
Once your wet ingredients are mixed, it’s time to introduce the dry ingredients. Gradually add flour and salt to the bowl, starting with a wooden spoon. As you stir, you’ll notice the dough transforming from a loose mixture into a shaggy mass. A shaggy dough is characterized by its messy and rough appearance, clinging together but not yet fully formed.
Signs that you have achieved the right consistency include the dough pulling away from the sides of the bowl and no longer being overly sticky. This is the perfect moment to move on to the next stage: kneading.
Kneading: The Key to Perfect Texture
Techniques for Kneading Dough Effectively
Kneading is essential for developing gluten, which gives bread its structure and chew. Start by lightly flouring your work surface to prevent sticking. Turn the shaggy dough out onto the floured surface.
Using the heel of your hand, push the dough away from you, then fold it over itself and rotate it a quarter turn. Repeat this process for about 8-10 minutes. As you knead, you should feel the dough becoming smoother and more elastic. If it feels too sticky, dust it lightly with flour, but avoid adding too much; you want to maintain a soft dough.
Understanding Dough Consistency and Elasticity
A well-kneaded dough should spring back when poked gently and have a smooth, slightly tacky surface. After kneading, you can perform the “windowpane test” to check gluten development: take a small piece of dough and stretch it gently between your fingers; it should stretch thin enough to become translucent without tearing. If it tears easily, continue kneading for a few more minutes.
First Rise and Its Importance
Tips for Creating an Optimal Environment for Rising
The first rise is crucial for developing flavor and texture in your Turkish Milk Bread. To create the ideal environment for rising, place your dough in a lightly greased bowl, cover it with a damp cloth or plastic wrap, and set it in a warm, draft-free area. An oven with the light on or a warm corner of your kitchen works well.
What to Expect During the Rising Process
Allow the dough to rise for about 1 to 1.5 hours, or until it has doubled in size. You will know it’s ready when you gently poke it, and the indentation remains. This indicates that the dough is properly aerated and ready for shaping.
Shaping the Dough
Techniques for Dividing and Shaping Dough Balls
Once the first rise is complete, it’s time to shape the dough. Gently punch it down to release excess gas, then turn it out onto a lightly floured surface. Divide the dough into equal portions, typically about 8-10 pieces, depending on your desired size.
To shape each piece, flatten it slightly into a disc, then fold the edges toward the center, pinching them together. Flip the dough ball over so the seam is on the bottom, and roll it gently against the surface to create a smooth top. This shaping technique helps create tension in the dough, which is crucial for an even rise during cooking.
The Significance of Resting the Dough
After shaping, let the dough balls rest for about 15-20 minutes under a clean cloth. This resting period allows the gluten to relax, making the dough easier to flatten and cook, ultimately resulting in a lighter texture.
Cooking the Bread: Pan Method Explained
Choosing the Right Cookware for Cooking
For Turkish Milk Bread, a heavy skillet or cast-iron pan is ideal. These types of cookware distribute heat evenly, ensuring a perfectly cooked bread with a crisp crust. If you do not have cast-iron, a non-stick skillet can also work but may require a bit more oil to prevent sticking.
Detailed Instructions for Pan-Frying Bread
Heat your skillet over medium heat and add a teaspoon of oil to coat the bottom. Once the oil is hot, carefully place a shaped dough ball in the pan. Cook for about 3-5 minutes on one side until golden brown. Use a spatula to gently flip the bread and cook for another 3-5 minutes on the other side.
You may need to adjust the heat to avoid burning, as every stove is different. The goal is to achieve a beautiful golden-brown crust while ensuring the inside is fully cooked. If needed, you can cover the pan with a lid for a minute or two to help the bread cook through without burning the outside.
Tips for Achieving the Perfect Golden Brown Crust
To ensure your bread achieves that desirable golden-brown crust, keep a close eye on the cooking process. If you find the bread browning too quickly, lower the heat. Conversely, if it’s cooking too slowly, increase the heat slightly. Additionally, you can brush the top of the bread with melted butter or oil during the last minute of cooking for added flavor and a glossy finish.
Tips for Serving and Enjoying Turkish Milk Bread
Ideal Pairings and Accompaniments
Turkish Milk Bread is incredibly versatile and can be enjoyed in various ways. Traditionally, it pairs well with dishes like kebabs, stews, or simply served alongside a meze platter. The soft texture complements savory dishes beautifully, making it an excellent accompaniment to rich flavors.
For a delightful breakfast or snack, consider spreading some homemade jam, honey, or even labneh, a creamy yogurt spread topped with olive oil and herbs. You can also serve it with a sprinkle of za’atar for a unique flavor twist.
Storage and Reheating Instructions
To store leftover Turkish Milk Bread, wrap it tightly in plastic wrap or place it in an airtight container at room temperature. It will keep fresh for 2-3 days. If you want to store it for a longer time, consider freezing it. Wrap each piece individually in plastic wrap and place them in a freezer-safe bag.
To reheat, place the bread in a toaster or a warm oven (around 350°F or 175°C) for a few minutes until warmed through. Avoid reheating in the microwave, as it can make the bread chewy rather than soft.
Nutritional Information
Breakdown of Nutritional Value
Turkish Milk Bread is not only delicious but also provides a satisfying balance of macronutrients. A single serving (one piece) contains approximately 150 calories, 4 grams of protein, 2 grams of fat, and 28 grams of carbohydrates. The bread is also a good source of calcium from the milk, making it a comforting yet nourishing option.
Health Benefits of Ingredients Used in the Recipe
The primary ingredients in Turkish Milk Bread—milk, flour, yeast, and butter—each bring their own health benefits. Milk is an excellent source of calcium and vitamin D, supporting bone health. The use of whole wheat flour increases the fiber content, promoting digestive health. Yeast not only helps the bread rise but can also contribute beneficial bacteria that support gut health.
Conclusion: Your Journey with Turkish Milk Bread
Turkish Milk Bread in a Pan is not just another bread recipe; it is a delightful culinary journey that invites you to explore the rich flavors and traditions of Turkish cuisine. By mastering the steps from mixing to kneading and cooking, you will create a bread that is not only soft and fluffy but also rich in flavor and history.
This bread serves as a perfect addition to any meal, whether you’re enjoying it freshly cooked or using it to complement your favorite dishes. So, embrace the joy of baking, gather your ingredients, and immerse yourself in the warmth and comfort that Turkish Milk Bread brings. Share it with your loved ones and create cherished memories around the table.