Introduction
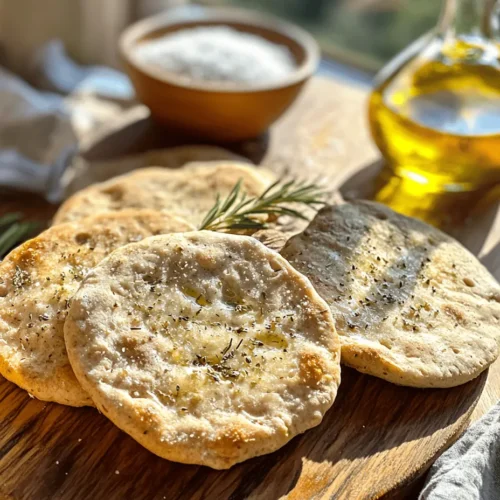
Unleavened bread holds a special place in culinary history, representing simplicity and tradition across various cultures. From the ancient Israelites who consumed matzo during Passover to the flatbreads of Middle Eastern cuisines, unleavened bread has been a staple food for millennia. Its lack of yeast makes it a quick and easy option for those looking to create a delicious bread without waiting for dough to rise.
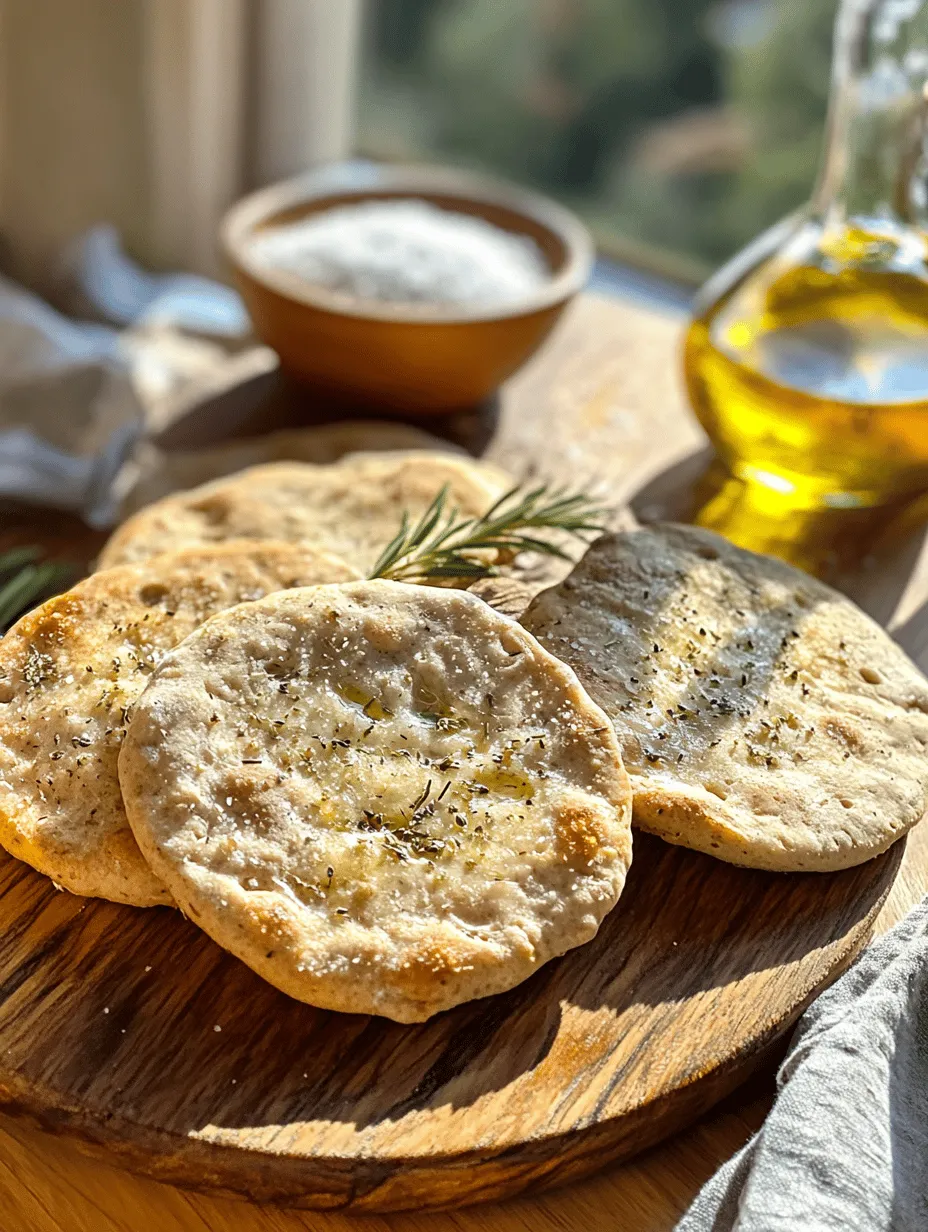
In a world that often prioritizes complex recipes and intricate techniques, the appeal of homemade unleavened bread lies in its simplicity. It invites home cooks of all skill levels to engage with the process of making bread from scratch. Whether you’re preparing a hearty meal or looking for a snack, unleavened bread can complement a variety of dishes—be it served alongside soups, used as a wrap for fillings, or enjoyed with dips.
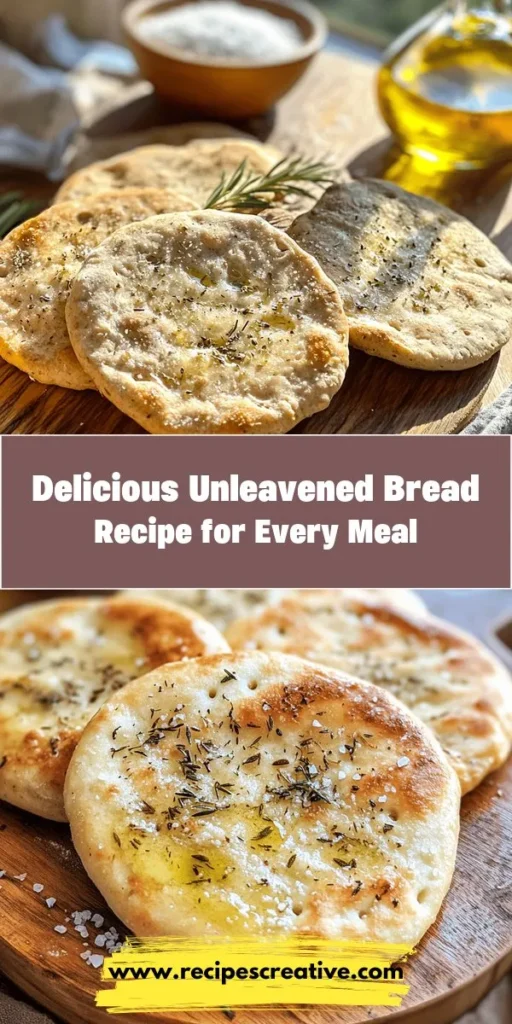
In this article, we will guide you through a delightful unleavened bread recipe that is not only easy to follow but also versatile enough to fit into any meal. The combination of all-purpose flour, salt, olive oil, and water creates a beautifully simple yet flavorful bread that can be customized to your taste. Let’s dive into the world of unleavened bread, exploring its characteristics, historical significance, and the steps to make your own batch from home.
Understanding Unleavened Bread
Definition and Characteristics of Unleavened Bread
Unleavened bread is defined by its lack of leavening agents, such as yeast or baking powder, which are typically responsible for the rise and airy texture found in many bread varieties. Instead, unleavened bread has a dense, flat consistency, often resulting in a crisp exterior and a chewy center. This unique texture makes it an excellent base for various toppings and fillings, allowing it to shine in both savory and sweet applications.
Historical Context: Origins and Cultural Significance
The origins of unleavened bread can be traced back to ancient civilizations. In biblical times, unleavened bread was consumed by the Israelites during their exodus from Egypt, symbolizing their swift departure and lack of time to allow bread to rise. This tradition continues today, particularly during the Jewish holiday of Passover, where matzo—a type of unleavened bread—serves as a significant element of the Seder meal.
Beyond Jewish traditions, unleavened bread appears in numerous cultures around the globe. In India, for instance, chapatis and rotis are staple flatbreads made without leavening. In Mexico, tortillas serve a similar purpose, acting as a versatile accompaniment to a wide range of dishes. The simplicity of unleavened bread speaks to its universal appeal, transcending cultural boundaries and adapting to local ingredients and preferences.
Comparison with Leavened Bread: Texture, Taste, and Preparation Differences
When comparing unleavened and leavened breads, the most notable difference is the texture. Leavened breads are light and airy due to the fermentation process that occurs when yeast is added to the dough. This fermentation produces carbon dioxide, causing the bread to rise. In contrast, unleavened bread is flat and dense, offering a more robust flavor that pairs well with various ingredients.
The preparation methods also differ significantly. Making leavened bread requires time and patience, as the dough must be allowed to rise multiple times throughout the process. This waiting period can be a deterrent for home cooks seeking quick solutions. Unleavened bread, on the other hand, can be mixed, shaped, and cooked in a matter of minutes, making it an ideal option for those who want freshly baked bread without the long wait.
Ingredients Breakdown
Detailed Description of Each Ingredient Used in the Recipe
To create your own Unleavened Bread Delight, you will need the following ingredients:
1. All-Purpose Flour or Whole Wheat Flour: The base of your bread, providing the necessary structure.
2. Salt: Enhances the flavor and balances the bread’s taste.
3. Olive Oil or Coconut Oil: Adds moisture and richness while improving the bread’s texture.
4. Water: Binds the ingredients together and helps achieve the right dough consistency.
All-Purpose Flour vs. Whole Wheat Flour: Nutritional Benefits and Flavor Profiles
Choosing between all-purpose flour and whole wheat flour for your unleavened bread can influence both the nutritional profile and taste of your final product. All-purpose flour is milled from a blend of hard and soft wheat, offering a fine texture that results in a light, tender bread. It is versatile and readily available, making it a popular choice for many home bakers.
On the other hand, whole wheat flour retains the bran and germ of the wheat grain, providing a higher fiber content and more nutrients. This choice yields a denser bread with a nuttier flavor, appealing to health-conscious consumers. The decision ultimately comes down to personal preference—whether you prefer the lighter texture of all-purpose flour or the heartiness of whole wheat.
The Role of Salt in Enhancing Flavor
Salt plays a crucial role in baking, not only as a flavor enhancer but also in strengthening the gluten structure of the dough. In unleavened bread, it helps to elevate the overall taste, ensuring that the bread is not bland. A pinch of salt can make a significant difference in the flavor profile, so it is advisable not to overlook its importance.
Olive Oil vs. Coconut Oil: Health Benefits and Taste Considerations
When it comes to adding fat to your unleavened bread, both olive oil and coconut oil have their distinct advantages. Olive oil is rich in monounsaturated fats and antioxidants, promoting heart health and contributing to the bread’s delicious flavor. Its fruity notes can elevate the overall taste of the bread, making it an excellent choice for savory applications.
Coconut oil, on the other hand, contains medium-chain triglycerides (MCTs), which may offer various health benefits, including improved metabolism. It imparts a subtle sweetness and tropical aroma to the bread, making it a great addition if you’re seeking a slightly different flavor profile. Choosing between the two oils will depend on your personal taste preferences and dietary considerations.
Importance of Adding Water: Achieving the Right Dough Consistency
Water is a critical ingredient in any bread recipe, serving to bind the dry ingredients together and create a workable dough. The amount of water required can vary based on the type of flour used and the humidity levels in your kitchen. It’s essential to add water gradually, mixing until you achieve a dough that is soft but not sticky. This balance is key to achieving the perfect texture in your unleavened bread.
Optional Herbs: Enhancing Flavor and Potential Health Benefits
For those looking to add an extra layer of flavor to their unleavened bread, consider incorporating optional herbs into the dough. Fresh or dried herbs such as rosemary, thyme, or oregano can elevate the taste and aroma of the bread, making it even more enjoyable. Additionally, many herbs offer health benefits, such as anti-inflammatory properties or antioxidants, which can enhance the nutritional value of your bread.
Step-by-Step Instructions for Making Unleavened Bread
Preparing the Dough: Importance of the Mixing Technique for Texture
To start, gather all your ingredients and ensure you have a clean workspace. In a large mixing bowl, combine the flour and salt, ensuring an even distribution. This step is crucial, as it ensures that the salt is uniformly mixed throughout the flour, contributing to the overall flavor of the bread.
Once the dry ingredients are combined, make a well in the center and add the olive oil. Begin mixing with a fork or your hands, gradually incorporating the flour into the oil. This technique helps to coat the flour with fat, improving the dough’s texture and preventing it from becoming too sticky.
Combining Ingredients: Tips for Achieving the Right Crumb Consistency
As you mix the dough, pay close attention to its consistency. You want a dough that holds together without being overly wet or dry. If the mixture seems too crumbly, gradually add water, one tablespoon at a time, until it begins to come together. Conversely, if the dough is too sticky, sprinkle in a little extra flour until you achieve the desired consistency.
Adding Water: Adjustments Based on Flour Type and Humidity Considerations
Remember, the amount of water you need may vary based on the flour type and the climate in your kitchen. If using whole wheat flour, you may require slightly more water due to its higher absorption properties. In humid conditions, your flour may already contain extra moisture, so be cautious when adding water to avoid a sticky dough.
Kneading the Dough: Techniques for Optimal Smoothness and Elasticity
Once your dough has come together, it’s time to knead. Lightly flour a clean surface and turn the dough out onto it. Knead the dough for about 5-7 minutes, pushing and folding it until it becomes smooth and elastic. This process develops the gluten, which is essential for creating a slightly chewy texture in your unleavened bread.
If the dough sticks to your hands or the work surface, dust with a little flour as needed. Pay attention to the feel of the dough; it should be soft yet cohesive, allowing you to shape it easily without falling apart.
Rolling Out: Importance of Even Thickness for Cooking
After kneading, divide the dough into equal portions based on how many pieces of bread you wish to make. Roll each piece out on a lightly floured surface, aiming for a thickness of about 1/8 inch. It’s crucial to achieve an even thickness, as this ensures that the bread cooks uniformly, resulting in a perfectly baked product.
Using a rolling pin, gently flatten the dough while maintaining its shape. If the edges crack, simply press them back together with your fingers. Once rolled out, your unleavened bread is ready to be cooked, whether in a skillet, on a baking sheet, or over an open flame.
Stay tuned for the next part of the Unleavened Bread Delight recipe, where we’ll explore cooking techniques and serving suggestions that will elevate your homemade bread experience!
Cooking Techniques for Perfect Unleavened Bread
Preheating the Skillet: Why Temperature Matters
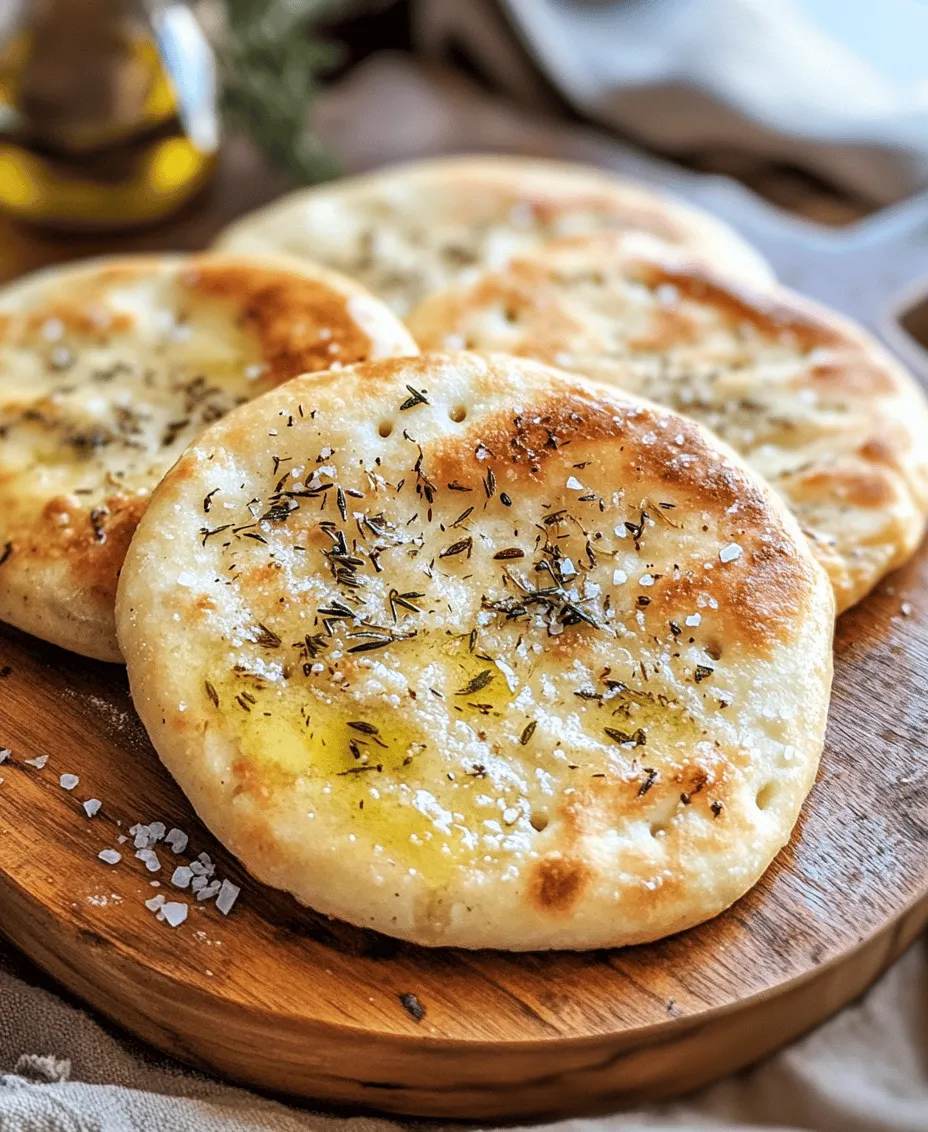
When making unleavened bread, preheating your skillet is a crucial step that should not be overlooked. The ideal temperature for cooking unleavened bread is medium to medium-high heat. This ensures that the bread cooks evenly and develops the characteristic golden-brown spots that make it visually appealing and enhance its flavor. A preheated skillet allows for a quick sear, giving the exterior a slight crispiness while keeping the inside tender.
To test if your skillet is ready, sprinkle a few drops of water onto the surface. If the water dances and evaporates quickly, your skillet is at the right temperature. If the water just sits there, it’s not hot enough yet. A well-preheated skillet also helps in achieving that delicious texture that elevates your unleavened bread from simple to delightful.
Cooking Times and Tips for Achieving Golden-Brown Spots
Cooking times for unleavened bread can vary depending on the thickness of your dough and the heat of your skillet. Typically, each side should be cooked for about 2 to 3 minutes, but keep an eye on progress to avoid overcooking. As the bread cooks, you should start to see small bubbles forming on the surface, which indicates that the bread is rising slightly and cooking through.
To achieve those coveted golden-brown spots, resist the urge to flip the bread too early. Allow it to develop a crust before turning it over. Once you flip it, continue to monitor closely, adjusting the heat if necessary to prevent burning. If you find that the bread is browning too quickly, reduce the heat slightly.
Adjustments for Different Cooking Surfaces: Skillet vs. Griddle
Different cooking surfaces can yield varying results when making unleavened bread. A cast-iron skillet is often preferred for its ability to retain heat, creating a consistent cooking environment. If you’re using a non-stick skillet, be mindful of the heat as they can cook more quickly due to less heat retention.
Griddles, both electric and stovetop versions, can also be excellent for making unleavened bread, especially if you’re cooking multiple pieces at once. The larger cooking surface allows for a uniform heat distribution, ensuring that each piece cooks evenly. Regardless of your chosen surface, remember to preheat adequately and adjust cooking times as necessary.
Tips for Flipping and Monitoring Doneness Without Burning
Flipping your unleavened bread correctly is key to achieving the best texture and flavor. Use a wide spatula to gently slide under the bread, lifting it with a flick of the wrist to avoid tearing. If the bread feels sticky when you attempt to flip it, it may need a little more time on the skillet.
To monitor doneness without burning, pay close attention to the color and texture. A well-cooked piece will have a nice, deep golden color and will feel firm but slightly pliable. If you’re unsure, you can always lift one edge to peek underneath for that lovely golden crust. Adjust your cooking time based on your preferences—some may prefer a softer bread, while others might like it crispier.
Cooling and Storing Unleavened Bread
Importance of Cooling on a Wire Rack: Preventing Sogginess
Once your unleavened bread is cooked to perfection, it’s essential to let it cool properly. Cooling the bread on a wire rack is critical as it allows air to circulate around the bread, preventing moisture buildup on the bottom. If left on a flat surface, the steam can create a soggy texture that detracts from the overall quality of the bread.
Allow the bread to cool for about 5 to 10 minutes before serving. This not only enhances the flavor but also ensures that the texture remains light and airy, making it more enjoyable to eat.
Best Practices for Storage: Keeping It Fresh at Room Temperature
To keep your unleavened bread fresh, store it in an airtight container or wrap it in a clean kitchen towel. Avoid storing it in the refrigerator, as this can lead to a dry texture. At room temperature, it should stay fresh for about 2 to 3 days.
For longer storage, consider freezing the bread. To do this, wrap each piece tightly in plastic wrap and then in aluminum foil or place them in a freezer-safe bag. When properly stored in the freezer, unleavened bread can last for up to three months. To reheat, simply thaw at room temperature or warm it in the skillet for a few minutes.
Shelf Life and Reheating Recommendations for Optimal Taste
The shelf life of unleavened bread can be extended by proper storage methods. As mentioned, it can be kept at room temperature for a few days or frozen for longer periods. Reheating can be done on a skillet, in a toaster oven, or even in a microwave, although the latter may lead to a softer texture. For the best results, reheating in a skillet is recommended as it helps restore some of the original crispness.
When reheating, keep the heat low and cover the bread for a minute or two to ensure it warms through without drying out. This method also helps maintain the bread’s texture and flavor, allowing you to enjoy it as if it were freshly made.
Serving Suggestions
Versatile Uses of Unleavened Bread in Meals
Unleavened bread is incredibly versatile and can be used in various meals throughout the day. It can serve as a base for sandwiches or wraps, be used as a side for soups and stews, or even enjoyed as a snack on its own. Its simple flavor profile allows it to complement a wide range of ingredients, making it a staple in many cuisines.
Pairing with Dips, Spreads, or Soups
Consider serving your unleavened bread with a selection of dips or spreads. Hummus, tzatziki, or a rich olive tapenade can enhance the flavor and provide a satisfying kitchen experience. Additionally, pairing it with soups, such as a hearty lentil or a creamy tomato, can create a fulfilling meal that warms the soul. The bread is perfect for dipping, soaking up the delicious broth, and adding texture to your dish.
Serving Alongside Main Dishes: Enhancing the Dining Experience
Unleavened bread also complements main dishes beautifully. Serve it alongside grilled meats, roasted vegetables, or even curries to provide a delightful contrast to the richness of the main course. The bread’s neutral flavor will soak up sauces and enhance every bite, making your meal more satisfying.
Creative Ideas for Breakfast or Snacks
For breakfast or snack options, try topping your unleavened bread with fresh avocado, a poached egg, or a sprinkle of nut butter and sliced bananas. These combinations create a nutritious and delicious start to your day or a quick energy boost during the afternoon. The possibilities are endless, and you can easily customize toppings based on your preferences and dietary needs.
Nutritional Information
Breakdown of Calories and Nutrients per Serving
Unleavened bread is not only easy to make but also provides a nutritious option for those looking to incorporate whole grains into their diet. A standard serving (one piece of unleavened bread) is roughly 100 calories, depending on the thickness and added ingredients. The nutritional composition includes approximately 3 grams of protein, 2 grams of fiber, and healthy fats if you use olive oil in your recipe.
Health Benefits of Using Whole Wheat Flour and Olive Oil
Using whole wheat flour in your unleavened bread provides essential nutrients such as fiber, B vitamins, and minerals like iron and magnesium. Fiber is known for promoting digestive health and can help maintain steady blood sugar levels. Incorporating olive oil not only enhances the flavor but also adds healthy monounsaturated fats, which support heart health.
Considerations for Dietary Restrictions and Preferences
This recipe can easily accommodate various dietary preferences. By using gluten-free flour, you can create a gluten-free version of unleavened bread for those with gluten sensitivities. Additionally, you can experiment by adding herbs or spices to the dough, making it suitable for vegan diets by omitting any animal-based ingredients.
Conclusion
Making unleavened bread at home is a rewarding and fulfilling culinary endeavor that brings together simplicity and flavor. The joy of crafting your own bread—from mixing the dough to cooking it to perfection—offers a sense of accomplishment that store-bought alternatives simply cannot match. Unleavened bread is not only easy to make but also provides ample opportunities for customization, allowing you to experiment with flavors and textures that suit your taste.
As you explore this recipe, don’t hesitate to add your personal touches, whether it’s incorporating herbs, spices, or different flours. The cultural significance of unleavened bread spans across various cuisines, connecting us to traditions and practices that have been cherished for centuries.
Embrace the versatility of unleavened bread, whether as a side to accompany your favorite meals, a base for creative snacks, or a comforting breakfast option. With its delicious flavor and simple preparation, unleavened bread is sure to become a beloved staple in your kitchen. So, gather your ingredients and start crafting this delightful bread today, and enjoy the lasting satisfaction of homemade goodness.