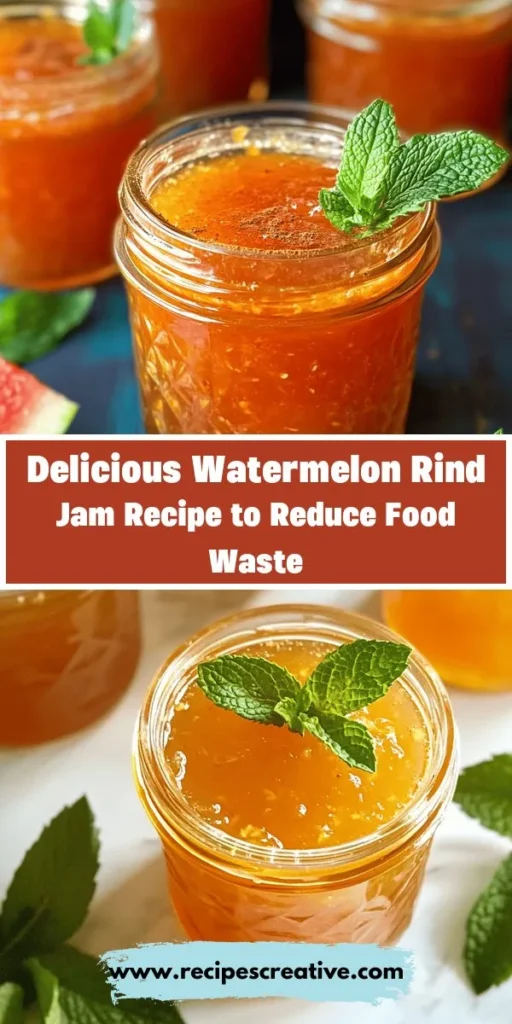
Introduction
In the realm of culinary creativity, few ingredients are as versatile as the watermelon. While the bright red flesh is a summer staple, the often-overlooked rind holds its own potential for deliciousness. Utilizing watermelon rind in cooking is not only a novel approach but also a sustainable practice that aims to reduce food waste. In a world increasingly focused on sustainability, using the whole fruit—rind included—can lead to delightful new flavors and textures while contributing to a more eco-friendly kitchen.
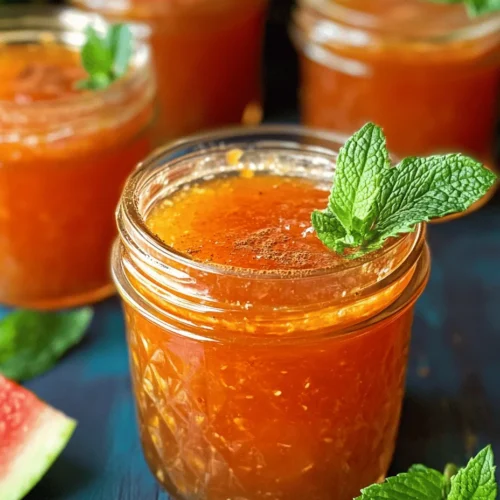
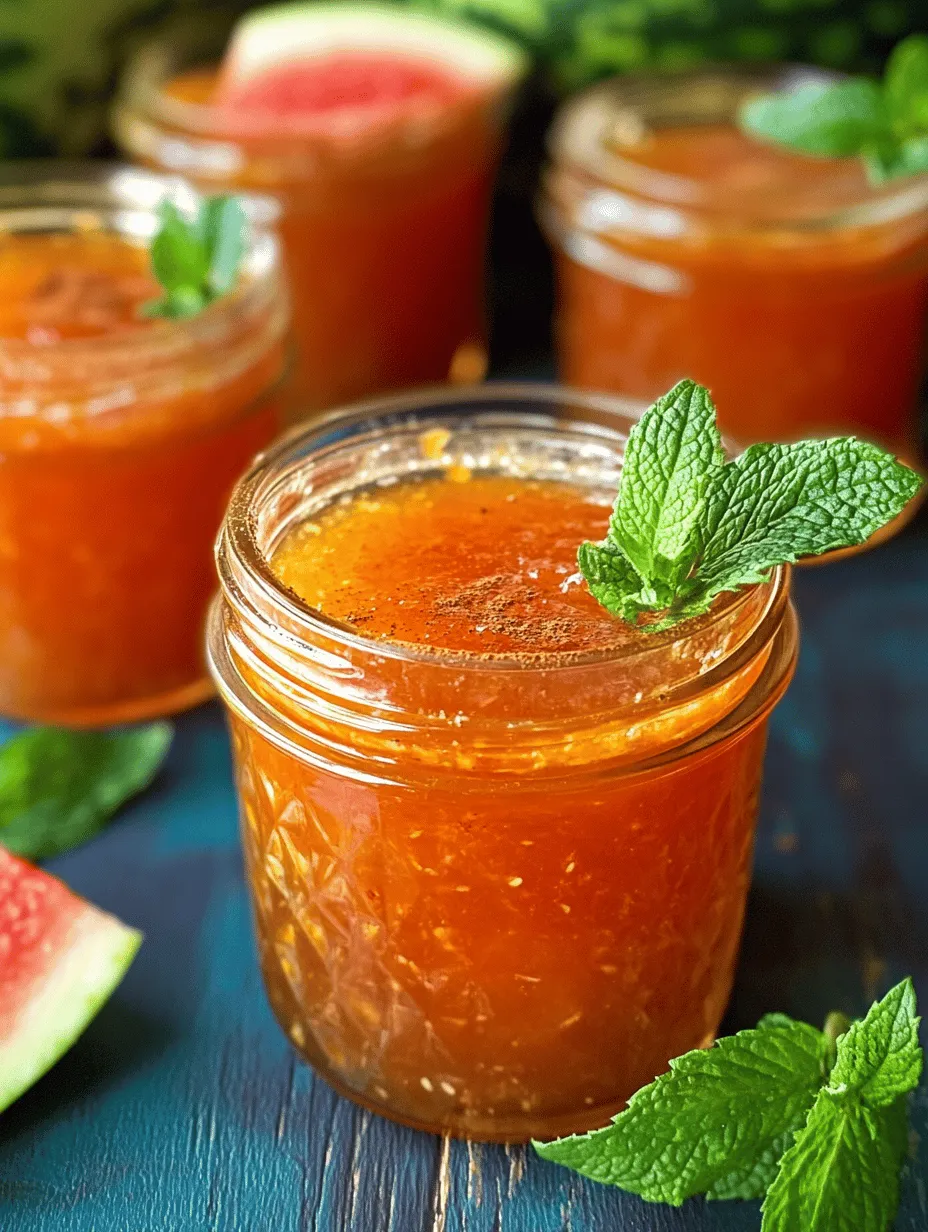
One unique and delightful way to enjoy watermelon rind is in the form of jam. Watermelon rind jam is not just a clever way to repurpose what would typically be discarded; it’s also a sweet, tangy condiment that can elevate your breakfast toast, serve as an enticing topping for desserts, or add a burst of flavor to savory dishes. This recipe invites you to explore the fascinating world of watermelon rind, encouraging you to transform what might be seen as waste into a delectable treat.
Understanding Watermelon Rind
Nutritional Benefits of Watermelon Rind
Watermelon rind is often underestimated in terms of nutritional value. While the flesh is undoubtedly hydrating and sweet, the rind is rich in nutrients that can benefit your health in various ways. Watermelon rind contains vitamins A, C, and B6, along with minerals like magnesium and potassium. It is also a source of citrulline, an amino acid that may help improve blood flow and reduce muscle soreness. By incorporating watermelon rind into your diet, you not only explore new flavors but also boost your intake of essential nutrients.
Historical and Cultural Significance of Using Watermelon Rind
The use of watermelon rind is not a modern invention; it has deep roots in various culinary traditions worldwide. In many cultures, watermelon rind has been pickled or cooked into sweet preserves for generations. In the Southern United States, for instance, watermelon rind pickles are a cherished tradition, often served alongside rich and savory dishes. Similarly, in Asian cuisines, watermelon rind is commonly used in stir-fries or soups, showcasing its versatility and importance in cooking.
By embracing the culinary history of watermelon rind, we can appreciate the creativity of past generations and contribute to its continued legacy. This jam recipe pays homage to these traditions while introducing a fresh twist that modern palates can enjoy.
Common Misconceptions About Watermelon Rind
Despite its potential, there are several misconceptions regarding watermelon rind that may prevent people from experimenting with it in the kitchen. One common myth is that watermelon rind lacks flavor or is too tough to eat. In reality, when prepared correctly, watermelon rind can be surprisingly tender and has a mild taste that absorbs the flavors of accompanying ingredients beautifully. Another misconception is that the rind is only suitable for pickling. While pickling is a popular method, making jam is another delicious way to savor its unique qualities.
By dispelling these myths, we can encourage more people to explore the culinary possibilities of watermelon rind, unlocking its potential as a delightful ingredient in various recipes, including our focus today: watermelon rind jam.
Gathering Ingredients for Watermelon Rind Jam
Before you embark on your watermelon rind jam-making adventure, it’s essential to gather the right ingredients. Each component plays a crucial role in creating a delicious and successful jam.
Detailed Descriptions of Each Ingredient and Its Role in the Recipe
1. Watermelon Rind: The star of our jam, watermelon rind provides the base. For this recipe, you’ll need the green outer skin and the white inner flesh, which will be diced into manageable pieces.
2. Sugar: Sugar is not just a sweetener; it also acts as a preservative. It helps to achieve the perfect consistency in jam while balancing the tartness of other ingredients. Depending on your taste preference and the sweetness of the watermelon, you can adjust the sugar quantity accordingly.
3. Lemon Juice: Fresh lemon juice adds brightness and acidity, enhancing the overall flavor of the jam. Additionally, the acidity helps with preservation, ensuring a longer shelf life for your homemade jam.
4. Water: Water is essential for cooking down the watermelon rind, allowing it to soften and meld with the sugar and lemon juice. It creates the right environment for the flavors to develop as the mixture simmers.
5. Optional Flavorings: You may choose to include spices such as cinnamon or ginger, which can add depth and complexity to the jam’s flavor profile. These spices are entirely optional but can elevate your jam to new heights.
Importance of Using Fresh, High-Quality Ingredients
When it comes to making jam, the quality of your ingredients matters. Using fresh, ripe watermelon ensures that your jam will have a vibrant flavor and appealing texture. Look for watermelons that are firm, heavy, and have a uniform color. The rind should be thick and free from blemishes or soft spots. By opting for high-quality ingredients, you’ll create a jam that is not only delicious but also showcases the natural flavors of the watermelon.
Suggestions for Sourcing Ingredients Sustainably
To further promote sustainability in your kitchen, consider sourcing your ingredients locally. Farmers’ markets are a great place to find fresh, in-season watermelons, and you might even be able to purchase directly from local farms. This not only supports local agriculture but also reduces the carbon footprint associated with transporting goods. Additionally, buying organic ingredients can further enhance the quality of your jam while being better for the environment.
Step-by-Step Guide to Making Watermelon Rind Jam
Creating watermelon rind jam is a straightforward process, but attention to detail is key to achieving the perfect consistency and flavor. Follow these steps for a successful jam-making experience.
Preparing the Watermelon Rind
1. Select the Right Watermelon: Start by choosing a ripe watermelon. Look for one that feels heavy for its size and has a uniform shape. The skin should be shiny and free of blemishes.
2. Peeling and Dicing the Rind: Begin by cutting off the ends of the watermelon. Then, slice the watermelon in half and scoop out the red flesh, setting it aside for another use. Next, using a sharp knife, carefully peel away the green outer skin from the white inner rind. Be thorough, ensuring that you remove all the green skin, as it can be tough and bitter. Once peeled, dice the rind into small, even pieces, approximately 1-inch cubes. This uniformity ensures even cooking and helps achieve the desired texture in the final jam.
3. Rinsing: Give the diced rind a quick rinse under cold water to remove any residual dirt or impurities. This step is particularly important if you’re using a conventional watermelon that may have been treated with pesticides.
Cooking the Rind
1. Simmering Process: In a large pot, combine the diced watermelon rind, sugar, lemon juice, and water. Stir well to ensure the sugar is evenly distributed. Bring the mixture to a gentle simmer over medium heat. This initial simmering helps to soften the rind, making it tender and more palatable.
2. Monitoring the Heat: Once it reaches a simmer, reduce the heat to low and allow the mixture to cook for about 30-45 minutes. During this time, stir occasionally to prevent sticking and ensure even cooking. You’ll notice the rind becoming translucent and softer as it cooks down.
3. Tools for Cooking: Use a large, heavy-bottomed pot to prevent scorching, and keep a wooden spoon or heat-resistant spatula on hand for stirring. A candy thermometer is also helpful if you want to monitor the temperature as the jam cooks.
Combining Ingredients
1. Breaking Down the Mixture: After simmering the rind, you may want to break down the mixture further to achieve your desired texture. Use a potato masher or an immersion blender to puree the mixture lightly, depending on whether you prefer a chunkier or smoother jam.
2. Flavor Integration: Add any optional flavorings, such as cinnamon or ginger, at this stage. These spices will infuse the jam with added depth, enhancing the overall profile.
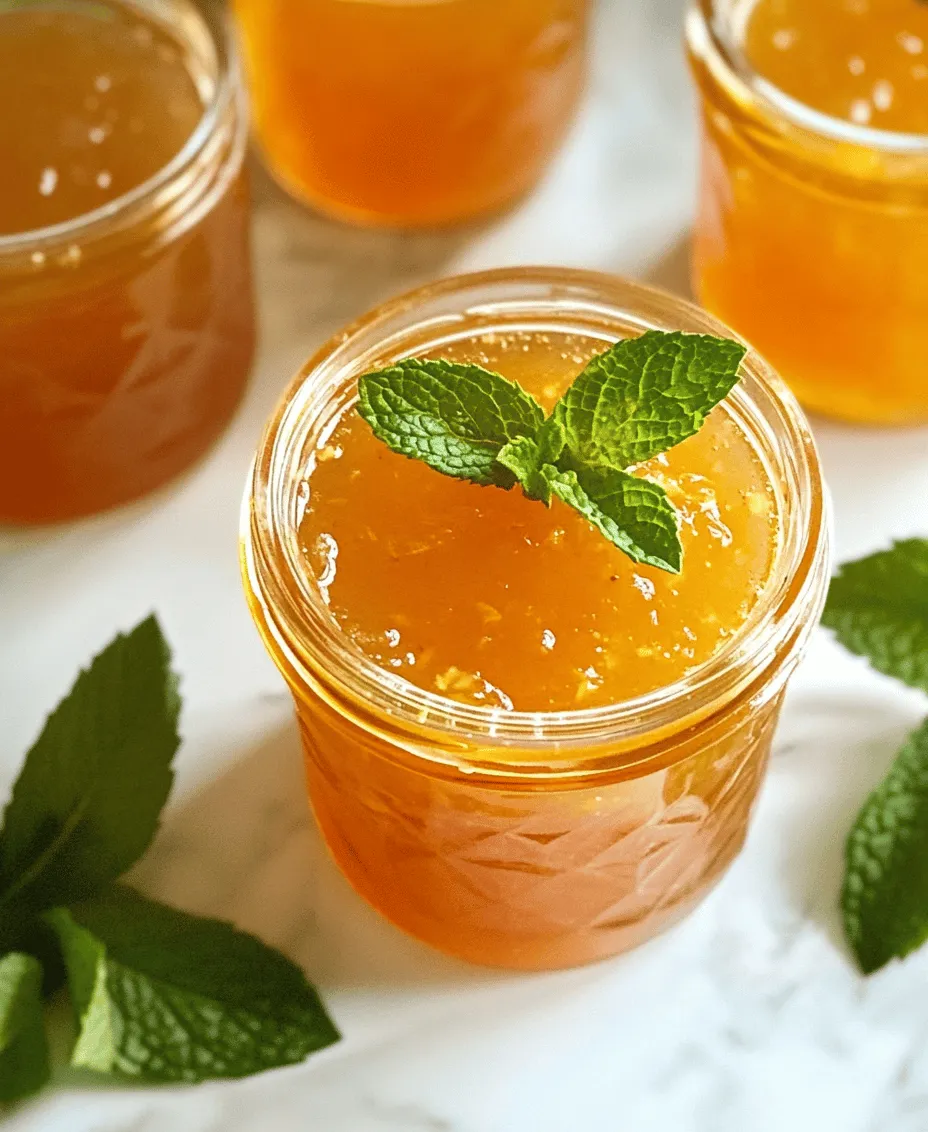
3. Final Cooking: Continue to simmer the mixture until it thickens to your preferred consistency. This can take an additional 20-30 minutes, depending on the moisture content of the watermelon and the heat level. The jam is ready when it clings to the back of a spoon and has a glossy appearance.
Cooking the Jam
1. Achieving the Right Consistency: To test the jam’s consistency, place a small spoonful on a plate and let it sit for a minute. Run your finger through the jam; if it holds its shape and doesn’t run back together, you’ve achieved the perfect consistency.
2. Canning Preparation: If you plan to store the jam long-term, prepare your canning supplies. Sterilize your jars and lids by boiling them in water for about 10 minutes. This step is crucial to prevent any bacterial growth and to ensure your jam stays fresh for months.
3. Filling the Jars: Once your jam has reached the desired consistency, remove it from heat and carefully ladle it into the sterilized jars, leaving about a quarter-inch of headspace at the top. Wipe the rims of the jars with a clean cloth to remove any residue, ensuring a proper seal when you apply the lids.
With these initial steps, you’re well on your way to creating a unique and flavorful watermelon rind jam. This recipe not only celebrates the often-overlooked parts of the watermelon but also invites you to embrace the art of preserving and cooking with intention. Stay tuned for the next part, where we will explore the finishing touches and preservation techniques for your delicious homemade jam.
Techniques for Testing Readiness: The Cold Plate Test
To ensure that your watermelon rind jam reaches the perfect consistency, it’s essential to test its readiness before canning. One of the most effective methods is the cold plate test. This simple technique helps you determine if your jam has thickened enough to set properly.
How to Perform the Cold Plate Test:
1. Chill a Plate: Place a small plate in the freezer for about 10 minutes. This will help cool the plate quickly, providing a cold surface for testing.
2. Spoon Some Jam: Once your jam mixture has reached a rolling boil, take a teaspoon and drop a small amount onto the chilled plate.
3. Let it Sit: Allow the jam to sit for about 30 seconds. This cooling period is crucial for assessing the thickness.
4. Run Your Finger Through It: After the jam has cooled, run your finger through the center of the dollop. If it holds its shape and the line remains visible, your jam is ready for canning. If it’s still too runny, continue boiling and retest every few minutes.
The Optional Use of Cinnamon and Its Flavor Profile
While watermelon rind is naturally sweet, adding spices can elevate the flavor profile of your jam. Cinnamon is a popular option that can impart a warm, comforting aroma and taste that complements the fruity notes of the watermelon rind.
Flavor Profile of Cinnamon:
Cinnamon brings a hint of spiciness and earthiness to the jam. Its aromatic qualities can balance the sweetness of the watermelon rind and add depth to the overall flavor. If you enjoy a spiced jam, consider adding about 1/2 teaspoon of ground cinnamon to your recipe. Adjust according to your taste preferences, as some may enjoy a more pronounced cinnamon flavor.
Sterilizing Jars
Sterilization is a crucial step in the jam-making process to prevent spoilage and extend shelf life. Properly sterilized jars create a vacuum seal, keeping your watermelon rind jam safe from bacteria and ensuring it stays fresh for months.
Importance of Sterilization in Preserving the Jam:
Sterilization kills any lingering bacteria or contaminants in the jars that could compromise the quality of your jam. A vacuum seal formed during the canning process also prevents air from entering the jar, which could lead to spoilage.
Step-by-Step Instructions for Safe Sterilization Techniques:
1. Wash Jars and Lids: Start by thoroughly washing your jars and lids in hot, soapy water. Rinse well to remove any soap residue.
2. Boil the Jars: Place the washed jars in a large pot of boiling water for 10 minutes. Make sure they are fully submerged.
3. Heat the Lids: In a separate small pot, bring water to a simmer and add the lids. Keep them warm, but do not boil.
4. Remove and Dry: Carefully remove the jars from the boiling water using tongs, and place them upside down on a clean kitchen towel to dry. Ensure they stay warm until you fill them with jam.
Filling the Jars
Once your watermelon rind jam is ready and your jars are sterilized, it’s time to fill them. Proper jar filling is crucial for creating a good seal and ensuring the longevity of your preserves.
Tips for Proper Jar Filling to Ensure a Good Seal:
1. Leave Headspace: When filling your jars, leave about 1/4 inch of headspace at the top. This space is essential for the jam to expand during processing.
2. Clean the Rims: After filling, wipe the rims of the jars with a clean, damp cloth to remove any residue. This step is vital for ensuring the lids seal properly.
3. Cap the Jars: Place the sterilized lids on top of the filled jars and screw on the metal bands until they are fingertip-tight.
Processing the Jars
The canning process is the final step in preserving your watermelon rind jam. This step not only helps seal the jars but also eliminates any remaining bacteria, ensuring your jam is safe for long-term storage.
Explanation of the Canning Process and Its Benefits for Long-Term Storage:
1. Water Bath Canning: This method involves submerging the filled jars in a boiling water bath for a specific amount of time. This process creates a vacuum seal as the jars cool, which helps preserve the jam.
2. Recommended Equipment for Canning: You will need a large pot (with a lid), a canning rack or a small kitchen towel to prevent jars from touching the bottom, and a jar lifter for safe handling.
Steps for Water Bath Canning:
1. Fill a large pot with water and bring it to a boil.
2. Using a jar lifter, carefully place the filled jars into the boiling water. Ensure the jars are covered by at least an inch of water.
3. Boil for about 10-15 minutes, adjusting the time based on your altitude (longer for higher altitudes).
4. Once processed, remove the jars from the water bath and let them cool on a clean towel or cooling rack.
Enjoying Your Watermelon Rind Jam
Once your watermelon rind jam has cooled and sealed properly, it’s time to enjoy it! This unique jam offers a delightful sweetness that can be paired with various foods.
Creative Serving Suggestions:
– Toast: Spread on warm toast for a delightful breakfast or snack. The sweetness pairs perfectly with buttery or cream cheese spreads.
– Desserts: Use as a filling for pastries, cakes, or even as a topping for cheesecake. Its unique flavor can elevate any dessert.
– Condiment: Serve alongside meats, such as glazed ham or grilled chicken, to add a sweet contrast.
Alternative Uses for the Jam:
– Glazes: Incorporate into glazes for roasted vegetables or meats.
– Salad Dressing: Mix with olive oil and vinegar for a fruity salad dressing.
– Ice Cream Topping: Drizzle over vanilla ice cream for a refreshing treat.
Storage and Shelf Life
To maintain the quality of your watermelon rind jam, proper storage is essential.
Best Practices for Storing Watermelon Rind Jam:
– Store sealed jars in a cool, dark place, such as a pantry or cupboard.
– Once opened, refrigerate the jam and consume it within a few weeks.
Information on Shelf Life and Signs of Spoilage:
– Unopened jars of watermelon rind jam can last for up to a year when stored properly.
– Signs of spoilage include bulging lids, off smells, or mold growth. Always check the seal before consuming.
Refrigeration vs. Pantry Storage:
– While unopened jars can be stored in the pantry, opened jars should always be refrigerated to prevent spoilage.
Exploring Variations of Watermelon Rind Jam
Once you’ve mastered the basic watermelon rind jam recipe, you can get creative with variations.
Suggestions for Flavor Variations:
– Spices: Incorporate other spices like nutmeg or ginger for a unique twist.
– Citrus: Add lemon or orange zest to enhance the freshness.
– Other Fruits: Mix in other fruits like strawberries or pineapple for a tropical flair.
Ideas for Adapting the Recipe for Dietary Restrictions:
– Low-Sugar Options: Use sugar substitutes like stevia or erythritol for a low-sugar version. Adjust the pectin accordingly to ensure proper setting.
Conclusion
Making watermelon rind jam is not just a delicious way to utilize an often-discarded part of the fruit; it is also a sustainable practice that encourages creativity in the kitchen. This unique recipe allows you to experiment with flavors and offers a delightful addition to your pantry.
Embrace the art of jam-making and explore the various ways you can enjoy your watermelon rind jam. Whether you spread it on toast, use it in desserts, or incorporate it into savory dishes, this jam is a testament to sustainability and innovative cooking. So, roll up your sleeves, gather your ingredients, and dive into the world of watermelon rind jam—you’ll be amazed at the delicious results!